Table of Contents
Advertisement
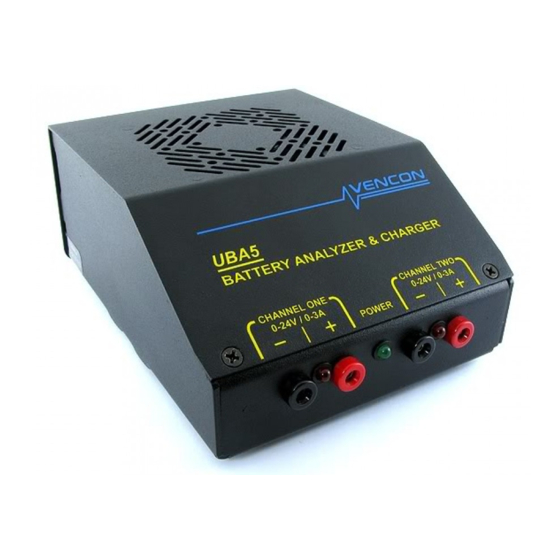
The UBA (Ultimate Battery Analyzer) is a battery analyzer, charger, discharger and reconditioner. It's also a data
logger, thermometer and electronic load . Wow! That's a lot of stuff in such a small box. How do we do it? Easy. We
get the PC to do most of the work.
The first three chapters in this guide show you how to setup the UBA then takes you step by step through a complete
battery analysis. Once you've done your first battery analysis, you can use the online help that comes with the UBA
Software to learn more. We recommend that you read these first three chapters before you run your first battery
analysis (it won't take that long).
Notes:
The latest version of software and online help is available at the private area of our web site. To get there, run
●
UBA Console and click on Get latest news on Vencon Website (Help menu), or go to:
http://www.vencon.com/UBA4News/B-0.96.html, or use the shortcut on the installation CD.
If you need help using the software or testing batteries, don't hesitate to call or email us. You can also email
●
us your battery analysis results for assistance in interpreting them.
Printed September 2007 for UBA Console version 1.0.
The UBA Let's Get Started Guide
Page i
Advertisement
Table of Contents

Related Manuals for Vencon UBA 5


Summary of Contents for Vencon UBA 5
- Page 1 The latest version of software and online help is available at the private area of our web site. To get there, run ● UBA Console and click on Get latest news on Vencon Website (Help menu), or go to: http://www.vencon.com/UBA4News/B-0.96.html, or use the shortcut on the installation CD.
- Page 2 Batteries are electro-chemical devices that have the potential to burn, explode, or emit harmful chemicals. Please read these safety warnings: Safety Warnings: Observe battery temperature. Allow cold batteries to warm up and hot batteries to cool ● before charging. Stop the battery test if the battery becomes very hot. Do not attempt to charge non-rechargeable batteries such as alkaline, carbon-zinc, ●...
-
Page 3: Table Of Contents
Table of Contents 1.Setting Up The UBA.................................1 1.1.Connecting the UBA to a Power Supply........................1 1.2.Connecting the UBA to a Computer........................2 1.3.Connecting More than One UBA to a Computer.....................2 1.4.Extending the Serial Cable............................2 1.5.Ventilation................................3 1.6.Battery Cables................................3 2.UBA Console Installation instructions..........................4 2.1.Installing UBA Console............................4 2.2.Starting UBA Console..............................5 2.3.Initializing the UBAs..............................5 2.4.Locating and Installing the UBA Calibration File(s)....................6... - Page 4 Regulatory Compliance FCC Class B Information This equipment has been tested and found to comply with the limits for a Class B digital device, pursuant to Part 15 of FCC Rules. These limits are designed to provide reasonable protection against harmful interference in a residential or commercial installation.
-
Page 5: Setting Up The Uba
Unpack the UBA shipping box and check that you’ve received the following: ● The UBA battery analyzer, charger, and conditioner. ● Vencon UBA Console CD, which contains the software for the UBA. ● A 2 metre 9 pin male to female shielded serial cable. ●... -
Page 6: Connecting The Uba To A Computer
Serial Port Port To Additional UBAs Vencon Vencon First UBA Second UBA Figure 1: UBA serial port connections for one or more UBAs. The UBA connects to any unused serial port the PC. You can use a USB port with a USB to serial port converter - contact us for purchase information. -
Page 7: Ventilation
Options... menu (under File, click on Options... and select the General tab). 1.6. Battery Cables Battery Vencon The UBA uses standard Figure 3: Connecting a battery to the UBA. banana jacks for its battery connections and comes with two sets of battery cables with alligator clips. Additional plugs or cables are available from us. -
Page 8: Uba Console Installation Instructions
By default it's put in the same folder as UBA Console, i.e.: C:\Program Files\Vencon\VenconUBA <- default (not recommended) We recommend you choose a different location which is regularly backed up. For example on our PCs we put it in My Documents: C:\Documents and Settings\UserName\My Documents\VenconUBA <- recommended... -
Page 9: Starting Uba Console
Database&Cal – Database, calibration, and sound files are stored here. Logs – Log files are stored here. 2.2. Starting UBA Console Start UBA Console (accessible from the Windows Start menu). Figure 6: UBA Console - UBA Network not yet initialized. If you don’t get this, see Appendix A - Troubleshooting. -
Page 10: Locating And Installing The Uba Calibration File(S)
2.4. Locating and Installing the UBA Calibration File(s) Every time UBA Console initializes a UBA Network, it reads the calibration file for each UBA that it detects. If it can’t locate the calibration file in the VenconUBA\Database&Cal folder, it will put up a Calibration file not found dialog box. Every UBA comes with a calibration file that can be found on the installation CD or it was emailed to you. -
Page 11: Setting Up The Battery Analysis
This is what the Multitester looks like: Sets the load to the requested current, or turns it off. More options include: constant resistance and power. Sets the charger to the requested current, or turns it off. More options include: Constant voltage and PWM Quick Test page. - Page 12 Start a battery analysis. Figure 11: UBAConsole: Starting a battery analysis. Click on the circled icon. This opens up the Start a Battery Analysis dialog box: Battery Parameters Choose a BAR Choose filename to store results. Figure 12: Start a Battery Analysis dialog box: Entering analysis parameters. There are three sections that need to be filled in before you can start the analysis.
- Page 13 Battery Chemistry Nominal Cell Voltage (Volts per cell) NiCd or NiMH 1.2 V SLA, lead acid or gel cells Lithium ion or lithium polymer 3.6 V Same battery examples: Lead Acid 6 cells 4.8V NiCd or NiMH 4 cells 7.2V NiCd or NiMH 6 cells 9.6V...
-
Page 14: Starting The Battery Analysis
Note, you have to enter a battery capacity, even if it's not required for the BAR that you'll be using. For example, if you are using the Datalog BAR you can enter any value for the capacity – 1mAh works fine. Battery Analysis Routine Filename The battery analysis routine (BAR) contains a sequence of actions that describe the battery analysis that is to be performed. -
Page 15: Monitoring The Battery Analysis
• Show the results graph. • Hide this window (use Active Instruments on the Instruments menu to redisplay). • Show the starting parameters. Right click on this battery analyzer window and select Grow (or Show More Information) for more information. Tool bar Battery voltage. - Page 16 The analysis that I received is shown on the next page. During the discharge portion the battery voltage follows the classic NiCd/NiMH form: an initial fast drop in voltage, a gradual decrease as the battery loses its charge, and a fast drop at the end when the battery is fully discharged.
-
Page 17: Creating A Battery Analysis Routine
Marc A. Venis P.Eng., M.A.Sc President Vencon Technologies Inc. The Battery Analysis Routine (BAR) Designer allows you to create a battery analysis using graphical techniques. Once you learn the basics of how to design a simple BAR, you'll be able to design your own advanced BARs that can form, recondition, and life test batteries, create and erase memory in NiCd/NiMH cells, and many other advanced functions. - Page 18 Figure 18: An empty BAR (Battery Analysis Routine). We want our BAR to first charge the battery, so we'll add a quick charge cycle or action. Actions are the building blocks of the BAR. There's no limit (except for screen size) to the number of actions that a BAR can contain. Right click on the gray background and choose: NiCd/NiMH | Add Cycle | Quick Charge Cycle.
- Page 19 Now to get this BAR to actually analyze a battery you need to set the charge and discharge values. Click on the NiCd Quick Charge action and enter the parameters as shown below. Enter “1” for the Charge Current which gives a current of 1C. This will charge the battery in approximately one hour.
- Page 20 Enter “10” (mV/cell) for the Peak Charge finish criteria. Thus when the cell voltage drops 10mV below its peak value, charging stops. Enter “0.05” for the Minimum Charge so that during the first 5% of the charging any voltage peaks are ignored. This skips false peaks that can occur at the beginning.
-
Page 21: Advanced" Bar Concepts
Enter “1.0” for the Cut Off Voltage. This is the value specified in the IEC standard. Figure 25: Discharge Action: Entering the finished parameters. Click OK to save these parameters and then Save (File menu) to save the BAR file. That’s it. - Page 22 Figure 27: Action flow in a subroutine. Relative Currents and Time You might have noticed the use of relative currents (based on the battery's C current) and time based on capacity. This is different from other battery analysis systems. The use of relative currents allow you to design BARs that work independently of battery capacity.
-
Page 23: Bar Actions
4.2. BAR Actions There are five actions that you can use to build a BAR: Figure 29: All available actions. NiCd/NiMH Quick Charge Cycle, Standard Charge Cycle and Trickle Charge Cycle: These are actually all the same – just a blank constant current action than can be terminated by a number of methods. You would normally use this for charging NiCd and NiMH cells. -
Page 24: Advanced Topics
Hint: the BARs that came with your software are designed to minimize the chance of your overwriting them (specifically, the Owner field is filled in), but if you do, you can get a new copy from your install CD in the Image/BARs folder. - Page 25 Figure 30: UBA Display window (click on the UBA icon in the UBA Network window to get this display, then click on the General button). In this example, the UBA Console S/W will limit its power supply current draw to no more than 1.0A. You can change this value by entering in a new one, but note that this number is not saved into the calibration file.
-
Page 26: Importing Results Into A Spreadsheet
2. You have a 1.0A power supply which doesn't supply enough current to power both channels at their maximum charge current. You should enter 1.0 as the power supply current in the UBA's calibration file. The setting of the Power Supply Current radio selection box is important. If Evenly divide between channels is selected then each channel will get up to almost 500mA charge current. -
Page 27: Current And Power Limitations
5.4. Current and Power Limitations Load Limit: 3A and 45W The UBA can discharge at up to 3A per channel, with a maximum dissipation of 45W. During discharge, the UBA converts the battery current into heat which it dissipates with its chassis. The power is limited to 45W per channel to prevent over heating the chassis and load transistors. -
Page 28: Appendix A - Troubleshooting
UBA Console requires files that don’t come with a fresh install of Windows 95 or NT4. If you have a Microsoft Internet Explorer or Microsoft Office installed, you shouldn’t have a problem. Otherwise you can get the missing files off of our website (www.vencon.com/downloads/Win95-NT.html ) , the UBA Console install CD (in the “Win95_NT”), or Microsoft’s website. -
Page 29: Appendix B - Faqs
Appendix B – FAQs Software Can I run a life cycle test on my battery? Yes. Change the repeat count in a BAR that cycles the battery to a large value (99,999 for example). Have the charge or discharge actions only write to the results file every minute or so in order to reduce the size of the results file. When the life time test is over (either by the number of cycles or the battery capacity), view the results file in the Battery Analysis Results Viewer (File menu) and select Write Report (Results Viewer File menu). - Page 30 I have a lot of batteries (or cells) to test. Can I test them by putting them in series? Yes and no. If the batteries are voltage charged, like lead acid or lithium ion, then the answer is no you can’t charge them since any imbalance will result in some cells being overcharged and some undercharged.
-
Page 31: Appendix C - Included Battery Analysis Routines
Appendix C – Included Battery Analysis Routines The following BARs are included with the UBA. You’re free to examine and modify them in the Battery Analysis Routine Designer and save them under a different name. Battery Analysis Chemistry Used for: Routine NiCd Peak Charge NiCd... - Page 32 Battery Analysis Chemistry Used for: Routine Charging a lithium ion or lithium polymer battery. Lithium-ion Before using this routine, check that the default charge Li-ion Charge voltage (4.2V) is appropriate for the battery otherwise Lithium-polymer the battery can be damaged or explode. Cycling a lithium ion or lithium polymer battery to determine its capacity.
-
Page 33: Uba Accessories - Optional Temperature Probes
UBA Accessories – Optional Temperature Probes If the UBA came with temperature probes then you'll be able to view and record the battery temperature during a battery analysis. Afterwards you can load the results into a spreadsheet and plot the temperature curve along with battery voltage and current. - Page 34 Connecting to an existing Thermistor Inside the Battery If the battery pack has a built in 10k thermistor with both leads floating or one connected to battery negative then you can use it as the temperature sensor (you'll need a temperature probe connector on the back of the UBA for this). Contact us for more information.
- Page 35 When Is a Battery Fully Charged? The most important part in fast charging is when to stop. Overcharging a battery can damage it and is dangerous. In the graph on the next page we deliberately overcharged a NiMH battery to show you what happens. Look at the battery temperature line.
- Page 36 Over Charging a NiMH Battery Pack 1.60 1.55 1.50 Battery Temperature 1.45 Battery Voltage 1.40 dT/dt 1.35 1.30 1.25 Charging Capacity (1.0 = 100%) Figure 35: Test results from deliberately over charging a battery pack. Page 32 The UBA Let's Get Started Guide...
-
Page 37: Uba Accessories - Channel Combiner
UBA Accessories - Channel Combiner Single UBA The channel combiner allows you to combine both channels of the UBA doubling the charge and discharge current and power. To do this, connect the battery positive terminal to both positive battery inputs and the battery negative terminal to the negative battery input (the negative battery inputs are already wired together). - Page 38 2. Add channels to it by clicking on the Channel menu: 3. Then start a battery test on the virtual UBA by clicking on the Instrument menu: Figure 37: Software instructions for combining channels and starting a battery analysis. Page 34 The UBA Let's Get Started Guide...
-
Page 39: Uba5 Specifications
Warrants that the UBA and accessories are free from defects in materials and workmanship for a period of two years from the date of purchase. Within this period contact Vencon to obtain a RMA number then send any malfunctioning units to an authorized repair centre prepaid. We will repair or replace it at our option without charge for parts and labour and return it in a timely manner at our expense.
Need help?
Do you have a question about the UBA 5 and is the answer not in the manual?
Questions and answers