Table of Contents
Advertisement
Quick Links
User's Manual
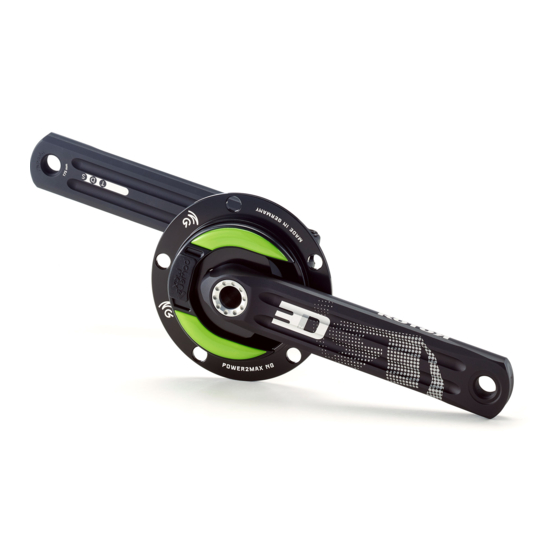
power2max NG Power Meter
1 Quick Start Guide
Warning
Please read the user's manual carefully before installation and use! Improper installation can cause
accidents. In case of doubt, consult a professional bicycle mechanic. Observe the indicated torque
values when installing screws and bolts. (See installation instructions at www.power2max.com.)
Before going on a ride, get to know the functions and operation of your power meter. Get a checkup
from a sports physician before starting your training program. Pay attention to traffic and road
conditions before checking any data.
Quick start guide
Thank you for choosing a power2max NG power meter! For installation, please download the
installation instructions: www.power2max.com
USB charging unit:
Please note: To charge your NG power meter, an USB charging unit with the USB
2.0 or higher standard is required.
Included:
power2max NG power meter
USB power cable
Quick Start Guide including inspection certificate
Optional:
NG colored ring, USB charging unit, Installation tools, Crank set, Bottom bracket, Chainring set,
Chainring bolts
Installation and operation:
1. First, completely charge the power2max NG power meter:
a. Open the USB cover.
b. Connect the charging unit to the power2max NG power meter via the USB cable (the
LED indicator light flashes red during charging).
c. Charging is complete when the red LED indicator light turns off.
2. Remove the USB cable from the power2max NG power meter.
3. The LED indicator light blinks green. Close the USB cover and connect the power meter to
your bike computer or your Bluetooth-enabled smartphone (observe manufacturer's
instructions).
4. Install chainrings onto the power meter. (Installation instructions at www.power2max.com.)
5. Install the power meter at the crank. (Installation instructions at www.power2max.com.
Observe manufacturer's instructions for torque values!)
6. Install the crankset on the bicycle. (Installation instructions at www.power2max.com.
Observe manufacturer's instructions for torque values!)
After installing, check the function of the front derailleur and adjust as necessary.
Finished! Now: go ride and have fun with your power2max NG!
Advertisement
Table of Contents

Related Manuals for Power2max NG


Summary of Contents for Power2max NG
- Page 1 1. First, completely charge the power2max NG power meter: a. Open the USB cover. b. Connect the charging unit to the power2max NG power meter via the USB cable (the LED indicator light flashes red during charging). c. Charging is complete when the red LED indicator light turns off.
-
Page 2: Table Of Contents
2 Contents 1 Quick Start Guide........................2 Contents..........................3 Declaration of conformity......................4 Warranty........................... 4.1 Scope of the warranty......................4.2 Local regulations........................4.3 For consumers in Australia......................4.4 Limitation of liability......................... 4.5 Warranty disclaimer......................5 Introduction..........................5.1 Warning ..........................6 Scope of delivery......................... 7 Operation and installation...................... -
Page 3: Declaration Of Conformity
3 Declaration of conformity DECLARATION OF CONFORMITY Saxonar GmbH hereby declares that the power2max power meter complies with the essential requirements and further relevant provisions of the 1999/5/EC Directive. The complete declaration of conformity is available at https://www.power2max.de Statement of Compliance for FCC and lndustry Canada This equipment has been tested and found to comply with the Iimits for a Class B digital device, pursuant to Part 15C of the FCC Rules and Radio Standards Specification RSS-247, Issue 1. - Page 4 DÉCLARATION DE CONFORMITÉ Saxonar GmbH déclare par la présente que power2max est conforme aux exigences essentielles et aux autres dispositions pertinentes de la 1999/5/EC Directive. La déclaration de conformité complète est disponible à l'adresse https://www.power2max.de Déclaration de conformité pour FCC et lndustry Canada Cet équipement a été...
-
Page 5: Warranty
4.5 Warranty disclaimer The warranty does not apply to products that are not installed and/or adjusted professionally or in accordance with Saxonar GmbH’s appropriate user’s manual. The power2max user’s manuals can be downloaded on the internet at www.power2max.com This warranty does not apply to damages to the product as a result of accidents, crashes or incorrect use, not observing manufacturer’s specifications or other circumstances in which the product was... - Page 6 Damages resulting from the use of parts that are not compatible or appropriate or are not authorized for use by the Saxonar GmbH for power2max power meters are excluded from this warranty. The warranty shall not cover any damages that are caused by commercial use (rentals).
-
Page 7: Introduction
Pay attention to traffic and road conditions before checking or controlling any data from your head unit. 6 Scope of delivery Your power2max NG power meter system is made up of: power2max NG power meter spider (corresponding your choice of crankset version and bolt circle diameter) USB charging cable Quickstart Guide with inspection certificate... -
Page 8: Operation And Installation
Rotor 3D24, NG Rotor 3D30, NG Rotor 3D+ or NG Specialized S-Works) a lockring tool is needed. Torx Key: To install the NG FSA Megaexo, or NG SRAM Force22/S900): A Torx key for installing the crankset to the power2max NG power meter is needed. - Page 9 7.4 Installation of your power2max NG power meter on your bike 7.4.1 Chain ring installation 1. First install the chainrings on the power2max NG power meter. In the process, take care that they are aligned correctly and solidly attached in accordance with the respective manufacturer’s specifications.
-
Page 10: Using Your Power Meter
Using your power2max NG power meter is as easy as the initial operation and installation is. 8.1 Before your ride When your bicycle isn’t being used, the power2max NG power meter is in standby. When the crank is moved, the power2max NG power meter is activated automatically, and the power2max NG power meter begins emitting a signal. -
Page 11: Turning The Power Meter On And Off
8.9 After a crash As a spider-based power meter, the power2max NG power meter is located in a place where crash forces are usually completely absorbed by the crank and bottom bracket. Therefore, crash damage to a power2max NG power meter is almost impossible. -
Page 12: Service Calibration And Control Of Function
11 Service calibration and control of function The power2max NG power meter is calibrated at the factory and doesn’t have to be newly calibrated within the warranty period. Regardless of this fact, you still have the option of ordering a calibration and function control in our Web Shop. -
Page 13: Technical Specifications
15 Trademarks power2max is a registered trademark of the power2max GmbH. All other names of products, brands or business names used in this manual can be trademarks or registered trademarks of the respective owners.
Need help?
Do you have a question about the NG and is the answer not in the manual?
Questions and answers