Table of Contents
Advertisement
Advertisement
Table of Contents

Related Manuals for HP KKBRF57711


Summary of Contents for HP KKBRF57711
- Page 1 HP Wireless Keyboard & Mouse Installation Guide...
- Page 2 Microsoft, Windows, and Windows Vista are either trademarks or registered trademarks of Microsoft Corporation in the United States and/or other countries. The only warranties for HP products and services are set forth in the express warranty statements accompanying such products and services. Nothing herein should be construed as constituting an additional warranty.
- Page 3 About This Guide This guide provides information on setting up and using the HP Wireless Keyboard & Mouse. WARNING! Text set off in this manner indicates that failure to follow directions could result in bodily harm or loss of life.
- Page 4 About This Guide ENWW...
-
Page 5: Table Of Contents
Product Environmental Notices ......................14 Materials Disposal ......................14 Disposal of Waste Equipment by Users in Private Household in the European Union ..14 HP Recycling Program ...................... 15 Chemical Substances ......................15 Restriction of Hazardous Substances (RoHS) ..............15... - Page 6 ENWW...
-
Page 7: Setting Up The Keyboard And Mouse
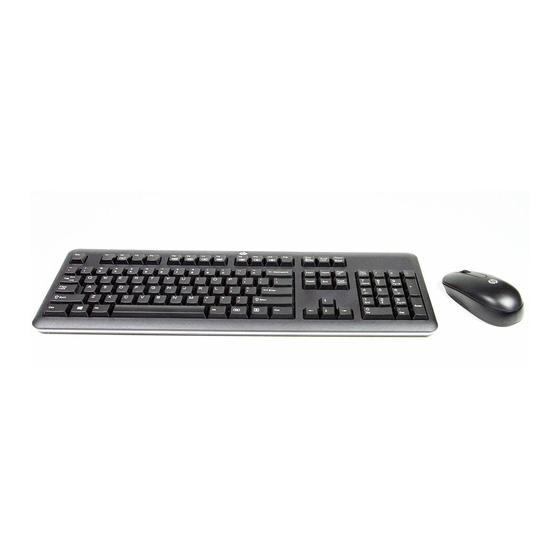
Setting Up the Keyboard and Mouse Introduction Figure 1-1 Kit Contents Ensure that you have the following contents in the wireless accessory kit. ● Wireless Keyboard ● Wireless Laser Mouse ● USB Receiver ● I/O and Security Software and Documentation CD, containing wireless applet and user documentation ENWW Introduction... -
Page 8: Initial Setup
Initial Setup Pull the tabs on the back of the keyboard and mouse to activate the pre-installed batteries. NOTE: For better mouse battery life and performance, avoid using the mouse on a dark or high-gloss surface, and turn the mouse power off when not in use. Figure 1-2 Activating the Keyboard Batteries Figure 1-3... - Page 9 Ensure the power switch on the bottom side of the mouse is in the On position. NOTE: The keyboard does not have an On/Off power switch. Figure 1-4 Turning on the Mouse Power Switch Plug the receiver into a USB port on the computer. NOTE: Some desktop and workstation All-in-One computers have an internal compartment with a designated USB port for wireless input devices.
- Page 10 Press the Connect button on the receiver for approximately five seconds. The status light on the receiver will flash for a few seconds when the Connect button is pressed. Figure 1-6 Pressing the USB Receiver Connect Button While the status light on the receiver is flashing, quickly press the Connect button on the mouse. NOTE: The mouse should be within 30 cm (1 foot) of the receiver and away from interference from other wireless devices.
- Page 11 The CD will automatically run and open to the main menu. Double-click Wireless Applet in the Driver Installation column for the HP Wireless Keyboard and Mouse category on the CD to install the software for your wireless keyboard and mouse.
-
Page 12: Using The Wireless Device Software
Using the Wireless Device Software After the software for the wireless keyboard and mouse has been installed, the following icon will appear in the computer’s system tray. Wireless Applet Icon Click this icon to display the Caps Lock, Num Lock, Scroll Lock, and the low battery indicators for the keyboard and mouse. -
Page 13: Troubleshooting
Troubleshooting Solving Common Problems When the wireless devices are activated, each wireless device should have a different ID to avoid conflict. This wireless set has 78 channels and 65535 IDs. Problem Possible Cause Solution Keyboard or mouse is not Devices may not be Synchronize the devices. -
Page 14: Synchronizing The Wireless Devices
Synchronizing the Wireless Devices The wireless keyboard in the kit is shipped pre-synchronized from the factory. The wireless mouse should be synchronized during initial setup. You only need to synchronize the devices again if you replace either the keyboard, mouse, or USB receiver. Ensure that the computer is turned on, the batteries are installed in the keyboard and mouse, the switch on the bottom of the mouse is in the On position, and the USB receiver is plugged into a USB port on the computer. -
Page 15: Replacing The Keyboard And Mouse Batteries
Replacing the Keyboard and Mouse Batteries The wireless devices use AA Alkaline batteries. NOTE: To prolong the life of the mouse batteries, turn the mouse power off when not in use. Remove the battery compartment cover on the underside of the mouse (1) and pull the batteries out of the compartment (2). - Page 16 Remove the battery compartment cover on the underside of the keyboard (1) and pull the batteries out of the compartment (2). Figure 2-2 Removing the Keyboard Batteries Install the new batteries in the keyboard and replace the cover. Be sure to follow the indicators in the battery compartment for proper battery placement.
-
Page 17: Appendix A Agency Regulatory Notices
Agency Regulatory Notices Federal Communications Commission Notice This equipment has been tested and found to comply with the limits for a Class B digital device, pursuant to Part 15 of the FCC Rules. These limits are designed to provide reasonable protection against harmful interference in a residential installation. -
Page 18: Wireless Devices
CE compliance of this product is valid if powered with the correct CE-marked AC adapter provided by Compliance with these directives implies conformity to applicable harmonized European standards (European Norms) that are listed in the EU Declaration of Conformity issued by HP for this product or Appendix A Agency Regulatory Notices... -
Page 19: Brazilian Notice
(in English only) either within the product documentation or at the following web site: http://www.hp.eu/certificates (type the product number in the search field). The compliance is indicated by one of the following conformity markings placed on the product: Please refer to the regulatory label provided on the product. - Page 20 CE compliance of this product is valid if powered with the correct CE-marked AC adapter provided by Compliance with these directives implies conformity to applicable harmonized European standards (European Norms) that are listed in the EU Declaration of Conformity issued by HP for this product or Appendix A Agency Regulatory Notices...
- Page 21 (in English only) either within the product documentation or at the following web site: http://www.hp.eu/certificates (type the product number in the search field). The compliance is indicated by one of the following conformity markings placed on the product: Please refer to the regulatory label provided on the product.
-
Page 22: Product Environmental Notices
Product Environmental Notices Materials Disposal This HP product contains Mercury in the fluorescent lamp in the display that might require special handling at end-of-life. Disposal of this material can be regulated because of environmental considerations. For disposal or recycling information, contact your local authorities or the Electronic Industries Alliance (EIA) (http://www.eiae.org). -
Page 23: Hp Recycling Program
Chemical Substances HP is committed to providing our customers with information about the chemical substances in our products as needed to comply with legal requirements such as REACH (Regulation EC No 1907/2006 of the European Parliament and the Council). A chemical information report for this product can be found at: http://www.hp.com/go/reach... - Page 24 I/O PCAs SJ/T11363-2006 SJ/T11363-2006 RoHS 2003 1 27 2002/95/EC Appendix A Agency Regulatory Notices ENWW...
Need help?
Do you have a question about the KKBRF57711 and is the answer not in the manual?
Questions and answers