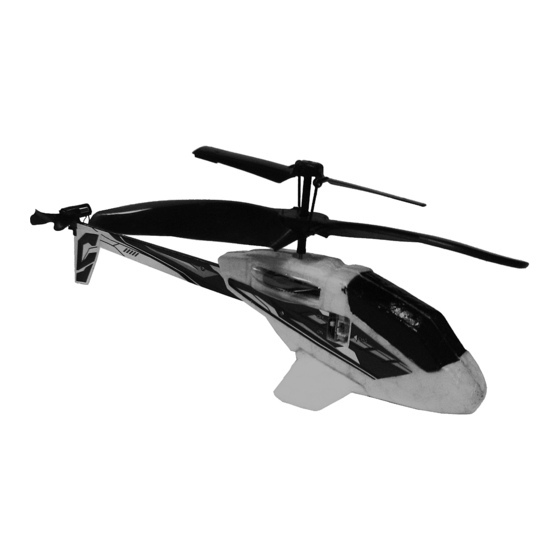
Table of Contents
Advertisement
Quick Links
Set up and Operating inStructiOnS
distributed exclusively by Harbor Freight tools
Visit our website at: http://www.harborfreight.com
read this material before using this product.
Failure to do so can result in serious injury.
SaVe tHiS manual.
©
Copyright
2008 by Harbor Freight Tools
contained herein may be reproduced in any shape or form without the express written consent of
Harbor Freight Tools. Diagrams within this manual may not be drawn proportionally. Due to continuing
improvements, actual product may differ slightly from the product described herein. Tools required for
assembly and service may not be included.
For technical questions or replacement parts, please call 1-800-444-3353.
98177
3491 Mission Oaks Blvd., Camarillo, CA 93011
®
. All rights reserved. No portion of this manual or any artwork
air piXie
HelicOpter
®
.
Advertisement
Table of Contents
Troubleshooting

Summary of Contents for Harbor Freight Tools AIR PIXIE HELICOPTER
- Page 1 Harbor Freight Tools. Diagrams within this manual may not be drawn proportionally. Due to continuing improvements, actual product may differ slightly from the product described herein. Tools required for assembly and service may not be included.
-
Page 2: Table Of Contents
cOntentS impOrtant SaFetY inFOrmatiOn ............3 aSSemblY precautiOnS ..................3 uSer precautiOnS ....................3 batterY precautiOnS: ..................3 SaFetY warning: ....................4 SpeciFicatiOnS ..................4 unpacking ....................4 liSt OF cOntentS ...................4 aSSemblY inStructiOnS ..............5 aSSemblY.........................5 Operating inStructiOnS ..............6 cHarging HelicOpter (recHargeable batterY pack): ......6 FlYing YOur HelicOpter ..................6 FligHt cOntrOl ....................7 take OFFS ........................7 FligHt lOcatiOn ....................8... -
Page 3: Important Safety Information
Users should keep and retain this information impOrtant SaFetY for future reference. inFOrmatiOn Users should keep strict accordance with the instruction manual while operating this assembly precautions product. Assemble only according to these instruc- Your Transmitter charger is tailor-made for tions. -
Page 4: Safety Warning
Never put hands or face close to rotating Harbor Freight Tools at the number shown parts. Doing so creates the risk of unexpect- on the cover of this document as soon as ed injury. -
Page 5: Assembly Instructions
Fig. 1 Fig 2 Fig 3 The batteries of choice would be new alka- aSSemblY inStructiOnS line batteries. read the entire impOrtant Replace the cover and tighten the screw in a SaFetY inFOrmatiOn section at the counter-clockwise direction. (See Fig.3.) beginning of this document including You can use either rechargeable or non- all text under subheadings therein... -
Page 6: Operating Instructions
Insert the charging plug into the socket on the Operating inStructiOnS helicopter. (See Fig. 5) Turn the power on. The green LED lights up while charging, and charging helicopter (rechargeable turns off when completed. (See Fig. 6) battery pack): Pull the plug out of the socket on helicopter. Turn off the power on helicopter and trans- The helicopter will have about 5-6 minutes of mitter. -
Page 7: Flight Control
Gently push the throttle up, or forward, to When the helicopter spirals counter-clock- raise your helicopter about 2' - 3' high. wise (see Fig.10) or keeps turning counter- clockwise (see Fig.11), push and release When the helicopter spirals clockwise (see the right side of the trim repeatedly until the Fig.7) or keeps turning clockwise (see turning stops and the helicopter straightens... -
Page 8: Flight Location
VERY gently add the throttle if the helicopter Don’t stick any other label on the helicopter; goes down. they might block the IR signal. VERY gently reduce the throttle if helicopter care and maintenance: goes up. Do not over control the helicopter; give short Always remove batteries from the transmitter and small movement to the direction stick. -
Page 9: Trouble Shooting
changing of temperature etc. You can solve this trOuble SHOOting: problem following the procedure below. (See Figs. The helicopter can be out of trim after some 17-22.) severe or multiple crashes, improper storage or if the helicopter takes too much forward speed by itself: Fig. -
Page 10: Troubleshooting Chart
troubleshooting chart Symptom cause Propeller won’t move. ON/OFF switch is off Turn on switch Weak battery Battery pack low Recharge battery pack Helicopter suddenly stops and falls Weak battery power Recharge battery pack Channel selection on transmitter is not Select the correct channel Helicopter does not react correct Another infrared control device using the... -
Page 11: Parts List & Assembly Diagram
partS liSt & aSSemblY diagram part description Qty. Stabilizer Shaft Main Rotor Driving Gear Tail Rotor Landing Gear Transmitter Fuselage Aluminum Sticker Spare Tail Rotor (See “Replace Tail Rotor” below) 3.7V Rechargeable Battery (Not shown) transmitter caution: Spare tail rotor must be replaced by an adult. record product’s Serial number Here: note: If product has no serial number, record month and year of purchase instead.


Need help?
Do you have a question about the AIR PIXIE HELICOPTER and is the answer not in the manual?
Questions and answers