
Summary of Contents for Dish TV S8300
- Page 1 S8300 DIGITAL SATELLITE RECORDER USER MANUAL Works only with a Satellite Dish Version 1.0 APRIL 2017...
- Page 2 • 02 •...
- Page 3 Welcome Welcome Thank you for choosing the Dish TV S8300 Digital Satellite Recorder. The S8300 is a Freeview Certified Satellite Recorder, that brings the most popular shows from Live TV and On Demand together. You can enjoy an entire online world on your TV and bring On Demand streaming straight to your living room.
-
Page 4: Table Of Contents
Contents Contents..........................About Your Receiver......................Main Features........................What’s in the Box?......................Product Overview......................Front/Back View........................Remote Control........................Connecting Up........................First Time Installation....................... Daily Use..........................Changing the Channel......................The INFO Button......................... TV/Radio Mode........................User Options........................Audio/Subtitles........................Freeview EPG........................Recording via the Freeview EPG..................Recording.......................... - Page 5 Manual Timer........................Admin..........................Factory Reset........................USB Software Upgrade..................... Network Software Upgrade....................OTA Software Upgrade..................... Software Upgrade Settings....................EPG..........................Recording via the Weekly EPG................... System Info........................Frequently Asked Questions..................Troubleshooting....................... Channel Groups......................S8300 Placement Instructions..................Contact Us........................Warranty Information...................... • 05 •...
-
Page 6: About Your Receiver
About Your Receiver Main Features • Freeview Live TV, On Demand & Record • Use with Satellite • Dual Tuner Recorder • Enhanced TV Guide • Switch between Live TV and On Demand² • Search Live and On Demand by Title/Genre •... -
Page 7: Product Overview
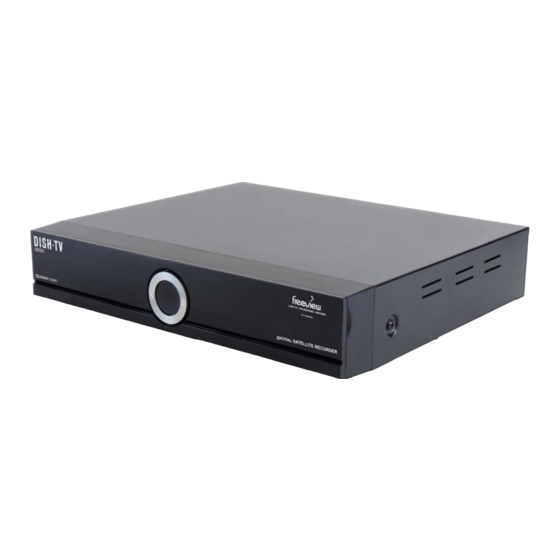
Product Overview Front Panel S8300 for Satellite DIGITAL SATELLITE RECORDER 01. DISPLAY 02. FUNCTIONS Displays Channel, Function. Power, Navigation Arrows. Back Panel R-NZ ANTENNA 12V 2A LNB IN ETHERNET HDMI AV OUT 13V/18V 0.45A 5V 0.5A 01. LNB IN 05. AV OUT Satellite Cable Input. -
Page 8: Remote Control
Product Overview Remote Control 01. POWER: Standby ON/OFF. 02. TV/R: Toggle TV/Radio Modes. 03. INFO: View Information. 04. APPS: Available Applications. 05. SETTINGS: Access User Options. 06. MENU: Access the Main Menu. 07. MUTE: Toggle Sound ON/OFF. 08. ARROWS: Navigate Menus. 09. -
Page 9: Connecting Up
Cable to connect to your TV. HDMI Cable Connect one end of the HDMI Cable into the HDMI Port on the back panel of your S8300, while connecting the other end of the HDMI Cable to the HDMI Port on your HD Ready... -
Page 10: First Time Installation
Step Welcome Screen The Welcome Screen should appear on your TV* when the S8300 is first turned on. Select the Region closest to your location and the Aspect Ratio most suitable for your TV. *If the Welcome Screen does not appear, go to the Menu, select Admin then Factory Reset. -
Page 11: Daily Use
Daily Use Changing the Channel Use your Remote Control to quickly change the channel. Channel Buttons You can use either the CH+ or CH- buttons to scroll through the available channels or use the NUMBER buttons to directly select a channel number. OK Button Press the OK button on your Remote Control. -
Page 12: Tv/Radio Mode
Daily Use TV/Radio Mode Pressing the TV/R button on your Remote Control allows you to toggle between TV and Radio channels. All Radio Channels are audio only, so to help preserve your screen and prevent image burn-in, a blank screen will display while audio is being played. -
Page 13: Audio/Subtitles
Daily Use Audio/Subtitles Broadcasters work with organisations such as Able NZ to make programmes you find on Freeview as accessible as possible for all. This means they provide Audio Descriptions as well as Subtitles for selected programmes. Audio Description Audio Descriptions are helpful for those who are visually impaired, narrating the selected programme with what’s happening on screen in between spoken dialogue. -
Page 14: Freeview Epg
Freeview EPG The Freeview EPG displays the programme schedule of each available channel for the next eight days. You can open the Freeview EPG (Electronic Programme Guide) by pressing the GUIDE button on the Remote Control. Navigation Display Window (Top-Right) To change the channel information displayed When the Freeview EPG is opened, the current use the ◄... -
Page 15: Recording Via The Freeview Epg
Freeview EPG Recording The Dish TV S8300 comes with a 1TB built-in Hard Drive allowing you to record up to 500 hours of programmes. You can record one off episodes or series link your favourites to record, and then watch when you want. -
Page 16: Instant Recording
Broadcasters transmit channels within a frequency, each frequency is often a group/number of channels provided by one broadcaster. More on Page 43. As the S8300 uses dual tuners, this allows it to tune into and record from two separate frequencies at the same time, whilst limiting the channels you can watch to only channels on those two frequencies. -
Page 17: Time Shift Recording
Recording Recording Time Shift Recording With the Dish TV S8300 you can pause Live TV so you’ll never miss a moment, or rewind back to a point that you missed. 1. First, make sure that you have the correct time shifting options set in the Main Menu you can find out more about this on Page 2. -
Page 18: Freeviewplus
FreeviewPlus THE SMARTEST WAY TO ENJOY TV, bringing the most popular programmes from On Demand and Live TV together. • Enhanced TV Guide - 7 Days Forward and Back • Switch easily between Live TV and On Demand • Search Live and On Demand by Title/Genre •... -
Page 19: Mini-Guide
FreeviewPlus Mini-Guide When displayed the Mini-Guide enables you to browse through the programme schedule for the next eight days, while allowing you to continue watching the current channel. Press the RED button at any time from Live TV to launch the Mini-Guide. Navigating the Mini-Guide Using the ▲... -
Page 20: Full Freeviewplus Guide
Mini-Guide. It also allows you to continue watching the current channel with the Live TV Preview. With your S8300 connected to the Internet, the DEFAULT GUIDE will change to display the FreeviewPlus Guide when the GUIDE button is pressed. -
Page 21: Recording Via Freeviewplus
FreeviewPlus Record When attempting to record more than two programmes at the same time, you will see the Alternate Booking message screen. It will state an alternate time slot to record one of the requested bookings, when available. Use the ▲ or ▼ buttons to select an option. Setting Recordings 1. -
Page 22: Set A Reminder
FreeviewPlus Set Reminder Don't want to miss a show? Set a reminder, so FreeviewPlus can let you know when it's about to start and take you to that channel if you want. Set a Reminder 1. Press the GUIDE button on your Remote Control to launch the FreeviewPlus Guide or the RED button for the Mini-Guide. -
Page 23: Favourite
FreeviewPlus Favourite Bookmark all your favourite shows and build up a personalised Favourites list so you can always find them easily to enjoy whenever it suits you. Favourite a Programme 1. Press the GUIDE button on your Remote Control to launch the FreeviewPlus Guide Remove a Favourite or the RED button for the Mini-Guide. -
Page 24: On Demand
FreeviewPlus On Demand With FreeviewPlus you can quickly access and discover a range of content throughout FreeviewPlus channels. On Demand Applications 1. Press the GREEN button on your Remote Control at any time from Live TV. 2. Select an On Demand Application to use and press the OK button. -
Page 25: Main Menu
All system information, user settings and tuning options are accessed through the Main Menu. You will need to access the Main Menu any time you decide to alter Media, User Interfaces or Reset the S8300. To display the Main Menu, press the MENU button on the Remote. -
Page 26: Installation
Satellites. Switch to the Transponder List to Delete, Add or Edit Transponders as well. Scanning a Satellite If you need to re-tune the S8300 at any time, use this option. This will restore the channels lost using the carriers already pre-configured with the S8300. -
Page 27: Channel Organiser
Main Menu Channel Organiser Here you can Lock, Skip, Move and Delete Channels. NOTE, that some options are only available if LCN is turned OFF in the Settings, refer to Page 29 for more information. 1. Press the MENU button on the Remote. 2. -
Page 28: Settings
Main Menu - Settings User Preference Adjust general user settings in the S8300 to customize your viewing experience. Brightness & Contrast Adjust the Brightness and Contrast to suit your preferences Preferred Audio & Subtitle The default Audio and Subtitle selection is English. -
Page 29: System Settings
HDMI Control Default is OFF. When ON, you can set your TV to turn on and off automatically when the S8300 is turned on or off. Often requires the relative HDMI-CEC setting to be ON in your TV to operate. -
Page 30: Network Setup
Wired Connection 1. Connect one end of the Ethernet Cable to the Ethernet Port on the back panel of the S8300, while connecting the other end of the Ethernet Cable to an Ethernet Port on your Router. 3. Go to Menu - Settings - Network Setup, select Wired and press OK. -
Page 31: Recorder Settings
Main Menu - Settings Recorder Settings Recording START Offset Adjust the time before a scheduled booking the S8300 starts to record. By default this is set at 1 Minute. It can be extended up to 15 Minutes or turned OFF. -
Page 32: Pvr
View all Media Devices such as USB Drives or the built-in 1TB Hard Drive and configure them to work with the Dish TV S8300. The first device listed will be the built-in 1TB Hard Drive, the default recording device. All recorded programmes will be saved to it. -
Page 33: Media Library
Main Menu - PVR Media Library Press the LIBRARY button on the Remote. Series/Episode View Episode View is set by default, so individual episodes will be listed as recorded. You can switch to Series View by pressing the BLUE button. Instead of listing individual episodes, Series View will group each series together. -
Page 34: Booked List
File Transfer Transfer recorded files between an external USB Device and the built-in 1TB Hard Drive. This useful when clearing the S8300 to start new or when moving files to another S8300. NOTE, the USB Drive used will first need to be formatted through the S8300. -
Page 35: Playback Via Usb
Main Menu - PVR Should I Copy or Move? Copy will maintain the selected file on both 3. To transfer multiple files, select a file and the original device and secondary device, press the GREEN button to mark. When whilst Move will transfer the selected file all desired files have been marked, press OFF onto the secondary device . -
Page 36: Timer Recording
3. Select the Service Name or Channel you want to record or appear at the specified date and time. 4. Specify a Date for the S8300 to power on or switch to the specified channel. Format is DD/MM/YY. 5. Specify a Time for the S8300 to power on or switch to the specified channel. -
Page 37: Admin
YES and press OK. Enter the PIN Code (Default is 0000). 3. Please allow a moment for the S8300 to return to the default settings. Once it has completed the Factory Reset, you will be taken to the First Time Installation screen to setup your S8300. -
Page 38: Network Software Upgrade
Main Menu - Admin Admin Network Software Upgrade The S8300 will need to be connected to the Internet before you start. Refer to Page 30. 1. Select Network Software Upgrade and press OK. 2. The S8300 will connect to the server and search for a software version subsequent to its current version. -
Page 39: Epg
Main Menu - EPG MHEG EPG 1. Press the MENU button on the Remote. 2. Select EPG and press OK. 3. Select MHEG EPG and press OK, please allow a few moments for the MHEG EPG to load. More information on Page 14. Weekly EPG The Weekly EPG displays the programme schedule of each available channel for the... -
Page 40: Recording Via The Weekly Epg
Main Menu - EPG Recording via the Weekly EPG 1. Refer to Menu - EPG - Weekly EPG. 2. Select a programme to book for recording and press the RED button. 3. You will be prompted to confirm whether you would like to record the whole series or only record the episode. -
Page 41: User Manual
Main Menu - User Manual We are working on this section. Refer to Menu - User Manual for updated information. • 41 •... -
Page 42: Frequently Asked Questions
Guide. Select either FREEVIEWPLUS or MHEG. Press OK to save the change. Q. My S8300 has only sound, NO picture? A. The S8300 is most likely on a Radio Channel, press the TV/R button on the Remote Control to toggle between the Radio and TV Channels. -
Page 43: Troubleshooting
Troubleshooting • Unplugged/ Switched Off. No Power Indicator Check the Power Supply is plugged into both the S8300 on Front Panel. and Wall Socket correctly, ensuring the Wall Socket is switched on and there is power available. • HDMI or AV cable is not... -
Page 44: S8300 Placement Instructions
• Ensure there is a reasonable amount of ventilation space around the S8300. • DO NOT place the S8300 in a location with NO ventilation, such as a cupboard. • Ensure the air vents on the S8300 are not blocked or covered. -
Page 45: Contact Us
Follow us on Twitter facebook.com/dishtvNZ twitter.com/dishtvNZ Product Videos Freeview Forum youtube.com/dishtvNZ freeviewforum.co.nz *Freeview Forum - free registration required, please be a descriptive as possible when posting and make sure you include Dish TV in the post title. • 45 •... -
Page 46: Warranty Information
• All warranty claims will require you to return the product to our address. • The obligations of Dish TV are limited to the repair of defective parts. Costs and risks of transport to the retailer as well as removal and installation of the product, and any other costs directly or indirectly related to its repair, are not covered by warranty. - Page 47 • 47 •...
- Page 48 www.dishtv.co.nz Version 1.0 APRIL 2017...
Need help?
Do you have a question about the S8300 and is the answer not in the manual?
Questions and answers
How do I delete mini guide