Table of Contents
Advertisement
Advertisement
Table of Contents

Related Manuals for iConnectivity iConnectMIDI4+


Summary of Contents for iConnectivity iConnectMIDI4+
- Page 1 OWNER’S MANUAL ...
-
Page 2: Compatibility
Warranty iConnectivity warrants to the original purchaser that this unit is free of defects in materials and workmanship under normal use and maintenance for a period of one (1) year from the date of original purchase. The warranty applies only to registered iConnectivity users that register their product(s) within fourteen (14) days of time of original purchase. -
Page 3: Precautions/Important Notes
PRECAUTIONS / IMPORTANT NOTES Interference with other electrical devices FCC (USA) / IC (Canada) Regulation Warning Radios and televisions placed nearby may experience This equipment has been tested and found to comply reception interference. Operate this unit at a suitable with the limits for a Class B digital device, pursuant to distance from radios and televisions. -
Page 4: Table Of Contents
........7 Mac OS X set-up ............ 12 Windows set-up ............13 iOS set-up ............... 15 Working with multiple iConnectivity interfaces ..16 Port Routing: understanding iConnectMIDI4 MIDI . 17 Audio passThru™ ............ 20 iConnectivity iConfig software ........ 21 Network MIDI set-up .......... - Page 5 Thank you for purchasing the iConnectMIDI Hybrid multi-host MIDI interface with Audio passThru™ technology. Your iConnectMIDI is the most flexible MIDI interface available, integrating today’s professional multiple-computer set-ups with iOS devices and traditional MIDI hardware. Not only does your interface support three computer devices simultaneously –...
-
Page 6: What's In The Box
(36W) center positive supply, or you risk damaging the device. This adapter operates over a range of 100-240V/50 or 60Hz, so it can be used internationally with wall plug adapters. Please contact your dealer or iConnectivity directly if any of these items were not included in the packaging. 6 ... -
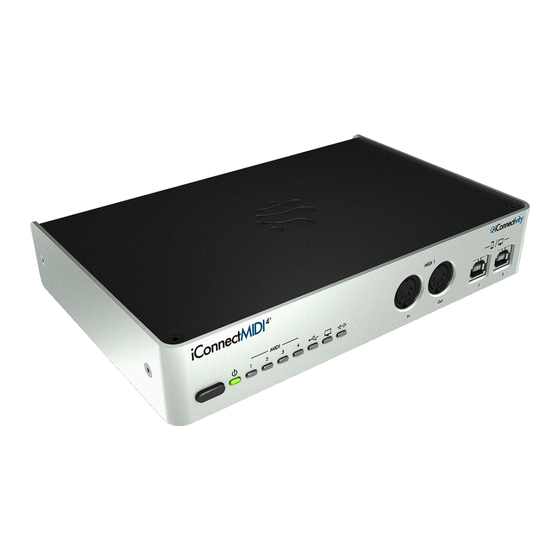
Page 7: The Iconnectmidi Hardware
The iConnectMIDI hardware 7 ... - Page 8 Power button This switch has several functions. • Putting the iConnectMIDI to sleep and waking it up. Put the device to sleep by holding the button in for a couple of seconds until the green LED (2) goes out, then releasing it. Wake it up by touching it briefly.
- Page 9 USB Host jack LED This light indicates that USB MIDI data is being sent to or received from a USB MIDI class-compliant device plugged into the USB Host jack. It also lights along with all the other LEDs when the device starts up, and when a hard reset is about to begin.
- Page 10 BETWEEN THE THREE USB DEVICE JACKS! These USB 1.0 jacks accept a USB B-standard plug for audio and MIDI connection to a Mac or Windows computer, or the iConnectivity Lightning or 30-pin to USB (B) connector for both audio and MIDI connection to an iOS device.
- Page 11 Please see the separate section on the Network MIDI feature for set- up instructions. Power supply jack Please use only the iConnectivity 12V/3A (36W) center positive transformer, or you risk damaging the device. This adapter operates over a range of 100-240V/50 or 60Hz, so it can be used internationally with wall plug adapters.
-
Page 12: Mac Os X Set-Up
Mac OS X set-up 1. Plug the iConnectMIDI into an available USB jack. If you’re using the iConnectMIDI alone on the Mac, that’s it. It will show up as an available audio and a MIDI interface in your sequencer. You can confirm this beforehand by opening the Audio MIDI Setup application found inside your Applications ->... - Page 13 13 ...
-
Page 14: Windows Set-Up
Windows set-up 1. Connect a USB A-to-B standard cable from Device port 1 or 2 to your Windows computer. The iConnectMIDI will appear in your MIDI software as an available MIDI interface with four 16-channel ports. In the following dialog in the Plogue Bidule host, for example, the MIDI interface is called “USB Audio Device”: 2. - Page 15 the free ASIO4all driver. The iConnectMID4 will show up as an available audio interface in your audio software, and you select it as the one to use. If you are using the iConnectMIDI4 alongside other audio interfaces installed on the Windows computer, as shown above, they are automatically “aggregated”...
-
Page 16: Ios Set-Up
GarageBand, for example. However, some apps - typically ones capable of supporting multiple MIDI interfaces (e.g. Network MIDI + an iConnectivity interface) - require that you select the interface(s) to be used. Note: because the iOS device uses the iConnectMIDI for audio I/O when it’s connected, some –... -
Page 17: Working With Multiple Iconnectivity Interfaces
USB jack on a Windows or Mac computer. Sequencers and other software running on the computer will then see them all. This applies to iConnectivity hybrid interfaces and to any other MIDI or audio interfaces, regardless of how many you’re using. -
Page 18: Port Routing: Understanding Iconnectmidi4 + Midi
Port Routing: understanding iConnectMIDI MIDI Bear in mind that jacks are physical connections and ports are 16- channel MIDI ports; one jack can carry several ports. For example, each USB Device jack has 16 MIDI ports. The 64 MIDI ports are configured as follows: •... - Page 19 - the USB Device jack with the same number (DIN1 goes to USB Device jack 1, DIN 2 to USB Device jack 2…) • All three USB device jacks are routed the same: - Ports 1-4 go to the same-numbered DIN jacks 1-4 (Port 1 to DIN 1, Port 2 to DIN 2…) - Ports 5-6 go to the other two USB device jacks;...
- Page 20 Additional information: - Up to 19 devices may be connected to the iConnectMIDI (four on the DIN jacks, three computer devices on the USB Device jacks, eight MIDI USB devices on the USB Host jack [if you use a powered USB hub], and an additional four computers networked over Ethernet).
-
Page 21: Audio Passthru
These must be set in the iConfig software, not in the computer’s set-up program (e.g. Audio MIDI Setup). -
Page 22: Iconnectivity Iconfig Software
Software The iConnectivity iConfig software provides access to some sophisticated MIDI features in the iConnectivity interface(s) connected to your system, as well as the audio settings. It allows you to save and open complete routing and processing Snapshot files that make working with sophisticated systems very simple. - Page 23 In this example we have two units connected to a Mac – an iConnectMIDI and an iConnectMIDI (Should any of your iConnectivity devices fail to appear, the most likely culprit has to be an unplugged or bad cable. Check your connections and click Refresh.) Then the program opens with the Device Info screen.
- Page 24 24 ...
- Page 25 MIDI Info tab This screen contains essential MIDI information, as well as a list view with information about each of the 64 potential 16-channel MIDI ports available in your interface. Please refer to the previous section “Port routing: understanding iConnectMIDI MIDI”...
- Page 26 About the “Running Status on DIN ports” checkbox (under MIDI Information): this defaults to being disabled/not transmitted (white), since it must be implemented – and implemented correctly - in the receiving device to function. As a practical matter, Running Status is a “leave it off unless you know otherwise”...
- Page 27 Port Routing tab Please refer to the previous section “Port routing: understanding iConnectMIDI MIDI.” The Port Routing screen is a simple routing matrix, but it accesses one of the iConnectMIDI ’s most sophisticated features: the ability to “patch” 16-channel MIDI streams wherever you want them to go, only where you want them to go.
- Page 28 There are countless applications in which the routing feature might be useful. Perhaps you need one MIDI keyboard controller routed to a layered sound that’s on two different computer devices, or maybe you have a percussion pad that you want “hardwired” to a percussion module.
- Page 29 The first six types of data can be filtered only on the selected MIDI channels; due to their nature, the remaining data types are filtered/enabled for the entire Port on all channels. MIDI Active Sensing, an arguably obsolete command designed to let you know when a device has gone offline (usually because it’s unplugged), is filtered by default.
- Page 30 Then go over to the Remap Channels table and select the data type and channel to be remapped, and enter the destination channel number in the Remap to Channel row. Controller Filters tab The Controller Filters matrix lets you enable/disable up to eight different MIDI Controller messages on each MIDI channel, on input or output.
- Page 31 Then each row lets you select one of the 127 MIDI Controllers from the Controller ID drop-downs. Only the first 30 or so are shown below, but all 127 controllers in the MIDI spec are there if you continue scrolling down: 31 ...
- Page 32 Controller Remap tab This matrix allows you to remap, or convert, up to eight MIDI Controllers from one type to another on selected MIDI channels. If you want to use, say, the mod wheel to control volume, this is where you’d convert MIDI CC#1 (Modulation) to #7 (Main Volume).
- Page 33 Audio Info tab The final screen is a list view with information about the internal audio ports, along with a few adjustable parameters. You must set the sample rate and bit depth here, rather than in computer device software (e.g. Mac Audio MIDI Setup). Audio Information The iConnectMIDI can route a number of channels of audio to and...
- Page 34 number of audio channels, and bit rate. (Audio channels are divided evenly between input and output.) The higher each of these numbers is, the more data is transferred and therefore more bandwidth is used. Under some but not all conditions the audio quality may improve slightly at 24 bits rather than 16, and extremely subtly at 96kHz vs.
- Page 35 iConfig iOS version The iOS version of the iConfig software has a different look from the computer versions, because its user interface is designed for touchscreen devices. So instead of clicking on tabs, you tap areas on the screen. The functions are the same, however, and the interface is completely intuitive.
-
Page 36: Network Midi Set-Up
Network MIDI set-up 4+’ The iConnectMIDI s Network MIDI feature is like having an additional 1 x 1 MIDI interface on each of up to four computers on your network. You can connect a single computer directly to the Network port with a standard Cat5 ethernet cable, or you can cable the iConnectMIDI to a wired switcher or (wireless) Wi-Fi router for access to the other three computers. - Page 37 Click on the + icon under My Sessions to create a new session (Session 1 is the default name; you can rename it in the righthand column). Click on the checkbox next to Session 1 to enable it. (You may give it your own name in the righthand column.) Click on (in this example) ETH1, then on the Connect button to connect ETH1 to the session.
- Page 38 Windows set-up (using rtpMIDI) The free rtpMIDI driver for Windows looks just the same as above. Please download and install it, then follow the same instructions. 38 ...
-
Page 39: Troubleshooting
Troubleshooting Music/audio system stops working properly At the risk of stating the obvious, the first thing to do with any digital device is to restart it. No indicator lights Data flowing through iConnectMIDI normally causes the port indicator lights to flash. If that doesn’t happen, the two most common causes are: - a detached or broken cable (swapping cables is at the top of any audio or MIDI troubleshooting list);... - Page 40 You can disable Audio passThru™ in the iConfig software’s Audio Information screen, leaving iConnectMIDI active. If you need live input to the iOS device, the best workaround is to connect the mic to the computer on the other end of the USB cable and route it to the iOS device by way of, for example, a record-enabled track in your DAW software.
-
Page 41: Specifications
Specifications General 3 USB Device jacks – Jack 1 provides 2.1A charging power, Jack 2 provides 1A, Jack 3 provides no charging power. 1 USB 2.0 Host jack for MIDI Class-Compliant devices. 4 pairs of MIDI DIN jacks. Ethernet Network port. Body Durable construction out of Rugged steel, brushed metal finish. -
Page 42: Appendix: Midi And Audio Basics
Appendix: MIDI and audio basics First came analog synthesizers, then came the digital revolution, at which time synthesizers were starting to come under digital control. To allow them to communicate with one another, in 1983 several musical instrument manufacturers agreed upon a standard: the Multiple Instrument Digital Interface (MIDI). MIDI is a control language that says things like “play a C3 at xxx velocity, now turn on the sustain pedal, now turn it off, now stop playing that C3, etc.” ... - Page 43 computer(s). It can also come from sounds that have been recorded or are being played live through a regular audio interface on one of the computers. What’s unique about the iConnectMIDI4 is that instead of having MIDI interfaces and audio interfaces on three computer devices – s ix devices - you just have one box that routes both MIDI and audio between the machines over USB.
- Page 44 So you connect an iConnectMIDI4 MIDI DIN out to your first instrument’s In, your first instrument’s Thru to your second instrument’s In, your second instrument’s Thru to your third instrument’s In, and (not shown in the illustration above) your third instrument’s Out to the iConnectMIDI4 MIDI DIN in.
-
Page 45: Support
Support Connect with us for support. Online Visit iConnectivity.com. Share your ideas, review FAQs for each product, and access our community forum for discussions on unique rig set-ups, product uses and more. Direct Email: support@iConnectivity.com Tel: +1(403)457-1122 Support Hours: Monday to Friday 8:30 am (MST) to 4:30 pm (MST)
Need help?
Do you have a question about the iConnectMIDI4+ and is the answer not in the manual?
Questions and answers