Table of Contents
Advertisement
Advertisement
Table of Contents

Subscribe to Our Youtube Channel
Related Manuals for FLYSURFER PEAK 4

Summary of Contents for FLYSURFER PEAK 4
- Page 1 USER MANUAL PEAK4...
-
Page 2: Table Of Contents
12.03 Repairing the Cloth ...............................17 Trimming ..............................18 13.01 Mixer Test ..................................18 13.02 Optimum trim of the flying lines ..........................18 Repair & Spare Parts ..........................18 PEAK4 User Manual ENGLISH #01 / 11-2018 Änderungen vorbehalten / data subject to change © FLYSURFER Kiteboarding 2018, www.flysurfer.com... -
Page 3: Safety Notes
01. Powerkiting is a potentially dangerous sport, that holds risks for the athlete or the people surrounding them. Incorrect use of this product may result in serious injury or even death for the user or third parties. Every user should be qualified by a FLYSURFER kiteschool or a FLYSURFER dealer. -
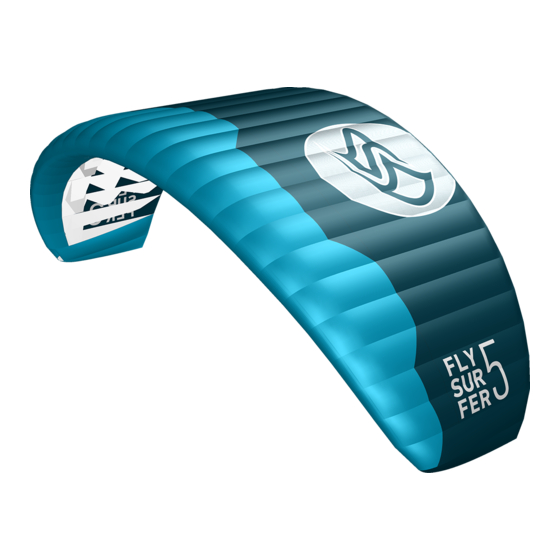
Page 4: Overview Of The Kite
02 OvERviEw Of THE KiTE... - Page 5 Optimized Construction X-Light / DLX+ Construction The PEAK4 uses our proven material mix of DLX+ & X-Light cloth, A high-strength Nylon 6.6, 32g / m2 double-ripstop, UV resistant as well as new reinforcements in areas subject to particularly + PU coating on the outside and Lotus coating on the inside. Ri- high loads such as the leading edge, the wingtip and the trailing gid foils make for a stiffer, more dynamic canopy.
-
Page 6: Handling
03 HANDLiNG Check your bridle for tangles. Make sure that none of the lines are caught around the back of the kite. A kite needs to be secured properly even if the wind is light. A runaway kite can be a se- rious danger to people or animals downwind. -
Page 7: Sorting The Bridle
If the lines are still twisted, untwist them by turning the bar. If the bridle is tangled, lines from one side of the bridle may It may be possible (especially after not being careful when pa- be running through the lines on the other side. cking away or setting up the kite) that the bar has to be pushed through the lines again to untwist. -
Page 8: Securing A Single-Skin Kite
04 LAUNCHiNG 03.03 Securing a Single-Skin Kite Fold your kite in the middle and let the tips flow out down- Please check not only the wind and weather conditions, but also wind. The bottom sail and the bridle will be facing inwards. all your equipment, especially the safety system before launching. -
Page 9: Edge Of The Wind Window With An Assistant
Release the kite from the sand or object securing it with a As soon as the kite is inflated and you are ready, give the step backwards away from the kite and carefully steer it. assistant the thumbs up signal that he can let go. Make sure to once again check whether all lines run freely before doing this. -
Page 10: Relaunch
05 RELAUNCH Put the flying lines under tension so that the kite rises slow- ly. Take another step to windward to release the weight from the 05.01 Reverse Launch trailing edge of the kite. Grab the leader lines above the floaters as high up as you can. -
Page 11: One Line Relaunch
06 LANDiNG The kite will now spin around. As soon as the leading edge of the kite points up let go of the remaining leader line and put 06.01 Landing with an assistant your hand back on the bar. Depower the kite till its back in the sky towards the zenith. -
Page 12: Landing Without An Assistant At The Side Of The Wind Window
As soon as the assistant has the kite securely in their hands, Go quickly toward the kite until it comes to rest entirely on walk towards them until all flying lines are no longer under ten- the ground. sion. This way the kite will flag out downwind of the assistant. Secure the kite as described in “Securing the Kite“. -
Page 13: Safety System
07 SAfETy SySTEM When you reach the bar, secure the endline to your harness hook. This is done by wrapping the side of the endline which is The PEAK4 kites are equipped with our B-Safe system. Af- under tension two times around the harness hook and then the ter activating the quick release, the control bar slides up to the loose side one time in the opposite direction. -
Page 14: Emergencies
09 PACKiNG UP In an emergency situation it is important not to panic, and to A FLYSURFER kite can be packed into its bag very quickly. It is react purposefully and goal orientated. important that the bridle is securely packed inside the kite and the bar never gets into or goes through the bridle lines. -
Page 15: Kite Care
10 KiTE CARE Throw the bridle lines in between the folded kite. FLYSURFER kites are very durable and very UV and saltwater re- sistant. With proper care, your kite may last even longer. Even- tual color changes of the cloth can be caused by environmental causes, UV-exposure, mechanical strain as well as it getting dir- ty. -
Page 16: Assembly Of B-Safe System
11 ASSEMBLy Of B-SAfE SySTEM 12.01 Replacing the Sparepart Lines Take out the gray B-Safe top lines, which are in the side po- The Sparepart Lines are the yellow lines that run through the cket of the PEAK4 bag. pulley system known as the mixer. The sparepart line should be replaced before the sleeving could tear or fray (approx. -
Page 17: Little Connection Lines
A spe- cial binding agent (silicone sealing compound) for the X-Light Cloth is available through Flysurfer sales partners or directly at Redo the short line pieces and pull the knots tight. -
Page 18: Trimming
14 REPAiR & SPARE PARTS Repairs can be done at either our workshop in the head office, or by a Flysurfer sales partner who offers a repair service. High quality original spare parts for all our Flysurfer products can be... - Page 20 FLYSURFER Kiteboarding Brand of Skywalk GmbH & Co. KG Windeckstr. 4 83250 Marquartstein, GERMANY WEBSITE: www.flysurfer.com EMAIL: info@flysurfer.com PHONE: +49 (0) 86 41 69 48 - 30...
Need help?
Do you have a question about the PEAK 4 and is the answer not in the manual?
Questions and answers