Segway RMP 210 User Manual

Segway RMP 210 User Manual

Robotics mobility platform
Table of Contents

Advertisement

User Manual
Segway
Robotics Mobility Platform
®
210/220

Advertisement

Table of Contents
loading
Need help?

Need help?

Do you have a question about the RMP 210 and is the answer not in the manual?

Questions and answers

Ethan
February 20, 2025

The problem I **** currently facing is that these lights stay on continuously after turning on the power. How can I solve this problem

User image 67b75689f08a6
1 comments:
Mr. Anderson
May 14, 2025

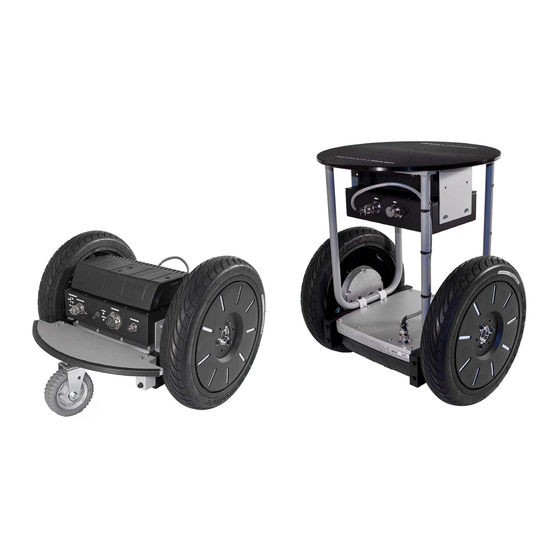
If the lights on the Segway RMP 210 stay on continuously after turning on the power, check the LED indicator pattern to identify the operational mode:

- If the red LED blinks rapidly and then turns off, double-check the disable button.
- If powered from USB, disconnect the USB cable and toggle the on/off switch ON again.

Refer to the LED patterns in Table 8 to match the light behavior with the system mode and troubleshoot accordingly.

This answer is automatically generated

Summary of Contents for Segway RMP 210

  • Page 1 User Manual Segway Robotics Mobility Platform ® 210/220...
  • Page 2: Table Of Contents

    Performance Limits ..............................25 Interaction With The Environment .......................... 27 Balance Mode Faults ..............................31 Hardware Balance Request ............................31 Velocity Filter ................................31 Electrical Overview System Architecture ..............................32 System Power ................................32 System Components ............................... 33 Copyright © 2014 Segway Inc. All rights reserved.
  • Page 3 Configuration Commands ............................51 Standard Input Mapping ............................62 RMP Response ................................. 66 IEEE754 32-bit Floating Point and Integer Representation ..................77 Cyclic Redundancy Check (CRC)-16 ........................78 Fault Status Definitions ............................82 Copyright © 2014 Segway Inc. All rights reserved.
  • Page 4 Removing Wheel Assemblies ...........................111 Replacing Wheel Assemblies ...........................111 Cleaning ..................................111 Software Updates ..............................111 Batteries Replacing Batteries ..............................112 Installation and Removal Instructions ........................113 Transportation and Shipping ..........................113 Proper Disposal ............................... 113 Copyright © 2014 Segway Inc. All rights reserved.
  • Page 5 RMP 210/220 Troubleshooting Reporting Problems to Segway ..........................114 Extracting the Faultlog ............................114 Reading the Faultlog ............................... 115 Faults ..................................116 Charging Faults ..............................120 Other Issues ................................120 Copyright © 2014 Segway Inc. All rights reserved.
  • Page 6: Copyright, Disclaimer, Trademarks, Patent, And Contact Information

    United States and in other countries. Those trademarks followed by ® are registered trademarks of Segway. All other marks are trademarks or common law marks of Segway. Failure of a mark to appear in this guide does not mean that Segway does not use the mark, nor does it mean that the product is not actively marketed or is not significant within its relevant market.
  • Page 7: Introduction

    RMP. Segway has chosen to allow users to control overall RMP movement, but not individual wheels/motors. This frees users to treat the RMP as a single unit rather than a collection of components, and allows Segway to provide a more robust, predictable mobility platform.
  • Page 8: Safety

    • Do not use cables that are frayed or damaged. You could shock yourself and/or damage the RMP. • Use only Segway approved fasteners on the RMP. Other fasteners may not perform as expected and may come loose. Failure to do so could expose you to risk of personal injury or property damage.
  • Page 9 • Use only charging devices approved by Segway and never attempt to bypass or override their charging protection circuits. • Always protect against electrostatic discharge (ESD) when working inside the RMP. The RMP could become damaged.
  • Page 10: Abbreviations

    State Of Charge — a measurement of battery charge from 0% (empty) to 100% (full). Segway Processor — a microcontroller on the CCU that contains proprietary Segway code for controlling the RMP. Serial Peripheral Interface — a synchronous serial data link standard that operates in full duplex mode.
  • Page 11: Rmp 210 And 220

    The major difference between the two models is the number of Motor Control Units (MCUs) in the powerbase and the presence or absence of a Balance Sensor Assembly (BSA). The RMP 210 has one MCU, one propulsion battery, and no BSA. The RMP 220 has two MCUs, two propulsion batteries, and a BSA.
  • Page 12: Capabilities

    RMP and interpret its responses are described later in this document (see "Communication," p. 47). To make this process easier, Segway provides an OCU Demo Application and source code (see "OCU Demo Application," p. 102). This application is fully functional, but is not intended to be an end solution. Instead it is meant to be used as a functional example of how to interface with the RMP.
  • Page 13: Coordinate System

    The RMP has a coordinate system relative to forward/reverse, pitch, roll, and yaw. This coordinate system is used when controlling the RMP. The diagrams below show the RMP's axes and coordinate system. Both the RMP 210 and 220 share the same coordinate system. An RMP 210 is pictured below. Ψ' Φ'...
  • Page 14: Physical Characteristics - 210

    Tire Pressure Other Weight 52 kg (115 lbs) 23.4 Figure 9: RMP 210 Top View 25.1 18.9 15.2 17.7 16.4 Figure 10: RMP 210 Side View Figure 11: RMP 210 Rear View Copyright © 2014 Segway Inc. All rights reserved.
  • Page 15: Physical Characteristics - 220

    73 kg (161 lbs) Figure 12: RMP 220 Top View 13.5 16.9 11.0 14.4 18.9 30.0 21.8 15.2 17.7 Figure 13: RMP 220 Side View 25.1 Figure 14: RMP 220 Rear View Copyright © 2014 Segway Inc. All rights reserved.
  • Page 16: Mounting Locations - 210

    The RMP 220 has all the same mounting locations as the 210. In addition, it includes a mounting plate at 761 mm (30.0 in) high. Tapped holes are M8 through holes. Dimensions are in mm [in]. 22.0 21.5 30.0 Figure 17: Mounting Plate Figure 18: End Mounting Holes Copyright © 2014 Segway Inc. All rights reserved.
  • Page 17: Turn Envelope

    The RMP can turn in place, so its turn envelope is very small. Both the 210 and the 220 have the same turn envelope. The caster plate is designed to fit within the turn envelope. 30.4 30.4 Figure 19: Turn Envelope, RMP 210 Figure 20: Turn Envelope, RMP 220 Copyright © 2014 Segway Inc. All rights reserved.
  • Page 18: User Interface Panel

    Auxiliary Battery Auxiliary Battery Front Front NOTICE Caster Plate is not standard on the RMP 220. Battery 0 Battery 0 Battery 1 Figure 22: Battery Locations, 210 Figure 23: Battery Locations, 220 Copyright © 2014 Segway Inc. All rights reserved.
  • Page 19: Powerbase Connections

    If two powerbases are used, the right-hand connector goes to the rear powerbase. The powerbase must be plugged into the proper connector for the charge status LEDs to be correct. Figure 24: Powerbase Connections Connector V Connect the powerbase to this jack. Connector VI Cover this jack with the protective cap. Copyright © 2014 Segway Inc. All rights reserved.
  • Page 20: Performance Specifications

    Maximum payload in Balance Mode is determined by the gain schedule (page 23). It is possible to use higher payloads with custom gain schedules. Environmental Specifications The Segway RMP was designed to withstand environmental conditions both indoors and outdoors. Table 5: Environmental Specifications...
  • Page 21: Transportation And Shipping

    To prevent damage to your RMP, always ship it in the original crate it came in. The crate disassembles for storage. If you do not have the original crate, contact Segway for a replacement (see "Contact Information," p. 6). Copyright © 2014 Segway Inc. All rights reserved.
  • Page 22: Balancing

    RMP will tilt. The RMP will push back, attempting to drive forward and tipping the front of the mounting plate up. For more information on how the RMP will act in a variety of situations, read the rest of this chapter. Copyright © 2014 Segway Inc. All rights reserved.
  • Page 23: Payload Gain Schedules

    In order to balance safely and accurately the controller's gain schedules must be precisely tuned for a given payload and weight distribution. Four pre-defined gain schedules can be selected, and Segway can create custom gain schedules for specific applications. CAUTION! The Tall configuration requires extra care.
  • Page 24: Balance Mode Requirements

    The RMP will beep with increasing frequency as it approaches vertical. Allow the RMP to balance on its own. You can now send motion commands. Figure 30: Tip the RMP Upright When Entering Balance Mode Copyright © 2014 Segway Inc. All rights reserved.
  • Page 25: Exiting Balance Mode

    This graph assumes that the RMP is operating on level ground. Any slope, however slight, will increase the likelihood of roll-over. Roll Over Performance Limits Unloaded Light Tall Heavy velocity [m/s] Figure 31: Roll Over Performance Limits Copyright © 2014 Segway Inc. All rights reserved.
  • Page 26 To calculate the stopping distance from the velocity and deceleration rate, use the following formula: Where, D = Distance Travelled (m) V = Initial Velocity (m/s) A = Acceleration/Deceleration Rate (m/s Copyright © 2014 Segway Inc. All rights reserved.
  • Page 27: Interaction With The Environment

    If the RMP is displaced from its desired position, it will lean against the displacement force, creating a new equilibrium position. The harder it is pushed, the more it will lean. Desired Position ∆X ∆X Figure 32: Displacement Direction Desired Position 2∆X ∆X Figure 33: Displacement Magnitude Copyright © 2014 Segway Inc. All rights reserved.
  • Page 28 In this case the RMP will push up against the table in an attempt to right itself. The force applied by the RMP can be quite strong, lifting the table or tipping it over. Figure 35: Caught Under a Table Copyright © 2014 Segway Inc. All rights reserved.
  • Page 29 A caster wheel can cause the RMP to accelerate rapidly even if it does not normally contact the ground. If the RMP hits an obstacle or encounters a slope, the caster wheel will tip the RMP and start it accelerating in the opposite direction. Figure 37: Caster Wheel on a Slope Copyright © 2014 Segway Inc. All rights reserved.
  • Page 30 RMP will not be able to maintain its balance and will move very quickly trying to right itself. This could result in death or serious injury to bystanders, or property damage. Copyright © 2014 Segway Inc. All rights reserved.
  • Page 31: Balance Mode Faults

    When in Balance Mode the RMP can tip quite suddenly, especially when large changes in velocity are commanded. To mitigate this a velocity filter can be applied that smooths velocity transitions by limiting the rate at which the acceleration rate can change. For more information see "Velocity Filter," p. 65. Copyright © 2014 Segway Inc. All rights reserved.
  • Page 32: Electrical Overview

    The RMP combines the robustness of the Segway powerbase with a versatile Centralized Control Unit (CCU). The powerbase is the same proven technology used in the Segway PT. It controls the wheels, senses the RMP's orientation, and provides a mounting location for the batteries.
  • Page 33: System Components

    Powerbase The powerbase is one of the main components of the Segway PT and has been leveraged for use as the propulsion unit of the RMP. Each RMP 220 has one powerbase that controls both wheels. Inside the powerbase are two Motor Control Units (MCUs) and a BSA. The powerbase is not serviceable by the user;...
  • Page 34 The other Power Converter is selectable at time of purchase. Output voltage options include 5 VDC, 12 VDC, 24 VDC, 36 VDC, and 48 VDC. Figure 45: Power Converter Copyright © 2014 Segway Inc. All rights reserved.
  • Page 35: Operational Model

    • Disable Mode • DTZ Mode • Figure 46 shows how these states interact. Each of these states is discussed in more depth on the following pages. Figure 46: System State Diagram Copyright © 2014 Segway Inc. All rights reserved.
  • Page 36: Faults

    7.2 VDC battery (if present) has low or high voltage. • Any detected machine motion (RMP moving un-commanded). • Tractor mode request is present from the user. • BSA communication has not been established. Copyright © 2014 Segway Inc. All rights reserved.
  • Page 37: Diagnostic Mode

    Balance Mode can be entered from both Standby Mode and Tractor Mode as a result of a user mode request (see "RMP_CMD_SET_ OPERATIONAL_MODE," p. 59) or by sending a hardware Boot1 signal ("Additional Signals," p. 43). From here the user can initiate a transition to Standby Mode, Tractor Mode, or Disable Mode. Copyright © 2014 Segway Inc. All rights reserved.
  • Page 38: Disable Mode

    DTZ Mode can be entered at any time via user command (see "RMP_CMD_SET_OPERATIONAL_MODE," p. 59) or hardware command (see "Connector II," p. 43). Some faults will also cause a transition to DTZ Mode. Copyright © 2014 Segway Inc. All rights reserved.
  • Page 39: Charging

    Table 7: Battery LEDs LED Status Meaning There is one LED for each 72 V Segway battery attached to the RMP. When charging, the LEDs turn green. If a battery is at maximum charge, its LED Battery is not charging.
  • Page 40: Powering On/Off Powering On

    The RMP logs the disable button press as a fault and powers down. Hardware DTZ input The RMP comes to a stop, logs the DTZ Input as a fault, and powers down. NOTICE A fault response may also result in the machine powering off. Copyright © 2014 Segway Inc. All rights reserved.
  • Page 41: Connecting

    RADIO6 USB_VBUS RADIO_GND USB_D+ RADIO+5V USB_D– LCD_POWER+5V USB_ID SERIAL_GND USB_GND POWER_1+ SERIAL_TX POWER_1– SERIAL_RX POWER_2+ CAN1H POWER_2+ CAN1L POWER_2– CAN1_GND POWER_2– RADIO1 POWER_3+ RADIO2 POWER_3– Not fully supported at time of printing. Copyright © 2014 Segway Inc. All rights reserved.
  • Page 42: Starter Breakout Harness

    Controller Area Network connection is available on the 56-pin connector (see pinout, Table 13). The starter breakout harness includes a male DB9 connector for CAN communication. Table 13: CAN Pinout DB9 Pin Signal Connector I Pin CAN1H CAN1L CAN1_GND Figure 54: Male DB9 Connector Copyright © 2014 Segway Inc. All rights reserved.
  • Page 43: Connector Ii

    Boot2 is used for entering bootloader mode. For more information see "Operational Model," p. 35, and "Hardware Controls," p. 97. Boot1 also doubles as a Balance Mode toggle on balancing platforms. Figure 56: Disable Button Copyright © 2014 Segway Inc. All rights reserved.
  • Page 44: Connector Iv

    This is a MIL-DTL-38999/24FD19PA plug. Mating connector is a MIL-DTL-38999/26FD19SA socket. Table 16: Connector IV Pinout Signal DC+1 GND1 DC+2 GND2 DC+3 GND3 Figure 57: 19-Pin Connector DC+4 GND4 DC+5 GND5 Not Connected A, C, D, F, H, K, L, S, V Copyright © 2014 Segway Inc. All rights reserved.
  • Page 45: Connecting To The Rmp

    Figure 58: Starter Breakout Harness Actual connection procedures may vary depending on which operating system is used. If you have any installation issues, please contact RMP support (see "Reporting Problems to Segway," p. 114). Table 17: Default RMP Ethernet Settings Parameter...
  • Page 46 Kvaser installs a new icon in the Control Panel. USB drivers are included with the RMP software (see "Included Software," p. 100). These are custom Segway drivers and will not install automatically. When the "Found New Hardware Wizard" appears, the folder containing the drivers must be explicitly selected.
  • Page 47: Communication

    32-bit floating point number represented as a IEE754 32-bit integer S16_T 16-bit signed integer U16_T 16-bit unsigned integer U32_T 32-bit unsigned integer See "IEEE754 32-bit Floating Point and Integer Representation," p. 77. Copyright © 2014 Segway Inc. All rights reserved.
  • Page 48: General Command Structure

    ((byte2 << 8) & 0x0000FF00) | Bytes 4-7: Value 2 (byte3 & 0x000000FF); Value2 = U32_T ((byte4 << 24) & 0xFF000000) | ((byte5 << 16) & 0x00FF0000) | ((byte6 << 8) & 0x0000FF00) | (byte7 & 0x000000FF); Copyright © 2014 Segway Inc. All rights reserved.
  • Page 49 Standard Motion Command 0x0600 Omni Motion Command 0x0501 Configuration Command 0x0502 RMP Response 1 0x0503 RMP Response 2 0x0504 RMP Response 3 0x0505 RMP Response 4 RMP Response ... CAN response only. Copyright © 2014 Segway Inc. All rights reserved.
  • Page 50: Standard Motion Commands

    = 0x00 Data[6] — Data[9] Normalized Yaw Rate Data[5] = 0x00 Data[10] — Data[11] CRC-16 Data[6] = 0x3E Data[7] = 0x80 Data[8] = 0x00 Data[9] = 0x00 Data[10] = 0x80 Data[11] = 0x1E Copyright © 2014 Segway Inc. All rights reserved.
  • Page 51: Configuration Commands

    = 0x01 Data[2] = 0x00 Data[3] = 0x00 Data[4] = 0x00 Data[5] = 0x20 Data[6] = 0x00 Data[7] = 0x00 Data[8] = 0x00 Data[9] = 0x05 Data[10] = 0xD4 Data[11] = 0x51 Copyright © 2014 Segway Inc. All rights reserved.
  • Page 52 This command is used to set the user defined maximum deceleration limit. See "Standard Input Mapping," p. 62, for how this value will affect velocity commands. Command ID: Parameter Type: Float32 Parameter Range: 0.0–7.848 Parameter Units: Stored in NVM: Default Value: 3.923 Copyright © 2014 Segway Inc. All rights reserved.
  • Page 53 This command is used to set the user defined yaw rate limit. See "Standard Input Mapping," p. 62, for how this value will affect yaw rate commands. Command ID: Parameter Type: Float32 Parameter Range: 0.0–4.5 Parameter Units: rad/s Stored in NVM: Default Value: Copyright © 2014 Segway Inc. All rights reserved.
  • Page 54 (yaw rate). The RMP must be power cycled (rebooted) for the change to take effect. Command ID: Parameter Type: Float32 Parameter Range: 0.4142–1.0 Parameter Units: Stored in NVM: Default Value: 0.5842 Copyright © 2014 Segway Inc. All rights reserved.
  • Page 55 Default Value: 0x00000001 YAW_ALAT_SCALE_MAPPING = 0; YAW_ALAT_LIMIT_MAPPING = 1; VELOCITY_BASED_MAPPING = 0; ACCELERATION_BASED_MAPPING = 1; ALLOW_MACHINE_AUDIO = 0; SILENCE_MACHINE_AUDIO = 1; ENABLE_AC_PRESENT_CSI = 0; DISABLE_AC_PRESENT_CSI = 1; BALANCE_MODE_DISABLED = 0; BALANCE_MODE_ENABLE = 1; Copyright © 2014 Segway Inc. All rights reserved.
  • Page 56 The RMP must be power cycled (rebooted) for the change to take effect. Command ID: Parameter Type: U32_T Parameter Range: Valid Ethernet Port Number Parameter Units: Unitless Stored in NVM: Default Value: 8080 Copyright © 2014 Segway Inc. All rights reserved.
  • Page 57 Defined Feedback Bitmap 2," p. 72. See "User Defined Feedback Bitmaps," p. 66, for details on how these bitmaps work. Command ID: Parameter Type: U32_T Parameter Range: 0xFFFFFFFF (valid mask) Parameter Units: Unitless Stored in NVM: Default Value: 0xFFFFFFFF Copyright © 2014 Segway Inc. All rights reserved.
  • Page 58 Responses thereafter will contain this data until the parameter is set to 0, at which point the feedback reverts to the user-defined feedback. See "User Defined Feedback Bitmaps," p. 66, for details. Copyright © 2014 Segway Inc. All rights reserved.
  • Page 59 Parameter Type: U32_T DTZ_REQUEST Any State Parameter Range: 1–5 Tractor Mode STANDBY_REQUEST Parameter Units: Unitless Balance Mode Stored in NVM: Standby Mode Default Value: TRACTOR_REQUEST Balance Mode Standby Mode BALANCE_REQUEST Tractor Mode Copyright © 2014 Segway Inc. All rights reserved.
  • Page 60 Stored in NVM: Default Value: NOTE: Some parameters (including Ethernet settings, tire diameter, wheel base, track width, and transmission ratio) will not take effect until after the machine has been power cycled (rebooted). Copyright © 2014 Segway Inc. All rights reserved.
  • Page 61 RMP_CMD_SET_OPERATIONAL_MODE U32_T 1–5 Unitless RMP_CMD_SEND_SP_FAULTLOG U32_T 0 or 1 Boolean 0x0000001F RMP_CMD_RESET_INTEGRATORS U32_T Unitless (valid mask) RMP_CMD_RESET_PARAMS_TO_DEFAULT U32_T 0 (value ignored) Unitless RMP must be power cycled for parameter to take effect. Copyright © 2014 Segway Inc. All rights reserved.
  • Page 62: Standard Input Mapping

    RMP_CMD_SET_MAXIMUM_DECELERATION — the value against which the normalized input command is scaled when the velocity target is moving toward zero velocity. RMP_CMD_SET_COASTDOWN_ACCEL — the rate at which the velocity target goes to zero with zero input command. Copyright © 2014 Segway Inc. All rights reserved.
  • Page 63 There are two configurable parameters stored in NVM that affect this type of input mapping: RMP_CMD_SET_MAXIMUM_TURN_RATE — the value against which the normalized input command is scaled to generate a desired yaw rate. RMP_CMD_SET_MAXIMUM_TURN_ACCEL — the rate of change limit for the yaw rate target. Copyright © 2014 Segway Inc. All rights reserved.
  • Page 64 There are two configurable parameters stored in NVM that affect this type of input mapping: RMP_CMD_SET_MAXIMUM_TURN_RATE — this shifts the transition velocity and limits the target for the yaw rate. RMP_CMD_SET_MAXIMUM_TURN_ACCEL — the rate of change limit for the yaw rate target. Copyright © 2014 Segway Inc. All rights reserved.
  • Page 65 When using the filter it is important to find a balance between how much filtering is applied and how long the delay is. Figure 63: Velocity Filter – No Filter Figure 64: Velocity Filter – 1 Hz Filter Copyright © 2014 Segway Inc. All rights reserved.
  • Page 66: Rmp Response

    Or with variable names from the UDFB tables: [fault_status_word_1, fault_status_word_2, CRC-16] The structure of the response packet(s) is described in "CAN Response Structure," p. 68, and "USB and UDP Response Structure," p. 69. Copyright © 2014 Segway Inc. All rights reserved.
  • Page 67 The structure of the response packet(s) is described in "CAN Response Variable 7 UDFB3-bit15 fram_dtz_decel_limit_ Structure," p. 68, and "USB and UDP Response Structure," p. 69. mps2 Variable 8 — 0x0000, CRC Copyright © 2014 Segway Inc. All rights reserved.
  • Page 68 The actual message received is shown in Table 41. Table 41: Example CAN Response Message CAN SID Value 1 Value 2 0x0502 fault_status_word_1 right_rear_vel_mps 0x0503 left_rear_vel_mps rear_base_batt_2_soc 0x0504 mcu_0_inst_power_W mcu_1_inst_power_W 0x0505 fram_dtz_decel_limit_mps2 0x0000, CRC Copyright © 2014 Segway Inc. All rights reserved.
  • Page 69 Data[18] — Data[21] Variable 5 mcu_0_inst_power_W Data[22] — Data[25] Variable 6 mcu_1_inst_power_W Data[26] — Data[29] Variable 7 fram_dtz_decel_limit_mps2 Data[30] — Data[31] Variable 8 Data[30] — Data[31]: 0x0000 Data[32] — Data[33]: CRC-16 Copyright © 2014 Segway Inc. All rights reserved.
  • Page 70 The estimated inertial pitch rate 0x00100000 pse_roll_deg Float32 The estimated inertial roll angle 0x00200000 pse_roll_rate_dps Float32 deg/s The estimated inertial roll rate 0x00400000 pse_yaw_rate_dps Float32 deg/s The estimated inertial yaw rate Copyright © 2014 Segway Inc. All rights reserved.
  • Page 71 Note that the availability of inertial data is dependent on a BSA being present in the RMP. If your system does not have a BSA, this data will be set to zero. BSA upgrades are available from Segway Inc. Copyright © 2014 Segway Inc. All rights reserved.
  • Page 72 Float32 °C Rear powerbase front battery temperature degC 0x00800000 rear_base_batt_2_temp_ Float32 °C Rear powerbase rear battery temperature degC 0x01000000 vel_target_mps Float32 Velocity controller target 0x02000000 yaw_rate_target_rps Float32 rad/s Yaw controller target Copyright © 2014 Segway Inc. All rights reserved.
  • Page 73 Note that on single powerbase machines with only one MCU, the front powerbase rear battery does not exist; therefore the data is set to zero. Only valid on Omni platforms. Note that on systems without an ABB this data is set to zero. Copyright © 2014 Segway Inc. All rights reserved.
  • Page 74 RMP track width (lateral distance between tires) stored in NVM (RMP_CMD_SET_WHEEL_TRACK_WIDTH) 0x00400000 fram_transmission_ratio Float32 Unitless RMP transmission (gearbox) ratio stored in NVM ratio (RMP_CMD_SET_TRANSMISSION_RATIO) 0x00800000 fram_config_bitmap U32_T Unitless Input mapping and audio silence configuration bitmap stored in NVM (RMP_CMD_SET_INPUT_CONFIG_BITMAP) Copyright © 2014 Segway Inc. All rights reserved.
  • Page 75 (RMP_CMD_SET_USER_FB_4_BITMAP) Note that on systems without an ABB this data is set to zero. Note that on systems without a 7.2 V battery this data is set to zero. Since power on. Copyright © 2014 Segway Inc. All rights reserved.
  • Page 76 User Defined Feedback Bitmap 4 UDFB4 is for future expansion and therefore contains no valid bits. The masks associated with UDFB4 for ease of implementing a parsing algorithm are: FLOATING_POINT_MASK = 0x00000000 INTEGER_MASK = 0x00000000 Copyright © 2014 Segway Inc. All rights reserved.
  • Page 77: Ieee754 32-Bit Floating Point And Integer Representation

    // \return Converted value //---------------------------------------------------------------------------- Float32 convert_u32_to_float32(U32_T value) // Convert the pointer to the Float value to a U32_T pointer // and return the dereferenced value. //lint -save -e740 return (*((Float32*)&value)); //lint -restore Copyright © 2014 Segway Inc. All rights reserved.
  • Page 78: Cyclic Redundancy Check (Crc)-16

    // \return void //---------------------------------------------------------------------------- void tk_crc_initialize(void) U16_T byte; for(byte = 0; byte < CRC_TABLE_SIZE; byte++) crc_table[byte] = compute_crc_table_value(byte); //---------------------------------------------------------------------------- tk_crc_calculate_crc_16 // \brief This computes an updated CRC 16 given the current value of Copyright © 2014 Segway Inc. All rights reserved.
  • Page 79 Now we'll send each byte to the CRC calculation. new_crc = tk_crc_calculate_crc_16(new_crc, byte_buffer[count]); The new CRC is saved in the last word. byte_buffer[crc_index] = (U8_T)((new_crc & 0xFF00) >> 8); byte_buffer[crc_index+1] = (U8_T)(new_crc & 0x00FF); //---------------------------------------------------------------------------- tk_crc_byte_buffer_crc_is_valid Copyright © 2014 Segway Inc. All rights reserved.
  • Page 80 // \brief computes the table value for a given byte // \param the_byte: the byte index in the table // \return void //---------------------------------------------------------------------------- static U16_T compute_crc_table_value(U16_T the_byte) U16_T j; U16_T k; Copyright © 2014 Segway Inc. All rights reserved.
  • Page 81 = 0; for(j = 0; j < 8; j++) if (((table_value ^ k) & 0x0001) == 0x0001) table_value = (table_value >> 1) ^ CRC_ADJUSTMENT; else table_value >>= 1; k >>= 1; return (table_value); Copyright © 2014 Segway Inc. All rights reserved.
  • Page 82: Fault Status Definitions

    0x00000000: ""}); """ Critical faults: These faults are latching. """ critical_fault_decode = dict({ 0x00000000: "", 0x00000001:"CRITICAL_FAULT_INIT", 0x00000002:"CRITICAL_FAULT_INIT_UIP_COMM", 0x00000004:"CRITICAL_FAULT_INIT_PROPULSION", 0x00000008:"CRITICAL_FAULT_INIT_TIMEOUT", 0x00000010:"CRITICAL_FAULT_FORW_SPEED_LIMITER_HAZARD", 0x00000020:"CRITICAL_FAULT_AFT_SPEED_LIMITER_HAZARD", 0x00000040:"CRITICAL_FAULT_CHECK_STARTUP", 0x00000080:"CRITICAL_FAULT_APP_VELOCITY_CTL_FAILED", 0x00000100:"CRITICAL_FAULT_APP_POSITION_CTL_FAILED", 0x00000200:"CRITICAL_FAULT_ABB_SHUTDOWN", 0x00000400:"CRITICAL_FAULT_AP_MODE_TRANS_TIMEOUT", 0x00000800:"CRITICAL_FAULT_PITCH_ANGLE_EXCEEDED", 0x00001000:"CRITICAL_FAULT_ROLL_ANGLE_EXCEEDED", 0x00002000:"CRITICAL_FAULT_BSB_INIT_FAILED", 0x00004000:"CRITICAL_FAULT_BSB_COMM_FAILED", 0x00008000:"CRITICAL_FAULT_BSB_LOST_POWER", 0x00010000:"CRITICAL_FAULT_BSB_HW_FAULT"}) Copyright © 2014 Segway Inc. All rights reserved.
  • Page 83 MCU faults: These faults are latching. """ mcu_fault_decode = dict({ 0x00000000: "", 0x00000001:"MCU_FAULT_MCU_0_IS_DEGRADED", 0x00000002:"MCU_FAULT_MCU_0_IS_FAILED", 0x00000004:"MCU_FAULT_MCU_0_REQUESTS_REDUCED_PERFORMANCE", 0x00000008:"MCU_FAULT_MCU_0_REQUESTS_ZERO_SPEED", 0x00000010:"MCU_FAULT_MCU_1_IS_DEGRADED", 0x00000020:"MCU_FAULT_MCU_1_IS_FAILED", 0x00000040:"MCU_FAULT_MCU_1_REQUESTS_REDUCED_PERFORMANCE", 0x00000080:"MCU_FAULT_MCU_1_REQUESTS_ZERO_SPEED", 0x00000100:"MCU_FAULT_MCU_2_IS_DEGRADED", 0x00000200:"MCU_FAULT_MCU_2_IS_FAILED", 0x00000400:"MCU_FAULT_MCU_2_REQUESTS_REDUCED_PERFORMANCE", 0x00000800:"MCU_FAULT_MCU_2_REQUESTS_ZERO_SPEED", 0x00001000:"MCU_FAULT_MCU_3_IS_DEGRADED", 0x00002000:"MCU_FAULT_MCU_3_IS_FAILED", 0x00004000:"MCU_FAULT_MCU_3_REQUESTS_REDUCED_PERFORMANCE", 0x00008000:"MCU_FAULT_MCU_3_REQUESTS_ZERO_SPEED", 0x00010000:"MCU_FAULT_MISSING_MCU_0_DATA", 0x00020000:"MCU_FAULT_MISSING_MCU_1_DATA", 0x00040000:"MCU_FAULT_MISSING_MCU_2_DATA", 0x00080000:"MCU_FAULT_MISSING_MCU_3_DATA", 0x00100000:"MCU_FAULT_UNKNOWN_MESSAGE_RECEIVED"}) Copyright © 2014 Segway Inc. All rights reserved.
  • Page 84 0x00000004:"SENSOR_FAULT_7P2V_VBAT_WARNING", 0x00000008:"SENSOR_FAULT_7P2V_BATT_INBALANCE_FAULT", 0x00000010:"SENSOR_FAULT_7P2V_BATT_TEMPERATURE_FAULT", 0x00000020:"SENSOR_FAULT_DIGITAL_INPUT", 0x00000040:"SENSOR_FAULT_RANGE", 0x00000080:"SENSOR_FAULT_DEFAULT", 0x00000100:"SENSOR_FAULT_5V_MONITOR_RANGE_FAULT", 0x00000200:"SENSOR_FAULT_12V_MONITOR_RANGE_FAULT"}) """ BSA faults: These faults are latching. """ bsa_fault_decode = dict({ 0x00000000: "", 0x00000001:"BSA_FAULT_SIDE_A_MISSING_BSA_DATA", 0x00000002:"BSA_FAULT_SIDE_B_MISSING_BSA_DATA", 0x00000004:"BSA_FAULT_UNKNOWN_MESSAGE_RECEIVED", 0x00000008:"BSA_FAULT_TRANSMIT_A_FAILED", 0x00000010:"BSA_FAULT_TRANSMIT_B_FAILED", 0x00000020:"BSA_FAULT_DEFAULT", 0x00000040:"BSA_FAULT_SIDE_A_RATE_SENSOR_SATURATED", 0x00000080:"BSA_FAULT_SIDE_B_RATE_SENSOR_SATURATED", 0x00000100:"BSA_FAULT_SIDE_A_TILT_SENSOR_SATURATED", 0x00000200:"BSA_FAULT_SIDE_B_TILT_SENSOR_SATURATED", 0x00000400:"PSE_FAULT_COMPARISON"}) Copyright © 2014 Segway Inc. All rights reserved.
  • Page 85 = dict({ 0x00000000: "", 0x00000001:"INTERNAL_FAULT_HIT_DEFAULT_CONDITION", 0x00000002:"INTERNAL_FAULT_HIT_SPECIAL_CASE"}) """ MCU specific faults: These faults are detected locally by the MCU """ mcu_specific_fault_decode = dict({ 0x00000000: "", 0x00000001:"MCU_TRANS_BATTERY_TEMP_WARNING", 0x00000002:"MCU_TRANS_BATTERY_COLD_REGEN", 0x00000004:"MCU_UNKNOWN", 0x00000008:"MCU_UNKNOWN", 0x00000010:"MCU_TRANS_LOW_BATTERY", 0x00000020:"MCU_TRANS_BATT_OVERVOLTAGE", 0x00000040:"MCU_CRITICAL_BATT_OVERVOLTAGE", 0x00000080:"MCU_CRITICAL_EMPTY_BATTERY", 0x00000100:"MCU_CRITICAL_BATTERY_TEMP", Copyright © 2014 Segway Inc. All rights reserved.
  • Page 86 All the fault groups are packed into four 32-bit fault status words. The following defines how they are packed into the words """ """ Fault status word 0 """ FSW_ARCH_FAULTS_INDEX FSW_ARCH_FAULTS_SHIFT FSW_ARCH_FAULTS_MASK = 0x00000FFF FSW_CRITICAL_FAULTS_INDEX FSW_CRITICAL_FAULTS_SHIFT = 12 FSW_CRITICAL_FAULTS_MASK = 0xFFFFF000 Copyright © 2014 Segway Inc. All rights reserved.
  • Page 87 Fault group index definitions """ FAULTGROUP_TRANSIENT = 0; FAULTGROUP_CRITICAL = 1; FAULTGROUP_COMM = 2; FAULTGROUP_SENSORS = 3; FAULTGROUP_BSA = 4; FAULTGROUP_MCU = 5; FAULTGROUP_ARCHITECTURE = 6; FAULTGROUP_INTERNAL = 7; NUM_OF_FAULTGROUPS = 8; Copyright © 2014 Segway Inc. All rights reserved.
  • Page 88: Internal Connections

    Internal Connections This section describes the hardware connections inside the Segway RMP enclosure. Some of these connections are used within the RMP for internal communication between components. Other connections are for external communication and can be used to control the RMP.
  • Page 89: Auxiliary Battery Board

    Segway Use Only LEDs – – Debug Headers – – Segway Use Only Programming – – Segway Use Only 23076-00001 Power Switch 23075-00001 All VABs Power Output Battery Connection Battery (Back Side) Battery Connection Copyright © 2014 Segway Inc. All rights reserved.
  • Page 90: Smart Charger Board

    CAN Channel 1 Communication – – Segway Use Only CAN Terminator N/A Jumper 23320-00002 Battery 1 Status 23320-00002 Battery 3 Status 23320-00002 Battery 0 Status 23320-00002 Aux Battery Status 23320-00002 Battery 2 Status Copyright © 2014 Segway Inc. All rights reserved.
  • Page 91: Communication

    Must be connected to CAN BUS GND. Segway Processor CAN 1 This CAN channel is strictly for Segway peripherals. This information is provided for completeness only. Please contact Segway if you believe you have a problem with this CAN channel. This CAN Channel is located at CCU J9.
  • Page 92 This CAN channel is reserved for future Segway peripherals. This information is provided for completeness only. Please contact Segway if you believe you have a problem with this CAN channel. This CAN channel is located at CCU J20. Table 53: SP CAN 2...
  • Page 93 This Ethernet interface is primarily used for communication between the RMP and an outside source. This interface is located at CCU J13. Table 56: CCU USB J13 Pin Name RJ45 Pin # ETH_TX+ ETH_TX– ETH_RX+ ETH_RX– Copyright © 2014 Segway Inc. All rights reserved.
  • Page 94 Be aware that the location of the receiver will affect its ability to receive radio signals. Placing the receiver on the side of the RMP may create one or more blind spots. Placing the receiver inside the enclosure may block it from receiving any signals at all. Copyright © 2014 Segway Inc. All rights reserved.
  • Page 95 Flip the Gear switch on the transmitter to 1. This will prevent the RMP from immediately shutting down once the radio connection is established. Turn on the transmitter. Turn on the RMP. The receiver will turn on after the RMP has started up. Copyright © 2014 Segway Inc. All rights reserved.
  • Page 96 1 = Tractor Mode Left Joystick Acts as a deadman switch. Disables movement if not held to far left. Disables movement if brought all the way down. Right Joystick Controls RMP motion. Copyright © 2014 Segway Inc. All rights reserved.
  • Page 97: Hardware Controls

    Method 1 — Internal Segway Logic At any point if the Segway processor logic needs to immediately disable the system it can do so by releasing one of its DIO lines. This will stop current flowing and prevent the opto-couplers from pulling down on the disable input.
  • Page 98: Mode Selection

    LEDs and what their patterns mean see "Powering On," p. 40. Status indicators are connected at CCU J16. Table 63: Status Indicators J16 Pin Name Power Indicator (Yellow bicolor LED) Status Indicator (Green LED) Power Indicator (Red bicolor LED) Ground Copyright © 2014 Segway Inc. All rights reserved.
  • Page 99: Ccu Input Power

    That voltage typically comes from the battery supply. CCU Battery Supply The CCU can be self-powered from a 7.2 V pack made from two series 3.6 V lithium iron phosphate cells. Use only Segway-approved battery packs. Connection to the CCU is via J22.
  • Page 100: Included Software

    Included Software Segway provides demonstration software so that users may test the RMP and see examples of how to communicate with the RMP. The software is provided as an example and is not suitable for controlling the RMP in an unstructured environment. Segway does not warranty or guarantee the performance of this software.
  • Page 101: Rmp Ccu Bootloader Application

    • C:\Program Files\Segway\RMP_Applications\Release Binaries • http://rmp.segway.com/forum There are two bootloaders: one for the Segway Processor (SP), and one for the User Interface Processor (UIP). Entering Bootloader Mode Make sure the RMP is powered off and unplugged. Connect pins D and F on the 6-pin connector (for the full pinout, see "Connector II,"...
  • Page 102: Ocu Demo Application

    RMP platform. Please see the software license agreement ("Software License Agreement," p. 107). Segway provides the Operator Control Unit (OCU) Demo application with source code that runs on Windows platforms (XP, Vista, 7). The source code illustrates how commands may be constructed and sent to the RMP and how data may be received back and parsed.
  • Page 103 The fault log is saved as an html file. Faults are listed in the order they appear in the fault log, not in the order in which they have occurred. NOTICE The Real Time Clock (RTC) does not take into account daylight savings time. The RTC is set to Eastern Daylight Time. Figure 75: Fault Log Copyright © 2014 Segway Inc. All rights reserved.
  • Page 104 For more information on how to control the RMP, see "Controls," p. 105. NOTICE The Balance Mode button will only cause a mode transition if Balance Mode is available and the transition is allowed. Figure 78: Control Screen Copyright © 2014 Segway Inc. All rights reserved.
  • Page 105 RMP 210/220 Controls The RMP can be controlled in a wide variety of ways. Segway provides some example control interfaces that are compatible with the Demo OCU, but many other methods are possible. WARNING The RMP can accelerate rapidly, risking personal injury and/or property damage. It is recommended that the RMP be securely raised so the wheels are off the ground until the user becomes familiar with the controls.
  • Page 106 Button 3 initiates a transition to Standby Mode. Button 4 initiates a transition to Tractor Mode. Button 5 causes a Decel To Zero. Button 6 causes a Disable. Figure 81: Logitech Extreme 3D Controls Copyright © 2014 Segway Inc. All rights reserved.
  • Page 107: Software License Agreement

    RMP 210/220 Software License Agreement Copyright © 2014, Segway Inc. All rights reserved. Redistribution and use in source and binary forms, with or without modification, are permitted provided that the following conditions are met: Redistributions of source code must retain the above copyright notice, this list of conditions and the following disclaimer.
  • Page 108: Maintenance

    • Failure to heed these warnings could lead to death, serious injury, or property damage. • Before performing any maintenance, verify that the Segway RMP is unplugged and powered off. It is not safe to perform maintenance while the RMP is powered on or charging: the RMP could move unexpectedly.
  • Page 109: Parts List - 210

    20537-00002 M8 x 65 SHCS Powerbase 23088-00004 1M Powerbase Cover 23091-00002 M6 x 25 SHCS Battery 20967-00001 Li-ion Wheel Nut 20158-00001 M8 Flange Nut Battery Hole Cover 20209-00001 Covers Hole Battery 20541-00002 M4 x 30 SHCS Copyright © 2014 Segway Inc. All rights reserved.
  • Page 110: Parts List - 220

    23263-00001 Standard Powerbase Cover 23091-00002 M6 x 25 SHCS Powerbase 23088-00001 2MB Battery 20541-00002 M4 x 30 SHCS Rail 23172-00001 Standard Gearbox 20919-00002 Standard Wheel Assembly 20162-00004 Tire and Hub Battery 20967-00001 Li-ion Copyright © 2014 Segway Inc. All rights reserved.
  • Page 111: Removing Wheel Assemblies

    The outside of the RMP can be cleaned by scrubbing with soap and water to remove any dirt and grime. Avoid getting water in the connectors. Do not submerge in water. If the inside of the RMP needs to be cleaned, contact Segway (see "Contact Information," p. 6). Do not use water or any liquid cleaning agents inside the enclosure.
  • Page 112: Replacing Batteries

    RMP 210/220 Batteries A pair of propulsion batteries mount to the bottom of the powerbase. An auxiliary battery mounts to the enclosure. The RMP 210 only has one battery mounted beneath the powerbase. Auxiliary Battery Auxiliary Battery Front Front Battery 0...
  • Page 113: Installation And Removal Instructions

    WARNING! Unplug or disconnect your Segway RMP from AC power before removing or installing batteries or performing any service. It is hazardous to work on any part of your RMP when it is plugged into AC power. You risk serious bodily injury from electric shock as well as damage to your RMP.
  • Page 114: Troubleshooting

    The RMP forum (http://rmp.segway.com/forum) is the best way to contact Segway about troubleshooting issues and problems. See "Contact Information," p. 6. Please search the forum before posting; your issue may have been discussed previously. To ensure a prompt and helpful response from Segway, please include the following when posting to the forum: •...
  • Page 115: Reading The Faultlog

    If a fault provides more information, that information is available in Data[0] and Data[1]. Often these contain bitmaps which can be decoded to provide additional information. Figure 87: Faultlog Example 1 Figure 88: Faultlog Example 2 Copyright © 2014 Segway Inc. All rights reserved.
  • Page 116: Faults

    Descriptions of the most common faults are provided below. These descriptions may provide sufficient information for users to solve problems on their own. As always, if you need help please see "Reporting Problems to Segway," p. 114. The RMP stores all faults in four 32-bit fault status words. Fault status can be transmitted as part of the RMP response (see "RMP Response,"...
  • Page 117 The following tables provide the bitmaps for ABB Status (Data[0] High) and Battery Hazards (Data[0] Low). If Battery Faults (Data[1] Low) is anything other than 0x0000, contact Segway to purchase a replacement battery. The mask for ABB Status Bitmap is 0x1FFF000 on Data[0].
  • Page 118 ARCHITECT_FAULT_COMMANDED_DISABLE The RMP received a user-commanded disable signal. See "RMP_CMD_SET_OPERATIONAL_MODE," p. 59. ARCHITECT_FAULT_COMMANDED_SAFETY_SHUTDOWN The RMP received a user-commanded DTZ signal. See "RMP_CMD_SET_OPERATIONAL_MODE," p. 59. ARCHITECT_FAULT_DECEL_SWITCH_ACTIVE The hardware DTZ button has been pressed. Copyright © 2014 Segway Inc. All rights reserved.
  • Page 119 ("Environmental Specifications," p. 20). MCU_BATTERY_FAULT The battery has an internal error. Replace the battery. MCU_ACTUATOR_POWER_CONSISTENCY_FAULT The RMP is operating at its limits. Reduce the performance parameters. Reduce the mass on the RMP. Copyright © 2014 Segway Inc. All rights reserved.
  • Page 120: Charging Faults

    Ping the RMP (e.g. "ping 192.168.0.40"). This verifies that there is a path to the RMP and that you are using the correct IP address. Check the port settings. The RMP will send and receive commands only on the port specified by "RMP_CMD_SET_ETH_ PORT_NUMBER," p. 56. Copyright © 2014 Segway Inc. All rights reserved.
  • Page 121 RMP 210/220 Copyright © 2014 Segway Inc. All rights reserved.
  • Page 122 Robotics 24271-00001 aa...

This manual is also suitable for:

Rmp 220

Table of Contents