Table of Contents
Advertisement
Quick Links
Advertisement
Table of Contents

Related Manuals for HORNER Shearing RAMBO


Summary of Contents for HORNER Shearing RAMBO
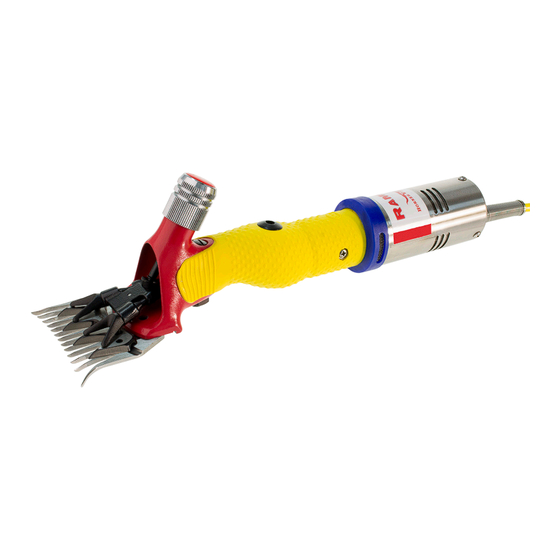
- Page 1 INSTRUCTION BOOKLET...
-
Page 2: Table Of Contents
Setting the Lead QuickDraw Accessories Setting the Throw Operation Setting the Tension Maintenance Comb & Cutter Usage Greasing Points Rambo Mains Lubrication 18, 19 Electrical Safety Parts List Operation Machine Breakdown Troubleshooting 22, 23 Rambo Vehicle Electrical Safety Operation RAMBO INSTRUCTION BOOKLET... -
Page 3: Safety Information
The shearer should check the wool for any foreign objects before starting shearing. Always disconnect power from the machine when it is not in use or when undergoing essential set up and/or maintenance. The machine should be used in a tidy, dry environment. RAMBO INSTRUCTION BOOKLET... -
Page 4: Comb & Cutter Set-Up
DO NOT position the heel of the comb to the back of the LONGHORN ® comb bed. Tighten the comb screws finger tight, holding the comb in place. Not too tight, you may need to adjust this further. RAMBO INSTRUCTION BOOKLET... -
Page 5: Setting The Lead
Adjust the comb so that as the cutter travels over the comb’s central tooth, at least 1.5 mm of the comb tooth’s flat ground surface is clear of the cutter’s tip. 1.5mm 1.5mm Central tooth Finally, firmly tighten the comb screws. RAMBO INSTRUCTION BOOKLET... -
Page 6: Setting The Throw
Tighten the tension knob by turning it clockwise. Too little tension causes ‘feathering’ which compromises the quality of the cut. Too much tension will cause the comb and cutter to overheat, resulting in your combs and cutters becoming blunt faster. RAMBO INSTRUCTION BOOKLET... -
Page 7: Comb & Cutter Usage
Once blunt, you should have your combs and cutters sharpened on a specialist grinder. For professional shearers the recommended cutter to comb ratio is three cutters to one comb. However, we advise that general farm shearers can lower that ratio to 2:1. RAMBO INSTRUCTION BOOKLET... -
Page 8: Rambo Mains Electrical Safety
• Keep the transformer out of direct sunlight and away from naked flames. • Never attempt to open the transformer. Mains Transformer Specifications AC Input Voltage Current Frequency 100-120VAC 220-240VAC 2.5A 50-60Hz DC Output RAMBO INSTRUCTION BOOKLET... -
Page 9: Operation
Ensuring the wall plug and the handpiece are switched off, plug the transformer into the wall. Holding the Rambo handpiece, switch the wall plug on and then switch the handpiece on via the switch located on the back of the handpiece. -
Page 10: Rambo Vehicle
2/3 hours for approximately 15 minutes to top up the battery. • There is no need to disconnect the battery from the vehicle when using the machine. • The vehicle does not need to be running whilst using the machine. RAMBO INSTRUCTION BOOKLET... - Page 11 Locate the handpiece’s power cable and plug this in to the vehicle adaptor. Ensuring the Rambo is switched off, clip the battery leads onto the battery. To switch the Rambo on, locate the switch at the back of the handpiece and turn on. RAMBO INSTRUCTION BOOKLET...
-
Page 12: Electrical Safety
See Troubleshooting pages 22 & 23 for diagnosis and solution. To reset the circuit breaker in the battery, simply push the button on top of the battery pack. RAMBO INSTRUCTION BOOKLET... -
Page 13: Charging The Batteries
Once the battery is fully charged the red light will turn to green. Charging Unit LED Indicator Charging Green Charging complete Green Flashing Battery pack overheating Red & Green Flashing Temperature range sensor (NTC) error Red Flashing Battery or DC plug short circuit RAMBO INSTRUCTION BOOKLET... -
Page 14: Quickdraw Accessories
RAMBO QUICKDRAW Accessories for the Rambo Please check that you have all the accessories to the Rambo QuickDraw before assembling. You should have: 1 x leather belt, 1 x leather holster, 1 x leather battery holder. Locate your leather belt, you will see 2 rivets through 2 holes in the middle of the belt. - Page 15 It is best to place your battery in the holder at this point. Place your battery in the holder so that the socket is facing forwards. You can now put the belt back on and fasten the leg strap on the holster, securing the holster in place. RAMBO INSTRUCTION BOOKLET...
-
Page 16: Operation
3 pins line up and that it clicks into place. You will now be able to switch the Rambo on using the switch located at the back of the handpiece. RAMBO INSTRUCTION BOOKLET... -
Page 17: Maintenance
Grease the fork swivels by rotating the fork 90 degrees and pull away from the handpiece. Apply grease to both ends that go into the fork body. Re-fit by reversing the procedure above. RAMBO INSTRUCTION BOOKLET... -
Page 18: Lubrication
(approximately 20 minutes). CRANK ROLLER TENSION PIN CUP COMB & CUTTER FORKS FULCRUM CUP & POST Drip oil down the barrel to reach the fulcrum cup & post. This should be done with no cutter attached to the handpiece. RAMBO INSTRUCTION BOOKLET... - Page 19 2 - 3 hours. Any more will cause damage to the internal components of the motor. Air Filters To allow adequate air flow you should clean these as frequently as necessary to keep the filter clear. RAMBO INSTRUCTION BOOKLET...
-
Page 20: Parts List
PARTS LIST RAMBO INSTRUCTION BOOKLET... -
Page 21: Machine Breakdown
MACHINE BREAKDOWN RAMBO INSTRUCTION BOOKLET... -
Page 22: Troubleshooting
Handpiece Cup and post worn. Have cup and post vibrating replaced and set by a Fulcrum post loose. excessively trained technician. Fork body Handpiece accidentally Send handpiece for repair broken damaged. and full service. RAMBO INSTRUCTION BOOKLET... - Page 23 Replace battery leads. won’t start Handpiece Breaker on vehicle adaptor Reset breaker. Send in for power cut out has tripped. service if problems persist. Rambo Mains Handpiece Faulty mains transformer. Send transformer in for won’t start service. RAMBO INSTRUCTION BOOKLET...
- Page 24 HORNER SHEARING • LANE SIDE • GRINDLETON ROAD • WEST BRADFORD • CLITHEROE • BB7 4QH • UK...
Need help?
Do you have a question about the RAMBO and is the answer not in the manual?
Questions and answers