Table of Contents
Advertisement
Advertisement
Table of Contents

Related Manuals for Lynx LHEM48


Summary of Contents for Lynx LHEM48
- Page 1 MAKE THE MOST OF YOUR LYNX EAVEMOUNT HEATER (LHEM48) CARE & USE/INSTALLATION...
- Page 3 THIS MANUAL MUST REMAIN WITH THE PRODUCT OWNER FOR FUTURE REFERENCE. This product complies with ANSI standard Z83.26-2007/ To obtain replacement parts or service contact: Z83.26a-2008 and CSA 2.17-2007/CSA 2.37a-2008 and Lynx Grills, Inc. has been tested an approved by Intertek. 7300 Flores Street Downey, CA 90242 888-289-5969 CARE &...
-
Page 4: If You Smell Gas
WARNINGS WARNING READ THIS MANUAL CAREFULLY and completely before using your heater to reduce the risk of: 1. Fire 2. Burn hazard, personal injury or property damage 3. Unapproved installation or servicing. THIS PRODUCT IS DESIGNED FOR OUTDOOR USE ONLY. Improper installation, adjustment, alteration, service or maintenance can cause property damage, injury or death. -
Page 5: State Of Massachusetts
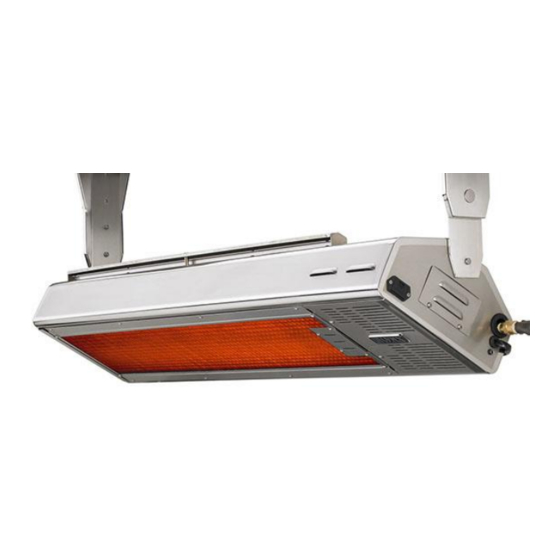
WARNINGS DANGER - CARBON MONOXIDE HAZARD • This appliance can produce carbon monoxide which has no odor. If not installed, operated, and maintained in accordance with manufacturers instructions, the emissions from this product can cause serious illness or death. Never use this appliance in an enclosed space. WARNING •... - Page 6 FEATURES Thank you for your purchase of our LYNX Deluxe Eave Mount Patio Heater. This product has been manufactured with the highest quality materials available, and combines the most advanced, state of the art, internal components with cutting edge, heater design technology. This product is sure to provide you many years of enjoyment and comfort.
-
Page 7: Mounting Considerations
MOUNTING CONSIDERATIONS Special considerations should be made when selecting a location for your heater before installation. The most important of which should be a location that will serve to be the most functional and useful in providing heat. Suggested locations would be under an eave, on a wall of an open or partially enclosed patio, or on a fascia. This heater has been thoroughly tested and certified to function during and after mild rain storms, and during mild wind conditions. -
Page 8: Before You Start
Be sure to hold on to the container for inspection. We extent of damage. cannot assume responsibility for damage or loss incurred in transit. (See “Contacting Lynx” for further details. page 31) IMPORTANT NOTES HOW LONG IS YOUR RUN? WHERE’S THE WIND? - Page 9 CLEARANCE TO CONSTRUCTION STRAIGHT MOUNTING If the heater is to be mounted facing straight down with no angle on its pivot point, then the heater must be mounted NO CLOSER than 14” from any overhead combustible construction. The side clearances must be NO CLOSER than 12” to a side wall, and the rear clearances must be NO CLOSER than 12”...
- Page 10 IMPORTANT NOTE: There is a pressure tap built into the provinces require this trained personnel be licensed. valve system used on the Lynx Eave Mount Patio Heater. Installations must be performed in accordance with To access this tap, remove the 2 screws which hold the local codes, or in the absence of local codes, the louvered plate on the END CAP of the heater.
-
Page 11: Gas Line Purging
AC/DC Adaptor (Transformer)-Input AC 100-240V-0.3A, 60/50Hz Output 7.5V ---1000mA 10W Max, cord length -24 in NOTE: If the AC/DC Transformer (Lynx P/N 33937) is NOT being used, then there is no preliminary electrical preparation required. If the transformer IS going to be used, then there must be electrical considerations. A GFI protected, 110 V grounded electrical power outlet must be placed within 24 inches of the end, DC jack receptacle on the heater. -
Page 12: Installation
Initial mounting considerations have been discussed, and now it’s time commit your placement theory into motion. Consider the following pieces of information to help you through: The Lynx Eave Mount Patio Heater is made from the finest materials available- heavy gauge stainless steel. As a result, this heater is heavy- It weighs around 50 pounds and must be mounted securely. - Page 13 INSTALLATION ...continued EAVE FASCIA MOUNTING Important Note! If the heater will be mounted on the fascia of an eave, then the heater shall be mounted with the brackets in the Use only the mounting brackets provided with this EXTENDED position only. The heater shall be mounted heater.
-
Page 14: Mounting Bracket Assembly
INSTALLATION ...continued MOUNTING BRACKET ASSEMBLY Locate and assemble the mounting brackets based on your pre-determined mounting distance to the ceiling (14” if mounting flat, 18” if mounting at an angle). Slide the long bracket extension INSIDE the main mounting bracket until the intended set of holes align. The entrance slot is at the bottom of the main mounting bracket. -
Page 15: Gas Connections
GAS CONNECTIONS MAKING THE GAS CONNECTONS Gas connections will vary depending on heater mounting location that it can be tripped over or in a location that location selected and the gas type (NG or LP) being used. passes by either the heat output or the exhaust of the See also previous section ‘Gas Supply and Connections’. -
Page 16: Checking For Gas Leaks
GAS CONNECTIONS ...continued and re-assemble the pipes and fittings. If a flexible gas line is being used to connect the heater to the hard DANGER! piping, and the leak is at that section, then be certain the fitting attached to the heater is the proper ½” MIP To prevent fire or explosion, DO NOT smoke or fitting, and the fitting at the other end is also a ½”... -
Page 17: Making The Electrical Connections
ELECTRICAL CONNECTIONS MAKING THE ELECTRICAL CONNECTIONS If the AC adaptor is NOT being used, and it is intended to run the heater from battery power only, then NO special electrical connections are needed. Note that this may require more frequent battery replacements. The AC/ DC output plug, at the right end of the heater, is covered with the rubber plug that is mounted under the jack. - Page 18 ELECTRICAL CONNECTIONS ...continued Touch Screen Remote Transmitter-remove the cover on and secure it in place with the Philips head screw. Leave the back of the remote control unit and install (4) AAA 1.5 V the louvered end plate off and let it hang straight down for batteries.
-
Page 19: Programming Your Remote
PROGRAMMING YOUR REMOTE INITIALIZING THE REMOTE CONTROL SYSTEM pilot did not begin to spark, then repeat the above process. After programming, press the ‘OFF’ button to turn On the wireless wall switch press the “OFF” button. the system off. Confirm that the red LED flashes. The LED will flash every NOTE: The wireless wall switch can now be mounted (if time that any of the 4 buttons are pushed. -
Page 20: Manual Operation
BASIC OPERATION OF YOUR HEATER will decrease more rapidly. Push the “OFF’ button when finished using the heater. Your new Lynx Eave Mount Patio Heater has been designed with cutting edge technology and easily operates with either the manual ON-OFF-HI-LOW wall switch or with the use of a touch screen remote control. -
Page 21: Touch Screen Remote Control Operation
PROGRAMMING YOUR REMOTE... continued When the heater is operated for the first time, there may be • Press the UP or DOWN Buttons to adjust the day a certain level of smoke exiting the heater exhaust vents. of week (press the MODE/SET Button or wait for 15 This may last for up to 15 minutes. - Page 22 TOUCH SCREEN REMOTE CONTROL MODE Zone AIR TEMP Zone SET TEM P Zone TIME/PROG Zone (Unused) LIGHT Zone (Unused) FLAME Zone AUX Zone (Unused) FAN Zone (Unus ed) DOWN Button MODE/SET Button UP Button MODE/SET HEATER MODES OF OPERATION Operation modes: •...
-
Page 23: Thermostat Mode
TOUCH SCREEN REMOTE CONTROL ...continued MANUAL OFF MODE THERMOSTAT MODE • Thermostat Mode will cycle heater on and off based • Transmits heater OFF command. on air set temperature seen directly at the remote • LCD Displays: control. The remote control will transmit the ON command when SET TEMP is set 2 degrees higher MODE Zone: OFF is displayed than AIR/ROOM TEMP, and will transmit OFF command... - Page 24 TOUCH SCREEN REMOTE CONTROL ...continued AIR TEMPERATURE LIMIT FUNCTION THERMOSTAT DISABLE FEATURE When using the heater with the remote control If, after using your heater, you decide that you do transmitter, always keep the remote transmitter by your not want to use the THERMOSTAT function, you can side, i.e., at the same place that you are sitting.
-
Page 25: Low Battery Indicator
FEATURES CONTINUOUS PILOT FEATURE: In some cases such as locations where severely cold weather or fog persists, it may be an advantage for you to set your heater so the small pilot flame stays continuously ON. This keeps the pilot area warm and allows immediate start-up of your heater. -
Page 26: Maintenance
MAINTENANCE REPLACING BATTERIES IN THE REMOTE CONTROL TRANSMITTER Remove the back cover on the remote control transmitter and lift out the 4 AAA batteries. Replace with 4 high quality 1.5V AAA batteries. Take special note to the polarity of the battery placement by observing the (+) and (-) markings in the compartment. -
Page 27: Potential Problems
POTENTIAL PROBLEMS PILOT IGNITER DOES NOT SPARK HEATER WILL LIGHT, BUT PILOT AND BURNER CYCLE ON AND OFF. REMOTE CONTROL FUNCTION Press the ‘ON’ button on the wireless wall switch. Verify If using the ‘thermostat’ on the remote, the ‘SET’ the LED flashes RED when the button is pushed. - Page 28 13014 13019 In order to keep Lynx LHEM heaters operating under peak performance conditions high altitude orifices can be ordered from the factory and be converted in the field using the proper orifice conversions. For more information please contact our customer service department at 888-289-5969 Mon-Fri., 6am-4:30pm PST.
-
Page 29: The Lynx Story
CONTACTING LYNX Before calling Lynx Customer Care, please make sure you Your satisfaction is of the utmost importance to us. If a have the following information: problem cannot be resolved to your satisfaction, please write, fax or email us: • Model number Lynx Grills, Inc. -
Page 30: Lynx Limited Warranty
7. No one has the authority to add to or vary Lynx’s warranty, or to create for Lynx any other obligation or liability in connection with the sale or use of its products. - Page 31 LYNX EAVE MOUNTED EXPLODED DIAGRAM CARE & USE/INSTALLATION...
- Page 32 LYNX EAVE MOUNTED HEATER PARTS LIST EAVE MOUNTED PATIO HEATER EXPLODED VIEW PARTS LIST Item No. Part Number Description Qty. 14029 Screw, 1/4-20 x 1, HHD, SS 14030 Screw, 1/4-20 x 1/2, HHD, SS 31876 Nut, 1/4-20, LKN, ST, W/ESL...
- Page 33 INDEX Battery Install, Wall Switch ..........17 Obtaining Service From LYNX ........29 Battery, Touch Screen ..........18 Battery, Heater .............. 18 Parts List ............... 32 Basic Operation ............20 Programing Your Remote ..........19 Pilot Flame Adjustment ..........26 Clearance to Construction ..........
- Page 36 The best outdoor kitchen products come from: Lynx Grills, Inc. 7300 Flores Street Downey, CA 90242 Service: (888)-289-5969 Fax: (562) 299-6978 www.lynxgrills.com PN #33535 Rev B 2018...
Need help?
Do you have a question about the LHEM48 and is the answer not in the manual?
Questions and answers