Table of Contents
Advertisement
Available languages
Available languages
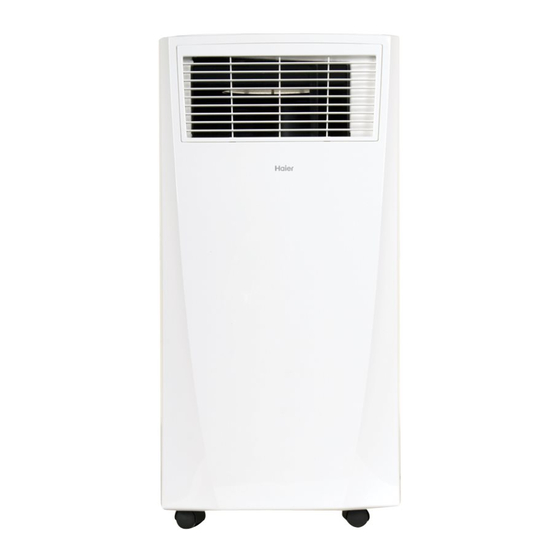
Portable Air Conditioner
Acondicionador de aire portatil
Design may vary by model number.
Some models may have an additional
letter after the model number
Installation Instruction
Manual del propietario y
instrucciones de instalación
El diseño puede variar según el número
de modelo
Algunos modelos pueden tener una
letra adicional después del número del
modelo
Owner's Manual and
QPCD05NXTW
HPB08XCM
49-7782-1 12-18 GEA
Advertisement
Chapters
Table of Contents

Related Manuals for Haier QPCD05NXTW


Summary of Contents for Haier QPCD05NXTW
- Page 1 Owner’s Manual and Installation Instruction Manual del propietario y instrucciones de instalación QPCD05NXTW Portable Air Conditioner HPB08XCM Acondicionador de aire portatil Design may vary by model number. El diseño puede variar según el número de modelo Some models may have an additional...
- Page 2 49-7782-1...
-
Page 3: Table Of Contents
HAIER WEBSITE Have a question or need assistance with your appliance? Try the Haier Website 24 hours a day, any day of the year! You can also shop for more great Haier products and take advantage of all our on-line support services designed for your convenience. -
Page 4: Saftey Information
SAFETY INFORMATION IMPORTANT SAFETY INFORMATION READ ALL INSTRUCTIONS BEFORE USING THE APPLIANCE IMPORTANT SAFETY INSTRUCTIONS NOTE: Turning off power by pressing the Power button WARNING To reduce the risk of fire, electrical does NOT disconnect the appliance from the power shock, injury to persons, or damage when using the air supply. -
Page 5: Control Panel
CONTROL PANEL Features and appearance will vary. Lights next to the touch pads on the air conditioner control panel indicate the selected settings. CONSTANT COOL COOL DEHUM HIGH Hold 3 Sec for Constant Cool speeds vary by model. BUTTONS Display Hold the FAN button for 3 seconds, the fan will continue running even when the compressor stops due to the B. - Page 6 CONTROL PANEL The display will always default to show the room temperature. When the air conditioner is turned on, it will automatically start in the last mode and fan settings selected. Cool Mode Use the COOL mode for cooling and for economy cooling. NOTE: If the air conditioner is off and is then turned on while set to COOL, it will take approximately 3 minutes for To set the COOL mode:...
- Page 7 CONTROL PANEL REMOTE CONTROL Power On/Off Mode Cool: Blue LED lights when in cooling mode. Dehumidification: Yellow LED lights when in dehumidification mode. Fan: Green LED lights when in fan mode. Fan Speeds Select between multiple fan speeds. Number of fan speeds vary by model.
-
Page 8: Parts And Features
PARTS AND FEATURES 1. Control Panel 7. Air Intake 2. Air Outlet 8. Upper Drain 3. Handle hole 9. Lower Drain 4. Caster NOTE: Please ensure if the water outlet drain is well installed before use. 5. Air Filter 10. Power Supply Cord 6. -
Page 9: Installation Requirements
INSTALLATION REQUIREMENTS TOOLS AND PARTS Gather the required tools and parts before starting installation. TOOLS NEEDED • Flat-blade Screwdriver • Phillips Screwdriver PARTS SUPPLIED Hose Connector Hose Connector Foam Seals Cover #5 Window Panel and Exhaust Hose Extension Panel (3) 49-7782-1... -
Page 10: Installation Instructions
INSTALLATION INSTRUCTIONS Questions? Call Haier Appliances at 1.877.337.3639 or visit our Website at: HaierAppliances.com. BEFORE YOU BEGIN Power cord includes a current interrupter device. A test and reset button is provided on the plug case. The device Read these instructions completely and carefully. - Page 11 INSTALLATION INSTRUCTIONS 1. Unpack the Air Conditioner Install Exhaust (cont.) 2. Sliding in one end of hose assembly (with hose WARNING connector #2) to rear panel. Excessive Weight Hazard • Use two or more people to move and install air conditioner.
- Page 12 INSTALLATION INSTRUCTIONS Install Window Panels Attach Exhaust Hose to the Exhaust Nozzle 1. Insert the window panel B and C to each end of the main panel A. Adjust to fix the length of window. 1. Insert the other end of the exhaust hose assembly (with hose connector #3) onto the window bracket.
-
Page 13: Air Conditioner Use
AIR CONDITIONER USE IMPORTANT: If the air conditioner has been tilted on its side, • When turning on the unit after previous use, it will wait 24 hours before turning on the air conditioner to allow remember the last settings used. the oil to return to the compressor. -
Page 14: Troubleshooting
TROUBLESHOOTING Problem Possible Causes Solution Unit does not start or Power supply cord is not plugged into an Plug the power cord into a grounded 3 prong outlet. operate outlet. Power supply cord has tripped. Press and release the RESET button on the power supply cord. -
Page 15: Limited Warranty
To know what your legal rights are, consult your local or state consumer affairs office or your state’s Attorney General. Warrantor US: GE Appliances, a Haier company Louisville, KY 40225 49-7782-1... - Page 16 NOTES 49-7782-1...
- Page 17 SITIO WEB DE HAIER ¿Desea realizar una consulta o necesita ayuda con su electrodoméstico? ¡Intente a través del Sitio Web de Haier las 24 horas del día, cualquier día del año! Usted también puede comprar más electrodomésticos maravillosos de Haier y aprovechar todos nuestros servicios de soporte a través de Internet, diseñados para su conveniencia.
- Page 18 49-7782-1...
-
Page 19: Seguridad Del Acondicionador De Aire
SEGURIDAD DEL ACONDICIONADOR DE AIRE INFORMACIÓN IMPORTANTE DE SEGURIDAD LEA TODAS LAS INSTRUCCIONES ANTES DE USAR INSTRUCCIONES IMPORTANTES DE SEGURIDAD • Desconecte el suministro de energía antes de limpiarlo.. ADVERTENCIA NOTA: Si apaga la unidad presionando el botón Power Para reducir el riesgo de incendio, (Encendido), esto NO desconecta el electrodoméstico del choque eléctrico, lesiones a personas o daños al utilizar el suministro de energía. -
Page 20: Panel De Control
PANEL DE CONTROL Features and appearance will vary. Lights next to the touch pads on the air conditioner control panel indicate the selected settings. CONSTANT COOL COOL HIGH DEHUM Hold 3 Sec for Constant Cool BOTONES la sala sin refrigeración. NOTA: No es necesario que la unidad sea ventilada en el modo Fan (Ventilador). - Page 21 PANEL DE CONTROL La pantalla siempre mostrará la temperatura del ambiente por omisión. Cuando el acondicionador de aire sea encendido, se iniciará de forma automática en las configuraciones de modo y ventilación que fueron usadas por última vez. Modo de Refrigeración Use el modo COOL (Refrigeración) para enfriar.
- Page 22 PANEL DE CONTROL Control Remoto 2. Modo Refrigeración: Luces LED azules al estar en el modo de refrigeración. Deshumidificación: Luces LED amarillas al estar en el modo de deshumidificación. ventilación. Seleccione entre varias velocidades de ventilador. El número de velocidades del ventilador varía según el modelo.
-
Page 23: Piezas Y Características
PIEZAS Y CARACTERÍSTICAS 1. Panel de Control 9. Drenaje Inferior 2. Salida de Aire NOTA: Por favor asegúrese de que el drenaje de la salida de agua esté bien instalado antes del 3. Hueco de la manija uso. 4. Ruedita 10. -
Page 24: Requisitos De Instalación
REQUISITOS DE INSTALACIÓN HERRAMIENTAS Y PIEZAS Reúna las herramientas y piezas necesarias antes de comenzar la instalación. HERRAMIENTAS NECESARIAS • Destornillador de hoja plana • Destornillador Phillips PIEZAS SUMINISTRADAS Hose Connector Hose Connector Foam Seals Cover #5 Window Panel and Exhaust Hose Extension Panel (3) 49-7782-1... -
Page 25: Instrucciones De Instalación
INSTRUCCIONES DE INSTALACIÓN ¿Preguntas? Llame a Haier Appliances al 1.877.337.3639 o visite nuestro sitio web en: HaierAppliances.com. ANTES DE INICIAR El cable de alimentación incluye un dispositivo para interrupción de corriente. Se incluye un botón de prueba y Lea estas instrucciones completa y cuidadosamente. - Page 26 INSTRUCCIONES DE INSTALACIÓN Instalación Del Extractor (cont.) 1. Desempaque Su Acondicionador De Aire ADVERTENCIA Peligro de Peso Excesivo • Use dos o más personas para mover e instalar el acondicionador de aire. • No seguir esta instrucción puede ocasionar una lesión en la espalda u otro tipo de lesiones.
- Page 27 INSTRUCCIONES DE INSTALACIÓN Adhiera La Manguera Del Extractor Instale Los Paneles De Ventana A La Boca Del Extractor Inserte el otro extremo del ensamble de la manguera la extensión de la ventana. soporte de la ventana. coincidan con el ancho y alto de la ventana con el conjunto de tornillos y tuercas montados en el panel Complete La Instalación ADVERTENCIA...
-
Page 28: Uso Del Acondicionador De Aire
USO DEL ACONDICIONADOR DE AIRE IMPORTANTE: Si el acondicionador de aire se ha inclinado • Al encender la unidad después de un uso anterior, hacia un lado, espere 24 horas antes de encender el recordará los últimos ajustes utilizados. acondicionador de aire a fin de permitir que el aceite •... -
Page 29: Solución De Problemas
SOLUCIÓN DE PROBLEMAS Problema Causas posibles Qué hacer La unidad no se pone El cable de suministro de energía no está Conecte el cable eléctrico a un toma corriente de en marcha ni funciona enchufado en un toma corriente. 3 terminales con conexión a tierra. El cable de suministro de energía se ha Presione y libere RESET (Restablecer) en el cable de disparado. - Page 30 NOTAS 49-7782-1...
-
Page 31: Garantía Limitada
Para conocer cuáles son sus derechos legales, consulte a la oficina de asuntos del consumidor local o estatal o al Fiscal de su estado. Garante en EE.UU: GE Appliances, a Haier company Louisville, KY 40225 49-7782-1... - Page 32 IMPORTANT Do Not Return This Product To The Store nearest authorized service center. DATED PROOF OF PURCHASE REQUIRED FOR WARRANTY SERVICE IMPORTANTE No regrese este producto a la tienda nombre y número telefónico del centro de servicio al cliente autorizado más cercano. Y DE SERIE PARA EL SERVICIO DE LA GARANTÍA Impreso en China 49-7782-1...
Need help?
Do you have a question about the QPCD05NXTW and is the answer not in the manual?
Questions and answers