Table of Contents
Advertisement
Available languages
Available languages
Advertisement
Table of Contents

Related Manuals for TMC Aquarium V2Skim 200 Compact


Summary of Contents for TMC Aquarium V2Skim 200 Compact
- Page 1 Skim 200 Compact Compact Protein Skimmer Protein Skimmer ™...
- Page 2 ENGLISH ........................................FRANÇAIS ........................................ DEUTSCH ....................................... NEDERLANDS ....................................ITALIANO ....................................... ESPAÑOL ......................................... PORTUGUÊS ....................................AQUARIUM VOLUMES AND FLOW RATES For aquariums up to 200 litres/44 UK Gallons with a flow rate of approximately 720l/hr. VOLUMES ET DÉBITS DE L’AQUARIUM Pour les aquariums de jusqu’à 200 litres avec un débit d’environ 720 litres/heure. FASSUNGSVERMÖGEN DES AQUARIUMS UND DURCHFLUSSRATE Für Aquarien mit einem Fassungsvermögen von bis zu 200 Litern und einer Durchflussrate von ca.
- Page 3 Skim 200 Compact Skimmer INSTRUCTIONS FOR INSTALLATIONAND USE Important Safety Information - Please Read Carefully - Always isolate the pump from the mains electricity before installing or carrying out any maintenance to the skimmer. - Power to the pump must be supplied through a Residual Current Device (RCD) with a rated residual operating current not exceeding 30mA.
-
Page 4: Parts List
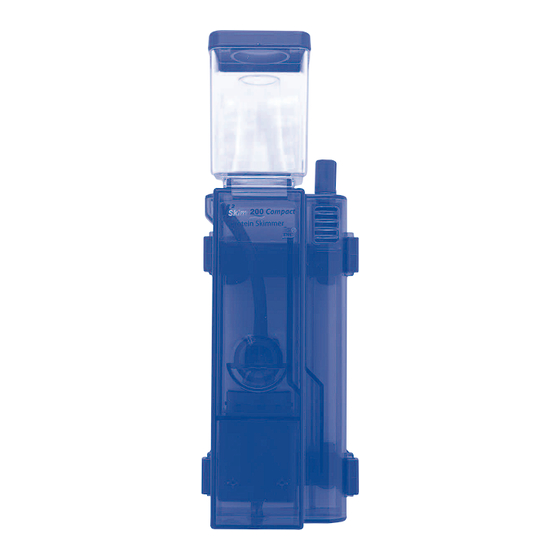
PARTS LIST Collection Cup Lid (order code: 5681) 11. Air Intake Tube (order code: 5686) 2. Collection Cup (order code: 5682-inc lid) 12. V Skim 200 Securing Suction Cup (order 3. Water Level Adjustment Dial code: 5526) 4. Air Intake 13. -
Page 5: Installation
SKIMMER ASSEMBLY The V Skim 200 Compact Protein Skimmer is supplied almost fully assembled. After unpacking and before installation you must:- 1. Ensure the skimmer collection cup (2), and collection cup lid (1) are securely and correctly positioned on the main skimmer body (7). INSTALLATION The V²Skim 200 is designed for simple installation internally in the aquarium or sump. -
Page 6: Initial Operation
Installation Method 2:Using Mounting BracketsA (13) + Mounting Bracket B (14) If you intend to use both mounting brackets A (13) and mounting bracket B (14) for the installation of the V²Skim 200 please read the following and refer to diagram 3 below. Slide bracket B 1. -
Page 7: Maintenance
MAINTENANCE Caution: To avoid possible electric shock, special care should be taken when using this electrical appliance near water. Caution: Always isolate the pump from mains electricity before installing or carrying out any maintenance to the skimmer. TheV²Skim 200 Protein Skimmer should need very little adjustment and maintenance once set up correctly. -
Page 8: Troubleshooting
TROUBLE SHOOTING Problem:The skimmer is not working properly 1. Possible Cause:Water level inside main skimmer body (7) is too low. Solution:Alter water level adjustment dial (3) accordingly. 2. Possible Cause:Air intake (4) and/or air intake tube (11) is blocked. Solution: Remove and check for blockage and clean as required. 3. - Page 9 TROUBLE SHOOTING (cont) Problem: No foam is being produced inside the collection cup 1. Possible Cause:The level of micro bubbles inside the skimmer needs to be adjusted. Solution:Alter water level adjustment dial (3) accordingly. 2. Possible Cause: Skimmer has just been installed and may take up to 24 hours to adjust properly to the aquarium system.
- Page 10 Skim 200 Compact-Écumeur INSTALLATION ET MODE D’EMPLOI Notice de sécurité importante –Veuillez lire soigneusement - Isolez toujours la pompe du courant de secteur avant l’installation ou les interventions de maintenance sur l’écumeur. - L’alimentation de la pompe doit être assurée par un disjoncteur différentiel dont le courant de service résiduel nominal de dépasse pas 30 mA.
- Page 11 NOMENCLATURE 1. Couvercle du godet de récupération (n° de 10. Couvercle du carter du rotor de la pompe réf : 5681) (n° de réf : 5655) 2. Godet de récupération (n° de réf : 5682 - 11. Tuyau d’admission d’air (n° de réf : 5686) couvercle inclus) 12.
- Page 12 ASSEMBLAGE DE L’ECUMEUR Le Compact-Écumeur de Protéines V Skim 200 est fourni pratiquement assemblé. Une fois déballé et avant de l’installer, vous devez : 1. Vérifiez que le godet de récupération de l’écumeur (2) et le couvercle du godet de récupération (1) sont fixés fermement et correctement sur le corps principal de l’écumeur (7).
-
Page 13: Fonctionnement Initial
Méthode d’installation 2:Utilisation des supports de fixationA (13) + B (14) Si vous avez l’intention d’installer les deux supports de fixation A (13) et B (14), veuillez poursuivre votre lecture et consulter le schéma 3 ci-dessous. Faites glisser le 1. Insérez le support de fixation B (14) dans la fente située support B vers au dos du support de fixation A (13) (voir le schéma 3). -
Page 14: Entretien
ENTRETIEN Attention: Pour éviter les chocs électriques éventuels, faites tout particulièrement attention lorsque vous utilisez cet appareil électrique à proximité d’eau. Attention: Isolez toujours la pompe du courant de secteur avant toute installation ou intervention de maintenance sur l’écumeur. Les Écumeurs de Protéines V²Skim 200 n’ont besoin que de très peu de réglages et d’entretiens s’ils sont configurés correctement.Toutefois, en raison des dépôts salins et du niveau élevé... - Page 15 DEPISTAGE DE PANNES Problème : L’écumeur ne fonctionne pas correctement 1. Cause possible : Le niveau d’eau à l’intérieur du corps principal de l’écumeur (7) est trop bas. Solution : Modifiez le cadran de réglage du niveau d’eau (3) en conséquence. 2.
- Page 16 DEPISTAGE DE PANNES (suite) Problème : Il n’y a pas d’écume à l’intérieur du godet de récupération 1. Cause possible : Le niveau des micro-bulles à l’intérieur de l’écumeur doit être réglé. Solution : Modifiez le cadran de réglage du niveau d’eau (3) en conséquence. 2.
- Page 17 Skim 200 Kompaktabschäumer INSTALLATIONSANWEISUNG UND BEDIENUNGSANLEITUNG Wichtige Sicherheitshinweise - Bitte sorgfältig durchlesen - Die Pumpe vor dem Installieren des Eiweißabschäumers, bzw. bevor Wartungsarbeiten an diesem durchgeführt werden, stets vom Netz trennen. - Die Pumpe muss über einen Fehlerstromschutzschalter (RCD-Schalter) abgesichert sein, wobei der Nennfehlerstrom maximal 30 mA betragen darf.
- Page 18 TEILELISTE Schaumtopfdeckel (Bestellnummer: 5681) 10. Abdeckung des Pumpenflügelradgehäuses Schaumtopf (Bestellnummer: 5682 einschl. (Bestellnummer: 5655) Deckel) 11. Lufteinlassrohr (Bestellnummer: 5686) Wasserpegel-Regler 12. Befestigungs-Saugnapf für V Skim 200 Lufteinlass (Bestellnummer: 5526) Wasserzulauf 13. Halterung A für V Skim 200 einschließlich Wasserablauf Saugnäpfe (Bestellnummer: 5684) Hauptgehäuse des Abschäumers (Bestell- 14.
- Page 19 ZUSAMMENBAUEN DES ABSCHÄUMERS Der Kompaktabschäumer V Skim 200 wird fast vollständig montiert geliefert. Nach dem Auspacken und vor der Installation des Skimmers müssen Sie Folgendes tun: 1. Sicherstellen, dass Schaumtopf (2) und Schaumtopfdeckel (1) des Abschäumers sicher und korrekt auf dem Hauptgehäuse des Abschäumers (7) befestigt sind. INSTALLATION Der Kompaktabschäumer V²Skim 200 ist für eine einfache Installation im Aquarium oder Filtersumpf konzipiert.
-
Page 20: Betrieb
Installationsmethode 2: Halterungen A (13) und Halterung B (14) verwenden Sollen sowohl die Halterungen A (13) als auch die Halterung B (14) für die Installation des V²Skim 200 verwendet werden, die nachstehenden Anweisungen und das untenstehende Schaubild 3 beachten. Halterung B 1. -
Page 21: Wartung
WARTUNG Vorsicht: Um die Gefahr eines Stromschlages zu umgehen, ist bei der Nutzung dieses elektrischen Geräts in der Nähe von Wasser besondereVorsicht geboten. Vorsicht: Die Pumpe vor dem Installieren des Eiweißabschäumers, bzw. bevor Wartungsarbeiten an diesem durchgeführt werden, stets vom Netz trennen. Der KompaktabschäumerV²Skim 200 muss, wenn er richtig eingerichtet wurde, kaum nachgestellt oder gewartet werden. -
Page 22: Fehlersuche
FEHLERSUCHE Problem: Der Abschäumer funktioniert nicht richtig. 1. Mögliche Ursache: Der Wasserpegel im Hauptgehäuse des Abschäumers (7) ist zu niedrig. Abhilfe: Den Wasserpegel-Regler (3) entsprechend verstellen. 2. Mögliche Ursache: Der Lufteinlass (4) bzw. das Lufteinlassrohr (11) ist blockiert. Abhilfe:Abbauen, auf Blockierungen kontrollieren und gegebenenfalls reinigen. 3. -
Page 23: Bitte Beachten
FEHLERSUCHE (Fortsetz.) Problem: Im Schaumtopf wird kein Schaum erzeugt. 1. Mögliche Ursache: Der Pegel der Mikroblasen im Abschäumer muss eingestellt werden. Abhilfe: Den Wasserpegel-Regler (3) entsprechend verstellen. 2. Mögliche Ursache: Der Abschäumer wurde gerade erst installiert und braucht schätzungsweise bis zu 24 Stunden, um sich richtig auf das Aquariumsystem einzustellen. - Page 24 Skim 200 Compact-afschuimer INSTALLATIE- EN GEBRUIKSAANWIJZINGEN Belangrijke veiligheidsinformatie - Lees dit zorgvuldig door - Koppel de pomp altijd van het elektrisch af voordat u begint met de installatie of onderhoud aan de afschuimer uitvoert. - De spanningsvoorziening van de pomp moet voorzien zijn van een aardlekschakelaar voor een lekstroom die niet hoger dan 30mA mag zijn.
-
Page 25: Lijst Met Onderdelen
LIJST MET ONDERDELEN 1. Deksel van opvangreservoir (bestelnr.: Pomprotor (bestelcode: 5525) 5681) 10. Behuizing pomprotor (bestelcode: 5655) 2. Opvangreservoir (bestelnr.: 5682-incl. 11. Buis luchtinlaat (bestelnr.: 5686) deksel) 12. V Skim 200 bevestigingszuignap (bestelnr.: 3. Instelknop waterpeil 5526) 4. Luchtinlaat 13. V Skim 200 bevestigingsbeugel A inclusief 5. - Page 26 CONSTRUCTIE EIWITAFSCHUIMER Bij levering is de V²Skim 200 Compact-afschuimer al bijna volledig in elkaar gezet. Na het uit de verpakking halen en vóór de installatie moet u:- 1. Zorg ervoor dat opvangreservoir (2) en deksel van opvangreservoir (1) stevig en correct worden gepositioneerd op het hoofdgedeelte van de eiwitafschuimer (7).
- Page 27 Installatiemethode 2: met behulp van bevestigingsbeugels A (13) + bevestigingsbeugel B (14) Als u van plan bent bevestigingsbeugels A (13) en bevestigingsbeugel B (14) te gebruiken voor de installatie van V²Skim 200, lees dan het onderstaande door en bekijk tekening 3 hieronder. Schuif beugel B 1.
- Page 28 ONDERHOUD Pas op: wees, ter vermijding van elektrische schokken, bijzonder voorzichtig met gebruik van elektrische apparatuur bij water. Pas op: koppel de pomp altijd van het elektrisch af voordat u begint met de installatie of onderhoud aan de afschuimer uitvoert. DeV²Skim 200 Protein Skimmer heeft weinig aanpassing en onderhoud nodig wanneer deze correct is geïnstalleerd.
- Page 29 STORINGEN Probleem: de afschuimer werkt niet goed 1. Mogelijke oorzaak: waterpeil in het hoofdgedeelte van de eiwitafschuimer (7) is te laag. Oplossing: draai aan de instelknop waterpeil (3) voor het juiste peil. 2. Mogelijke oorzaak: de luchtinlaat (4) en/of luchtinlaatbuis (11) is verstopt. Oplossing: verwijder buis en controleer op obstakels en reinig de buis indien nodig.
- Page 30 STORINGEN (vervolg) Probleem: er wordt geen schuim gemaakt in het opvangreservoir. 1. Mogelijke oorzaak: het niveau aan microbelletjes in de afschuimer moet worden bijgesteld. Oplossing: draai aan de instelknop waterpeil (3) voor het juiste peil. 2. Mogelijke oorzaak: afschuimer is pas geïnstalleerd en kan 24 uur nodig hebben om zich aan te passen aan het aquariumsysteem.
- Page 31 Skim 200 Compatto Schiumatoio ISTRUZIONI PER L’INSTALLAZIONE E L’UTILIZZO Informazioni Importanti sulla Sicurezza – Leggere Attentamente - Isolare sempre la pompa dalla rete elettrica prima di installarla o effettuare interventi di manutenzione allo schiumatoio. - La pompa deve essere alimentata attraverso un Interruttore Differenziale con un rapporto di corrente residua non superiore ai 30mA.
- Page 32 COMPONENTI 1. Coperchio del bicchiere di raccolta (codice 9. Girante della pompa (codice art.: 5525) art.: 5681) 10. Copertura della girante della pompa 2. Bicchiere di raccolta (codice art.: 5682 - (codice art.: 5655) inc coperchio) 11. Tubo per l’ingresso dell’aria (codice art.: 3.
-
Page 33: Installazione
ASSEMBLAGGIO DELLO SCHIUMATOIO Il Compatto Schiumatoio di Proteine V Skim 200 viene fornito quasi completamente assemblato. Estrarlo dalla confezione e, prima dell’installazione, procedere come segue:- 1. Verificare che il bicchiere di raccolta (2) e il coperchio del bicchiere di raccolta (1) siano correttamente assemblati e assicurati sul corpo principale (7) dello schiumatoio. -
Page 34: Funzionamento Iniziale
Metodo 2: Utilizzando Staffe Di Montaggio A (13) + Staffa di montaggio B (14) Se si intende usare entrambe le staffe di montaggio A (13) + B (14) per installare il V²Skim 200, seguire le istruzioni sotto riportate e consultare la figura 3. Regolare la staffa 1. -
Page 35: Manutenzione
MANUTENZIONE Attenzione: Prendere tutte le precauzioni per evitare il pericolo di folgorazione. Quando si utilizzano apparecchiature elettriche in prossimità di acqua. Attenzione: Isolare sempre la pompa dalla rete elettrica prima di installare o effettuare interventi di manutenzione allo schiumatoio. Lo Schiumatoio di ProteineV²Skim 200 ha bisogno di pochissima manutenzione e regolazione una volta installato correttamente.Tuttavia, a causa dei depositi salini e delle calcificazioni comuni negli acquari marini,si raccomanda di pulire lo schiumatoio periodicamente. -
Page 36: Risoluzione Dei Problemi
RISOLUZIONE DEI PROBLEMI Problema: lo schiumatoio non funziona correttamente 1. Causa possibile: Il livello dell’acqua è troppo basso. Soluzione: cambiare il livello dell’acqua mediante il regolatore (3). 2. Causa possibile: l’ingresso dell’aria (4) e/o il tubo (11) sono intasati. Soluzione: rimuoverlo, controllare se è intasato ed eventualmente ripulirlo. 3. - Page 37 RISOLUZIONE DEI PROBLEMI (segue) Problema: non è presente alcuna schiuma all’interno del bicchiere di raccolta 1. Causa possibile: è necessario regolare il livello di micro bolle all’interno dello schiumatoio. Soluzione: modificare il livello dell’acqua con l’apposito regolatore (3). 2. Causa possibile: lo schiumatoio è stato appena installato e potrebbero volerci fino a 24 ore per una piena operatività.
- Page 38 Skim 200 Espumador Compacto INSTRUCCIONES DE INSTALACIÓN Y USO Importante información sobre seguridad – Lea detenidamente - Aísle siempre la bomba de la toma de suministro eléctrico antes de instalar o realizar obras de mantenimiento al espumador. - El suministro de corriente a la bomba se debe hacer a través de un dispositivo de corriente residual (DCR) con una corriente operativa residual no superior a 30mA.
-
Page 39: Lista De Piezas
LISTA DE PIEZAS 1. Tapa del vaso espumador (código de 10. Carcasa del propulsor de la bomba pedido: 5681) (código de pedido: 5655) 2. Vaso espumador (código de pedido: 5682 11. Tubo de entrada de aire (código de -incluye tapa) pedido: 5686) 3. -
Page 40: Instalación
MONTAJE DEL ESPUMADOR El Espumador Compacto V Skim 200 se suministra montado casi en su totalidad. Después de desempaquetarlo y antes de proceder a su instalación debe: 1. Asegúrese de que el vaso espumador (2) y la tapa del vaso espumador (1) están correctamente situados sobre el cuerpo espumador central (7). -
Page 41: Funcionamiento Inicial
Método de instalación 2: Uso de los Soportes de montaje A (13) + Soporte de montaje B (14) Si va a utilizar ambos soportes de montaje A (13) y soporte de montaje B (16) para la instalación del V²Skim 200 lea las siguientes instrucciones y consulte el diagrama 3. 1. -
Page 42: Mantenimiento
MANTENIMIENTO Precaución: A fin de evitar posibles descargas eléctricas, debe extremar el cuidado cuando utilice este dispositivo eléctrico cerca de agua. Precaución: Aísle siempre la bomba de la toma de suministro eléctrico antes de instalar o realizar obras de mantenimiento al espumador. El Espumador de ProteínasV²Skim 200 necesita muy poco ajuste y mantenimiento una vez ha sido correctamente instalado. -
Page 43: Resolución De Problemas
RESOLUCIÓN DE PROBLEMAS Problema: El espumador no funciona correctamente 1. Posible causa: El nivel de agua dentro del cuerpo espumador central (7) es demasiado bajo. Solución: Modifique la rueda de ajuste del nivel de agua (3). 2. Posible causa: La entrada de aire (4) y/o el tubo de entrada de aire (11) están atascados. Solución: Quítelo y compruebe si está... - Page 44 RESOLUCIÓN DE PROBLEMAS (continuación) Problema: No se produce espuma dentro del vaso espumador. 1. Posible causa: Es necesario ajustar el nivel de micro burbujas dentro del espumador. Solución: Modifique la rueda de ajuste del nivel de agua (3). 2. Posible causa: El espumador acaba de ser instalado y puede tardar hasta 24 horas en ajustarse adecuadamente al sistema del acuario.
- Page 45 Skim 200 Escumador Compacta INSTRUÇÕES DE INSTALAÇÃO E UTILIZAÇÃO Informações de Segurança Importantes – Leia-as atentamente - Desligue sempre a bomba da tomada de corrente eléctrica antes de instalar o escumador ou realizar uma operação de manutenção do mesmo. - A electricidade deve ser fornecida através de um dispositivo de corrente residual (RCD) com uma intensidade de corrente residual atribuída não superior a 30mA.
-
Page 46: Lista De Peças
LISTA DE PEÇAS 1. Tampa de taça de recolha (Ref.ª 5681) 10. Impulsor de bomba (Ref.ª 5655) 2. Taça de recolha (Ref.ª 5682 - incl. tampa) 11. Tubo para entrada de ar (Ref.ª 5686) 3. Manómetro de ajuste do nível de água 12. - Page 47 MONTAGEM DO ESCUMADOR O Escumador Compacta V²Skim 200 é fornecido praticamente montado. Depois de o retirar da embalagem e antes de o instalar, deverá:- 1. Verifique se a taça de recolha do escumador (2) e a tampa de recolha (1) estão firme e correctamente encaixados no corpo principal do escumador (7).
-
Page 48: Colocação Em Funcionamento
Instalação – Método 2: Utilizando os Suportes de Fixação A (13) + o Suporte de Fixação B (14) Se pretender utilizar os suportes de fixação A (13) e o suporte de fixação B (14) para instalar o V²Skim 200, leia por favor as seguintes instruções e consulte o Esquema 3 abaixo. - Page 49 MANUTENÇÃO Cuidado: Para evitar um possível choque eléctrico, é preciso ter especialmente cuidado ao utilizar este equipamento eléctrico perto da água. Cuidado: Desligue sempre a bomba da tomada de corrente eléctrica antes de instalar o escumador ou realizar uma operação de manutenção do mesmo. O Escumador de ProteínasV²Skim 200 quando instalado correctamente não precisa de muitos ajustes ou manutenção.
-
Page 50: Resolução De Problemas
RESOLUÇÃO DE PROBLEMAS Problema: O escumador não está a funcionar correctamente 1. Causa possível: O nível de água dentro do corpo principal do escumador (7) é demasiado baixo. Solução:Altere o manómetro de ajuste do nível de água (3) de modo a que o nível de água seja o adequado. - Page 51 RESOLUÇÃO DE PROBLEMAS (cont.) Problema: Não está a ser produzida nenhuma espuma dentro da taça de recolha 1. Causa possível: O nível de micro-bolhas dentro do escumador precisa de ser ajustado. Solução:Altere o manómetro de ajuste do nível de água (3) de modo a que o nível de água seja o adequado.
- Page 52 ™ Tropical Marine Centre, Solesbridge Lane, Chorleywood, Hertfordshire,WD3 5SX, UK Technical Information Lines Tel: +44 (0) 1923 284151 Fax: +44 (0) 1923 285840 Open between 9am - 5pm Monday to Thursday/9am - 12pm Friday. www.tropicalmarinecentre.co.uk tmc@tropicalmarinecentre.co.uk v.1/2009...
Need help?
Do you have a question about the V2Skim 200 Compact and is the answer not in the manual?
Questions and answers