
Related Manuals for Klarstein 10030683


Summary of Contents for Klarstein 10030683
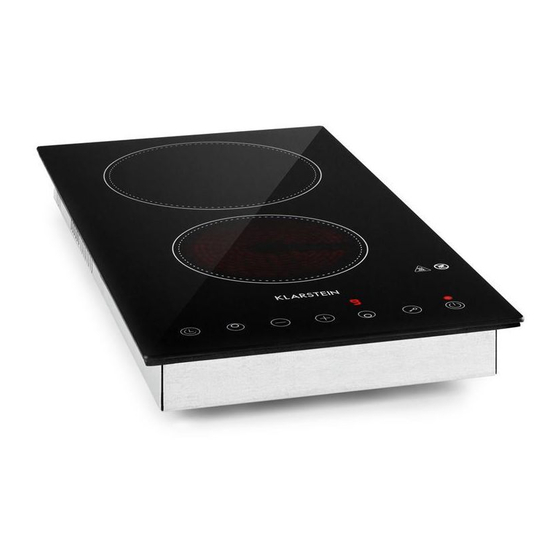
- Page 1 Einbau-Kochfeld Built-In Electric Hob Encimera incorporada Plaques de cuisson encastrables Piano cottura da incasso 10030683...
-
Page 3: Table Of Contents
Timer einstellen 12 Sicherheitsfunktionen 15 Kochtipps 16 Heizleistung einstellen 17 Reinigung und Pflege 17 Fehlersuche und Fehlerbehebung 18 Hinweise zur Entsorgung 20 TECHNISCHE DATEN Artikelnummer 10030683 Stromversorgung 230 V ~ 50 Hz Leistung großes Kochfeld 1800 W Leistung kleines Kochfeld 1200 W KONFORMITÄTSERKLÄRUNG Hersteller: Chal-Tec GmbH, Wallstraße 16, 10179 Berlin, Deutschland. -
Page 4: Sicherheitshinweise
SICHERHEITSHINWEISE • Die Installation und der Anschluss müssen von qualifiziertem Fachpersonal ausgeführt werden. • Versuchen Sie nicht das Gerät selbst zu reparieren. Reparaturen dürfen nur von geschultem Fachpersonal durchgeführt werden. Kontaktieren Sie eine Fachbetrieb in Ihrer Nähe. • Falls das Gerät Störungen aufweist, schalten Sie alle Kochplatten aus und kontaktieren Sie den Kundendienst. -
Page 5: Installation
So vermeiden Sie Schäden • Benutzen Sie das Kochfeld nicht, um Gegenstände darauf abzustellen. • Achten Sie auf die kanten, wenn Sie mit Pfannen und Töpfen hantieren. • Benutzen Sie die Kochfelder nicht mit leeren Pfannen oder Töpfen, oder ohne Pfannen und Töpfe. - Page 6 Achten Sie darauf, dass die Herdplatte gut belüftet ist und der Lufteinlass und der Luftauslass nicht blockiert sind. Versichern Sie sich, dass die Herdplatte richtig sitzt (siehe Abbildung). Hinweis: Der Sicherheitsabstand zwischen den Herdplatten und einem Hängeschrank sollte mindestens 760 mm betragen. A (mm) B (mm) C (mm)
-
Page 7: Geräteübersicht Und Bedienfeld
Hinweise zur Installation • Installieren Sie die Platte nicht über Kühlschränken oder Geschirrspülern. • Das Kochfeld muss so installiert werden, dass es effizient arbeiten kann. Halten Sie sich daher genau an die angegebenen Abstände und Maße. • Wände um und Schränke die über der Herdplatte sollten hitzeunempfindlich sein. •... -
Page 8: Inbetriebnahme
INBETRIEBNAHME Hinweis: Falls sich noch eine Schutzfolie auf dem Kochfeld befindet, entfernen Sie sie Folie vor dem Betrieb. So bedienen Sie die Tasten richtig • Die Tasten reagieren auf Berührung, Sie müssen keinen Druck ausüben. • Benutzen Sie ihren Fingerballen, um sie anzutippen (siehe Bild). •... -
Page 9: Bedienung
BEDIENUNG Mit dem Kochen beginnen Stecken Sie den Stecker in die Steckdose. Halten Sie die Ein/Aus-Taste 3 Sekunden lang gedrückt. Ein Piepton ertönt und das Gerät geht an. Das Gerät befindet sich nun im Standby-Modus, alle Anzeigen einschließlich dem Timer zeigen [-] an. Stellen Sie eine geeignete Pfanne oder einen Topf auf das Kochfeld, das Sie benutzen möchten. - Page 10 Wichtige Hinweise zur Bedienung • Nachdem Sie den Stecker eingesteckt haben ertönt kurz der Summer. Alle Anzeigen leuchten 1 Sekunde lang und gehen dann wieder aus. • Wenn Sie das Gerät im Standby-Modus befindet und innerhalb 1 Minute keine Eingaben vorgenommen werden, geht das Gerät automatisch aus und der Summer piept 1 Mal.
- Page 11 Kindersicherung Um zu verhindern dass die Tasten aus Versehen gedrückt werden (beispielsweise von Kindern) können Sie die Kindersicherung aktivieren. Hinweis: Ist die Kindersicherung aktiv, sind alle Tasten, bis auf die Ein/Aus-Taste und die Kindersicherungs-Taste inaktiv. Kindersicherung einschalten: Drücken Sie einmal auf die Kindersicherungs-Taste. Die Timer-Anzeige zeigt [Lo] an und die Kindersicherung ist aktiv.
-
Page 12: Timer Einstellen
TIMER EINSTELLEN Übersicht Minutenanzeige: zeigt die verbleibenden Minuten an Tasten zum Einstellen des Timers Timer ohne Auswahl einer Kochplatten einstellen Versichern Sie sich, dass das Kochfeld eingeschaltet ist. Hinweis: Diese Funktion können Sie nur benutzen wenn keine Kochzone ausgewählt wurde. Drücken Sie auf die Timer-Taste und in der Timer- Anzeige erscheint eine Zahl. - Page 13 Sobald der Timer eingestellt wurde, beginnt er herunterzuzählen. Das Display zeigt die verbleibende Zeit an. Sobald die Zeit abgelaufen ist piept der Summer 30 Sekunden lang und das Display zeigt [--] an. Drücken Sie eine beliebige Taste, um den Alarm zu stoppen. •...
- Page 14 Sobald der Timer eingestellt wurde, beginnt er herunterzuzählen. Das Display zeigt die verbleibende Zeit an. Hinweis: Der rote Punkt neben der Leistungsanzeige zeigt, welche Kochplatte ausgewählt ist. Um den Timer einer bestimmten Kochplatte zu überprüfen, drücken Sie auf die entsprechende Kochzonen-Taste. Hinweis: Wenn der Timer für beide Platten gestellt wurde, zeigt die Timer-Anzeige die Zeit des Timers an, der als erster abläuft.
-
Page 15: Sicherheitsfunktionen
SICHERHEITSFUNKTIONEN Restwärme-Warnung Nachdem die Heizplatte in Betrieb war, strahlt die Oberfläche noch Restwärme ab. Damit Sie sich nicht verbrennen, erscheint [H] im Display und signalisiert, dass die Oberfläche noch heiß ist. Auto-Ausschalt-Funktion Falls Sie vergessen sollten eine Kochplatte auszuschalten, wird diese nach einer bestimmten Zeit automatisch abgeschaltet. -
Page 16: Kochtipps
KOCHTIPPS • Sobald das Essen kocht, reduzieren Sie die Temperatur. • Benutzen Sie einen Deckel, um die Kochzeit zu reduzieren und Energie zu sparen. • Um die Kochzeit zu reduzieren, verwenden Sie nicht mehr Fett und Wasser als nötig. • Starten sie mit einer hohen Temperatur und reduzieren Sie diese, sobald das Essen warm ist. -
Page 17: Heizleistung Einstellen
HEIZLEISTUNG EINSTELLEN Leistungsstufe Geeignet für • Erwärmen von kleineren Mengen Essen • Schmelzen von Schokolade • Köcheln • Langsamen Erwärmen • Aufwärmen • Schnelles Köcheln • Reis kochen • Pfannkuchen • Kurzes Anbraten • Nudeln kochen • Frittieren und scharf anbraten •... -
Page 18: Fehlersuche Und Fehlerbehebung
FEHLERSUCHE UND FEHLERBEHEBUNG Was? Wie? Wichtig! Tägliche Ver- 1. Schalten Sie die Kochplatte • Wenn die Kochplatte unreinigungen aus. ausgeschaltet ist erlischt auf dem Glas 2. Sprühen Sie einen Kochplat- die „Heiße Oberfläche“ (Fingerabdrü- tenreiniger auf, solange die Anzeige, obwohl die cke, Abdrücke Platte noch warm, aber nicht Kochplatte noch heiß... - Page 19 Was? Wie? Wichtig! Übergelaufenes 1. Schalten Sie die Kochplatte Es kann sein, dass die Essen oder aus. Kochplatte piept, sich selbst Flüssigkeiten auf 2. Weichen Sie die Rückstände abschaltet und die Tasten nicht den Funktions- ein. mehr funktionieren, solange tasten. 3.
-
Page 20: Hinweise Zur Entsorgung
HINWEISE ZUR ENTSORGUNG Befindet sich die linke Abbildung (durchgestrichene Mülltonne auf Rädern) auf dem Produkt, gilt die Europäische Richtlinie 2012/19/EU. Diese Produkte dürfen nicht mit dem normalen Hausmüll entsorgt werden. Informieren Sie sich über die örtlichen Regelungen zur getrennten Sammlung elektrischer und elektronischer Gerätschaften. - Page 21 Using the Timer 30 Safety Functions 33 Cooking Guidelines 34 Heat Settings 35 Care and Cleaning 35 Troubleshooting 36 Hints on Disposal 38 TECHNICAL DATA 10030683 Item number Power supply 230 V ~ 50 Hz Power upper zone 1800 W Power unter zone 1200 W DECLARATION OF CONFORMITY Producer: Chal-Tec GmbH, Wallstraße 16, 10179 Berlin, Germany.
-
Page 22: Safety Instructions
SAFETY INSTRUCTIONS • The installation and connection of the new appliance must only be carried out by qualified personal. • Repairs to the appliance are only to be carried out by approved service persons. Repairs carried out by inexperienced persons may cause injury or serious malfunctioning. -
Page 23: Installation
How to avoid damage to the appliance • Do not use the cooking area as a worktop or storage space. • Please be careful the edges when moving pots and pans around. • Do not have the cooking zones on with empty pans, or with no pots or pans on them. - Page 24 Under any circumstances, make sure the ceramic cooker hob is well ventilated and the air inlet and outlet are not blocked. Ensure the ceramic cooker hob is in good work state. As shown below. Note: The safety distance between the hotplate and the cupboard above the hotplate should be at least 760 mm.
-
Page 25: Overview And Control Panel
Cautions • The hob shall not be mounted to cooling equipment, dishwashers and rotary dryers. • The hob shall be installed such that better heat radiation can be ensured to enhance its reliability. • The wall and induced heating zone above the work surface shall withstand heat. •... -
Page 26: Getting Started
GETTING STARTED Note: Remove any protective film that may still be on your hob. Using the Touch Controls • The controls respond to touch, so you don’t need to apply any pressure. • Use the ball of your finger, not its tip. •... -
Page 27: Operation
OPERATION To start cooking After the hob be connected to electricity and power on. Press and hold the ON/OFF control button for about 3 seconds till you hear a “beep” to turn the hob on. Now the hob enter into Standby mode, all heat setting indicators and Timer setting indicators shows [-]. - Page 28 Notes • After connect to electricity, when power on, the buzzer of hob beeps once, all indicators light up for 1 second then go out. • When the hob in Standby mode, if there is no practice within 1 minute, the hob will auto turn off, with buzzer beeps once.
- Page 29 Child Lock Safety Control You can lock the controls to prevent unintended use (for example children accidentally turning the cooking zones on) by active Child Lock function. Note: When the controls are locked, except the ON/OFF control button and Child Lock control button, all other touch control buttons are disabled.
-
Page 30: Using The Timer
USING THE TIMER Timer overview Minute display shows the number of minutes Timer control Using the Timer as a Minute Minder Make sure the hob is turned on. Note: you can use the minute minder if you haven’t selected any cooking zone. - Page 31 When the time is set, it will begin to count down immediately, the display will show the remaining time. Buzzer will beeps for 30 seconds and the timer indicator shows [- -] when the setting time finished. Any efficient touching of control buttons during it, would end up the buzzer beeps.
- Page 32 When the time is set, it will begin to count down immediately, the display will show the remaining time. NOTE: The red dot next to power level indicator will illuminate for those zone set with timer. You can check timer setting of different cooking zone which set with timer, by press corresponding cooking zone select button.
-
Page 33: Safety Functions
SAFETY FUNCTIONS Residual Heat Warning When the hob has been operating for some time, there will be some residual heat. The letter “ H ”appears to warn you to keep away from it. Auto Shutdown Another safety feature of the hob is auto shutdown. This occurs whenever you forget to switch off a cooking zone. -
Page 34: Cooking Guidelines
COOKING GUIDELINES • When food comes to the boil, reduce the temperature setting. • Using a lid will reduce cooking times and save energy by retaining the heat. • Minimize the amount of liquid or fat to reduce cooking times. •... -
Page 35: Heat Settings
HEAT SETTINGS Power level Suitability • delicate warming for small amounts of food • melting chocolate, butter, and foods that burn quickly • gentle simmering • slow warming • reheating • rapid simmering • cooking rice • pancakes • sauteing •... -
Page 36: Troubleshooting
TROUBLESHOOTING What? How? Important! Everyday 1. Switch the power to the • When the power to the soiling on glass cooktop off. cooktop is switched off, (fingerprints, 2. Apply a cooktop cleaner there will be no ‘hot marks, stains while the glass is still warm surface’... - Page 37 What? How? Important! Spillovers on the 1. Switch the power to the The cooktop may beep and turn touch controls. cooktop off. itself off, and the touch controls 2. Soak up the spill may not function while there is 3. Wipe the touch control area liquid on them.
-
Page 38: Hints On Disposal
HINTS ON DISPOSAL According to the European waste regulation 2012/19/EU this symbol on the product or on its packaging indicates that this product may not be treated as household waste. Instead it should be taken to the appropriate collection point for the recycling of electrical and electronic equipment. - Page 39 Ajustar la potencia de calor 53 Limpieza y cuidado 53 Detección y resolución de problemas 54 Retirada del aparato 56 DATOS TÉCNICOS Número de artículo 10030683 Suministro eléctrico 230 V ~ 50 Hz Potencia zona de cocción grande 1800 W Potencia zona de cocción pequeña 1200 W DECLARACIÓN DE CONFORMIDAD...
-
Page 40: Indicaciones De Seguridad
INDICACIONES DE SEGURIDAD • La instalación y conexión deberán ser realizadas por personal técnico cualificado. • No intente reparar el aparato usted mismo. Las reparaciones deberán ser realizadas por personal técnico cualificado. Contacte con un servicio técnico de su zona. •... -
Page 41: Instalación
Cómo evitar los daños • No utilice la superficie de cocción para apoyar objetos. • Tenga cuidado con los cantos cuando mueva las sartenes y ollas. • No utilice las superficies de cocción con ollas ni sartenes vacías ni sin sartenes ni ollas. - Page 42 Asegúrese de que la placa de cocción esté bien ventilada y la entrada y salida de aire no estén bloqueadas. Asegúrese de que la placa de cocción esté correctamente colocada (véase ilustración). Advertencia: La distancia de seguridad entre la placa de cocción y un mueble debe ser mínimo de 760 mm.
-
Page 43: Descripción Del Aparato
Indicaciones de instalación • No instale la placa sobre frigoríficos o lavavajillas. • La placa de cocción debe instalarse de tal manera que pueda trabajar eficazmente. Cíñase a las medidas y distancias indicadas. • Las paredes y los armarios que se instalen sobre la placa de cocción deben ser resistentes al calor. -
Page 44: Puesta En Marcha
PUESTA EN MARCHA Advertencia: Si todavía se encuentra una lámina de protección en la placa de cocción, retírela antes de su uso. Cómo manejar correctamente los botones • Los botones reaccionan al tacto, no debe ejercer ninguna presión. • Utilice las yemas de los dedos para manejarlos (véase imagen). •... -
Page 45: Utilización
UTILIZACIÓN Comenzar con la cocción Conecte el enchufe a la toma de corriente. Mantenga el botón on/off pulsado durante 3 segundos. Escuchará un pitido y el aparato se enciende. El aparato se encuentra en modo standby, todos los indicados, incluido el del temporizador, muestran [-]. Coloque un recipiente adecuado sobre la superficie de cocción deseada. - Page 46 Indicaciones de uso importantes • Cuando haya conectado el enchufe a una toma de corriente, sonará un zumbido. Todos los indicadores se iluminan durante 1 segundo y a continuación se apagan. • Si el aparato se encuentra en modo standby y no se ha realizado ninguna acción en el plazo de un minuto, el aparato se apaga automáticamente y el zumbador suena 1 vez.
- Page 47 Bloqueo para niños Para evitar que los botones se pulsen accidentalmente (por ejemplo por los niños), puede activar el bloqueo para niños. Advertencia: Si el bloqueo para niños está activado, todos los botones excepto on/ off y el del bloqueo para niños estarán desactivados. Activar bloqueo para niños: Pulse una vez el botón de bloqueo para niños.
-
Page 48: Ajustar Temporizador
AJUSTAR TEMPORIZADOR Descripción Indicador de minutos: muestra los minutos restantes Botones para ajustar el temporizador Ajustar temporizador sin selección de una zona de cocción. Asegúrese de que la placa de cocción esté encendida. Advertencia: Esta función puede utilizarla si no ha seleccionado ninguna zona de cocción. - Page 49 En cuanto se haya ajustado el temporizador, comienza una cuenta atrás. El display muestra el tiempo restante. En cuanto haya transcurrido el tiempo, suena un pitido durante 30 segundos y el display muestra [--]. Pulse cualquier otro botón para finalizar la alarma. •...
- Page 50 En cuanto se haya ajustado el temporizador, comienza una cuenta atrás. El display muestra el tiempo restante. Advertencia: El punto rojo junto al indicador de potencia indica qué zona de cocción está encendida. Para comprobar el temporizador de una zona de cocción determinada, pulse el botón de la zona de cocción correspondiente.
-
Page 51: Funciones De Seguridad
FUNCIONES DE SEGURIDAD Advertencia de calor residual Después del funcionamiento de la misma, la superficie todavía generará restos de calor. Para evitar quemarse, aparece [H] en el display para indicar que la superficie todavía está caliente. Función de apagado automático Si olvida apagar una zona de cocción, esta se apagará... -
Page 52: Consejos De Cocción
CONSEJOS DE COCCIÓN • En cuanto los alimentos hiervan, reduzca la temperatura. • Utilice una tapa para reducir el tiempo de cocción y ahorrar energía. • Para reducir el tiempo de cocción, no utilice más grasa o agua de las necesarias. •... -
Page 53: Ajustar La Potencia De Calor
AJUSTAR LA POTENCIA DE CALOR Niveles de potencia Apto para • Calentar pequeñas cantidades de alimentos • Derretir chocolate • Hervir a fuego lento • Calentar a fuego lento • Calentar • Hervir rápidamente • Hervir arroz • Tortitas • Freír durante poco tiempo •... -
Page 54: Detección Y Resolución De Problemas
DETECCIÓN Y RESOLUCIÓN DE PROBLEMAS ¿Qué? ¿Cómo? Importante 1. Apague la placa. • Si apaga la placa, el Suciedad diaria en la 2. Vierta un poco de limpiador indicador para la superficie placa (marcas para vitrocerámicas cuando caliente desaparecerá de dedos la placa todavía no se haya aunque la placa todavía no y manchas... - Page 55 ¿Qué? ¿Cómo? Importante 1. Apague la placa. • Puede ocurrir que la placa Comida o líqui- 2. Limpie los restos. dos derramados emita un pitido, se apague en las teclas de 3. Limpie las teclas con un automáticamente y las teclas control.
-
Page 56: Retirada Del Aparato
RETIRADA DEL APARATO Si el aparato lleva adherida la ilustración de la izquierda (el contenedor de basura tachado) entonces rige la normativa europea, directiva 2012/19/UE. Este producto no debe arrojarse a un contenedor de basura común. Infórmese sobre las leyes territoriales que regulan la recogida separada de aparatos eléctricos y electrónicos. - Page 57 Réglage de la puissance de chauffe 71 Nettoyage et entretien 71 Identification et résolution des problèmes 72 Conseils pour le recyclage 74 FICHE TECHNIQUE Numéro d'article 10030683 Alimentation 230 V ~ 50 Hz Puissance du grand foyer 1800 W Puissance du petit foyer 1200 W DÉCLARATION DE CONFORMITÉ...
-
Page 58: Consignes De Sécurité
CONSIGNES DE SÉCURITÉ Pour éviter les risques d‘électrocution • Débranchez l‘appareil du secteur avant de procéder à des opérations sur lui ou de l‘entretenir. • Veillez à ce que le circuit du secteur soit relié à la terre. • Le branchement au secteur de l‘appareil ne doit être réalisé que par un professionnel, car un mauvais branchement peut provoquer un accident y compris mortel. -
Page 59: Installation
Comment éviter les accidents • N‘utilisez pas les plaques de cuisson pour y poser des objets. • Faites attention aux bords, lorsque vous manipulez des poêles et des casseroles. • N‘utilisez pas les foyers de cuisson avec des poêles et casseroles vides, ni sans poêle ou casserole. - Page 60 Veillez à ce que la table de cuisson soit bien ventilée et que les entrées d‘air ne soient pas bloquées. Assurez-vous que la table de cuisson soit bien installée (voir illustration). Remarque : la distance de sécurité entre les plaques de cuisson et un meuble suspendu doit être d‘au moins 760 mm.
-
Page 61: Aperçu De L'appareil Et Panneau De Commande
Conseils d‘installation • N‘installez pas la table au-dessus d‘un réfrigérateur ou d‘un lave-vaisselle. • La plaque de cuisson doit être installée de façon à pouvoir fonctionner efficacement. Tenez-vous en strictement aux espacements et dimensions indiqués. • Les parois autour et les placards qui se trouvent au-dessus de la table de cuisson doivent être résistants à... -
Page 62: Mise En Service
MISE EN SERVICE Remarque : si un film de protection se trouve encore sur la plaque de cuisson, retirez- le avant d‘utiliser celle-ci. Comment bien utiliser les touches • Les commandes réagissent au toucher, vous n‘avez pas besoin d‘exercer une pression. -
Page 63: Utilisation
UTILISATION Débuter la cuisson Branchez la fiche dans la prise. Maintenez la touche de marche /arrêt pendant 3 secondes. Un bip retentit et l'appareil démarre. L'appareil se trouve maintenant en mode veille, tous les voyants y compris la minuterie indiquent [-]. Placez une poêle ou une casserole adaptée sur la plaque de cuisson. - Page 64 Importants conseils d‘utilisation • Une fois que vous avez branché la fiche dans la prise, un vibreur retentit brièvement. Tous les témoins s‘allument 1 seconde et s‘éteignent ensuite. • Lorsque l‘appareil se trouve en mode veille et qu‘au bout d‘ 1 minute vous n‘avez effectué...
- Page 65 Verrouillage parental Pour éviter que les touches ne soient utilisées par accident (par exemple par des enfants) vous pouvez activer le verrouillage parental. Remarque: si le verrouillage parental est actif, toutes les touches sauf les touches de marche/arrêt et de verrouillage parental sont inactives. Activer le verrouillage parental : Appuyez une fois sur la touche de verrouillage parental.
-
Page 66: Réglage De La Minuterie
RÉGLAGE DE LA MINUTERIE Aperçu Affichage des minutes : indique le nombre de minutes restantes Touches de réglage de la minuterie Réglage de la minuterie sans choisir de foyer de cuisson Assurez-vous que la plaque de cuisson est allumée. Remarque : vous ne pouvez utiliser cette fonction que lorsqu'aucun foyer n'a été... - Page 67 Dès que la minuterie est réglée, elle commence le compte à rebours. L'écran indique la durée restante. Dès que la durée est écoulée, le vibreur bipe pendant 30 secondes et l'écran indique [--]. Appuyez sur une touche quelconque pour arrêter l'alarme. •...
- Page 68 Dès que vous avez réglé la minuterie, elle commence le compte à rebours. L'écran affiche la durée restante. Remarque : le point rouge près du témoin de puissance de chauffe indique quel foyer a été choisi. Pour vérifier la minuterie d'un foyer donné, appuyez sur la touche de la zone de cuisson correspondante.
-
Page 69: Fonctions De Sécurité
FONCTIONS DE SÉCURITÉ Alarme de chaleur résiduelle Lorsque la plaque de cuisson a servi, sa surface émet encore de la chaleur résiduelle. Pour que vous ne vous brûliez pas, la lettre [H] apparaît à l’écran et vous indique que la surface est encore chaude. Fonction d’arrêt automatique Si vous oubliez d’éteindre un foyer, celui-ci s’éteindra tout seul au bout d’un certain temps. -
Page 70: Astuces De Cuisson
ASTUCES DE CUISSON • Dès que les aliments bouillent, réduisez la température. • Utilisez un couvercle pour réduire la durée de la cuisson et économiser de l’énergie. • Pour réduire la durée de la cuisson, n’utilisez pas plus de graisse ou d’eau que nécessaire. -
Page 71: Réglage De La Puissance De Chauffe
RÉGLAGE DE LA PUISSANCE DE CHAUFFE Niveau de Convient pour puissance • réchauffer de petites quantités d‘aliments • faire fondre du chocolat • mijoter • réchauffer lentement • réchauffer • mijoter rapidement • cuire du riz • gâteaux à la poêle •... -
Page 72: Identification Et Résolution Des Problèmes
IDENTIFICATION ET RÉSOLUTION DES PROBLÈMES Quoi ? Comment ? Important ! Impuretés 1. Éteindre la table de cuisson. • Lorsque la table de cuisson 2. Asperger la table de cuisson quotidiennes sur est éteinte, l’affichage « le verre (traces avec un produit d’entretien Surface chaude »... - Page 73 Quoi ? Comment ? Important ! 1. Éteindre la table de cuisson. • Il se peut que la table de Résidus de 2. Ramollir les résidus en les nourriture ou de cuisson produise un bip, liquide ayant imbibant d’eau. qu’elle s’éteigne d’elle- 3.
-
Page 74: Conseils Pour Le Recyclage
CONSEILS POUR LE RECYCLAGE Le pictogramme ci-contre apposé sur le produit signifie que la directive européenne 2012/19/UE s‘applique (poubelle à roues barrée d’une croix). Ces produits ne peuvent être jetés dans les poubelles domestiques courantes. Renseignez- vous concernant les règles appliquées pour la collecte d’appareils électriques et électroniques. - Page 75 Consigli per la cottura 88 Impostare i livelli di potenza 89 Pulizia e manutenzione 89 Ricerca e risoluzione dei problemi 90 Smaltimento 92 DATI TECNICI Articolo numero 10030683 Alimentazione 230 V ~ 50 Hz Potenza piastra grande 1800 W Potenza piastra piccola 1200 W DICHIARAZIONE DI CONFORMITÀ...
-
Page 76: Avvertenze Di Sicurezza
AVVERTENZE DI SICUREZZA • L‘installazione e il collegamento devono essere eseguiti da un tecnico qualificato. • Non tentare di riparare il dispositivo da soli. Le riparazioni devono essere eseguite esclusivamente un tecnico qualificato. Contattare un tecnico nelle vicinanze. • Se il dispositivo non funziona correttamente, spegnere tutte le piastre e contattare il servizio clienti. -
Page 77: Installazione
Evitare di danneggiare il dispositivo • Non utilizzare il piano cottura per appoggiare oggetti. • Maneggiare con attenzione pentole e padelle. • Non utilizzare il piano cottura con padelle o pentole vuote o senza padelle e pentole. • Nonostante il vetro sia molto duro e resistente, potrebbe rompersi. Fare attenzione a non far cadere oggetti appuntiti o pesanti sul piano cottura. - Page 78 Assicurarsi che il piano cottura sia ben ventilato e che la presa d‘aria e lo scarico non siano ostruiti. Assicurarsi inoltre che il piano cottura sia installato correttamente (vedi figura). Nota: la distanza di sicurezza tra il piano cottura e il mobile sovrastante deve essere di almeno 760 mm.
-
Page 79: Descrizione Del Prodotto E Pannello Dei Comandi
Note sull‘installazione • Non installare il piano cottura sopra frigoriferi o lavastoviglie. • Installare il piano cottura in modo che possa funzionare in modo efficiente. Attenersi alle distanze e alle dimensioni indicate. • Le pareti e gli armadietti sopra il piano cottura devono essere resistenti al calore. •... -
Page 80: Messa In Funzione
MESSA IN FUNZIONE Nota: se sul piano cottura è ancora presente una pellicola protettiva, rimuoverla prima dell‘uso. Come utilizzare i tasti correttamente • I tasti sono sensibili al tocco, non è necessario esercitare alcuna pressione. • Premere i tasti con i polpastrelli (vedere la figura). •... -
Page 81: Utilizzo
UTILIZZO Iniziare a cucinare Inserire la spina nella presa. Tenere premuto il tasto On/Off per 3 secondi. Viene emesso un segnale acustico e il dispositivo si accende. Il dispositivo ora è in modalità standby, tutte le spie incluso il timer indicano [-]. - Page 82 Note importanti per l´uso • Dopo aver inserito la spina nella presa, viene emesso un breve segnale acustico. Tutte le spie si accendono per 1 secondo e poi si spengono di nuovo. • Se il dispositivo si trova in modalità standby e se non si preme alcun tasto entro 1 minuto, il dispositivo si spegne automaticamente e viene emesso un segnale acustico.
- Page 83 Blocco sicurezza bambini Per evitare che i tasti vengano premuti accidentalmente (ad esempio dai bambini), attivare il blocco di sicurezza. Nota: quando il blocco di sicurezza è attivo, tutti i tasti sono inattivi ad eccezione del tasto On / Off e del tasto del blocco di sicurezza. Attivare il blocco sicurezza bambini: Premere il tasto del blocco di sicurezza.
-
Page 84: Impostare Il Timer
IMPOSTARE IL TIMER Descrizione Display minuti: indica i minuti rimanenti Tasti per impostare il timer Impostare il timer senza selezionare una piastra Assicurarsi che il piano cottura sia acceso. Nota: è possibile utilizzare questa funzione solo se non è stata selezionata alcuna piastra. - Page 85 Dopo aver impostato il timer, inizia il conto alla rovescia. Il display indica il tempo rimanente. Allo scadere del tempo, viene emesso un segnale acustico per 30 secondi e il display indica [--]. Premere un tasto qualsiasi per interrompere il segnale acustico.
- Page 86 Una volta impostato il timer, inizia il conto alla rovescia. Il display indica il tempo rimanente. Nota: il punto rosso accanto alla spia della potenza indica la piastra selezionata. Per controllare il timer di una determinata piastra, premere il tasto della piastra corrispondente.
-
Page 87: Funzioni Di Sicurezza
FUNZIONI DI SICUREZZA Avviso calore residuo Dopo l´uso, la superficie della piastra rimane calda. Per evitare ustioni, sul display compare [H] e indica che la superficie è ancora calda. Funzione spegnimento automatico Se si dimentica di spegnere una piastra, questa si spegnerà automaticamente dopo un tempo determinato. -
Page 88: Consigli Per La Cottura
CONSIGLI PER LA COTTURA • Quando il cibo è cotto, diminuire la temperatura. • Utilizzare un coperchio per diminuire i tempi di cottura e risparmiare energia. • Per ridurre il tempo di cottura, non versare più olio e acqua. • Iniziare con una temperatura elevata e ridurla appena il cibo è caldo. Cuocere a fuoco lento e cuocere il riso •... -
Page 89: Impostare I Livelli Di Potenza
IMPOSTARE I LIVELLI DI POTENZA Potenza Utilizzo • Riscaldamento di piccole quantità di cibo • Sciogliere il cioccolato • Cuocere a fuoco lento • Riscaldare a fuoco lento • Riscaldare • Cuocere rapidamente • Cuocere il riso • Frittelle • Rosolare •... -
Page 90: Ricerca E Risoluzione Dei Problemi
RICERCA E RISOLUZIONE DEI PROBLEMI Cosa? Come? Importante! 1. Spegnere la piastra. • Quando la piastra Impurità quotidiane sul 2. Utilizzare un detergente • è spenta, la spia „superficie vetro (impronte adatto per la pulizia delle calda“ sul display si spegne, digitali, piastre quando la piastra sebbene la piastra sia... - Page 91 Cosa? Come? Importante! 1. Spegnere la piastra. • Se è ancora presente del Residui di cibo 2. Pulire i tasti con un panno o liquidi sui tasti liquido sulla piastra, può funzione. umido. accadere che il piano di 3. Utilizzare un panno cottura emetta un segnale morbido, una spugna acustico, si spenga e i...
-
Page 92: Smaltimento
SMALTIMENTO Se sul prodotto è presente la figura a sinistra (il cassonetto dei rifiuti mobile sbarrato), si applica la direttiva europea 2012/19/UE. Questi prodotti non possono essere smaltiti con i rifiuti normali. Informarsi sulle disposizioni vigenti in merito alla raccolta separata di dispositivi elettrici ed elettronici. Non smaltire i vecchi dispositivi con i rifiuti domestici.
Need help?
Do you have a question about the 10030683 and is the answer not in the manual?
Questions and answers