Advertisement
Quick Links
Download this manual
See also:
Manual
AIR
WHAT'S INCLUDED • WHAT'S INCLUDED • WHAT'S INCLUDED • WHAT'S INCLUDED •
WHAT'S INCLUDED • WHAT'S INCLUDED • WHAT'S INCLUDED • WHAT'S INCLUDED
E
D
H
GB
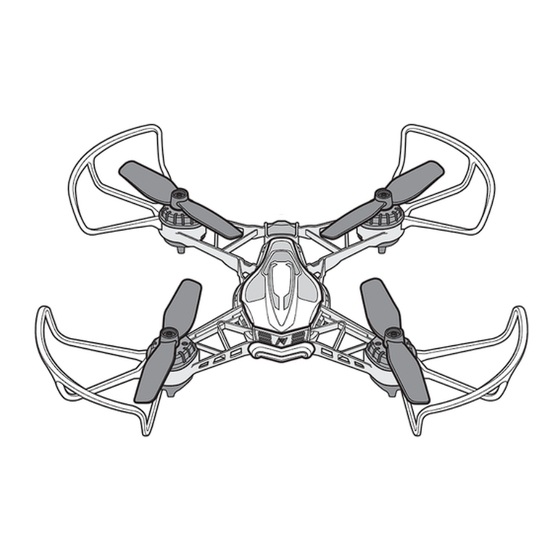
A. Drone
B. Controller + 4 AA batteries
C. FPV goggles
(included in #22608)
D. SD memory card
E. Screen holder
F. Joystick
G. Drone battery
H. USB charging cable
I. Replaceable propellers x 4
J. LCD screen + 4 AA batteries
IT
A. Drone
B. Controller + 4 AA batteries
C. FPV goggles
(included in #22608)
D. SD memory card
E. Screen holder
F. Joystick
G. Drone battery
H. USB charging cable
I. Replaceable propellers x 4
J. LCD screen + 4 AA batteries
Asst.
#22612
#22608
TOY STATE INTERNATIONAL LIMITED
66 MODY ROAD, KOWLOON, HONG KONG
www.toystate.com
www.NikkoAir.com
A
F
FR
A. Drone
B. Controller + 4 AA batteries
C. FPV goggles
(included in #22608)
D. SD memory card
E. Screen holder
F. Joystick
G. Drone battery
H. USB charging cable
I. Replaceable propellers x 4
J. LCD screen + 4 AA batteries
PT
A. Drone
B. Controller + 4 AA batteries
C. FPV goggles
(included in #22608)
D. SD memory card
E. Screen holder
F. Joystick
G. Drone battery
H. USB charging cable
I. Replaceable propellers x 4
J. LCD screen + 4 AA batteries
B
G
I
DE
A. Drone
B. Controller + 4 AA batteries
C. FPV goggles
(included in #22608)
D. SD memory card
E. Screen holder
F. Joystick
G. Drone battery
H. USB charging cable
I. Replaceable propellers x 4
J. LCD screen + 4 AA batteries
NL
A. Drone
B. Controller + 4 AA batteries
C. FPV goggles
(included in #22608)
D. SD memory card
E. Screen holder
F. Joystick
G. Drone battery
H. USB charging cable
I. Replaceable propellers x 4
J. LCD screen + 4 AA batteries
14+
C
J
ES
A. Drone
B. Controller + 4 AA batteries
C. FPV goggles
(included in #22608)
D. SD memory card
E. Screen holder
F. Joystick
G. Drone battery
H. USB charging cable
I. Replaceable propellers x 4
J. LCD screen + 4 AA batteries
PL
A. Drone
B. Controller + 4 AA batteries
C. FPV goggles
(included in #22608)
D. SD memory card
E. Screen holder
F. Joystick
G. Drone battery
H. USB charging cable
I. Replaceable propellers x 4
J. LCD screen + 4 AA batteries
Advertisement

Related Manuals for Nikko Air RACE VISION 220 FPV

Summary of Contents for Nikko Air RACE VISION 220 FPV
- Page 1 WHAT’S INCLUDED • WHAT’S INCLUDED • WHAT’S INCLUDED • WHAT’S INCLUDED • WHAT’S INCLUDED • WHAT’S INCLUDED • WHAT’S INCLUDED • WHAT’S INCLUDED A. Drone A. Drone A. Drone A. Drone B. Controller + 4 AA batteries B. Controller + 4 AA batteries B.
- Page 2 BATTERY INSTALLATION • BATTERY INSTALLATION • BATTERY INSTALLATION • BATTERY INSTALLATION • BATTERY INSTALLATION • BATTERY INSTALLATION • BATTERY INSTALLATION • BATTERY INSTALLATION CONTROLLER & LCD SCREEN BATTERIES Caution! Make sure they are in the o position (O) before inserting or removing the battery. •...
- Page 3 CHARGING THE DRONE • CHARGING THE DRONE • CHARGING THE DRONE • CHARGING THE DRONE • CHARGING THE DRONE • CHARGING THE DRONE • CHARGING THE DRONE • CHARGING THE DRONE • MAX. 5V 2.4A 60-180 60-180 mins. GB Caution! Make sure the drone is switched to the o position (O) Caution! Make sure the drone is switched to the o position (O) before charging.
- Page 4 FLIGHT CONTROLS • FLIGHT CONTROLS • FLIGHT CONTROLS • FLIGHT CONTROLS • FLIGHT CONTROLS • FLIGHT CONTROLS • FLIGHT CONTROLS • FLIGHT CONTROLS ONE TOUCH STUNTS • ONE TOUCH STUNTS • ONE TOUCH STUNTS • ONE TOUCH STUNTS • ONE TOUCH STUNTS • ONE TOUCH STUNTS • ONE TOUCH STUNTS • ONE TOUCH STUNTS FLIPS/ROLLS EXÉCUTION DE SAUTS SALTOS/ROLLEN...
- Page 5 SYNCING CONTROLLER TO DRONE • SYNCING CONTROLLER TO DRONE • SYNCING CONTROLLER TO DRONE • SYNCING CONTROLLER TO DRONE • SYNCING CONTROLLER TO DRONE • SYNCING CONTROLLER TO DRONE • SYNCING CONTROLLER TO DRONE • SYNCING CONTROLLER TO DRONE MICRO USB 1.
- Page 6 VARIABLE FLIGHT MODES • VARIABLE FLIGHT MODES • VARIABLE FLIGHT MODES • VARIABLE FLIGHT MODES • VARIABLE FLIGHT MODES • VARIABLE FLIGHT MODES • VARIABLE FLIGHT MODES • VARIABLE FLIGHT MODES • 100% • Adjust the flight controls to match your skill level. •...
- Page 7 ONE TOUCH STUNTS • ONE TOUCH STUNTS • ONE TOUCH STUNTS • ONE TOUCH STUNTS • ONE TOUCH STUNTS • ONE TOUCH STUNTS • ONE TOUCH STUNTS • ONE TOUCH STUNTS • Caution! Before using the stunt button, make sure to y at least 6 feet (2m) in the air with at least 6 feet clearance in all directions. Caution! Before using the stunt button, make sure to y at least 6 feet (2m) in the air with at least 6 feet clearance in all directions.
- Page 8 FPV SCREEN CONTROLLER MOUNT • FPV SCREEN CONTROLLER MOUNT • FPV SCREEN CONTROLLER MOUNT • FPV SCREEN CONTROLLER MOUNT • FPV SCREEN CONTROLLER MOUNT • FPV SCREEN CONTROLLER MOUNT • FPV SCREEN CONTROLLER MOUNT • FPV SCREEN CONTROLLER MOUNT 1. Insert the locking tab on the controller mount into the slot on the controller . 1.
- Page 9 FPV SCREEN • FPV SCREEN • FPV SCREEN • FPV SCREEN • FPV SCREEN • FPV SCREEN • FPV SCREEN • FPV SCREEN MICRO SD CARD • MICRO SD CARD • MICRO SD CARD • MICRO SD CARD • MICRO SD CARD • MICRO SD CARD • MICRO SD CARD • MICRO SD CARD 1.
- Page 10 USING FPV SCREEN • USING FPV SCREEN • USING FPV SCREEN • USING FPV SCREEN • USING FPV SCREEN • USING FPV SCREEN • USING FPV SCREEN • USING FPV SCREEN ON/OFF • ON/OFF • ON/OFF • ON/OFF • ON/OFF • ON/OFF • ON/OFF • ON/OFF Push power button: to turn on or to turn off.
- Page 11 USING THE FPV GOGGLES • USING THE FPV GOGGLES • USING THE FPV GOGGLES • USING THE FPV GOGGLES • USING THE FPV GOGGLES • USING THE FPV GOGGLES • USING THE FPV GOGGLES • USING THE FPV GOGGLES Before attaching the FPV screen, put the goggles on and adjust the straps to Before attaching the FPV screen, put the goggles on and adjust the straps to ensure a secure fit.
- Page 12 REPLACING ROTORS • REPLACING ROTORS • REPLACING ROTORS • REPLACING ROTORS • REPLACING ROTORS • REPLACING ROTORS • REPLACING ROTORS • REPLACING ROTORS Make sure to use the correct replacement rotor, A or B. Markings are located on the Make sure to use the correct replacement rotor, A or B. Markings are located on the underside of blade.
- Page 13 REMOVABLE BLADE GUARDS • REMOVABLE BLADE GUARDS • REMOVABLE BLADE GUARDS • REMOVABLE BLADE GUARDS • REMOVABLE BLADE GUARDS • REMOVABLE BLADE GUARDS • REMOVABLE BLADE GUARDS • REMOVABLE BLADE GUARDS The blade guards are great for beginners and can be removed for experienced pilots. 1.
- Page 14 ADJUSTING THE TRIM • ADJUSTING THE TRIM • ADJUSTING THE TRIM • ADJUSTING THE TRIM • ADJUSTING THE TRIM • ADJUSTING THE TRIM • ADJUSTING THE TRIM • ADJUSTING THE TRIM You may notice a “pull” in one direction when flying, this is known as drift. You You may notice a “pull”...
- Page 15 DRL FLIGHT SIMULATOR • DRL FLIGHT SIMULATOR • DRL FLIGHT SIMULATOR • DRL FLIGHT SIMULATOR • DRL FLIGHT SIMULATOR • DRL FLIGHT SIMULATOR • DRL FLIGHT SIMULATOR • DRL FLIGHT SIMULATOR The DRL racing simulator allows new pilots to learn The DRL racing simulator allows new pilots to learn how to y a racing drone.
- Page 16 SYNC CONTROLLER TO SIMULATOR : 1. Using the USB charging cord, plug the USB into the computer and insert the charging port to the drone. 2. Turn on the power of the drone and the controller. 3. Arm the drone. Push “B” for 5 seconds until the rear lights of the drone turn green and fade on and o . 4.
- Page 17 BETA FLIGHT • BETA FLIGHT • BETA FLIGHT • BETA FLIGHT • BETA FLIGHT • BETA FLIGHT • BETA FLIGHT Beta Flight software allows you to customize your Beta Flight software allows you to customize your controls. Learn more at: controls.
- Page 18 PROBLEM SOLUTION The drone is unresponsive • Make sure the battery is fully charged and power is on. • Drone may be disarmed. Follow the syncing instructions to ensure the controller is paired with drone. The FPV screen only shows static •...
- Page 19 PILOTING TIPS • PILOTING TIPS • PILOTING TIPS • PILOTING TIPS • PILOTING TIPS • PILOTING TIPS • PILOTING TIPS • PILOTING TIPS • When the battery power is 20% the rear light on the drone will blink and you will feel a vibration in the controller to signal power is low.
-
Page 20: Safety Precaution
SAFETY PRECAUTION OUTDOOR TOYS INTENDED FOR CHILDREN OVER 14 YEARS OF AGE. DO NOT TOUCH THE RUNNING ROTORS. HANDS, HAIR AND LOOSE CLOTHES SHALL BE KEPT AWAY FROM THE ROTORS. IMPORTANT! Carefully read the Owners Manual before play! Keep the Manual for later reference. CAUTION: •... -
Page 21: Précautions De Securité
PRÉCAUTIONS DE SECURITÉ JOUETS PLEIN AIR DESTINÉS AUX ENFANTS DE PLUS DE 14 ANS. NE PAS TOUCHER LE ROTORS EN ROTATION. MAINTENIR MAINS, CHEVEUX ET VÊTEMENTS AMPLES À L'ÉCART DU ROTORS. IMPORTANT! Lisez attentivement le manuel d'utilisation avant de jouer ! Conservez le manuel a n de pouvoir vous y référer ultérieurement. - Page 22 REMARQUE DU FABRICANT • Toute modification non autorisée par le fabricant peut annuler le droit quʼa lʼutilisateur dʼutiliser l'appareil. • Ce jouet ainsi que tous les accessoires doivent être périodiquement vérifiés afin de détecter tout danger et toute pièce potentiellement dangereuse doit être réparée ou remplacée.
- Page 23 HINWEIS VOM HERSTELLER • Änderungen, die nicht ausdrücklich vom hersteller genehmigt wurden, können die Betriebserlaubnis des benutzers erlöschen lassen. • Dieses spielzeug und alle zubehörteile müssen regelmäßig auf potenzielle gefahren untersucht zu werden, und möglicherweise gefährliche teile müssen repariert oder ersetzt werden. •...
-
Page 24: Consigli Per La Sicurezza
CUMPLIMIENTO CON LA COMISIÓN FEDERAL DE COMUNICACIONES NOTA: Este dispositivo cumple con la Parte 15 de las Regulaciones FCC. La operación queda sujeta a las siguientes dos condiciones: (1) este dispositivo no puede provocar interferencias peligrosas, y (2) este dispositivo debe aceptar cualquier interferencia recibida, incluyendo aquellas que puedan provocar un funcionamiento no deseado. Advertencia: Los cambios o modificaciones a este producto sin la aprobación expresa de la parte responsable del dicho cumplimiento podrían anular la autoridad del usuario para operar el equipo. -
Page 25: Precauções De Segurança
NOTA DEL PRODUTTORE • Modifiche non autorizzate dal produttore potrebbero invalidare il diritto dell'utente a utilizzare il dispositivo. • Il giocattolo e tutti gli accessori devono essere regolarmente esaminati per verificare l'esistenza di potenziali rischi. Ogni parte che costituisce un potenziale rischio deve essere riparata o sostituita. - Page 26 VEILIGHEIDSAANWIJZINGEN BUITEN SPEELGOED BEDOELD VOOR KINDEREN BOVEN 14 JAAR OUD. RAAK DE BEWEGENDE ROTOREN NIET AAN. HOUD HANDEN, HAAR EN LOSSE KLEDING UIT DE BUURT VAN DE ROTOR. BELANGRIJK! Lees zorgvuldig de gebruikshandleiding voor het spelen! Bewaar de handleiding om in de toekomst te raadplegen.
-
Page 27: Informacje Dotyczące Bezpieczeństwa
INFORMACJE DOTYCZĄCE BEZPIECZEŃSTWA ZABAWKI DO UŻYTKU ZEWNĘTRZNEGO PRZEZNACZONE DLA DZIECI POWYŻEJ 12. ROKU ŻYCIA. NIE DOTYKAĆ KRĘCĄCYCH SIĘ WIRNIKÓW. DŁONIE, WŁOSY I LUŹNĄ ODZIEŻ NALEŻY TRZYMAĆ Z DALA OD WIRNIKÓW. WAŻNE! Uważnie zapoznaj się z Instrukcją obsługi przed użyciem! Zachowaj instrukcję do późniejszego wykorzystania.
Need help?
Do you have a question about the RACE VISION 220 FPV and is the answer not in the manual?
Questions and answers
I can’t get the remote to connect to the drone
To connect the remote to the Nikko Air RACE VISION 220 FPV drone:
1. Turn on the remote; its light will blink.
2. Turn on the drone; its light will blink rapidly.
3. Place the drone on a flat surface.
4. Push the throttle stick on the remote upward, then downward. The lights on both the controller and drone will turn solid.
5. The controller and drone are now synced. Gently push the throttle upward to lift off.
If you don’t fly within 5 seconds of syncing or if the drone collides with an object, it will disarm.
This answer is automatically generated