Table of Contents
Advertisement
Quick Links
Advertisement
Table of Contents

Related Manuals for Loewe MediaVision 3D


Summary of Contents for Loewe MediaVision 3D
- Page 1 Audiodesign Blu-ray Audio System MediaVision 3D Operating Manual...
-
Page 3: Brief Instructions
Brief instructions Preparation Other functions TV Mode Call up menu MediaVision Mode press briefly Close menu Switch device on/off Title Menu Insert disc Sensor button Insert disc Pop-up menu (Blu-ray Disc™) Operating modes Disc Menu (DVD) Select operating mode Movie - Music - Photos - Source selection Inputs - FM Radio - OK Title recognition... -
Page 4: Assist Remote Control - Mediavision 3D Mode
Assist remote control – MediaVision 3D Mode Sound Mute/On LED indicator light for current operating mode Switch over to TV mode Switch over to operate recorder Sleep Timer Zoom function Title recognition DISC: Disc Menu (DVD) Menu settings; DISC: Pop-up menu (Blu-ray Disc™) V+/V–... -
Page 5: Table Of Contents
Blu-ray disc memory 25 Legal information 45 Switching on/off 16 Brief instructions 3 Lock 21 Symbols 27 Center-Kanalwiedergabe bei Loewe TV-Geräten 21 Main Menu 17, 34 Technical Data 45 Chapter / Track selection 29 Manual search 39 Time 29 Cleaning 10... - Page 6 Contents Playing discs ..................27 Brief instructions .................3 Prerequisites ....................27 Assist remote control – MediaVision 3D Mode ........4 Playback in general ..................28 Front / Rear view.................. 7 Disc playback ....................29 Performance Features .................8 Flagging the last scene ................31 Welcome ....................9 Disc Menu ....................32...
-
Page 7: Front / Rear View
Front / Rear view CD/DVD/Blu-ray disc Open / Close disc drawer Volume iPod dock Switch off to Stand-by drive Display Operating Source Stop Next chapter display IR receiver Playback Previous chapter Pause HDMI IN 1/2 INPUT AUX R/L COMPONENT VIDEO OUT (HDMI inputs) (analog audio input (Video output) -
Page 8: Performance Features
Operation via touch-sensitive sensor buttons on the device and Assist remote control Use with other Loewe system components Connection of Loewe flat TV sets via Digital Link HD (HDMI CEC) (from chassis Media management L271x - a software update for the TV set might be required) and operation with a DLNA streaming client single Assist remote control - also for concealed set-up of the MediaVision 3D. -
Page 9: Welcome
Welcome Thank you, Set-up for choosing a Loewe product. We are happy to have you as a customer. • Place unit on a stable, even surface. At Loewe we combine the highest requirements regarding technology, design • Do not set up the unit near strong heat sources or in direct sunlight. -
Page 10: For Your Safety
Do not let children loiter unsupervised around the device. Do not let children play If the unit is used outdoors, make sure that it is protected from moisture (rain, in the immediate vicinity of the device. Do not operate your MediaVision 3D drips, sprayed water or dew). -
Page 11: Connection
AUDIO-LINK cable to the subwoofer, as well as the Centre-IN socket of Connect the HDMI OUT socket of the MediaVision 3D to an HDMI IN socket on the TV set. (see page 21). your Loewe TV set using the HDMI cable provided. -
Page 12: Mediavision 3D As An Audio System (Sl155)
Centre-IN socket of the adapter 009-71387.001 on the TV set. Connect the HDMI OUT socket of the MediaVision 3D to an HDMI 1 socket on To be able to reproduce the sound of the TV set, e.g. DVB radio, via your MediaVisi- your Loewe TV set using the HDMI cable provided. -
Page 13: Mediavision 3D As An Audio System (Sl2Xx)
TV set. (page 21). Connect the HDMI OUT socket of the MediaVision 3D to an HDMI 1 socket on To be able to reproduce the sound of the TV set, e.g. DVB radio, via your MediaVisi- your Loewe TV set using the HDMI cable provided. -
Page 14: Mediavision 3D As A Player
The audio signals are processed via your TV set in this configuration. MediaVision serves as an audio and video source *. Connect the HDMI OUT socket of the MediaVision 3D to an HDMI IN socket on your TV set using the HDMI cable provided. -
Page 15: Startup
Other devices Press TV button; the LED Display above it You can operate various Loewe devices using the Assist remote control. The unit lights up for approx. 5 seconds buttons REC - DVD - AUDIO can be set for this. -
Page 16: Connecting To The Mains Supply
Switching on/off the Loewe TV set to compatible accessory units, e.g. MediaVision 3D. Digital Link HD is recommended if you wish to set up MediaVision 3D so that it is concealed Set the remote control for MediaVision 3D Mode by pressing and the complete device control is to occur via the Loewe TV set. -
Page 17: Navigation In The Menu
Close the menu. Press OK to confirm. Main Menu The Main Menu of the MediaVision 3D is shown on the screen of the TV set connected. Here you can select the required functions. Call up the Main Menu. Call up the Main Menu. -
Page 18: Language Menu
Language Menu Your MediaVision 3D attempts to automatically set the correct menu language via the HDMI-CEC connection to the same language as your Loewe TV set. You can also set the required menu language manually. Call up the Main Menu. -
Page 19: Menu Display
Menu Display Resolution You can set the resolution of the video signal at the HDMI OUT and COMPONENT In the Display Menu you can set the screen imaging of your MediaVision 3D VIDEO OUT socket. on your TV set. Select the option Resolution. -
Page 20: Audio Menu
A system interface Wireless Audio-Link is integrated in your MediaVision 3D. If you have connected a speaker system to MediaVision (page You can use this to connect your compatible Loewe subwoofer to MediaVision 3D 11), you can make the necessary settings here. -
Page 21: Dolby Pl Ii Menu
HDMI connection. MediaVision (page 11 to 13). Your TV set must support this function (Loewe TV sets from chassis SL155 / SL2xx). DIGITAL IN Select this option if the sound signal is fed in at the Call up the Main Menu. -
Page 22: Lock Menu
Start-up Lock Menu Select the option DVD Rating. Press button. You can specify playback restrictions in the Lock Menu. Use the numerical buttons to enter the current four-digit password. Press OK to confirm. Select desired option. Cancel The disc is not played completely Level 1 to 8 Only the scenes of the inserted discs corresponding to the assigned security level or whose level value is below this are played. -
Page 23: Network Menu
If a dynamic IP address has been assigned, a corresponding message will appear. Your MediaVision 3D can be connected via the LAN connection on the rear to a home network (LAN) with Internet connection (page 11 to 13). That means you can use the BD-LIVE™... -
Page 24: Bd-Live™Connection
Assist remote control. BD-LIVE™ connection Select the option OK. You can specify whether your MediaVision 3D may establish an Internet connec- Press OK to confirm. tion to the BD-LIVE™ service (page 33). Call up the Setup Menu. -
Page 25: Others Menu
Start-up Others Menu DivX® VOD You will receive the DivX® VOD (Video On Demand) registration code for borrowing and buying Movies via the DivX® VOD service. Blu-ray Disc Storage Select Call up the Main Menu. You can set whether you wish to use the integral memory in the device or a memory connected to the USB socket for the BD-LIVE function. -
Page 26: Software Updating
➠ The USB stick or the mains cable must never be disconnected • If you still do not have an independent access to the Loewe Support Portal, from the device during the updating process! set it up now. Click on Register now. -
Page 27: Playing Discs
Audio Inserting discs (CD-DA) The disc drawer of your MediaVision 3D is located on the front (page 7). To open the disc drawer, press the sensor button on the unit. Insert the disc in this drawer. The printed side of the disc should face upwards. Press the sensor... -
Page 28: Playback In General
Playing discs Playback in general Searching BD DVD-V DivX CD Your MediaVision 3D attempts to read the disc. During this Select the search direction and speed: READING is shown in the display. Press longer: Rewind. Increase the playback speed backwards Depending on the medium, the playback starts automatically or by pressing several times. -
Page 29: Disc Playback
Playing discs Disc playback Title selection CD DivX MP3 JPEG You can display various information on the inserted disc on the screen and set options for the playback. P+ during play, in order to select the next title/the next photo Call up Title Menu during play. -
Page 30: Angle
Playing discs Subtitles Movie information BD DVD-V DivX BD DVD-V DivX Call up Title Menu. Call up Title Menu. Select Subtitle Select Movie Information . Confirm with OK. Select Subtitle language - if available. If you are connected to the Internet, databases will now be queried in the Internet (e.g. -
Page 31: Flagging The Last Scene
Press the button several times until the symbol is displayed: Flagging the last scene BD DVD-V Your MediaVision 3D remembers the scene last played on the previous disc (Blu- ray Disc™, Video-DVD). The position of the last scene is saved in the memory, even Yellow button Zoom in when the device is switched off (or in Standby Mode). -
Page 32: Disc Menu
Playing discs Disc Menu Picture Mode You can make various settings for the screen imaging during play. BD DVD-V Call up Title Menu during play. Some discs contains menus for setting e.g. the language for the Movie sound or subtitles or selecting certain scenes. Accompanying Movie material can also be available. -
Page 33: Bd-Live
Set up the access to your home network as described from page 23. Open sound mode (press several times). ➠ Activate the option whereby your MediaVision 3D can set up Select option. an online connection to the BD-LIVE™ service (page 24). -
Page 34: Playing Media Files
Playing media files Video files You can use your MediaVision 3D to play digital media services that are saved on discs, USB storage media or on your home network. Main Menu Playing video files Call up the Main Menu. Call up the Main Menu. -
Page 35: Usb Mode
Playing media files USB Mode DivX subtitles Select the subtitles as described on page 29. • You can connect a USB storage medium directly to each of the USB sockets. Green button Select code table for DivX subtitles by pressing •... -
Page 36: Music Files
Playing media files Music files Title recognition. If you are connected to the Internet, databases will now be Playing music files queried in the Internet (e.g. Gracenote). If the query is successful, an album graphic along with possible supplementary information Call up the Main Menu. -
Page 37: Photo Files
Showing media files Photo files Select/Set options. Uppermost line Select photo with Showing photo files Slide show Pause/Play slide show with OK Call up the Main Menu. Music select Select music for slide show Select the Photo option in the Main Menu. Music Pause/Play music with OK Rotate Rotate image 90°... -
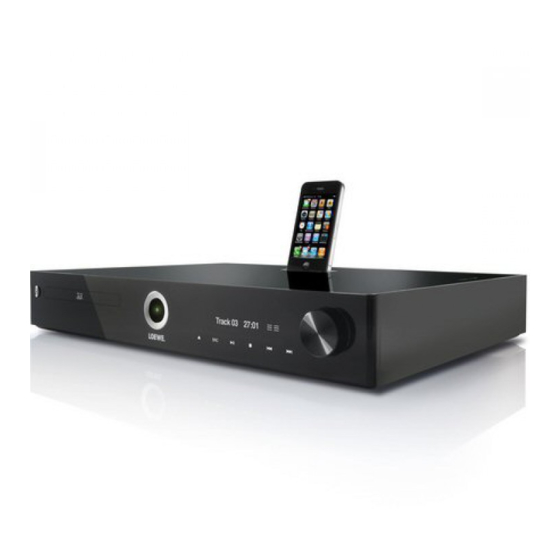
Page 38: Playback From Ipod
Playback from iPod iPod playback You can connect your Apple iPod to MediaVision allowing you to enjoy your music with the highest quality of reproduction. Your MediaVision has an integrated iPod dock. If MediaVision is switched on, the battery of the connected iPods will Call up the Main Menu. -
Page 39: Setting The Radio Stations
FM Radio Setting the radio stations Listening to the radio You can save up to 50 FM radio stations. Select saved radio station ➠ For a perfect radio reception, the unit must be connected to Press and hold for FM Radio Mode a suitable FM Radio antenna (page 7). -
Page 40: Importing Music
Importing Music Importing Audio CDs Select Start. Press OK to confirm. You can convert the titles (tracks) on your audio CDs to digital music files and then Select a storage medium and a potential destination access them easily with MediaVision. The music files are saved on a connected folder on this or create a new folder with New Folder. -
Page 41: Sleep Timer
Further functions Environment Sleep Timer Cardboard box and packaging In line with national regulations regarding the disposal of packaging materials, You can use the Sleep Timer to set the unit so that it automatically switches off we pay a fee to authorised recyclers who collect packaging from dealers. Never- after a time set by you. -
Page 42: Troubleshooting
The unit is not working properly. Unplug the mains plug from the mains socket and then try plugging it in again after 30 seconds. The software of your Loewe TV set is Please contact your dealer. not compatible with MediaVision 3D. -
Page 43: Glossary
Movie accelerated. That is optimum for sports broad- Interlaced Mode: Technology for image formation in interlaced scanning for casts, but it distorts the picture quality for calmer movies. The new Loewe TV sets flicker-free reproduction of frames with double frame rate. -
Page 44: Language Code List
Language code list Country code list Enter the corresponding code for the initial setting of "Disc Audio", "Disc Subtitles" Enter the corresponding code for the initial setting of "Country Code" (page 22). and/or "Disc Menu". (page 18). Maori 7773 Afghanistan Republic of Congo Afar 6565... -
Page 45: Technical Data
Playback Playback formats Blu-ray Disc™, Blu-ray 3D™ Editorial date 11.15. 4bth issue DVD-Video, DVD+/-R, DVD+/-RW (Video Mode) © Loewe Technologies GmbH, Kronach CD, CD-R, CD-RW Video standards TV standard PAL / NTSC All rights reserved including translation. Picture format 16:9, Letterbox 4:3, Design and technical specifications are subject to change without notice. -
Page 46: Trademark Rights
Trademark rights Blu-ray Disc™, Blu-ray™, Blu-ray 3D™, BD-Live™, BONUSVIEW™ as well as the The software provided by Gracenote ("Gracenote software") enables this application to identify music albums and/or files online and access music-related data from logos and brands are trademarks of the Blu-ray Disc Association. online servers or integral databases (summarised under the designation "Gracenote ABOUT DIVX VIDEO: DivX®... -
Page 47: Declaration Of Conformity
General Public License (LGPL) and/or other open source licenses. This equipment is in compliance with the essential require- The publication of this program by Loewe is carried out WITHOUT ANY GUARAN- ments and other relevant provisions of Directive 1999/5/EC. TEE OR SUPPORT, particularly without an implicit guarantee concerning MARKET It may be operated in all countries in the EU and also in MATURITY or the USABILITY FOR A SPECIFIC PURPOSE. -
Page 48: Service
Tel +30 - 210 672 12 00 Olaya Street, Near Kingdom Center E-mail: info@icontrol-leb.com Fax +30 - 210 674 02 04 RIYADH, SAUDI ARABIA E-mail: christina_argyropoulou@ P.O Box 92831 Riyadh 11663 isembel.gr Tel +966-11-4640927 © by Loewe Technologies 01.09.15 Fax +966-11-4640759 E-mail: hkkurkjian@gmail.com...
Need help?
Do you have a question about the MediaVision 3D and is the answer not in the manual?
Questions and answers