
Related Manuals for Essilor Neksia


Summary of Contents for Essilor Neksia
- Page 1 User Manual...
-
Page 3: Table Of Contents
> C ANUAL ONTENTS ONTENTS NTRODUCTION I. F IRST STEPS 1. Descriptive diagrams 2. Using the edger a. Turning on the edger b. Switching off off the edger c. Using the touch screen and keypads d. Edging screen II. E DGING A LENS 1. - Page 4 > C ANUAL ONTENTS d. Adjusting the chamfer e. Adjusting the groove 3. Restoring the factory settings IV. M & AINTENANCE SERVICING 1. Carrying out the autotests 2. Checks and calibration a. Calibrating the feelers b. Calibrate the touch screen 3.
-
Page 5: Introduction
• the user manual, on the CD-ROM The screens and features vary according to the edger used: • Neksia Classic • Neksia • Neksia drill This manual documents the use of the Neksia Drill edger. Neksia > v1.0 - 02.14... -
Page 7: First Steps
I. F IRST STEPS... -
Page 8: Descriptive Diagrams
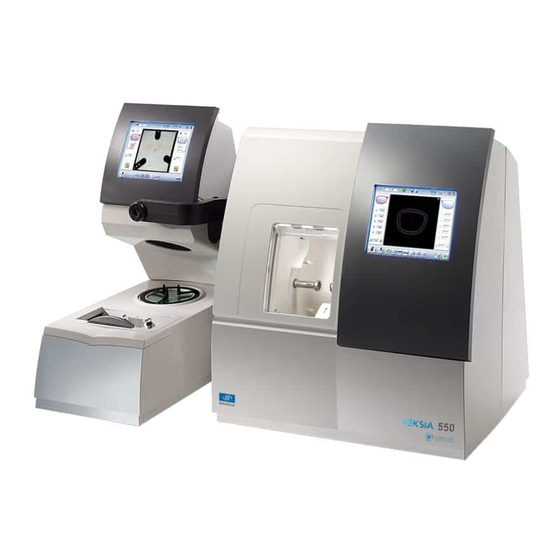
• Description of the edger p.8) • Using the device p.10) 1. D ESCRIPTIVE DIAGRAMS This section consists of the list and descriptions of accessories for the edger. Trough Main switch Connectors Screen Manufacturer plate Neksia > v1.0 - 02.14... - Page 9 • Orange dressing stone for glass roughing wheel • White dressing stone for finishing wheel • Square dressing stone for polishing wheel • Drill bit changeover tool • Open-ended spanners for tool changeover (quantity 2) Neksia > v1.0 - 02.14...
-
Page 10: Using The Edger
• select the edging screen Select then > A confirmation message is displayed on each screen. Select to confirm. > The edger will switch off. Neksia > v1.0 - 02.14... -
Page 11: Using The Touch Screen And Keypads
The numeric keypad is displayed for the input of values. • Reset the fields • Back • Confirm • Cancel and go back to the work screen • The alphanumeric keyboard is displayed for storing, calling and searching for jobs. Neksia > v1.0 - 02.14... -
Page 12: Edging Screen
Job reference (alphanumeric characters) d. Edging screen Main menus of the edging screen: Work screen indicator Tool wear indicators Settings Devices connected Active eye and information on the shape Size increase / reduction Work area Machine shutdown. Neksia > v1.0 - 02.14... - Page 13 IRST STEPS Job call Actions available for the current screen Start the edging cycle Detailed functions For more information, consult the section Edging a lens > Work environment of the edger > Captioned screen. p.16) Neksia > v1.0 - 02.14...
- Page 14 > I. F ANUAL IRST STEPS Neksia > v1.0 - 02.14...
-
Page 15: Edging A Lens
II. E DGING A LENS... -
Page 16: Edger Working Environment
Menu screen Size reduction / increase (mm) Job call button from the tracer Lens material ◦ Plastic lens - index 1.5 & ◦ Polycarbonate lens ◦ Medium/High index plastic lens - index > 1.5 Neksia > v1.0 - 02.14... - Page 17 For all types of materials. This cycle offers a more sophisticated edging mode than the standard cycle, dedicated to thin lenses or hydrophobic lenses. Polishing ◦ Polished lens ◦ Non-polished lens Front surface chamfering ◦ Thin chamfer ◦ Thick chamfer ◦ No chamfering Rear surface chamfering Neksia > v1.0 - 02.14...
-
Page 18: Calling A Shape
A reminder of the type of posiblock required is displayed on the shape. It is crucial to use the proper accessory to edge the lens. Otherwise, an error message is displayed at the start of the cycle. Neksia > v1.0 - 02.14... -
Page 19: Lens Set-Up And Feeling
: Manual lens clamping is particularly suited to hydrophobic lenses, thick lenses and high-camber lenses, as it ensures that the lens won't come off the pad before clamping. Make sure you move your hand well away before you start the edging cycle. Neksia > v1.0 - 02.14... -
Page 20: Beveling
◦ a modification at a point of the bevel curve p.26) ◦ a displacement of the bevel curve p.27) • You can consult the description of the customized bevel screen. p.22) Neksia > v1.0 - 02.14... -
Page 21: Automatic Beveling
Otherwise, start edging the second lens. Select the lens directly on screen, on the left or right of the work area. > The edging screen for the second lens is displayed. All finishes chosen and the modifications made are kept. Neksia > v1.0 - 02.14... -
Page 22: Legend Screen For Customized Bevels
The cursor is represented by the green square along the shape. To move it, select it directly or use the buttons. Zoom window Represents the bevel profile and indicates the distance between the bevel crest and the front and rear surfaces of the lens at the cursor position. Neksia > v1.0 - 02.14... -
Page 23: Customized Beveling
Thin lens for which the base is Compliance with original shape. groove (groove approximately equal to the meniscus Job using a specific frame. with of the groove. meniscus & Call the desired shape located on the tracer. Neksia > v1.0 - 02.14... - Page 24 All groove imperfections will be reproduced. Press to adjust the distribution value if required. Press > The edging cycle starts. > When the edging cycle is finished, the retouch screen is displayed. Press to release the lens. Neksia > v1.0 - 02.14...
-
Page 25: Modifying The Bevel Curve
Press > The edging cycle starts. > When the edging cycle is finished, the retouch screen is displayed. Press to release the lens. If necessary, retouch the lens. Neksia > v1.0 - 02.14... -
Page 26: Modifying The Bevel Curve At A Particular Point
Press Press to go back to the customized bevel finish screen. > For the second lens, the customized bevel icon is pre-selected and the trajectory modification icon is displayed. Neksia > v1.0 - 02.14... -
Page 27: Displacing The Bevel Curve
This section describes the procedures for the creation of a groove: • In automatic mode , you do not have anything to configure. All the data is automatically p.28) retrieved from the tracer. The lens cutting starts automatically after the feeling cycle. Neksia > v1.0 - 02.14... -
Page 28: Automatic Grooving
The door closes, the lens is clamped and then felt. > The edging cycle starts. > When the edging cycle is finished, the retouch screen is displayed. Press to release the lens. If necessary, retouch the lens. Neksia > v1.0 - 02.14... -
Page 29: Customized Groove Menu Screen
Lens curve tracking: the camber of the groove is adjustable. Lens thickness ◦ Maximum lens thickness - represented by the white square along the shape ◦ Minimum lens thickness - represented by the red square along the shape Cursor movement Neksia > v1.0 - 02.14... - Page 30 General modification of the groove curve ◦ Modification of a point in the groove curve ◦ Displacement of the groove curve Navigation ◦ Stop the cycle ◦ Back to the main edging screen ◦ Start the edging cycle Neksia > v1.0 - 02.14...
-
Page 31: Customized Grooving
Choose the type of cycle. Choose whether or not to polish and/or chamfer your lens. For more information, refer to the section Edging a lens > Polishing and Edging a lens > p.39) Chamfering p.40) Press Neksia > v1.0 - 02.14... -
Page 32: Modifying The Groove Curve
You will access the trajectory modification screen. Press to select the general modification of the groove curve. Use the buttons to move the groove curve. • Press to move the curve towards the front surface of the lens. Neksia > v1.0 - 02.14... -
Page 33: Modifying A Point In The Groove Curve
Using the cursor, select the point on the curve that you want to move or click directly on the screen. Use the buttons to move the point on the selected curve. • Press to move it towards the front surface of the lens. Neksia > v1.0 - 02.14... -
Page 34: Displacement Of The Groove Curve
The position of the groove as well as the distances between the center of the groove and the front & rear surfaces of the lens are displayed in the zoom window. Press > The edging cycle starts. > When the edging cycle is finished, the retouch screen is displayed. Neksia > v1.0 - 02.14... -
Page 35: Flat-Edge Finishing
Press > The door closes, the lens is clamped and then felt. > The edging cycle starts. > When the edging cycle is finished, the retouch screen is displayed. Press to release the lens. Neksia > v1.0 - 02.14... -
Page 36: Drilled Job
The drilling function is selected by default. • The automatic mode is selected by default. Select lens material. Select the type of finish. Select the type of cycle. Choose whether or not to polish and/or chamfer your lens. Neksia > v1.0 - 02.14... -
Page 37: Customized Drilling Menu Screen
The edging screen for the second lens is displayed. All finishes chosen and the modifications made are kept. b. Customized drilling menu screen Type of drilling ◦ Perpendicular to the front surface ◦ Perpendicular to the rear surface Neksia > v1.0 - 02.14... -
Page 38: Customized Drilling
After the tracing of a shape with drilling settings: • The drilling function is selected by default. • The automatic mode is selected by default. Select lens material. Change the edging mode. Press to select customized mode Neksia > v1.0 - 02.14... -
Page 39: Polishing
Otherwise, start edging the second lens. Select the lens directly on screen, on the left or right of the work area. > The edging screen for the second lens is displayed. All finishes chosen and the modifications made are kept. 6. P OLISHING Neksia > v1.0 - 02.14... -
Page 40: Chamfering
7. C HAMFERING The chamfer, also called counter-bevel, removes the sharp edge of the lens. • Standard value of a small chamfer: 0.20 mm • Standard value of a large chamfer: 0.40 mm Neksia > v1.0 - 02.14... - Page 41 The chamfers available also depend on the lens shape and the posiblock used when blocking. Press the buttons to configure a thin chamfer, a thick chamfer or no chamfer on the front and rear surfaces of the lens. Neksia > v1.0 - 02.14...
-
Page 42: Retouching
> II. E ANUAL DGING A LENS 8. R ETOUCHING Diameter modification Manual lens clamping Start the retouch Neksia > v1.0 - 02.14... - Page 43 In all other cases, the door closes, the lens is clamped automatically, then the retouching starts. Select the second lens to be edged directly on screen, on the left or right of the work area. > The edging screen for the second lens is displayed. Neksia > v1.0 - 02.14...
- Page 44 > II. E ANUAL DGING A LENS > All finishes chosen and the modifications made are kept. The retouch done on the first lens is automatically saved for the edging of the second lens. Neksia > v1.0 - 02.14...
- Page 45 > II. E ANUAL DGING A LENS Neksia > v1.0 - 02.14...
- Page 47 III. C ONFIGURING THE EDGER...
-
Page 48: Configuring The Edger
The following screen is displayed: Time Use the arrows to set the time. Date Use the arrows to set the date. Type of date display Select the type of display out of the available formats. Language Neksia > v1.0 - 02.14... -
Page 49: Connections
Screensaver and screen brightness This menu is used to configure a screensaver and the brightness of the work area. To access this menu from your work screen, select > > The following screen is displayed: Neksia > v1.0 - 02.14... -
Page 50: Adjusting The Precision Of The Edger
If lenses of a particular material always seem too small or too big after edging, you can adjust their diameter according to the type of frame. To access that menu from your edger work screen, select > > The following screen is displayed: Frame types Neksia > v1.0 - 02.14... -
Page 51: Adjusting The Position Of The Bevel And Groove
The following screen is displayed: Default bevel position ◦ Press to move the bevel towards the front surface of the lens. ◦ Press to move the bevel towards the rear surface of the lens. Default polished bevel position Neksia > v1.0 - 02.14... -
Page 52: Adjusting The Diameter Of Drill-Holes
Increasing or reducing the default drill-hole diameter a. Press the value to be modified. > The numeric keypad is displayed. b. Enter the new value. ◦ Negative value: the hole will be smaller ◦ Positive value: the hole will be larger Neksia > v1.0 - 02.14... -
Page 53: Adjusting The Chamfer
Press the value to be modified. > The numeric keypad is displayed. b. Enter the new value. ◦ Negative value: the chamfer will be smaller ◦ Positive value: the chamfer will be larger c. Press on to confirm. Neksia > v1.0 - 02.14... -
Page 54: Adjusting The Groove
At the bottom right of certain settings screens, the button can be used to restore the factory parameters of the page. • Press to cancel and go back to the settings screen. • Press to confirm the reset. Neksia > v1.0 - 02.14... -
Page 55: Maintenance & Servicing
IV. M & AINTENANCE SERVICING... -
Page 56: Carrying Out The Autotests
> > from your work screen. Edger autotests Initialisation and rotation of lens shafts Reproducer: lens shaft raising and lowering Right feeler movement Left feeler movement Closing of lens shafts Wheel rotation GCD module rotation Neksia > v1.0 - 02.14... -
Page 57: Checks And Calibration
During the feeler calibration cycle, the edger factors in the wear on the feelers since the last calibration and makes an adjustment to offset any difference. Have the plastic calibration gauge to hand. Press > > to access the calibration menu. The following screen is displayed: Neksia > v1.0 - 02.14... - Page 58 > The calibration cycle is complete. Press if the feelers are not aligned. > A message is displayed indicating that calibration by a technician is required: contact your technical department. Neksia > v1.0 - 02.14...
-
Page 59: Calibrate The Touch Screen
This menu enables you to view the numbers of cycles performed by the edger. It also gives you access to the technical history. • Edger cycles p.59) • Technical history and errors p.60) a. Edger cycles From the work screen, select > > to view the number of cycles carried out by the edger. Neksia > v1.0 - 02.14... -
Page 60: Technical History And Errors
Glass roughing wheel / Finishing wheel / Polishing wheel Number of lenses cut Next page / Previous page b. Technical history and errors From the work screen, select > > to access the list of error messages. The following screen is displayed: Neksia > v1.0 - 02.14... - Page 61 Error message codes Classed by display frequency. Error message pages Description of selected error Use the scroll box on the right of the message box to scroll through the text. Press to return to the work screen. Neksia > v1.0 - 02.14...
-
Page 62: Changing Or Cleaning The Edger Tools
• Always use the tools recommended by Essilor. • Do not use the edger if one of the tools is missing. Never remove a used or broken tool if you cannot replace it. - Page 63 Position the open-ended spanner between the two grooving and chamfering wheels. Loosen the drill bit by bringing the tool towards you. Remove the drill bit and replace it with the one you want, by putting it in the stop at the bottom of the chuck. Neksia > v1.0 - 02.14...
-
Page 64: Changing The Grooving Or Chamfering Wheel
Trimaterial chamfering wheel (option) May be ordered, for chamfering glass lenses. Washer We recommend that you change the grooving and chamfering wheels every 5,000 grooves or chamfers. Have the following to hand: • Allen key • Open-ended spanner Neksia > v1.0 - 02.14... - Page 65 For instructions on how to proceed, consult section: Maintenance and servicing > Changing the tools on the edger > Changing or cleaning the drill bit p.62) Position the open-ended spanner behind the chamfering wheel to hold the spindle, and insert the Allen key in the screw. Neksia > v1.0 - 02.14...
-
Page 66: Maintaining And Cleaning The Edger
AINTAINING AND CLEANING THE EDGER This section describes the procedures for servicing and cleaning the digital system: • Precautions required p.66) • Cleaning the door and GCD module p.67) • Dress the wheels p.70) a. Precautions required Neksia > v1.0 - 02.14... -
Page 67: Cleaning The Window And Gcd Module
> The door closes. > The cleaning is done automatically. Have a Phillips screwdriver to hand. Disassembling and cleaning the window Press > The module moves into position. > The door opens. Neksia > v1.0 - 02.14... - Page 68 > IV. M & ANUAL AINTENANCE SERVICING Unscrew the screw using the Phillips screwdriver whilst holding the window in place. Slide the window then pull it towards you to remove it. > The window is disassembled. Neksia > v1.0 - 02.14...
- Page 69 > IV. M & ANUAL AINTENANCE SERVICING Clean the window with water but do not rub. To reassemble the window, reverse the procedure. Precautions Ensure that you correctly position the window in the door runners. Neksia > v1.0 - 02.14...
-
Page 70: Dressing The Wheels
For each wheel, there is a specific dressing stone, whose icon is displayed on the screen: • Orange dressing stone for the glass roughing wheel • White dressing stone for the finishing wheel • Square dressing stone for the polishing wheel Neksia > v1.0 - 02.14... - Page 71 Once the cycle is finished, press to open the clamps and remove the dressing stone. If the dressing stone shows a residual ring, remove it in order not to disrupt subsequent dressing operations. Neksia > v1.0 - 02.14...
- Page 72 > IV. M & ANUAL AINTENANCE SERVICING Neksia > v1.0 - 02.14...
-
Page 73: Technical Data
ECHNICAL DATA... -
Page 74: Edger
Essibox Integrated auto-maintenance functions (self-calibration, autotests) Size of colour touch screen: 8.4 inches Dimensions: L 560, D 420, H 620 mm Weight: 54.7 kg Power supply: 220-240V – 50/60 Hz or 100-120V – 50/60 Hz Neksia > v1.0 - 02.14... -
Page 75: Environment
The back of your machine must be at least 20 cm away from a wall. This machine is neither adapted nor intended to operate in an environment where there is a risk of explosion. Neksia > v1.0 - 02.14... - Page 76 > T ANUAL ECHNICAL DATA Neksia > v1.0 - 02.14...
-
Page 77: General Information
ENERAL INFORMATION... -
Page 78: Symbols
Essilor cannot be held responsible for any malfunction or loss of data resulting from such errors or omissions. -
Page 79: Copyright
The aim of all edgers is to obtain a final shape on a lens, by removal of material. This process generates dust whose type depends on the lens and the materials used. The materials used for coating the Essilor wheel and consumed during its use are not toxic or allergenic. Nevertheless, users must check that the ground materials are not toxic. -
Page 80: Electromagnetic Waves
It is an electrical appliance compliant with the applicable safety standards. In the event of malfunction, repairs must be carried out by qualified personnel approved by Essilor. Otherwise, user safety is likely to be compromised. In the event of a long period of non-use and before maintenance and/or replacement of certain accessories, you must unplug your edger from the mains. -
Page 81: Glossary
LOSSARY... - Page 82 The indices vary according to the materials used for the lenses: • Plastic lens: 1.5 • Polycarbonate lens: 1.59 • Medium or High Index lens: > 1.5 • Trivex™ lens: 1.5 to 1.6 • Glass lens: 1.5 to 1.9 Neksia > v1.0 - 02.14...
- Page 84 Essilor Instruments USA 8600 W. Catalpa Avenue, Suite 703 Chicago, IL 60656 Phone: 855.393.4647 Email: info@essilorinstrumentsusa.com www.essilorinstrumentsusa.com...
Need help?
Do you have a question about the Neksia and is the answer not in the manual?
Questions and answers