Table of Contents
Advertisement
Advertisement
Table of Contents

Related Manuals for ZUG Combair S Series


Summary of Contents for ZUG Combair S Series
- Page 1 Operating instructions Combair S Oven • Hob...
- Page 2 The product family (model number) corresponds to the first alphanumerics on the identi- fication plate. These operating instructions apply to: Type Product family Size system 21009 55-600/55-762 BCS60 21010 60-600/60-762 22009 55-600/55-762 ECS60 22010 60-600 Variations depending on the model are noted in the text. © V-ZUG Ltd, CH-6302 Zug, 2018...
-
Page 3: Table Of Contents
Contents Grill-forced convection......... 22 Safety precautions 5 Tips and tricks 23 Symbols used............ 5 General safety precautions........ 5 Baking and roasting.......... 23 Appliance-specific safety precautions .... 6 Cakes .............. 23 Instructions for use.......... 7 Uneven browning.......... 23 Saving energy............ - Page 4 Notes 38 Service & Support 39...
-
Page 5: Safety Precautions
Safety precautions Symbols used General safety precautions Denotes important safety precau- tions. Failure to observe said precautions ▪ Read the operating instruc- can result in injury or in damage to tions before using the appli- the appliance or fittings! ance for the first time! Information and precautions that should be observed. -
Page 6: Appliance-Specific Safety Precautions
1 Safety precautions ently installed electrical install- lishments; by guests in hotels, ation in accordance with the motels and other accommod- installation regulations. ation establishments; in bed ▪ If the mains cable of this ap- and breakfast establishments. pliance is damaged, it must ▪... -
Page 7: Instructions For Use
1 Safety precautions Correct use stance, a corrosive or explos- ▪ The appliance is designed for use in ive atmosphere (dust, steam the home for preparing food. Under no or gas) or condensing mois- circumstances flambé or cook food us- ture. - Page 8 1 Safety precautions ▪ Ensure there are no foreign bodies or ▪ Accessories get hot in the cooking pets in the cooking space before clos- space. Use protective gloves or oven ing the appliance door. cloths. ▪ Objects that could pose a danger if the Caution: Risk of injury! appliance were accidentally switched ▪...
- Page 9 1 Safety precautions ▪ Do not leave the hotplates switched on at a high power level for any length of time without any cookware as this can damage them.
-
Page 10: Appliance Description
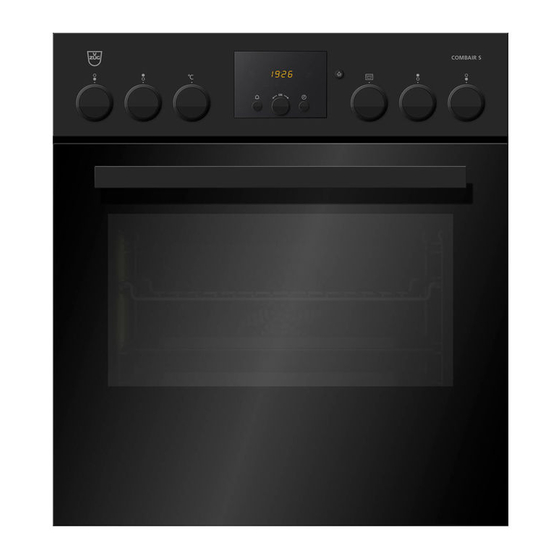
Appliance description Construction Operating and display elements Dials Ventilation opening Door handle Appliance door Appliance drawer/Heatable appliance drawer * * Depending on model Operating and display elements... - Page 11 2 Appliance description Dials Cooking space temperature Operating mode The symbols for the different operating modes and the temperature values are located on the retractable dials and are visible when extended. ▸ To extend the dial, press it in the middle. ▸...
-
Page 12: Cooking Space
2 Appliance description Cooking space Appliance door Grill/Top heat guard Door seal Cooking space ventilation Bottom heat Grill/Top heat Illumination Levels (labelled) Hot air fan Protective foil Cooking space temperature sensor Accessories Incorrect handling can cause damage! Do not use knives or cutting wheels on the accessories. TopClean baking tray ▪... -
Page 13: Operating The Appliance
3 Operating the appliance Wire shelf ▪ For standing roasting and baking tins on ▪ For standing meat, frozen pizza, etc. on ▸ Ensure that the cross strut 1 is to the back of the cook- ing space. It enables the food to be removed safely from the cooking space. -
Page 14: Selecting The Operating Mode
4 User settings There is likely to be some smoke and odour given off, we therefore recommend ventilating the room well during this phase. See separate operating instructions on using a glass ceramic hob for the first time and its operation and follow the instructions given. Selecting the operating mode ▸... -
Page 15: Time Display
4 User settings ▸ Press the adjusting knob to confirm the setting. ▸ Turn the adjusting knob to move to the next setting should you wish to change any other settings. ▸ The user settings menu ends automatically after 10 seconds. After a power failure the factory settings are active again. -
Page 16: Time Functions
5 Time functions Time functions Available time functions The following time functions are available: ▪ Time ▪ Timer ▪ Operating time – time-controlled switch-off of the appliance ▪ Delayed start – time-controlled switch-on and switch-off of the appliance When the appliance is switched off, the time display is dimmed between 24:00 and 6:00. -
Page 17: Operating Time
5 Time functions Starting ▸ Press the adjusting knob to start the timer. – The countdown to the time remaining is visible in the display. – The symbol illuminates. Set duration finished When the set duration is up – a sequence of 5 short acoustic signals is repeated for 1 minute –... -
Page 18: Delayed Start
5 Time functions Switching off before time ▸ Set the dial to «0». Operating time finished When the set duration is up – the operating mode selected ends automatically – a long, intermittent acoustic signal is emitted for 1 minute – flashes in the display –... - Page 19 5 Time functions The switch-off time can be delayed by a maximum of 23 hrs. and 59 mins. If the time format has been selected, the switch-off time can be delayed by a maximum of 11 hrs. and 59 mins. ▸...
-
Page 20: Operating Modes
6 Operating modes Operating modes Overview of operating modes All the operating modes are described below. ▸ Place tins, moulds, etc. on the wire shelf. ▸ Ensure that the «sloped» side of the baking tray is facing the back of the cooking space. -
Page 21: Hot Air
6 Operating modes The cooking space is heated by the bottom heating element. Uses ▪ Baking flan bases ▪ Making preserves Use a dark enamelled tray or a black tray or tin for crispy results. Hot air Temperature range 50–270 °C Recommended value 180 °C Level... -
Page 22: Pizzaplus
6 Operating modes PizzaPlus Temperature range 50–270 °C Recommended value 200 °C Level 2 (or 1) The cooking space is heated by hot air and bottom heat. The base of the food is baked particularly intensively. ▪ Pizza ▪ Flans and quiches Use a dark enamelled tray or a black tray or tin without baking paper for very crispy results. -
Page 23: Tips And Tricks
7 Tips and tricks Tips and tricks Baking and roasting Result Solution ▪ The baking or roast looks ▸ Next time, set a lower temperature and extend good on the outside but is the operating time. still doughy or raw on the in- ▸... -
Page 24: Saving Energy
8 Heatable appliance drawer option Saving energy operating modes consume less energy than the operating modes. ▸ Avoid opening the appliance door frequently. ▸ Only switch the illumination on when needed. ▸ Use residual heat: for longer cooking times, i.e. over 30 minutes, switch the appliance off 5–10 minutes before the end of the cooking time. -
Page 25: Cleaning The Door Seal
9 Care and maintenance Cleaning the door seal ▸ Clean the door seal with a soft cloth dampened with water, but do not use any clean- ing agent. ▸ Wipe dry with a soft cloth. Removing the door seal ▸ Pull the seal slightly out at the corners and unhook. Cleaning the appliance door ▸... -
Page 26: Cleaning The Cooking Space
9 Care and maintenance Removing and reassembling the shelf guides ▸ Push the shelf guides at the top back- wards and take out of the opening. ▸ Swing the shelf guide into the middle of the cooking space and remove from the opening at the bottom. -
Page 27: Replacing The Halogen Light Bulb
9 Care and maintenance ▸ When grilling: line the original baking tray with aluminium foil and then place it under- neath the wire shelf. ▸ Use porcelain or glassware for grilling large, bulky food. ▸ Wipe away food spills as soon as possible when still in a liquid form. ▸... -
Page 28: Trouble-Shooting
10 Trouble-shooting Trouble-shooting 10.1 Procedure This section lists faults that can be solved simply by following the instructions given. If another fault is displayed or the fault cannot be remedied, please call Customer Ser- vices. Before calling Customer Services: ▸ Please note down the serial number (FN) (see 'Technical data' for the identification plate) and the error message in full, e.g. - Page 29 10 Trouble-shooting … when heating up, thick smoke is given off Possible cause Solution ▸ Clean the heating elements when they have cooled ▪ When roasting with down. , fat may drip on to the Under no circumstances use strong detergent or ab- bottom heating element.
-
Page 30: After A Power Failure
11 Hob 10.3 After a power failure After a power failure – flashes in the display – the symbol flashes ▸ Set the dial to «0». ▸ Turn the adjusting knob to set the hour. ▸ Press the adjusting knob to confirm. ▸... -
Page 31: Cookware
11 Hob Dials The numbers for the different power levels are located on the retractable dials and are visible when extended. ▸ To extend the dial, press it in the middle. ▸ To retract the dial, first set it to «0» and then press it in the middle. 11.2 Cookware Suitable cookware... -
Page 32: Care And Maintenance
12 Accessories and spare parts Overview of power levels Power level Cooking method Melting, gentle warming Butter, chocolate, gelatine, sauces Swelling Rice Simmering, reducing, steaming Vegetables, potatoes, sauces, fruit, fish Simmering, braising Pasta, soup, braised meat Gentle frying Rösti (hash browns), omelettes, breaded fried foods, sausages Frying, deep frying, fast heating Meat, chips, boiling water... -
Page 33: Spare Parts
13 Technical data 12.3 Spare parts Shelf guides left/right Protective foil for Halogen light bulb Door seal bottom of cooking space The halogen light bulb is also available from specialist retailers. Technical data External dimensions ▸ See installation instructions Electrical connection ▸... -
Page 34: Product Fiche
13 Technical data 13.3 Product fiche In accordance with EU Regulation No.: 66/2014 Brand – V-ZUG Ltd Type of appliance – Oven | Oven | Hob Model designation – BCS | BCS DV | ECS Mass of MS 55 appliance... -
Page 35: Disposal
14 Disposal Disposal 14.1 Packaging Never allow children to play with packaging material due to the danger of injury or suffocation. Store the packaging material in a safe location or dispose of it in an environmentally-friendly way. 14.2 Safety Render the appliance unusable to prevent accidents caused by improper use (e.g. through children playing): ▸... -
Page 36: Index
Index Accessories ..........12, 32 Grill ..............22 Cleaning ............ 25 Grill-forced convection ........22 Acoustic signal ..........15 Appliance disposal .......... 35 Appliance door Halogen light bulb ........... 27 Cleaning ............ 25 Heatable appliance drawer......24 Removing ............ 25 Cleaning ............ - Page 37 15 Index Cleaning ............ 24 Wire shelf............13 Safety guard............26 Safety precautions Appliance-specific .......... 6 Before using for the first time....... 7 Correct use ............ 7 General ............. 5 Saving energy..........24, 34 Selecting the cooking space temperature ..............14 Self-cleaning ............. 26 Service &...
- Page 38 Notes...
- Page 39 Your repair order Call the free service number 0800 850 850 to contact your nearest V-ZUG service centre. You can arrange an on-site visit by us by phone if you wish. General queries, accessories and service agreement V-ZUG will be happy to help you with any general administrative or technical queries, to accept your orders for accessories and spare parts and to inform you about our pro- gressive service agreements.
- Page 40 ▸ Press the button. ▸ Turn the adjusting knob to set the timer duration. J21009013-R04 V-ZUG Ltd, Industriestrasse 66, CH-6302 Zug Tel. +41 58 767 67 67, Fax +41 58 767 61 61 info@vzug.com, www.vzug.com Service Centre: Tel. 0800 850 850...
Need help?
Do you have a question about the Combair S Series and is the answer not in the manual?
Questions and answers