
Related Manuals for Belkin F5D6001


Summary of Contents for Belkin F5D6001
- Page 1 802.11b Wireless Desktop Network Card Connect your desktop to a wireless network User Manual F5D6001...
-
Page 2: Table Of Contents
Introduction Features ...1 Product Specifications...2 System Requirements ...2 Package Contents ...2 Knowing your Desktop Network Card...3 Installing the Card ...4 The Belkin Wireless Network Monitor Utility...10 Troubleshooting ...18 Information...19 TABLE OF CONTENTS... -
Page 3: Introduction
Thank you for purchasing the Belkin Wireless Desktop Network Card (the Card). This high-speed Card provides you with an innovative wireless networking solution that is easy to set up and use. The Card transmits at a rate of 11, 5.5, 2, or 1Mbps to let you share files and printers on the network—without the hassle... -
Page 4: Product Specifications
• PC with available PCI expansion slot • PC running Windows 98SE, 2000, Me, or XP • CD-ROM drive (for loading software) Package Contents • Belkin Wireless Desktop Network Card • External Antenna • Software CD • Quick Installation Guide •... -
Page 5: Knowing Your Desktop Network Card
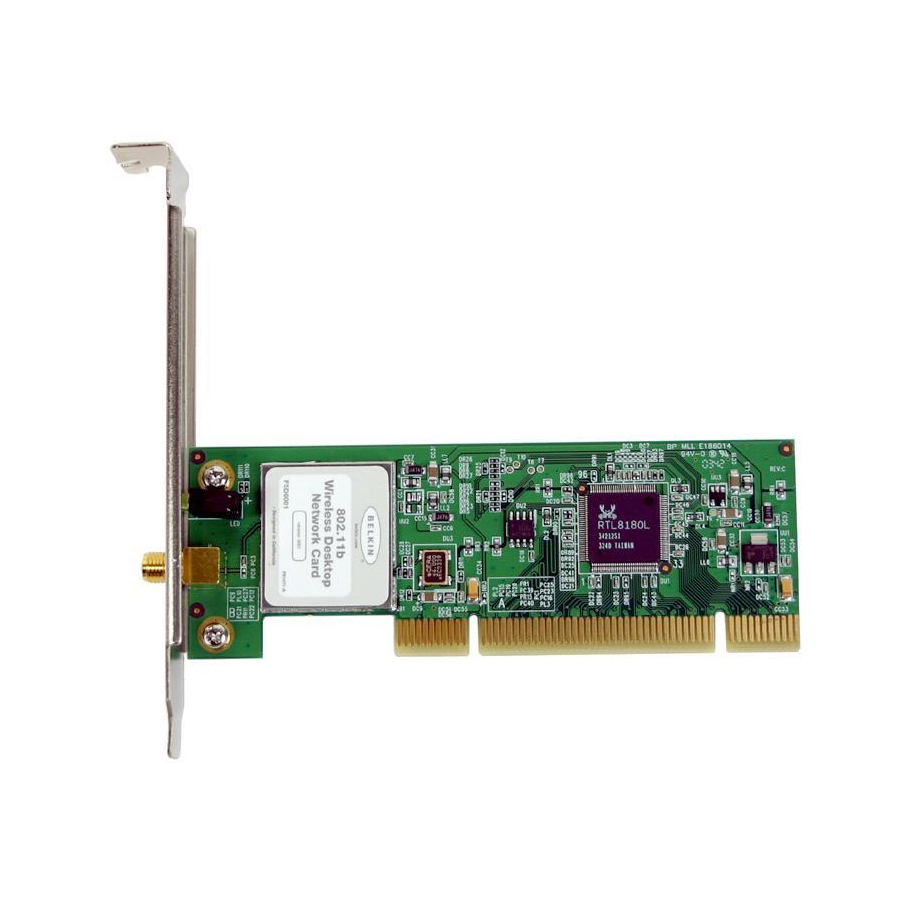
KNOWING YOUR DESKTOP NETWORK CARD Warning! Your Card is sensitive to static electricity. Handle the Card by the edges and avoid touching the PCI edge connector or any of the components on the green printed circuit board. Antenna Antenna Cable... -
Page 6: Installing The Card
Step 1: Software and Driver Installation 1. Insert the CD into your CD-ROM drive. 2. The Belkin Wireless Desktop Network Card Setup Utility screen will automatically appear. If it does not appear within 15-20 seconds, then select your CD-ROM drive and double-click on the folder named “Files”. - Page 7 4. The installer will start. You will see a progress screen. Go to the next step. 5. Next, you will see an introduction screen. Click “Next” to continue with the installation of the Card. 6. If you are using Windows 2000 or Windows XP, you may see a screen similar to the one below.
- Page 8 7. When the software installation is complete, you will see a screen prompting you to finish. Click “Finish”. 8. A message will appear telling you that you need to shut down your computer to install the Card. Choose “Yes, I want to shut down my computer now” to shut down your computer.
- Page 9 Step 2: Installing the Card into your PC 1. POWER OFF THE COMPUTER AND DISCONNECT THE POWER CORD. 2. Remove the screws that secure the computer cover and remove the cover. 3. Touch any metal part of the case to ground yourself. This will discharge any static electricity that could damage your product or your computer.
-
Page 10: Step 3: Finishing The Installation
Step 3: Finishing the Installation 1. After you have installed your Card and replaced the cover on your computer, turn your computer back on and let it boot up. 2. Windows will detect that new hardware has been installed. Depending on which version of Windows you are using, a window similar to the one pictured below will appear. - Page 11 Windows 98SE or Me users: You may be asked to restart the computer. Let the computer restart before going to the next step. 5. When the installation is complete or your computer has restarted, the Belkin Wireless Network Utility icon will appear on your desktop. To open the Monitor Utility, double-click on this icon.
-
Page 12: The Belkin Wireless Network Monitor Utility
THE BELKIN WIRELESS NETWORK MONITOR UTILITY The Wireless Network Monitor Utility is a central point on your computer that allows you to control your Wireless Notebook Network Card. Among the things you can do using the Utility, you can: • Choose the wireless network you want to connect to •... - Page 13 Card or you can use the Belkin Wireless Network Monitor Utility. We suggest that you use the Belkin Utility to control your Card. If you choose to use the WZC, directions for operation of the WZC are available in the Windows XP help file.
- Page 14 THE BELKIN WIRELESS NETWORK MONITOR UTILITY Using the Belkin Utility (Windows 98SE, Me, 2000, XP) When the Utility opens, you will see the Utility screen. The view will be of the Configuration screen. This is the screen you will use most often to choose and change networks.
- Page 15 THE BELKIN WIRELESS NETWORK MONITOR UTILITY Connecting to a Wireless Network After you install your Card for the first time, it will connect to your wireless network automatically. You should not have to do anything further to connect to a network. To manually connect to a wireless network, see the steps below.
- Page 16 THE BELKIN WIRELESS NETWORK MONITOR UTILITY You may find it easier to use the Quick Connect screen to connect to networks. To switch to the Quick Connect screen, right-click on the Utility system tray icon ). In the menu that appears, select “Use Quick Connect screen”. After you...
- Page 17 Creating and Using a Profile Profiles are automatically created when you connect to a network. From the factory, Belkin has also created one profile called “Default”. This is a special profile that will connect to the first wireless network that the Card detects. You can remove this profile if you wish.
- Page 18 THE BELKIN WIRELESS NETWORK MONITOR UTILITY 4. Name the profile by typing in a name in the Profile Name field. 5. Type in the name of the wireless network in the Network Name (SSID) field. 6. If the network you are going to be connecting to uses an access point (this is the most common configuration), leave the box next to “This Network uses...
- Page 19 THE BELKIN WIRELESS NETWORK MONITOR UTILITY Power Save Mode Allows you to select the Power Save mode. Default is OFF. Show icon in system tray Choose to display or NOT display the icon in the system tray. Default Ad-Hoc Channel Allows you to select the default Ad-Hoc channel.
-
Page 20: Troubleshooting
Technical Support You can find technical support information at www.belkin.com/networking or www.belkin.com through the tech support area. If you want to contact technical support by phone, please call 877-736-5771. Technical support is available 24 hours a day, 7 days a week. -
Page 21: Information
Belkin Corporation warrants this product against defects in materials and workmanship for its lifetime. If a defect is discovered, Belkin will, at its option, repair or replace the product at no charge provided it is returned during the warranty period, with transportation charges prepaid, to the authorized Belkin dealer from whom you purchased the product. -
Page 22: Federal Communications Commission Notice
FCC Statement DECLARATION OF CONFORMITY WITH FCC RULES FOR ELECTROMAGNETIC COMPATIBILITY We, Belkin Corporation, of 501 West Walnut Street, Compton, CA 90220, declare under our sole responsibility that the product, to which this declaration relates, complies with Part 15 of the FCC Rules. Operation is subject to the following two conditions: (1) this device may not cause harmful interference, and (2) this device must accept any interference received, including interference that may cause undesired operation. -
Page 23: Canada-Industry Canada (Ic)
• EN 300 328 Technical requirement for radio equipment • ETS 300 826 General EMC requirements for radio equipment. To determine the type of transmitter, check the identification label on your Belkin product. Products with the CE marking comply with the EMC Directive (89/336/EEC) and the Low Voltage Directive (72/23/EEC) issued by the Commission of the European Community. - Page 24 Fax: +61 (0) 2 4372 8603 Belkin Tech Support US: 877.736.5771 310.898.1100 ext. 2263 Europe: 00 800 223 55 460 Australia: 1800 666 040 P74056-D © 2003 Belkin Corporation. All rights reserved. All trade names are registered trademarks of respective manufacturers listed.
Need help?
Do you have a question about the F5D6001 and is the answer not in the manual?
Questions and answers