
Related Manuals for Rejuvenation Heron


Summary of Contents for Rejuvenation Heron
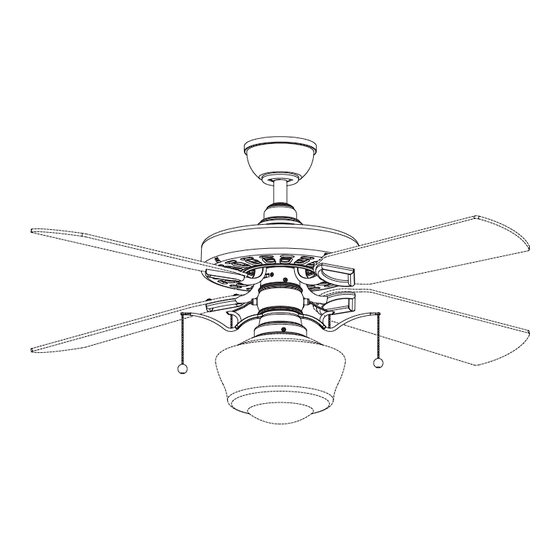
- Page 1 The Heron Ceiling Fan Net Weight 11.78kg (25.94 lbs) OWNER’S MANUAL READ AND SAVE THESE INSTRUCTIONS...
-
Page 2: Table Of Contents
Heron Exploded-View Illustration ........ -
Page 3: Unpacking Instructions
This manual is designed to make it as easy as possible for you to assemble, install, operate, and maintain your Rejuvenation ceiling fan Tools Needed for Assembly Materials • One Phillips head screwdriver • One wire stripper Wiring outlet box and box connectors must be of type •... -
Page 4: Electrical And Structural Requirements
Energy Efficient Use of Ceiling Fans Ceiling fan performance and energy savings rely Using the Ceiling Fan Year Round heavily on the proper installation and use of the ceiling Summer Season: Use the ceiling fan in the counter- fan. Here are a few tips to ensure efficient product clockwise direction. - Page 5 Electrical and Structural Requirements (Continued) Deep box with brace (Figure 3) Paired with a deep box, this hanger is meant to span CEILING JOIST between two joists and takes the place of wooden blocking. WARNING To reduce the risk of fire, electric shock, or personal injury, mount to outlet box marked acceptable for fan support of 15.9 kg (35 lbs) or less and use mounting screws provided with the outlet box.
-
Page 6: How To Assemble Your Ceiling Fan
How to Assemble Your Ceiling Fan 1. Prior to assembly, set aside and save the hardware bags packed in the packing. Remove the hanger ball by loosening the setscrew in the hanger ball until the ball falls freely down the downrod. Remove the pin Hanger from the downrod, then remove the hanger ball. - Page 7 How to Assemble Your Ceiling Fan (continued) Route wires and cable through motor coupling cover, canopy screw cover and ceiling canopy. (Figure 5) Ceiling Canopy Canopy Screw Cover Motor Coupling Cover Figure 5 Reinstall the hanger ball on the downrod as follows.
-
Page 8: How To Hang Your Ceiling Fan
How to Hang Your Ceiling Fan WARNING To avoid possible electrical shock, be sure electricity is turned off at the main fuse box before hanging. (Figure 1) MAIN FUSE BOX NOTE: If you are not sure if the outlet box is grounded, contact a licensed electrician for advice, as it must be grounded for safe operation. -
Page 9: How To Wire Your Ceiling Fan
How to Wire Your Ceiling Fan WARNING To avoid possible fire or shock, be sure electricity is turned off at the main fuse box before hanging. MAIN FUSE BOX (Figure 1) Figure 1 1. Connect the green grounding lead from the hanger BLACK FAN WIRE ball and the green grounding lead from the hanger... -
Page 10: Installing The Canopy Housing
Installing the Canopy Housing NOTE: This step is applicable after the necessary wiring is completed. WARNING To avoid possible fire or shock, make sure that the electrical wires are completely inside the canopy housing and not pinched between the housing and the ceiling. Figure 1a 1. -
Page 11: Pull Chain Operating Instructions
Pull Chain Operating Instructions 1. Install the fan chain coupler and light kit chain coupler. (Figure 1) Figure 1 2. Check the operation of the fan by gently pulling on the fan chain coupler. (Figure 2) Fan Pull Chain Operating Sequence Pull High Pull... -
Page 12: Maintenance
Maintenance CAUTION n i l maintenance that is needed. Do not use solvents when cleaning your ceiling fan. It When cleaning, use only a soft brush or lint free cloth could damage the motor or the blades and create the possibility of electrical shock. -
Page 13: Heron Parts List
Heron Parts List Ref.# Description Part # Hanger Bracket- Screw Assembly AP255BL Ball-Downrod Assembly ADR1-45** 9˝ Downrod DR1-9** P797201** Canopy Canopy Screw Cover Assembly AP797202** Motor Coupler Cover Assembly AP797204** Motor Assembly AMA7972** Blade Holder Set AP797214** Hardware Bag Containing:... -
Page 14: Heron Exploded-View Illustration
Heron Exploded-View Illustration NOTE: The illustration shown is not to scale or its actual parts confi guration may var . y. -
Page 15: Light Kit And Pull Chain Extender Assembly
Light Kit and Pull Chain Extender Assembly Part No. A6804, A6805 Supporter Assembly AP797215** Light Housing Assembly AP797217** Light Bulb PPE27C13 Heron Four Blade Pack Part No. A6802, A6803 A6802, A6803 Blade Set Glass Optional NOTE: NOTE: ion may vary. -
Page 16: Trouble Shooting
1 and 3 or 1 and 4. If this does not improve wobble, exchange 2 and 4. 4. NOT ENOUGH AIR 1. If possible, consider using a longer downrod (not included, you can buy the longer downrod from MOVEMENT rejuvenation.com). - Page 17 2550 N.W. Nicolai Street, Portland Oregon 97210 Customer Service: 888-401-1900 www.rejuvenation.com...
- Page 18 The Heron Ventilador de techo Peso neto 11,78kg (25,94 lbs) MANUAL DEL PROPIETARIO LEA Y GUARDE ESTAS INSTRUCCIONES...
- Page 19 Cómo limpiar las palas de su ventilador de techo Lista de piezas de Heron ................30 Ilustración del despiece de Heron...
-
Page 20: Instrucciones Para El Desempaque
Este manual está diseñado para facilitar al máximo el ensamblaje, la instalación, el funcionamiento y el mantenimiento de su ventilador de techo. Herramientas necesarias Materiales para el ensamblaje La caja de distribución eléctrica y los conectores de la caja deben ser del tipo •... -
Page 21: Requisitos Eléctricos Y Estructurales
El nivel de rendimiento y ahorro de energía de los Uso del ventilador de techo todo el año ventiladores de techo dependen de su correcta instalación yuso.Acontinuaciónlepresentamosalgunassugerencias En verano: Use el ventilador de techo en sentido contrario a para asegurar un rendimiento eficiente del producto. las agujas del reloj. - Page 22 Requisitos eléctricos y estructurales (cont.) Profunda caja con aparato ortopédico (Figura 3) Vigas del Conectado a una caja de distribución eléctrica, este colgador techo sirve para abarcar el espacio entre dos vigas y ocupar el lugar de bloqueo de la madera. ADVERTENCIA Para reducir el riesgo de incendio, descargas eléctricas o lesiones personales, monte el ventilador en una caja de...
- Page 23 Cómo ensamblar el ventilador de techo (cont.) 1. Antes de realizar el ensamblaje, separe y guarde las bolsas de accesorios en el empaque. Afloje el tornillo de fijación de la semiesfera para lograr que ésta pueda desplazarse libremente por el barral. Retire el pasador Pasador del barral y luego extraiga la semiesfera.
- Page 24 Cómo ensamblar el ventilador de techo (cont.) Pase los cables a través de la cubierta de unión del motor, la cubierta para el tornillo y el capuchón. (Figura 5) Capuchón de techo Cubierta de Cubierta del unión del motor tornillo de la base Figura 5 Vuelva a colocar la semiesfera en el barral como se indica a continuación.
- Page 25 Cómo colgar el ventilador de techo ADVERTENCIA Para evitar una posible descarga eléctrica, asegúrese PRINCIPAL CAJA DE de cortar la alimentación eléctrica de la caja de FUSIBLES fusibles principal antes de colgar el ventilador. (Figura 1) NOTA: Si no está seguro de si la caja de salida tiene conexión a tierra, pida consejo a un electricista certificado, ya que debe tener conexión a Figura 1...
- Page 26 Cómo colgar el ventilador de techo (Cont.) ADVERTENCIA ADVERTENCIA Para evitar una posible descarga eléctrica, no apriete Si no coloca la lengüeta en la ranura, podrían los cables entre el ensamble de la bola para colgar y dañarse los cables eléctricos y podrían ocurrir la abrazadera para colgar.
- Page 27 Instalación de la cubierta del capuchón NOTA: Este paso se debe realizar luego de completar la instalación eléctrica necesaria. ADVERTENCIA Para evitar posibles incendios o descargas eléctricas, asegúrese de que los cables eléctricos se encuentren completamente adentro de la cubierta del capuchón y de que no estén aprisionados entre la cubierta y el techo.
- Page 28 Instrucciones de funcionamiento de la cadena Instale los acopladores y las cadenas de encendido/ apagado. (Figura 1) Figura 1 2. Verifique el funcionamiento del ventilador tirando levemente de la cadena de encendido/apagado para el control de la velocidad. (Figura 2) Secuencia de funcionamiento de la cadena del tirador 1.ª...
-
Page 29: Cómo Limpiar Las Palas De Su Ventilador De Techo
Mantenimiento El único mantenimiento necesario para el ventilador de PRECAUCIÓN techo es una limpieza periódica. Al llevar a cabo la limpieza, use sólo un cepillo suave o un No utilice agua para limpiar el ventilador de techo. Podría dañar el motor o las aspas y ocasionar posibles paño sin pelusas, para evitar rayar el acabado. -
Page 30: Lista De Piezas De Heron
Lista de piezas de Heron ° . ó i º . AP255BL Unidad del soporte de suspensión ADR1-45** Unidad del barral/de la semiesfera Varilla de 22.9 cm (9˝) DR1-9** P797201** Capuchón de techo AP797202** Cubierta para el tornillo del capuchón AP797204** Cubierta de unión del motor... -
Page 31: Ilustración Del Despiece De Heron
Ilustración del despiece de Heron NOTA: la ilustración que se muestra no está hecha a escala y su configuración real puede variar. -
Page 32: Kit De Iluminación Y Unidad De Extensión De La Cadena De Encendido
Juego de aspa A6802, A6803 Cristal opcional NOTA: Para pedir pantallas de iluminación, visite nuestra web www.rejuvenation.com NOTA: la ilustración que se muestra no está hecha a escala y su configuración real puede variar. Antes de desechar los materiales de embalaje, asegúrese de haber extraído todas las piezas Cómo hacer un pedido de piezas... -
Page 33: Solución De Problemas
2 y 4. 1. Si es posible, considere el uso de un barral más largo 4. NO HAY SUFICIENTE Por ejemplo (no incluido, usted puede comprar el MOVIMIENTO DE AIRE tiempo de la vara hacia abajo rejuvenation.com) - Page 34 2550 N.W. Nicolai Street, Portland Oregon 97210 Customer Service: 888-401-1900 www.rejuvenation.com...
Need help?
Do you have a question about the Heron and is the answer not in the manual?
Questions and answers