Table of Contents
Advertisement
Quick Links
Advertisement
Table of Contents

Subscribe to Our Youtube Channel
Related Manuals for YUNEEC Proaction CGO4

Summary of Contents for YUNEEC Proaction CGO4
- Page 1 V11172015...
-
Page 2: Table Of Contents
TABLE OF CONTENTS INTRODUCTION SPECIFICATIONS GENERAL WARNINGS SAFETY PRECAUTIONS OVERVIEW SD CARD INSTALLATION LED STATUS INDICATION AERIAL IMAGING SYSTEM ATTACHING CGO4 GIMBAL CAMERA TO MULTI-COPTER BINDING CGO4 GIMBAL CAMERA TO THE ST24 (SINGLE MODE) CAMERA CONTROL ON MULTI-COPTER(SINGLE MODE) BINDING CGO4 GIMBAL CAMERA TO THE ST24 (TEAM MODE) BINDING H920 MULTI-COPTER TO THE ST12 (TEAM MODE) CAMERA CONTROL ON MULTI-COPTER (TEAM MODE) CGO4 INTERFACE(ST24) -
Page 3: Introduction
TORNADO H920 copter and the ProAction ground SteadyGrip system. All the regular Panasonic GH4 camera settings can be freely and remotely adjusted through Yuneec ST24 transmitter which totally transforms and reshapes the boundaries of aerial imaging creation. Through the user friendly control app interface in the ST24, the CGO4 becomes an incredible tool to realize the highest levels of aerial photographic and video graphic imagery. -
Page 4: General Warnings
GENERAL WARNINGS IMPORTANT NOTE: All safety precautions and warnings, instructions, warranties and other collateral information is subject to change at the sole discretion of Yuneec. For the most up-to-date information please visit the corresponding product page at www.Yuneec.com or contact the nearest Yuneec office or authorized distributor. -
Page 5: Safety Precautions
SAFETY PRECAUTIONS PROACTION Do not touch or move the ProAction within about 12s until the initialization is completed. Do not operate the ProAction in the rain! Do not expose the ProAction to fire sources! The ProAction can't be operated after the second level low voltage battery warning! CGO4 Do not expose the CGO4 gimbal camera to water. -
Page 6: Sd Card Installation
SD CARD INSTALLATION NOTICE: Before photo-taking, SD card should be fully inserted into the camera. (The SD card is not included in the package.) CAUTION: Power off the camera before inserting or removing the card. STEP 1): Remove the rubber bumpers. STEP 2): Slide the memory card into the card slot in accordance with the direction indicated by the sticker. -
Page 7: Attaching Cgo4 Gimbal Camera To Multicopter
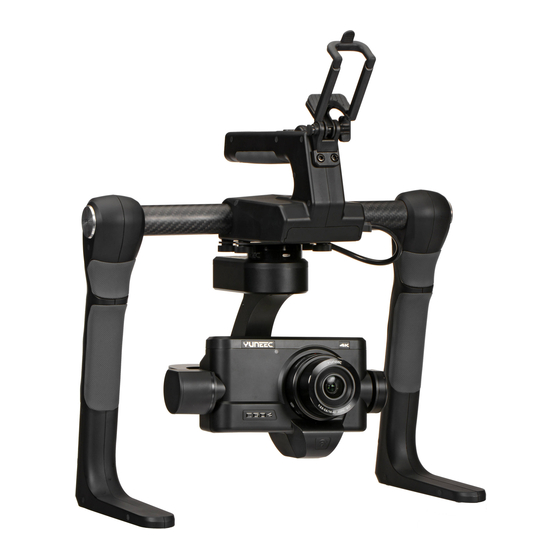
AERIAL IMAGING SOLUTION ATTACHING CGO4 GIMBAL CAMERA TO MULTICOPTER STEP 1): Mount the Rubber Dumpers to H920 fixing eyelet, install the two thread-off proof screws to fix the gimbal damping plate and then tighten all the screws. STEP 2):Insert the Gimbal Connection Cord to the inner side of Gimbal Damping Plate (relative to the direction of H920 Power Connection Port) STEP 3):Mount the Gimbal Thumb Screws and lock washers (4 pcs) to the Gimbal and rotate the screws until... - Page 8 NOTICE: We recommend users to power on the aircraft in the angle mode. NOTICE: When returns back to the FPV interface, you will hear two long beeps. That means the binding is complete. The Real-time images can now be seen on the screen. CAMERA CONTROL ON MULTICOPTRER (SINGLE MODE) CAUTION: The gimbal can only be controlled through ST24 When being attached to H920.
-
Page 9: Binding Cgo4 Gimbal Camera To The St24 (Team Mode)
BINDING CGO4 GIMBAL CAMERA TO THE ST24 (TEAM MODE) STEP 1): Power on the ST24, tap [ ] to go to the main interface. STEP 2): Switch on the TORNADO H920. Wait until the gimbal LED blinks green. That means the Wi-Fi has been started up. -
Page 10: Camera Control On Multicopter (Team Mode)
STEP 8): Tap [ ] twice to return to the main screen and the model /receiver should automat- ically connect to ST12 NOTICE: The H920 main LED indicator will blink red and white if the TORNADO loses GPS signal /lock. The H920 main LED indicator will be solid color of the current mode if the GPS signal/lock is acquired. -
Page 11: Cgo4 Interface(St24)
CGO4 INTERFACE (ST24) Welcome, Pilot 9:43:31 pm Model: H920 CGO4 VOLTS MODE 4K 30 N/AV N/Am G-SPD N/A KPH N/A E N/A m N/A N F3.5 -2/3 MODE 1/60s 00:00:00 System Settings Model Select Channel Settings 01. CAMERA SWITCH 02. CAMERA MODE 03. -
Page 12: Camera Mode Introduction
CAMERA MODE INTRODUCTION The CGO4 gimbal camera has eight camera modes in total,providing photographers with a multiple of choices for different shooting scenes. INTELLIGENT AUTO MODE: The subjects are recorded using settings automatically selected by the camera. NOTE: In this mode, the camera makes the optimal settings for the subject and scene, so we recommend it when you wish to leave the settings to the camera and record without thinking about them. -
Page 13: Adjusting The White Balance
ADJUSTING THE WHITE BALANCE In sunlight, under incandescent lights or in other such conditions where the color of white takes on a reddish or bluish tinge, this item adjusts to the color of white which is closest to what is seen by the eye in accordance with light source. Daylight Cloudy Shade... -
Page 14: Menu Setting Introduction
Mechanical Shutter Speed [Still image] Bulb(Max. 60minutes),1/8000-60 [Motion picture]: 59.94Hz: 1/16,ooo-1/30; 50.00Hz: 1/16,ooo-1/25; 23.98Hz: 1/16,ooo-1/24 Shutter Life Approx.200,000 images Burst speed MECHANICAL SHUTTER: H: 12 frames/sec(AFS), 7 frames/sec(AFC) M: 7 frames/sec(Live View) L: 2 frames/sec(Live View) Electronic shutter: SH: 4O frames/sec NOTE: If the photographer wants to capture fast-move subjects, set a relatively high shutter speed;... - Page 15 PHOTO STYLE This selects effects to match the type of image you wish to record and adjust the color and image quality of the effects.(Standard / Vivid / Natural / Monochrome / Scenery / Portrait) ASPECT RATIO This allows you to select the aspect ratio of the pictures to suit printing or the playback method. [Aspect Ratio] of a 4:3 TV 4608x3456 (16M) ;...
- Page 16 PHOTO STYLE You can select effects to match the type of image you wish to record. You can adjust the color and image quality of the effects. STANDARD / VIVID / NATURAL / MONOCHROME / SCENERY / PORTRAIT DRIVE MODE Slide the menu and select Drive Mode.
-
Page 17: App Downloading
GROUND IMAGING SOLUTION APP DOWNLOADING Download the free APP named CGO4 to smart device at the APP Store or Google Play Store. Install the APP to your 5.8GHz Wi-Fi capable device. Make a note of the network name and password located on the top of the gimbal assembly. CGO4 APP COMPATIBLE DEVICES: APPLE IOS: IOS 7.0 or above ANDROID: Android 4.2 or above... - Page 18 When the self-check (start-up) process is complete, the Control Status LED will grow solid blue. The user can switch freely between Follow Mode and Global Mode without powering off the gimbal. FOLLOW MODE In Follow Mode, the camera lens moves in the direction of ProAction. The user can only manipulate the pitch direction through Gimbal Control Stick on the right.
- Page 19 SINGLE HAND OPERATING: Lift the center carrying handle with one hand. When holding the ProAction™ with single hand, press and hold the Function Switch Button in the rear of the Pitch Control Wheel. The Control Status Indicator will glow solid blue when successfully switched. The control right has been switched to the Pitch Control Wheel on the center carrying handle.
-
Page 20: App Interface
APP INTERFACE YUNEEC_81004F 16: 55: 08 Len: 5739 pic 01. WHITE BALANCE 02. EXPOSURE VALUE/ISO SENSITIVITY 03. APERTURE/SHUTTER SPEED 04. FULL SCREEN DISPLAY 05. FOCAL LENGTH 06. CONTROL MENU 07. VIDEO-RECORDING 08. BUTTONPHOTO-TAKING BUTTON 09. LEFT STORAGE 10. SETTING MENU PHOTO TAKING AND VIDEO RECORDING TO TAKE PHOTOS STEP 1): Tap the APP icon on your mobile device and you’ll come to the Camera Control Interface. -
Page 21: Camera Mode Introduction
CAMERA MODE INTRODUCTION The CGO4 gimbal camera has eight camera modes in total,providing photographers with a multiple of choices for different shooting scenes. INTELLIGENT AUTO MODE: The subjects are recorded using settings automatically selected by the camera. NOTE: In this mode, the camera makes the optimal settings for the subject and scene, so we recommend it when you wish to leave the settings to the camera and record without thinking about them. -
Page 22: Compensating The Exposure
Cloudy Daylight Shade Halogon AWB: Automatic Adjustment Daylight: When taking pictures outdoors under a clear sky Cloudy: When taking pictures under a cloudy sky Shade: When taking pictures outdoors in the shade Halogon: When taking pictures under the incandescent lights NOTICE: It will operate as [AWB] during motion picture recording. -
Page 23: Adjusting The Focal Length
When CGO4 gimbal camera is in Manual Exposure Mode: the photographer can determine First, tap Mode button on the lower portion of the screen and a virtual mode dial will pop up on the screen and then set the mode dial to [M].Slide the aperture value picker and shutter speed picker to set the appropriate aperture value and shutter speed. - Page 24 VIDEO ENCODING This allows you to set different video formats. The MP4 data format is suitable for playback on a PC, etc. MP4(LPCM) The MP4 data format for image editing Data format for image editing. VIDEO QUALITY This sets up the picture quality for motion pictures: OPTIONS: MP4 30P 100Mbps 4K;...
- Page 25 AF MODE This allows the focusing method that suits the positions and number of the subjects to be selected. Focus and exposure will keep on following the subject even if it moves. 1-Area: The camera focuses on the subject in the AF area on the center of the screen.Position and Size of the AF area can be changed.
-
Page 26: Disclaimer
DISCLAIMER Yuneec Electric Aviation cannot be held liable for any damage, injury or for use of the product in violation with legal regulations, especially in the following circumstances: Damage and/or injury as well violation of legal regulations resulting from a failure to comply with the operating instructions or the instructions at www.yuneec.com, product information,... - Page 27 Further losses which do not fall within the scope of use defined by Yuneec Electric Aviation as improper. This product is designed for both professional use and personal, private use. The national and international laws and regulations in force as the time of taking off must be adhered to.
- Page 28 Federal Communications Commission (FCC) Interference Statement This equipment has been tested and found to comply with the limits for a Class B digital device, pursuant to Part 15 of the FCC Rules. These limits are designed to provide reasonable protection against harmful interference in a residential installation.
- Page 29 IC Radiation Exposure Statement for Canada This device complies with Industry Canada licence-exempt RSS standard(s). Operation is subject to the following two conditions: (1) this device may not cause interference, and (2) this device must accept any interference, including interference that may cause undesired operation of the device. Le présent appareil est conforme aux CNR d'Industrie Canada applicables aux appareils radio exempts de licence.
Need help?
Do you have a question about the Proaction CGO4 and is the answer not in the manual?
Questions and answers