
Related Manuals for Steinmayer P-60


Summary of Contents for Steinmayer P-60
- Page 1 P-60 Stagepiano MIDI Bedienungsanleitung / Users manual ArtNr 00055299 , 00055300 Version 08/2018...
- Page 2 Thank you for your purchase of the Steinmayer P-60 Stage piano. We hope that you will enjoy the use of the Steinmayer P-60 Stage piano. Please read through this manual carefully before beginning to use, so that you will be able to take full advantage of the Steinmayer P-60 Stage piano features and enjoy trouble-free operation for years to come.
-
Page 3: Table Of Contents
Bitte schließen Sie das mitgelieferte Netzteil an einer Steckdose mit korrekter Spannung an. Verbinden Sie das Gerät nicht mit einer Steckdose, deren Spannung für das Gerät nicht geeignet ist. Trennen Sie das Netzteil vom Strom, wenn Sie das Instrument nicht benutzen oder während eines Gewitters. Steinmayer P-60 Stagepiano... - Page 4 Sie dafür, dass kein Papier, Metall oder sonstige Objekte in das Instrument gelangen können. Sollte es doch passieren, trennen Sie das Gerät bitte sofort vom Stromkreis und bringen Sie es zum Fachhändler zur Überprüfung. Entfernen Sie bitte stets alle Kabelverbindungen, bevor Sie das Instrument bewegen! Steinmayer P-60 Stagepiano...
- Page 5 Notenhalter Netzteil Pedal FP-1 Bedienungsanleitung Bevor Sie anfangen, das Instrument aufzubauen, vergewissern Sie sich, dass alle unten aufgeführten Teile im Paket enthalten sind. Falls eines der Teile beschädigt sein sollte wenden Sie sich bitte an unseren Kundendienst. Steinmayer P-60 Stagepiano...
-
Page 6: Aufbau Ihres Pianos
Stecken Sie das Netzteil in die Anschlussbuche am Piano und in Ihre Steckdose. Schalten Piano mit Hilfe des POWER Knopfes an. Nutzen Sie nur das mitgelieferte Netzteil, da es ansonsten zu Schäden aufgrund von Spannungsunterschieden kommen kann. Steinmayer P-60 Stagepiano... - Page 7 Töne werden nicht ausgehalten, sondern normal wiedergegeben. So können Sie beispielsweise einen Akkord mit Sustain versehen und andere Noten staccato spielen. 3. Soft Pedal (linkes Pedal) Dieses Pedal reduziert die Lautstärke und ändert leicht das Timbre der gespielten Noten. Steinmayer P-60 Stagepiano...
-
Page 8: Bedienung Und Steuerung
3. Audio Output (AUX OUT) Dier Anschluss wird verwendet, wenn Sie eine stärkere externe Audioquelle anschließen wollen (z.B. Verstärker). Nutzen Sie ein Audiokabel und verbinden Sie es mit dem AUX OUT Anschluss des Pianos und dem „Input“-Anschlusses des externen Gerätes. Steinmayer P-60 Stagepiano... -
Page 9: Kontrolleinheit
4. Aufnahme 5. Play/Stop 6. Track 1 7. Track 2 Einstellungen Anschlüsse 13. LCD Monitor A) USB TO HOST 14. DATA/Tempo B) 3-Pedal-Controller 15. Setup C) SUSTAIN 16. ENTER D) LINE OUT R/L/MONO E) Kopfhörer F) Stromanschluss Steinmayer P-60 Stagepiano... -
Page 10: Standard Funktionen
Stimmen belegt sind Nach der Auswahl wird die Stimme am Monitor angezeigt Um die zweite Stimme einer Stimmentaste zu wählen drücken Sie diese erneut Nach einem Neustart wird die zuletzt verwendete Stimme erneut geladen Liste der Stimmen Steinmayer P-60 Stagepiano... -
Page 11: Layer-Funktion
Sie können den Punkt an dem das Piano in den linken und rechten Teil aufgeteilt wird beliebig wählen indem Sie den SPLIT Knopf drücken und halten und gleichzeitig den gewünschten Split-Punkt wählen. Anschließend wird Ihre Auswahl am LCD Display angezeigt. Steinmayer P-60 Stagepiano... -
Page 12: Reverb-Funktion
Drücken Sie hierzu den METRONOM Knopf für zwei Sekunden während das Metronom aktiviert ist. Nun sollte der LCD Monitor das derzeitige Metronom anzeigen. Nutzen Sie DATA UP / DOWN um das gewünschte Metronom auszuwählen. UP und DOWN gleichzeitig stellt das Standardmetronom her (1/4 Takt) Metronom Takte: 1/4,2/4,3/4,4/4,5/4,6/8,9/8,C/8(12/8) Steinmayer P-60 Stagepiano... -
Page 13: Twin-Piano-Funktion
3. Anpassung des Werts der ausgewählten Funktion Drücken Sie die ENTER Taste und ändern Sie den Wert mit DATA UP/DOWN. Um den Setup-Modus zu verlassen drücken Sie die SETUP Taste. DATA UP und DOWN gleichzeitig stellen die Werkseinstellungen wieder her. Steinmayer P-60 Stagepiano... -
Page 14: Main/Split/Layer/Musiklautstärke
Soft: Die Sounds klingen relativ laut, auch wenn Sie sanft spielen. Normal: In dieser Einstellung klingt das Piano wie ein normales Klavier. Hard: Sie müssen sehr kräftig spielen, um ein Maximum an Lautstärke zu erreichen. Main/Split/Layer Oktaven Mit dieser Funktion können Sie die verschiedenen Oktavenreichweite verändern. Steinmayer P-60 Stagepiano... -
Page 15: Stimmung
Hiermit werden sämtliche Einstellungen zurückgesetzt und alle aufgenommenen Songs gelöscht. Wenn Sie im Reset-Menü die Enter-Taste drücken, beginnt das Piano zu resetten. Dieser Vorgang dauert ca. 5 Sekunden. Trennen Sie niemals die Stromversorgung während des Vorgangs. Nach dem Zurücksetzen zeigt das Display ‚TEMPO‘ an Steinmayer P-60 Stagepiano... -
Page 16: Aufnahme
Drücken Sie den DEMO Knopf. Der Monitor zeigt nun „Classic“ an. 2. Abspielen eines Demo Songs Drücken Sie ENTER und wählen Sie mithilfe der DATA UP/DOWN Knöpfe ihren Song aus und spielen diesen mit dem PLAY Knopf ab. Drücken Sie PLAY erneut um das Abspielen zu unterbrechen. Steinmayer P-60 Stagepiano... - Page 17 Liste der klassischen Demo Musik Steinmayer P-60 Stagepiano...
- Page 18 Drücken Sie PLAY um Playback zu stoppen. 5. Verlassen des Demo Modus Drücken Sie den DEMO Knopf um dem Modus zu verlassen. Das Piano wechselt in den Performance-Modus. Um in den Musikauswahlmodus zu gelangen, drücken Sie die Eingabetaste im Demo-Modus. Steinmayer P-60 Stagepiano...
-
Page 19: Sonatine Demo Musik
Sonatine Demo Musik Steinmayer P-60 Stagepiano... -
Page 20: Schlagzeug- Und Soundeffekttabelle
Schlagzeug- und Soundeffekttabelle Steinmayer P-60 Stagepiano... -
Page 21: Midi Tabelle
MIDI-Tabelle Steinmayer P-60 Stagepiano... -
Page 22: Problembehandlung
Problembehandlung Steinmayer P-60 Stagepiano... -
Page 23: Spezifikationen
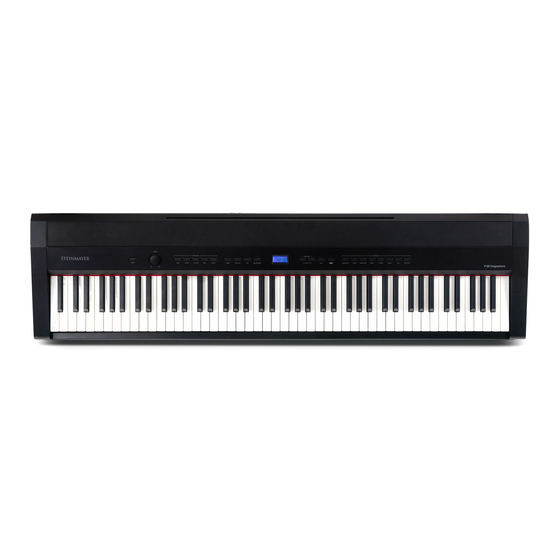
Spezifikationen Produkt Steinmayer P-60 Stagepiano (00055299 schwarz; 00055300 weiß) Tastatur 88 Tasten (Standard), 7 ¼ Oktaven Anschlagempfindlichkeit Aus, weich, normal, hart Max. Polyphonie 128 Noten Sounds 14 Sounds, 1 Drumkit, 1 Sound Effekt Set Funktionen Layer, Split, Twin Piano, Tune, Transpose, MIDI... - Page 24 Bedienungsanleitung ist urheberrechtlich geschützt. Jede Vervielfältigung, bzw. jeder Nachdruck, auch auszugsweise, und jede Wiedergabe der Abbildungen, auch in verändertem Zustand, ist nur mit schriftlicher Zustimmung der Firma Musikhaus Kirstein GmbH gestattet. Herstellerangaben Musikhaus Kirstein GmbH Bernbeurener Strasse 11 86956 Schongau Telefon: 0049-8861-909494-0 Telefax: 0049-8861-909494-19 www.kirstein.de Steinmayer P-60 Stagepiano...
- Page 25 PRECAUTIONS PLEASE READ CAREFULLY BEFORE PROCEEDING. Please keep this manual in a safe and handy place for future reference. For AC adaptor WARNING CAUTION •This AC adaptor is designed for use with only the •When setting up, make sure that the AC outlet is easily digital piano.
- Page 26 CAUTION Always follow the basic precautions listed below to avoid the possibility of physical injury to you or others, or damage to the instrument or other property. These precautions include, but are not limited to, the following: • Do not connect the instrument to an electrical provided screws only.
- Page 27 Wecome Thank you and congratulations on your purchase of the digital piano. Your new digital piano is a state-of-the-art musical instrument which incorporates the latest electronics technology to make its operation as easy as possible. In addition to the many features usually found on digital pianos, this contains a variety of educational resources that can be used for the learning of musical concepts and piano skills.
-
Page 28: Unpacking
Carefully take out the digital piano and its accessories from the packing box. The digital piano set consists of the following items. Unpacking Digital Piano Music Rest Pedal FP-1 Owner’ s Manual Inspect each item carefully to make sure that it is in a good condition. If you d any item missing or damaged, immediately contact the place of purchase for replacement... -
Page 29: Setting Up Your Piano
Setting Up Your Piano Music Rest Insert the Music rest into the slot. Power Requirements Connect the AC POWER ADAPTOR. Insert the DC plug of the AC adaptor into the piano and the AC plug into a household AC power outlet. Turn on POWER by pressing the POWER button. - Page 30 Using the Foot Pedal ( FP-1) The SUSTAIN jack is for connecting the included foot pedal FP- 1, which works in the same way as a damper pedal on an acoustic piano. •Do not press the footswitch when turning the power on. Doing this changes the recognized polarity of the footswitch, resulting in reversed footswitch operation.
-
Page 31: Controls And Terminals
Controls and Terminals Turning ON the Power Connect the AC POWER ADAPTER. Insert the DC plug of the AC adapter into the piano and the AC plug into a household AC power outlet. on page 5 . See ' Power requirements Turn on POWER Press the POWER button to turn on the piano. -
Page 32: Connecting To The External Device
Connecting to the External Devices Terminals Connecting to a Computer) USB to HOST( By connecting a computer to the USB, you can transfer MIDI and audio data between the instrument and the computer and take advantage of sophisticated computer music programs. -
Page 33: Control Panel
Control Panel POWER PERFORMANCE Page 7 Page 11 POWER Switch VOICE Buttons Page 13 REVERB VOLUME Page 14 TWIN PIANO Page 11 Page 12 MASTER VOLUME SPLIT Page 14 METRONOME RECORD & DEMO Page 19,21 DEMO Page 19 RECORD Page 18,19,21 PLAY/STOP Page 18,21 TRACK1... - Page 34 SETUP TERMINALS Page 8 LCD screen USB TO HOST Page 6,8 3 -PEDAL CONTROLLER DATA/TEMPO Page 15 Page 6 SUSTAIN SETUP Page 15 Page 8 LINE OUT R,L/MONO ENTER Page 7 PHONES Page 5 DC IN...
-
Page 35: Basic Operation
Basic Operation Adjusting the Volume The piano has one volume knob on the panel for adjusting the volume. MASTER VOLUME This determines the entire volume of the piano. This also determines the volume level of the HEADPHONE(s) . Selecting Voices The piano features a wealth of rich, authentic voices, including piano, organ, elec. -
Page 36: Layer
Voice List Grand E.Piano Harpsichord Organ E.Organ Strings Bass Percussion Piano Button 1 Button 2 Button 3 Button 4 Button 5 Button 6 Button 7 Button 8 G. Piano 1 E.Piano 1 Organ 1 E. Organ 1 Strings 1 Harpsichord Acoust Bass Drum Set G. -
Page 37: Changing The Split Point
Call up the Split mode. To call up the split mode, press the SPLIT button. The lamp will begin shing; the LCD screen will display the number of current split voice. 07 ' ACOUSTIC BASS The default voice is 'A in the split mode. -
Page 38: Using The Metronome
Using the Metronome The piano features a convenient metronome that is ideal for practice. Twin Piano The twin piano is a tool that divides the piano into two smaller pianos with identical octave range. This feature allows two people to play the piano in the same octave range simultaneously. Select a Voice. -
Page 39: Function
The set values for each of the 19 functions can be adjusted in the setup menu. The setup menu also gives you the option of re-initializing the piano, Function restoring the values of all functions to their default and bringing the piano to its initial status. Setup mode Call up the setup mode. -
Page 40: Main/Split/Layer/Music Volume
Main/Split/Layer/Music Volume All voice parts can be independently adjusted by using this function. When the music volume is adjusted, both the metronome and the music volume are adjusted. Touch The touch option determines the extent to which the volume of the piano responds to your playing strength(velocity). -
Page 41: Reverb Volume
Reverb Volume The reverb volume can be adjusted. Reverb Type There are 8 reverb types in the piano. 01 (Room 1 ), 02 (Room 2 ), 03 (Room 3 ), 04 (Hall 1 ), 05 (Hall 2 ), 06 (Plate), 07 (Short Delay), 08 (Long Delay) t volume can be adjusted. -
Page 42: Recording
The piano features comprehensive song recording functions that allow you to record your own performance. Recording A song records 2 tracks and approx. 9 , 000 notes can be recorded into one track. Recording and Playback Prepare recording to the track RECORD and the TRACK 1 buttons. -
Page 43: Demo Music
There are 50 classical tunes and 321 educational tunes in the demo music of this piano. Demo Music Classic Demo Music There are 50 demo tunes in the piano. Enter the demo music mode. ‘ Classic ’ . Press the DEMO button. The LCD screen shows Go to the Classic Demo Music mode. -
Page 44: Classic Demo Music List
Classic Demo Music List Etude op. 10 no. 1 Chopin, Fryderyk Franciszek Etude op. 10 no. 4 Etude op. 10 no. 5 Etude op. 25 no. 9 Nocturne op. 9 no. 1 Nocturne op. 9 no. 2 Nocturne op. 27 no. 2 Nocturne op. -
Page 45: Educational Demo Music
Educational Demo Music The Educational Music allows the user to practice the piano using a selection of built-in piano lesson music. The left and right hand parts for each piece can be practiced separately, while adjusting the Enter the demo music mode. The LCD screen shows ‘Classic ’... -
Page 46: Sonatine Demo Music List
Sonatine Demo Music List 0 1 1 S o n a t i n e o p . 2 0 n o . 1 1 m o v e m e n t F . K u h l a u 0 1 2 S o n a t i n e o p . - Page 47 Drum and Sound FX Table Prog 1 Prog 57 Standard Drum Sound FX 39 - D# 2 High Q Jing Samul Drum 1 40 - E 2 Slap Samul Drum 2 41 - F 2 Scratch Push Samul Cymbal 1 42 - F# 2 Scratch Pull 43 - G 2...
-
Page 48: Midi Implementation Chart
MIDI Implementation Chart Function Recognized Transmitted Remark Basic Channel Default 1 -3 Mode Default OMNI OFF, POLY OMNI OFF, POLY Note ON/OFF 9nH kk vv #kk:note ON (0-127) #vv:velocity (1-127) Pitch Bender EnH bi bh Maximum swing +/- 1 tone 00 BnH 00H cc Bank Select 01 BnH 01H cc... -
Page 49: Troubleshooting
Troubleshooting If a problem occurs while using this product, check the points listed belo to contacting customer service. Problem Cause Solution 1) The power cord is not properly 1) Properly plug the power cord. plugged. 2) Press the power switch. The piano does not turn on. - Page 50 PRODUCT PORTABLE DIGITAL PIANO KEYBOARD 88 KEYS(STANDARD) - 7 1 / 4 OCTAVES TOUCH RESPONSE OFF, SOFT, NORMAL, HARD 128 NOTES MAX. POLYPHONY 14 VOICES SOUND 1 DRUM KIT 1 SOUND EFFECT SET FUNCTIONS LAYER, SPLIT, TWIN PIANO, TUNE, TRANSPOSE, MIDI LOCAL CONTROL, PEDAL EFFECT( 8 ), REVERB( 8 ) DIGITAL SIGNAL PROCESSING...
-
Page 51: Weee Declaration
WEEE Declaration Your product is designed and manufactured with materials and components of high quality, which are recyclable and can be reused. The symbol means that your product should be disposed of separately from household waste when it reaches its end of life. Please dispose of this equipment at your local collection point or recycling center.
Need help?
Do you have a question about the P-60 and is the answer not in the manual?
Questions and answers