Table of Contents
Advertisement
Quick Links
Advertisement
Table of Contents

Subscribe to Our Youtube Channel
Summary of Contents for Gared Pro-S 9616
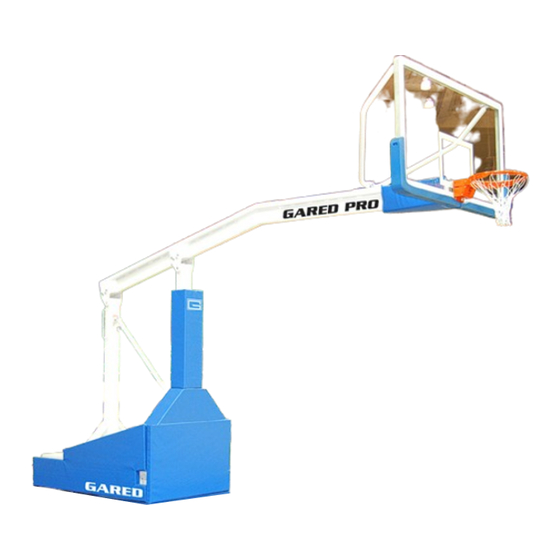
- Page 1 Gared Pro-S Portable Backstop Models: 9616 & 9618 Installation, Operation and Maintenance Instructions Please read all instructions before attempting installation or operation of these units SAVE THESE INSTRUCTIONS FOR FUTURE USE Revised UBLICATION 5 5 1 7 5 4 7 6 0...
- Page 2 Gared Pro-S Portable Backstop...
-
Page 3: Table Of Contents
Gared Pro-S Portable Backstop Table of Contents Section Page No. Introduction Cautions and Warnings Parts Checklist Assembly and Setup Unit Operation Maintenance... -
Page 4: Introduction
If items are found to be nonconforming, replacements can be ordered from Gared Sports or one of our authorized dealers. When contacting Gared Sports, please have information regarding the dealer/installer who sold the unit, the name of the project, and any applicable warranty information. -
Page 5: Cautions And Warnings
Gared Pro-S Portable Backstop Read and understand the following warnings to prevent possible personal injury and potential damage to the equipment during assembly, setup, and operation. Before proceeding with assembly, read all instructions and assembly procedures. Make sure all parts have been received and are not damaged. -
Page 6: Parts Checklist
Bracket, Wheel Lift Pad Mount 556554095 Clip, Pad Attachment 2.0” 234-20-12Z Screw, Mach Pan HD Phil, ¼-20 x 3/4” 556554953 Striker Bolt, .67” Dia. 541-7-14 Hex Nut, 7/16-14 Contact Gared Customer Service at 800-325-2682 for assistance with replacement of any parts missing or damaged. - Page 7 Gared Pro-S Portable Backstop...
-
Page 8: Assembly And Setup
Gared Pro-S Portable Backstop INSTALLATION INSTRUCTIONS Tools Required: Adjustable wrench with 1-1/8” to 1-12’ capacity ½” wrench and socket 9/16” wrench and socket ¾” wrench #2 Phillips screw driver Flat blade screw driver Allen wrench set Two plumb bobs with string... - Page 9 Gared Pro-S Portable Backstop IMPORTANT NOTE: Before proceeding to the next step, make sure at least three individuals are available to assist with the mounting of the backboard to the unit. A minimum of two, preferably three, individuals is required for safe assembly of the backboard to the unit.
- Page 10 Gared Pro-S Portable Backstop 8. Position the backboard with the slots of the Quick Change bracket onto the pins of the bracket on the main boom as shown in figure 4. Slide the board assembly completely onto the pins and insert the Quick Change Locking Rod (item 20) through the slots and holes in the board and boom brackets.
- Page 11 Gared Pro-S Portable Backstop 11. Remove the shipping bracket from the main boom and store the bracket and hardware in a location for future use when replacing backboards or storing the unit. 12. Use the ratchet and 1-1/2” socket supplied to raise the leveling pads so that the front caster wheels rest firmly on the floor.
- Page 12 Gared Pro-S Portable Backstop 18. Slide the locking collar on the leveling screw down to contact the leveling screw plate and secure with the set screw. The locking collar is used to insure the leveling pads are always set at the correct height when the unit is moved or reinstalled.
- Page 13 Gared Pro-S Portable Backstop 22. Once the unit is relocated and the plumb bobs are exactly on the marks located in step 13, recheck all dimensions to make sure the 10’-0” playing height is correct and the face of the backboard is 4’-0” in front of the court baseline.
-
Page 14: Front Base Pad
Gared Pro-S Portable Backstop 35. Install the two wheel lift pads (item 7) to the front base pad, (item 3) using Angle (item 38). The shorter leg will attach to the front base pad. Refer to figure 13. Front Pad... -
Page 15: Upright Pad
Gared Pro-S Portable Backstop 39. Install the Upright pad (item 6) to the front upright using the Velcro straps. Refer to figure 17 & 18. 40. Install the Center unit cover (item 8) with the cutout on the front end as shown. -
Page 16: Unit Operation
Gared Pro-S Portable Backstop Operation 1. Before operating the unit, read all caution, warning, and information labels. 2. To raise the unit from the stored position. a. Make sure the unit is in the correct position on the court and the locator pins are inserted into the floor inserts b. -
Page 17: Maintenance
Gared Pro-S Portable Backstop Maintenance 1. General inspection of equipment when used should be performed to ensure no catastrophic failures have occurred during the course of use between yearly inspections. 2. It is recommended that yearly inspections be conducted to determine if any bolts or other hardware has become worn or loosened. - Page 18 Gared Holdings, LLC Performance Sports Systems Gared Sports 9200 E. 146 Street 707 North 2 Street Noblesville, IN 46060 St. Louis, MO 63102 800-848-8034 800-325-2682 www.perfsports.com www.garedsports.com...


Need help?
Do you have a question about the Pro-S 9616 and is the answer not in the manual?
Questions and answers