Advertisement
Table of Contents
A NOTE ABOUT SAFETY . . . . . . . . . . . . . . . . . . . . . . . . . . . . . . . . . . . . . . . . . . . . . . . . . . . . . . . . . . . . . . . . . . . . . . . . . . . . . . . . . . . . . . 2
GENERAL. . . . . . . . . . . . . . . . . . . . . . . . . . . . . . . . . . . . . . . . . . . . . . . . . . . . . . . . . . . . . . . . . . . . . . . . . . . . . . . . . . . . . . . . . . . . . . . . . . . . 2
PART NAMES AND FRONT DISPLAY CODES . . . . . . . . . . . . . . . . . . . . . . . . . . . . . . . . . . . . . . . . . . . . . . . . . . . . . . . . . . . . . . . . . . . . 3
FUNCTION BUTTONS. . . . . . . . . . . . . . . . . . . . . . . . . . . . . . . . . . . . . . . . . . . . . . . . . . . . . . . . . . . . . . . . . . . . . . . . . . . . . . . . . . . . . . . . . 4
REMOTE CONTROL . . . . . . . . . . . . . . . . . . . . . . . . . . . . . . . . . . . . . . . . . . . . . . . . . . . . . . . . . . . . . . . . . . . . . . . . . . . . . . . . . . . . . . . . . . 6
REMOTE CONTROL FUNCTIONS . . . . . . . . . . . . . . . . . . . . . . . . . . . . . . . . . . . . . . . . . . . . . . . . . . . . . . . . . . . . . . . . . . . . . . . . . . . . . . 7
CLEANING, MAINTENANCE, AND TROUBLESHOOTING . . . . . . . . . . . . . . . . . . . . . . . . . . . . . . . . . . . . . . . . . . . . . . . . . . . . . . . . 10
TROUBLESHOOTING . . . . . . . . . . . . . . . . . . . . . . . . . . . . . . . . . . . . . . . . . . . . . . . . . . . . . . . . . . . . . . . . . . . . . . . . . . . . . . . . . . . . . . . . 12
Please read this Owner's Information Manual carefully before installing and using this appliance
and keep this manual for future reference.
For your convenience, please record the model and serial numbers of your new equipment in the
spaces provided. This information, along with the installation data and dealer contact information, will
be helpful should your system require maintenance or service.
UNIT INFORMATION
Model # _______________________________
Serial # ________________________________
INSTALLATION INFORMATION
Date Installed ___________________________
OWNER'S MANUAL
High Wall Ductless System - Sizes 09 to 36
TABLE OF CONTENTS
NOTE TO EQUIPMENT OWNER:
Specifications subject to change without notice.
DLFSHA
DEALERSHIP CONTACT INFORMATION
Company Name: ______________________
Address:_____________________________
Phone Number:________________________
Technician Name:______________________
PAGE
Advertisement
Table of Contents
Troubleshooting

Related Manuals for CMNA DLFSHA

Summary of Contents for CMNA DLFSHA
-
Page 1: Table Of Contents
DLFSHA OWNER’S MANUAL High Wall Ductless System - Sizes 09 to 36 TABLE OF CONTENTS PAGE A NOTE ABOUT SAFETY ..................2 GENERAL. -
Page 2: A Note About Safety
A NOTE ABOUT SAFETY GENERAL Any time you see this symbol in manuals, instructions and on the The high wall fan coil unit provides quiet, maximum comfort. In unit, be aware of the potential for personal injury. There are three addition to cooling and/or heating, the high wall fan coil unit levels of precaution: matched with an outdoor condensing unit filters and dehumidifies... -
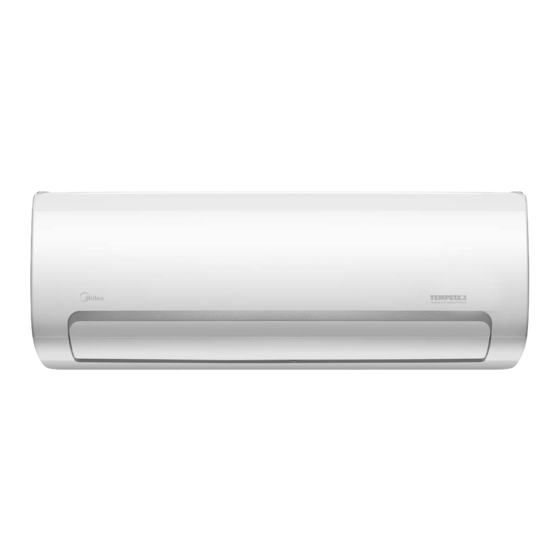
Page 3: Part Names And Front Display Codes
PART NAMES AND FRONT DISPLAY CODES Front Panel Louver Remote Control Functional Filter Remote Holder Display Window “ ” for 3 seconds when: • TIMER ON is set • SWING, TURBO, or SILENCE features are turned on “ ” for 3 seconds when: •... -
Page 4: Function Buttons
FUNCTION BUTTONS IMPORTANT: Before you begin using your new air conditioner, familiarize yourself with the remote control. Button ON/OFF Starts and stops the louver Turns the unit on or off movement. Press this button, the horizontal Adjust louver swings up and down Increase temperature in automatically. - Page 5 Remote LCD Screen Indicators ON/OFF display Appears when the unit is turned on, and disappears when the unit is turned off Battery display Low battery detection Transmission Indicator TIMER ON display Lights up when remote Displays when TIMER sends signal to indoor ON is set unit ECO display...
-
Page 6: Remote Control
REMOTE CONTROL Remote Control Operation - Quick Start NOTE: When transmitting a command from the remote control to the unit, be sure to point the control toward the right side of the unit. The unit confirms receipt of a CAUTION command by sounding an audible beep. -
Page 7: Remote Control Functions
REMOTE CONTROL FUNCTIONS Selecting the Up-Down Louver Position To optimize comfort, the Up-Down louver operates in a preset range (see Figure 8). Pressing ON/OFF When the air conditioner is not in operation, the remote control displays the last set point and mode. •... - Page 8 Timer Function Setting both TIMER ON and TIMER OFF at the same time Use both functions to program the unit to turn on and shut off at TIMER ON (to start the unit) and TIMER OFF (to stop the unit) specified times.
- Page 9 Self Clean Mode Freeze Protection Mode Airborne bacteria can grow in the moisture that condenses around When the air conditioner operates under the HEATING mode with the unit’s heat exchanger. With regular use, most of this moisture is the set temperature of 60°F (16°C), press twice in two seconds to evaporated from the unit.
-
Page 10: Cleaning, Maintenance, And Troubleshooting
CLEANING, MAINTENANCE, AND TROUBLESHOOTING CAUTION EQUIPMENT DAMAGE/OPERATION HAZARD Failure to follow this caution may result in equipment damage or improper unit operation. Operating the system with dirty air filters may damage the indoor unit and could cause reduced cooling performance. intermittent system operation frost Filter Tab build-up on the indoor coil or blown fuses. - Page 11 Pre-Season Inspection System Operation Recommendations The items outlined in the following list help to assure proper system operation: • Replace both remote control batteries at the same time. • Point the remote control toward the unit display panel when transmitting a command. •...
-
Page 12: Troubleshooting
TROUBLESHOOTING Refer to Table 3 before contacting your local dealer. Table 1 — Periodic Maintenance INDOOR UNIT EVERY MONTH EVERY MONTH EVERY YEAR Clean Air Filter* Replace Carbon Filter Change Remote Control Batteries OUTDOOR UNIT EVERY MONTH EVERY MONTH EVERY YEAR ... - Page 13 Table 3 — Troubleshooting PROBLEM POSSIBLE CAUSE SOLUTION The circuit breaker has tripped or a fuse has blown. Reset the circuit breaker or replace the fuse with the specified replacement fuse. Power Failure Restart operation when the power is restored. Unit/System Does Not Work Diagnostic lights illuminate* Call your service representative.
- Page 14 Copyright 2018 CMNA 3300 Riverview Parkway Atlanta GA 30339 32802000102 Specifications subject to change without notice.
Need help?
Do you have a question about the DLFSHA and is the answer not in the manual?
Questions and answers
Outside fan is not working a gift code F5