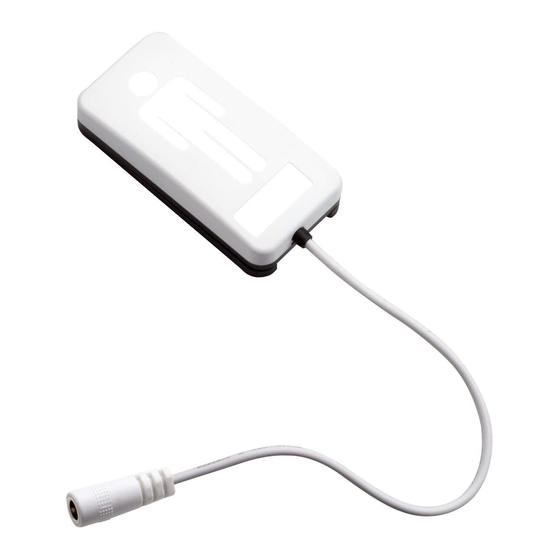
Summary of Contents for Murata SCA11H
- Page 1 1 (20) APPLICATION NOTE SCA11H BED SENSOR INSTALLATION GUIDE Murata Electronics Oy SCA11H Doc.No. 2077 www.murata.com Rev. 3...
-
Page 2: Table Of Contents
Local communication mode ..................4 Cloud communication mode ..................5 SCA11H user interface ..................... 5 SCA11H installation ......................6 Positioning SCA11H into the bed ................. 6 Setting SCA11H into configuration mode ..............8 Configuration ........................ 8 Calibration ........................13 Completing configuration .................... 15 Testing the output of SCA11H .................. -
Page 3: Sca11H Product Content
3 (20) SCA11H product content Figure 1. SCA11H-C01 BCG sensor node Power adapter o 9V/500mA switching power supply with 2.1/5.5 mm plug. o Four different power plugs are supported according to the table below. Product type Note www.iec.ch/worldplugs... -
Page 4: Sca11H Operation Modes
Local communication mode In local communication mode SCA11H connects to pre-defined WiFi network. SCA11H sensor node works as TCP/IP-server and writes output data in ASCII- format in the defined IP-address port 8080 Simple Service Discovery Protocol SSDP is used for device discovery. -
Page 5: Cloud Communication Mode
Communication parameters can be set through the configuration mode. SCA11H sensor node sends data to the server as HTTP POST message. HTPP POST body contains XML-formatted BCG data according to Product Specification 1325 SCA11H cloud server interface specification. -
Page 6: Sca11H Installation
Positioning SCA11H into the bed Positioning of SCA11H is very important. Please note two main items: 1. Orientation of the SCA11H needs to be the same as printed on top of the node (head to toes) 2. SCA11H measures the bed vibration caused by blood circulation and therefore it needs to be positioned in a place most optimal to measure this vibration. - Page 7 7 (20) Figure 5. Examples of good SCA11H attachment positions Murata Electronics Oy SCA11H Doc.No. 2077 www.murata.com Rev. 3...
-
Page 8: Setting Sca11H Into Configuration Mode
12. After steps 1-5 SCA11H is ready for positioning and configuration. attachment plate Figure 6. SCA11H node without attachment plate Flow chart for setting SCA11H into configuration mode is presented in Appendix 1. Configuration 1. Connect the used configuration device (for example laptop) to SCA11H's configuration network: muRata_CFG_XXXXXX using password: 24681012. - Page 9 9 (20) Figure 7. Example SCA11H's configuration network. 2. Open the browser at page http://192.168.253.1 Figure 8. Start-up page 3. Select Advanced Bed Sensor Settings Murata Electronics Oy SCA11H Doc.No. 2077 www.murata.com Rev. 3...
- Page 10 4. Select “BCG Mode” for algorithm data output or “Data Logger Mode” for raw data output. 5. Select “Normal” as measurement direction. 6. Click “Apply” if changes were made. Remark: Do not modify calibration parameters manually without in-depth understanding! Murata Electronics Oy SCA11H Doc.No. 2077 www.murata.com Rev. 3...
- Page 11 8. If cloud mode is selected, please follow the service provider instructions to configure the parameters. 9. Click “Apply” if changes were made. Murata Electronics Oy SCA11H Doc.No. 2077 www.murata.com Rev. 3...
- Page 12 12 (20) Select Network Settings tab Figure 11. Network Settings 10. Select the local network where to connect SCA11H bed sensor node and enter the network password. Murata Electronics Oy SCA11H Doc.No. 2077 www.murata.com Rev. 3...
-
Page 13: Calibration
Calibration Calibration is recommended to be carried out separately for each person in bed. If the person in bed changes, calibration should be repeated in order to obtain reliable results for each person. Murata Electronics Oy SCA11H Doc.No. 2077 www.murata.com... - Page 14 Select Bed Sensor Settings tab Figure 13. Calibration 12. Make sure that the SCA11H is positioned as instructed in chapter 4.2, bed is empty and it is not exposed to disturbances. 13. Start the empty bed calibration by clicking the “Start” button. This takes 1 minute.
-
Page 15: Completing Configuration
15 (20) Completing configuration Select System Info tab Figure 14. System Info Check the configured settings are correct. If yes, click ”Reboot to complete configuration”. SCA11H Bed Sensor Node has now been configured. Murata Electronics Oy SCA11H Doc.No. 2077 www.murata.com... -
Page 16: Testing The Output Of Sca11H
- SCA11H operating temperature range is 10 to 55 °C - Non-authorized modification by user is prohibited. - SCA11H sensor is not a medical device and has not been validated or approved as such. It should not be used to diagnose or treat medical conditions. -
Page 17: Appendixes
17 (20) Appendixes Appendix 1 Setting up SCA11H to the configuration mode Murata Electronics Oy SCA11H Doc.No. 2077 www.murata.com Rev. 3... - Page 18 18 (20) Appendix 2 SCA11H Configuration and Calibration using configuration WEB page Murata Electronics Oy SCA11H Doc.No. 2077 www.murata.com Rev. 3...
- Page 19 (2) this device must accept any interference received, including interference that may cause undesired operation. NOTICE: Changes or modifications made to this equipment not expressly approved by Murata Manufacturing Co., Ltd. may void the FCC authorization to operate this equipment. NOTE: This equipment has been tested and found to comply with the limits for a Class B digital device, pursuant to Part 15 of the FCC Rules.
-
Page 20: Change Control
Change Control Rev. Date Change Description Document moved to new control system and template, updated 25-Sep-15 document references. Appendix 1 updated. 19-Jan-17 Section 4.1 updated. 12-Apr-17 Section 4.3, Appendix 2 updated. Murata Electronics Oy SCA11H Doc.No. 2077 www.murata.com Rev. 3...


Need help?
Do you have a question about the SCA11H and is the answer not in the manual?
Questions and answers