Table of Contents
Advertisement
Available languages
Available languages
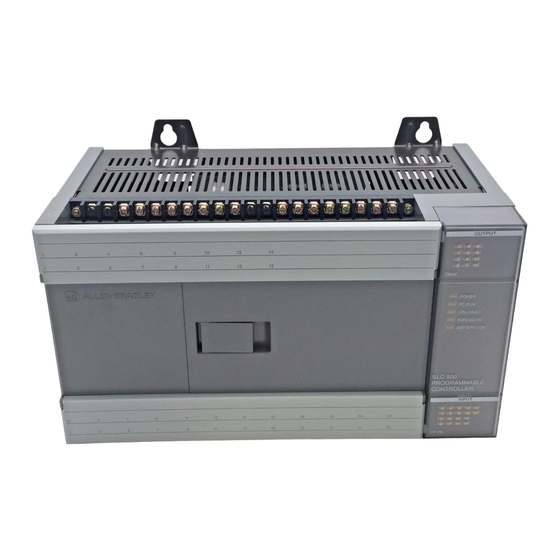
SLC 500™ Fixed Hardware Style
Controllers
(Catalog Numbers 1747-L20, 1747-L30, and 1747-L40)
Inside...
English Section ....................................................................................... 3
Section en français............................................................................... 23
Deutscher Abschnitt ............................................................................. 43
Sezione italiana .................................................................................... 63
Sección en español............................................................................... 83
Physical Dimensions........................................................................... 103
Wiring Diagrams................................................................................. 104
Installation Instructions
page
Advertisement
Chapters
Table of Contents

Related Manuals for Allen-Bradley SLC 500 1747-L20


Summary of Contents for Allen-Bradley SLC 500 1747-L20
- Page 1 Installation Instructions SLC 500™ Fixed Hardware Style Controllers (Catalog Numbers 1747-L20, 1747-L30, and 1747-L40) Inside… page English Section ..................3 Section en français................23 Deutscher Abschnitt ................43 Sezione italiana ..................63 Sección en español................83 Physical Dimensions................103 Wiring Diagrams................. 104...
-
Page 3: Table Of Contents
Installation Instructions English Section SLC 500™ Fixed Hardware Style Controllers (Catalog Numbers 1747-L20, 1747-L30, and 1747-L40) Inside… page Important User Information ..............4 For More Information ................5 Safety Considerations................6 Controller Spacing .................. 7 Mounting the 2-Slot Expansion Chassis (Optional)........ 7 Mounting Your Controller ............... -
Page 4: Important User Information
Allen-Bradley publication SGI-1.1, Safety Guidelines for the Application, Installation, and Maintenance of Solid-State Control (available from your local Allen-Bradley office), describes some important differences between solid-state equipment and electromechanical devices that should be taken into consideration when applying products such as those described in this publication. -
Page 5: For More Information
For More Information As part of our effort to preserve, protect, and improve our environment, Allen-Bradley is reducing the amount of paper we use. Less paper means more options for you. In addition to traditional printed publications and CD-ROM versions, we now offer on-line manuals with the most up-to-date information available. -
Page 6: Safety Considerations
SLC 500™ Fixed Hardware Style Controllers Safety Considerations High Voltages - SLC 500 Fixed Hardware Style Controller (Series C) (Applies to 1747-L20A, -L30A, -L40A, -L20C, -L30C, and -L40C controllers) Front Cover The printed circuit board, located under the front cover of Series ATTENTION C fixed hardware style controllers, has high voltages (120V ac and 240V ac) available at certain points when the controller is... -
Page 7: Controller Spacing
SLC 500™ Fixed Hardware Style Controllers Controller Spacing Follow the recommended controller orientation and minimum spacing shown below to allow for convection cooling within the enclosure. Air in the enclosure must be kept within the range of 0°C to +60°C (+32°F to +140°F). A. -
Page 8: Mounting Your Controller
SLC 500™ Fixed Hardware Style Controllers 2. To install additional I/O and specialty I/O modules, gently slide the module in until the top and bottom retainer clips are secured. Retainer clip Mounting Your Controller You can mount the fixed hardware style unit directly to the back panel of your enclosure using the mounting tabs and #10 and #12 screws. -
Page 9: Configuring The High-Speed Counter
SLC 500™ Fixed Hardware Style Controllers Configuring the High-Speed Counter The fixed controllers that have 24V dc input circuits are also equipped with a high-speed counter. For high-speed counter use, follow the procedure below: 1. Turn off power to the fixed controller. ATTENTION When power is applied to the controller, hazardous electrical potentials exist under the front cover. -
Page 10: Grounding Your Controller
SLC 500™ Fixed Hardware Style Controllers Grounding Your Controller In solid-state control systems, grounding helps limit the effects of noise due to electromagnetic interference (EMI). Run the ground connection from the ground screw of the controller (first screw from the left on the lower input terminal rung) to the ground bus. -
Page 11: Wiring Your Controller
SLC 500™ Fixed Hardware Style Controllers Wiring Your Controller See page 104 to locate the wiring diagram for your controller. ATTENTION Before you install and wire I/O devices, disconnect power from the controller and any other source to the I/O devices. Use acceptable wire gauge Use acceptable wire gauge - The I/O wiring terminals are designed to accept #14 Use acceptable wire gauge... -
Page 12: Understanding Led Messages
3. Move across the table to identify the probable cause. 4. Follow the recommended action steps for each probable cause until the cause is identified. If recommended actions do not identify the cause, contact your local Allen-Bradley sales office or distributor. Probable Cause Recommended Action... - Page 13 SLC 500™ Fixed Hardware Style Controllers Probable Cause Recommended Action POWER No Line Power Verify proper line voltage and PC RUN connections on the power terminals. CPU FAULT Power Supply 1. Check for the proper incoming FORCED I/O Fuse Blown power connections.
- Page 14 SLC 500™ Fixed Hardware Style Controllers Probable Cause Recommended Action POWER CPU Memory Error Cycle power. If the steady CPU FAULT PC RUN or Faulty CPU LED reappears, replace the controller. CPU FAULT Faulty Memory 1. Remove power and then remove FORCED I/O Module the memory module from the...
-
Page 15: Configuration Options
SLC 500™ Fixed Hardware Style Controllers Configuration Options The following table provides configuration options for the fixed controllers. Catalog Line I/O Configuration High- User Power Number Power Speed Input Output 1747– Counter L20A 120/ (12) 120V ac (8) ac/dc Relay 240V ac L30A (18) 120V ac... -
Page 16: Specifications
SLC 500™ Fixed Hardware Style Controllers Specifications Description Specification Memory Type Capacitor-backed RAM memory. Battery back-up optional. Memory Backup Options EEPROM or UVPROM Program Memory 1K Instruction Capacity Battery Life 5 years 30 days at 25°C (77°F) Capacitor Memory Back-Up Time 5 days at 60°C (140°F) 8 ms/1K Typical Scan Time... - Page 17 SLC 500™ Fixed Hardware Style Controllers Input Specifications Inputs Specifications 120V ac On-State Voltage 85-132V ac Frequency 47-63 Hz Off-State Voltage 30V ac (maximum) Inrush Current 0.8A peak Nominal Input Current 12 mA at 120V ac Turn-On Time 35 ms (maximum) Turn-Off Time 45 ms (maximum) Maximum Off-State Current...
- Page 18 SLC 500™ Fixed Hardware Style Controllers Output Specifications Outputs Specifications Triac Output Voltage 85-265V ac Continuous Current (per output) 0.5A at +30°C 0.25A at +60°C (maximum) Minimum Load Current 10mA Turn-On Time 0.1 ms (maximum) Turn-Off Time 10 ms (maximum) Maximum Off-State Leakage Current Maximum On-State Voltage Drop...
-
Page 19: Using Surge Suppressors
SLC 500™ Fixed Hardware Style Controllers Relay Contact Ratings Maximum Amperes Amperes Volt-amperes Volts Continuous Make Break Make Break 240V ac 7.5A 0.75A 2.5A 1800 VA 180 VA 120V ac 1.5A 125V dc 0.22A 1.0A 28 VA 24V dc 1.2A 2.0A 28 VA To calculate make and break ratings for other load voltages, divide the volt-ampere... - Page 20 24V ac common Suitable surge suppression methods for inductive ac load devices include a varistor, an RC network, or an Allen-Bradley surge suppressor, all shown below. These components must be appropriately rated to suppress the switching transient characteristic of the particular inductive device.
- Page 21 The suppressors we recommend for triac outputs when switching 120V ac inductive loads are a Harris MOV, part number V220 MA2A, or an Allen-Bradley MOV, catalog number 599-K04 or 599-KA04. Consult the varistor manufacturer’s data sheet when selecting a varistor for your application.
- Page 22 SLC 500™ Fixed Hardware Style Controllers Publication 1747-IN008B-MU-P...
-
Page 23: Section En Français
Instructions d’installation Section en français Automates SLC 500™ version bloc (Références 1747-L20, 1747-L30 et 1747-L40) Au sommaire… page Informations utilisateur................ 24 Complément d’informations..............25 Considérations sur la sécurité.............. 26 Dégagement de l’automate..............27 Montage du châssis d’extension à 2 emplacements (en option) ..27 Montage de l’automate................ -
Page 24: Informations Utilisateur
Les illustrations, schémas et exemples de programmes contenus dans ce manuel sont présentés à titre indicatif seulement. En raison des nombreuses variables et impératifs associés à chaque installation, la société Allen-Bradley ne saurait être tenue pour responsable ou redevable (y compris en matière de propriété intellectuelle) des suites d’utilisation réelle basée sur les exemples et schémas présentés dans ce manuel. -
Page 25: Complément D'informations
Complément d’informations Dans le cadre des efforts de protection, de sauvegarde et d’amélioration de l’environnement, Allen-Bradley réduit la quantité de papier utilisé. Moins de papier, c’est aussi un plus grand choix pour les utilisateurs : outre les publications imprimées traditionnelles et versions sur CD-ROM, nous vous offrons maintenant des manuels en ligne comportant les informations les plus récentes. -
Page 26: Considérations Sur La Sécurité
Automates SLC 500™ version bloc Considérations sur la sécurité Hautes tensions - Automate SLC 500 version bloc (série C)(s’applique aux automates 1747-L20A, -L30A, -L40A, -L20C, -L30C et -L40C) Couvercle avant La carte de circuits imprimés, située sous le couvercle avant des ATTENTION automates version bloc série C, présente des hautes tensions (120 et 240 V c.a.) à... -
Page 27: Dégagement De L'automate
Automates SLC 500™ version bloc Dégagement de l’automate Observez l’orientation recommandée pour l’automate et le dégagement mini- mum indiqué ci-dessous afin de permettre le refroidissement par convection à l’intérieur de l’armoire. L’air circulant dans l’armoire doit être maintenu entre 0° C et +60° C (+32° F et +140° F). Haut A. -
Page 28: Montage De L'automate
Automates SLC 500™ version bloc 2. Pour installer des modules d’E/S supplémentaires et des modules d’E/S spécialisées, introduisez soigneusement le module dans l’automate jusqu’au blocage des brides de retenue. Bride de retenue Montage de l’automate Vous pouvez monter l’automate version bloc directement sur le panneau arrière de votre armoire à... -
Page 29: Configuration Du Compteur Rapide
Automates SLC 500™ version bloc Configuration du compteur rapide Les automates version bloc dotés de circuits d’entrée de 24 V c.c. sont également équipés d’un compteur rapide. Pour utiliser ce dernier, suivez cette procédure : 1. Mettez l’automate hors tension. ATTENTION Lorsque l’automate est sous tension, des possibilités de dangers électriques existent sous le couvercle avant. -
Page 30: Mise À La Terre De L'automate
Pour davantage de renseignements sur les directives de mise à la terre correcte, consultez la publication 1770-4.1FR, Câblage des automates programmables Allen-Bradley et directives de mise à la terre, ou les normes spécifiques à votre région : • Europe : Normes de la directive EN 60204 et règlements nationaux. -
Page 31: Câblage De L'automate
Automates SLC 500™ version bloc Câblage de l’automate Voir page 104 pour le schéma de câblage de votre automate. ATTENTION Avant d’installer et de câbler des dispositifs d’E/S, mettez l’automate hors tension et coupez toute source d’alimentation des dispositifs d’E/S. Utilisez une section de fil acceptable Utilisez une section de fil acceptable - Les bornes de câblage des E/S sont conçues Utilisez une section de fil acceptable... -
Page 32: Descriptif Des Messages Des Voyants Led
3. Parcourez le tableau pour identifier la cause probable. 4. Suivez les étapes de l’action recommandée pour chaque cause probable jusqu’à son identification. Si les actions recommandés n’identifient pas la cause, adressez-vous à votre agence commerciale Allen-Bradley ou à votre distributeur local. Cause probable Action recommandée... - Page 33 Automates SLC 500™ version bloc POWER Cause probable Action recommandée PC RUN Vérifiez si la tension de linge est correcte et d’alimentation de les connexions des bornes d’alimentation. CPU FAULT linge FORCED I/O BATTERY LOW Fusible du bloc 1. Vérifiez si les connexions d’alimentation d’alimentation d’entrée sont correctes.
- Page 34 Automates SLC 500™ version bloc POWER Cause probable Action recommandée PC RUN Erreur mémoire Mettez hors et sous tension. Si le voyant CPU FAULT UC ou UC en LED de défaut UC <<CPU FAULT>> s’allume défaut encore de façon, fixe, remplacez l’automate. FORCED I/O BATTERY LOW Module mémoire...
-
Page 35: Options De Configuration
Automates SLC 500™ version bloc Options de configuration Le tableau ci-dessous donne les options de configuration des automates version bloc. Réf. Tension Configuration des E/S Comp- Alliment. 1747- d’alimen- teur utilisateur Entrées Sorties tation rapide L20A 120 / (12) 120 V c.a. (8) Relais c.a./c.c. -
Page 36: Spécifications
Automates SLC 500™ version bloc Spécifications Description Spécification Type de mémoire Mémoire RAM sauvegardée par condensateur. Sauvegarde par pile en option. Options de sauvegarde mémoire EEPROM ou UVPROM Mémoire programme Capacité d’instructions de 1 K Longévité de la pile 5 ans Durée de sauvegarde mémoire par 30 jours à... - Page 37 Automates SLC 500™ version bloc Spécifications des entrées Entrées Spécifications 120 V c.a. Tension en charge 85 à 132 V c.a. Fréquence 47 à 63 Hz Tension à vide 30 V c.a. (maximum) Surintensité Pic de 0,8 A Intensité nominale d’entrée 12 mA à...
- Page 38 Automates SLC 500™ version bloc Spécifications des sorties Sorties Spécifications Triac Tension de sortie 85 à 265 V c.a. Courant continu (par sortie) 0,5 A à +30° C 0,25 A à +60° C (maximum) Intensité minimale de charge 10 mA Temps d’activation 0,1 ms (maximum) Temps de désactivation...
-
Page 39: Utilisation De Filtres Antiparasites
Automates SLC 500™ version bloc Valeurs nominales des contacts à relais Tension Intensité Intensité Volts-ampères maximale continue Fermeture Ouverture Fermeture Ouverture 240 V c.a. 7,5 A 0,75 A 2,5 A 1 800 VA 180 VA 120 V c.a. 15 A 1,5 A 125 V c.c. - Page 40 Les méthodes de suppression des surtensions convenant pour les dispositifs de charge c.a. comprennent une varistance, un réseau RC ou un filtre antiparasites Allen-Bradley, comme représenté ci-dessous. Ces composants doivent avoir une valeur nominale appropriée afin de supprimer toute caractéristique transitoire des commutations d’un appareil particulier à...
- Page 41 120 V c.a. : varistance d’oxyde métallique Harris, pièce n° V220 MA2A, ou varistance d’oxyde métallique Allen-Bradley, référence 599-K04 ou 599-KA04. Consultez la fiche technique du fabricant de la varistance afin de choisir en fonction de votre application.
- Page 42 Automates SLC 500™ version bloc Table de conversion des schémas de câblage Anglais Français Dimensions in mm (in.) Dimensions en mm (po.) Catalog Number Référence Inputs Entrées High-Speed Counter Input Entrée de compteur rapide Sinking Inputs Entrées NPN Sourcing Inputs Entrées PNP Relay Outputs Sorties à...
-
Page 43: Deutscher Abschnitt
Installationsdaten Deutscher Abschnitt SLC 500™-Steuerungen mit fester Hardware-Konfiguration (Bestellnummern 1747-L20, 1747-L30 und 1747-L40) Inhalt… Seite Wichtige Anwendungshinweise ............44 Weitere Informationen................. 45 Sicherheitshinweise................46 Abstände zur Steuerung............... 47 Installation des 2-Steckplatz-Erweiterungschassis (optional)..... 47 Einbau der Steuerung................48 Konfiguration des Hochgeschwindigkeitszählers ........ 49 Erdung der Steuerung................ -
Page 44: Wichtige Anwendungshinweise
Haftung (einschließlich Haftung für geistiges Eigentum) für den tatsächlichen Einsatz, der auf den in dieser Publikation enthaltenen Beispielen beruht, übernehmen. Die Allen-Bradley Publikation SGI-1.1, Safety Guidelines for the Application, Installation, and Maintenance of Solid-State Controls (erhältlich über Ihre örtliche Allen-Bradley Geschäftsstelle) behandelt einige wichtige Unterschiede zwischen elektronischen und elektromechanischen Geräten, die bei der Anwendung der in... -
Page 45: Weitere Informationen
Weitere Informationen In unseren Bemühungen, die Umwelt zu erhalten, zu schützen und zu verbessern, reduzieren wir bei Allen-Bradley die Papiermenge, die wir einsetzen. Weniger Papier bedeutet mehr Alternativen für Sie. Neben den herkömmlichen gedruckten Publikationen bieten wir nun Online-Handbücher an, die aktuellste Daten enthalten. -
Page 46: Sicherheitshinweise
SLC 500™-Steuerungen mit fester Hardware-Konfiguration Sicherheitshinweise Hochspannungen - SLC 500-Steuerungen mit fester Hardware-Konfiguration (Serie C) (bezieht sich auf die Steuerungen 1747-L20A, -L30A, -L40A, -L20C, -L30C und -L40C) Frontabdeckung Die gedruckten Leiterplatten hinter der Frontabdeckung der ACHTUNG Steuerungen mit fester Hardware-Konfiguration (Serie C) führen an bestimmten Punkten Hochspannung (120V ac und 240V ac), wenn die Steuerung eingeschaltet ist. -
Page 47: Abstände Zur Steuerung
SLC 500™-Steuerungen mit fester Hardware-Konfiguration Abstände zur Steuerung Befolgen Sie die empfohlene Ausrichtung der Steuerung sowie die unten abgebildeten Mindestabstände, um für ausreichende Konvektionskühlung im Gehäuse zu sorgen. Die Lufttemperatur im Gehäuse muß zwischen 0°C und +60°C betragen. oben A. Größer als 101,6 mm B. -
Page 48: Einbau Der Steuerung
SLC 500™-Steuerungen mit fester Hardware-Konfiguration 2. Der Einbau von E/A- und E/A-Sondermodulen erfolgt, indem die Module vorsichtig eingeschoben werden, bis die obere und die untere Befestigungslasche eingeschnappt sind. Befestigungslasche Einbau der Steuerung Die Steuerung mit fester Hardware-Konfiguration kann mit den Befestigungs-laschen sowie mit Schrauben der US-Größe 10 und 12 direkt an der Gehäuserückwand befestigt werden. -
Page 49: Konfiguration Des Hochgeschwindigkeitszählers
SLC 500™-Steuerungen mit fester Hardware-Konfiguration Konfiguration des Hochgeschwindigkeitszählers Die fest konfigurierten Steuerungen mit 24- V dc-Eingangsschaltungen verfügen auch über einen Hochgeschwindigkeitszähler. Dieser wird wie folgt konfiguriert: 1. Die Stromversorgung zur fest konfigurierten Steuerung ausschalten. ACHTUNG Wenn die Stromversorgung zur Steuerung eingeschaltet ist, sind unter der Frontabdeckung gefährliche Spannungen anwesend. -
Page 50: Erdung Der Steuerung
SLC 500™-Steuerungen mit fester Hardware-Konfiguration Erdung der Steuerung Bei Halbleiter-Steuerungssystemen trägt die Erdung dazu bei, die Auswirkungen von Störungen aufgrund elektromagnetischer Interferenzen (EMI) zu begrenzen. Die Verbindung mit Erde erfolgt über die Masseschraube der Steuerung (erste Schraube von links an der unteren Klemmenreihe) zur Masseschiene. SLC 500-Steuerung ohne Erweiterungschassis Leiter, 8 AWG... -
Page 51: Verdrahtung Der Steuerung
SLC 500™-Steuerungen mit fester Hardware-Konfiguration Verdrahtung der Steuerung Ein Verdrahtungsdiagramm für die Steuerung ist auf Seite 104 enthalten. ACHTUNG Vor der Installation und Verdrahtung von E/A-Geräten müssen die Spannungsversorgung der Steuerung und alle weiteren Spannungsquellen der E/A-Geräte ausgeschaltet werden. Verwendung zulässiger Drahtstärken Verwendung zulässiger Drahtstärken - Die E/A-Verdrahtungsklemmen können Verwendung zulässiger Drahtstärken Verwendung zulässiger Drahtstärken... -
Page 52: Bedeutung Der Led-Meldungen
4. Die empfohlene Abhilfemaßnahme für jede Ursache befolgen, bis sich die tatsächliche Ursache feststellen läßt. Läßt sich die Ursache nicht anhand der empfohlenen Abhilfemaßnahmen feststellen, setzen Sie sich bitte mit Ihrem Allen-Bradley-Verkaufsbüro oder Vertriebshändler in Verbindung. Mögliche Empfohlene Abhilfemaßnahme POWER... - Page 53 SLC 500™-Steuerungen mit fester Hardware-Konfiguration POWER Mögliche Empfohlene Abhilfemaßnahme Ursache PC RUN CPU FAULT keine Überprüfen, ob korrekte Netzspannung Netzspannung anliegt, und ob die Anschlüsse an den FORCED I/O Spannungs-klemmen ordnungsgemäß BATTERY LOW hergestellt wurden. Netzteil- 1. Überprüfen, ob die Anschlüsse der Fehlertpy: sicherung Netzspannung ordnungsgemäß...
- Page 54 SLC 500™-Steuerungen mit fester Hardware-Konfiguration POWER Mögliche Empfohlene Abhilfemaßnahme PC RUN Ursache CPU FAULT CPU-Speicher- Strom aus- und wieder einschalten. Leuchtet FORCED I/O fehler oder die LED-Anzeige CPU FAULT weiterhin stetig, fehlerhafte die Steuerung auswechseln. BATTERY LOW CPU-Einheit Fehlerhaftes 1. Die Spannungsversorgung ausschalten Fehlertyp: Speichermodul und anschließend das Speichermodul aus...
-
Page 55: Konfigurationsoptionen
SLC 500™-Steuerungen mit fester Hardware-Konfiguration Konfigurationsoptionen Die Konfigurationsoptionen für fest konfigurierte Steuerungen sind in der folgenden Tabelle aufgeführt. Bestell- Netz- E/A-Konfiguration Hoch- Anwender- span- geschw.- leistung Eingang Ausgang 1747- nung Zähler L20A 120/ (12) 120V ac (8) ac/dc Relais nein nicht zutr. -
Page 56: Technische Daten
SLC 500™-Steuerungen mit fester Hardware-Konfiguration Technische Daten Beschreibung Spezifikationen Speichertyp Kondensatorgepufferter RAM-Speicher, Batteriepufferung optional Speicher-Backup-Optionen EEPROM oder UVPROM Programmspeicher 1K Befehlskapazität Batterielebensdauer 5 Jahre 30 Tage bei 25°C Kondensatorspeicher-Backup-Zeit 5 Tage bei 60°C 8 ms/1K typische Abfragezeit Bitausführung (XIC) 4 µs Programmabfrage-Haltezeit nach Stromausfall 20 ms bis 700 ms (je nach Last) Betriebsspannung, Netzteil... - Page 57 SLC 500™-Steuerungen mit fester Hardware-Konfiguration Eingangsdaten Eingänge Spezifikationen 120V ac Durchlaßspannung 85-132V ac Frequenz 47-63 Hz Sperrspannung 30V ac (maximal) Einschaltstrom 0,8 A Spitze Eingangsnennstrom 12 mA bei 120V ac Einschaltzeit 35 ms (maximal) Ausschaltzeit 45 ms (maximal) maximaler Sperrstrom 2 mA 240V ac Durchlaßspannung...
- Page 58 SLC 500™-Steuerungen mit fester Hardware-Konfiguration Ausgangsdaten Ausgänge Spezifikationen Triac Ausgangsspannung 85-265V ac Dauerstrom (je Ausgang) 0,5 A bei +30° C 0,25 A bei +60°C (maximal) Mindestlaststrom 10 mA Einschaltzeit 0,1 ms (maximal) Ausschaltzeit 10 ms (maximal) max. Leckstrom im AUSZustand 2 mA max.
-
Page 59: Verwendung Von Stoßspannungsunterdrückung
SLC 500™-Steuerungen mit fester Hardware-Konfiguration Relaiskontakt-Nennwerte Maximal- Ampere Ampere Volt-Ampere spannung Dauerstrom 240V ac 7,5 A 0,75 A 2,5 A 1800 VA 180 VA 120V ac 15 A 1,5 A 125V dc 0,22 A 1,0 A 28 VA 24V dc 1,2 A 2,0 A 28 VA... - Page 60 SLC 500™-Steuerungen mit fester Hardware-Konfiguration Im folgenden Diagramm ist ein Ausgang mit einem Entstörgerät abgebildet. Es empfiehlt sich, das Entstörgerät möglichst nahe am Lastgerät anzubringen. + dc oder L1 VAC/VDC Übersp.- schutz OUT 0 OUT 1 OUT 2 ac- oder OUT 3 dc-Ausgänge OUT 4...
- Page 61 Zum Schalten von induktiven Lasten (120V ac) werden für Triac-Ausgänge die Stoßspannungsunterdrückungsgeräte Harris MOV, Teilenummer V220 MA2A oder ein MOV von Allen-Bradley, Bestellnummer 599-K04 oder 599-KA04 empfohlen. Bei der Wahl eines Varistors für die jeweilige Anwendung sind die Angaben im Datenblatt des Varistor-Herstellers zu beachten.
-
Page 62: Übersetzungstabelle Zu Den Verdrahtungsdiagrammen
SLC 500™-Steuerungen mit fester Hardware-Konfiguration Übersetzungstabelle zu den Verdrahtungsdiagrammen Englisch Deutsch Dimensions in mm (in.) Abmessungen in mm (Zoll) Catalog Number Bestellnummer Inputs Eingänge High-Speed Counter Input Hochgeschwindigkeitszähler-Eingang Sinking Inputs stromziehende Eingänge Sourcing Inputs stromliefernde Eingänge Relay Outputs Relais-Ausgänge Triac Outputs Triac-Ausgänge Transistor Sourcing Outputs stromliefernde Transistor-Ausgänge... -
Page 63: Sezione Italiana
Istruzioni per l’installazione Sezione italiana Controllori SLC 500™ compatti (Numeri di catalogo 1747-L20, 1747-L30 e 1747-L40) All’interno… pagina Informazioni importanti per l’utente............. 64 Per ulteriori informazioni ..............65 Considerazioni sulla sicurezza .............. 66 Spazio per il controllore ................ 67 Montaggio dello chassis di espansione a 2 slot (opzionale)....67 Montaggio del controllore .............. -
Page 64: Informazioni Importanti Per L'utente
Le illustrazioni, gli schemi, i programmi campione e gli esempi di configurazioni di questo manuale sono intesi esclusivamente ad illustrare il testo. A causa dei numerosi requisiti e variabili propri di ciascuna installazione, la Allen-Bradley declina ogni responsabilità (compresa la responsabilità per la proprietà intellettuale) per l’uso dei prodotti basato sulle applicazioni illustrate in questa pubblicazione. -
Page 65: Per Ulteriori Informazioni
Per ulteriori informazioni Nell’ambito dell’impegno profuso per preservare, proteggere e migliorare il nostro ambiente, la Allen-Bradley sta gradualmente riducendo la quantità di carta utilizzata. Una minore quantità di carta significa maggiori opportunità per l’utente. Oltre alle tradizionali pubblicazioni su carta, la Allen-Bradley offre ora manuali in linea contenenti tutte le informazioni più... -
Page 66: Considerazioni Sulla Sicurezza
Controllori SLC 500™ compatti Considerazioni sulla sicurezza Alte tensioni - Controllori SLC 500 compatti (Serie C) (per controllori 1747-L20A, -L30A, -L40A, -L20C, -L30C e -L40C) Coperchio anteriore sotto il coperchio anteriore dei controllori compatti Serie C è ATTENZIONE ubicata la scheda del circuito stampato. Quando il controllore viene acceso, alcuni punti della scheda sono ad alta tensione (120V ca e 240V ca). -
Page 67: Spazio Per Il Controllore
Controllori SLC 500™ compatti Spazio per il controllore Seguire le raccomandazioni di seguito illustrate, relative all’orientamento del controllore ed allo spazio minimo che deve intercorrere tra il controllore e la custodia, necessarie per consentire il raffreddamento per convezione all’interno della custodia. -
Page 68: Montaggio Del Controllore
Controllori SLC 500™ compatti 2. Per installare moduli I/O aggiuntivi o particolari, spingere delicatamente il modulo fino a quando i fermi superiore e inferiore non risultano fissati. Fermo Montaggio del controllore È possibile montare l’unità fissa compatta direttamente sul pannello posteriore della custodia utilizzando le asole di montaggio e due viti da 10 e da 12. -
Page 69: Configurazione Del Contatore Veloce
Controllori SLC 500™ compatti Configurazione del contatore veloce I controllori compatti con circuiti di ingresso a 24V cc sono anche dotati di un contatore veloce. Per l’utilizzo del contatore veloce, procedere come segue: 1. Togliere la corrente al controllore compatto. ATTENZIONE quando il controllore è... -
Page 70: Messa A Terra Del Controllore
Controllori SLC 500™ compatti Messa a terra del controllore Nei sistemi di controllo a stato solido, la messa a terra contribuisce a ridurre gli effetti dei disturbi dovuti ad interferenza elettromagnetica (EMI). Portare il collegamento di terra dalla vite di terra del controllore (la prima a sinistra sulla riga più... -
Page 71: Cablaggio Del Controllore
Controllori SLC 500™ compatti Cablaggio del controllore Vedere pagina 104 per individuare lo schema di cablaggio del controllore. ATTENZIONE prima di installare ed eseguire il cablaggio dei dispositivi I/O, togliere la corrente al controllore ed a qualsiasi altra sorgente nei dispositivi I/O. -
Page 72: Interpretazione Dei Messaggi Dei Led
3. Scorrere la tabella ed identificare la probabile causa. 4. Eseguire i passi delle azioni suggerite relativi a ciascuna probabile causa fino ad identificare quella effettiva. Se le azioni suggerite non identificano la causa, contattare il più vicino distributore o ufficio vendite Allen-Bradley. Probabile causa Azione consigliata... - Page 73 Controllori SLC 500™ compatti POWER Probabile causa Azione consigliata PC RUN Mancanza di Controllare la tensione di linea ed i tensione collegamenti sui morsetti di CPU FAULT alimentazione. FORCED I/O Fusible 1. Controllare i collegamenti in entrata BATTERY LOW dell’alimentatore dell’alimentazione.
- Page 74 Controllori SLC 500™ compatti Probabile causa Azione consigliata POWER Errore di memoria Spegnere e riaccendere il dispositivo. Se PC RUN della CPU o CPU il LED CPU FAULT torna ad eccendersi, CPU FAULT guasta sostituire il controllore. FORCED I/O Il modulo di memoria 1.
-
Page 75: Opzioni Di Configurazione
Controllori SLC 500™ compatti Opzioni di configurazione La seguente tabella mostra le opzioni di configurazione per i controllori compatti. Numero Aliment. Configurazione I/O Contatore Aliment. catalogo veloce utente Ingresso Uscita 1747- L20A 120/ (12) 120V ca (8) Relè ca/cc 240V ca L30A (18) 120V ca (12) Relè... -
Page 76: Caratteristiche Tecniche
Controllori SLC 500™ compatti Caratteristiche tecniche Descrizione Specifica Tipo di memoria Memoria RAM di backup con condensatore. Backup con batteria opzionale. Opzioni di backup della memoria EEPROM o UVPROM Memoria di programma 1 K di istruzioni Durata della batteria 5 anni Durata del backup della memoria con 30 giorni a 25°C (77°F) 5 giorni a 60°C (140°F) - Page 77 Controllori SLC 500™ compatti Caratteristiche degli ingressi Ingressi Specifiche 120V ca Tensione stato acceso 85-132V ca Frequenza 47-63 Hz Tensione stato spento 30V ca (max.) Corrente iniziale 0,8A picco Corrente nominale di ingresso 12mA a 120V ca Tempo accensione 35 ms (max.) Tempo spegnimento 45 ms (max.) Corrente massima stato spento...
- Page 78 Controllori SLC 500™ compatti Specifiche delle uscite Uscite Specifiche Triac Tensione di uscita 85-265V ca Corrente continua (per uscita) 0,5A a +30°C 0,25A a +60°C (max.) Corrente minima di carico 10mA Tempo di accensione 0,1 ms (max.) Tempo di spegnimento 10 ms (max.) Perdita corrente stato spento (max.) 2mA Caduta tensione stato acceso (max.) 1,5V at 0,5A...
-
Page 79: Uso Dei Soppressori Di Picco
Controllori SLC 500™ compatti Valori nominali dei contatti a relè Tensione Intensità Intensità Voltampere massima Continua Aperto Chiuso Aperto Chiuso 240V ca 7,5A 0,75A 2,5A 1800 VA 180 VA 120V ca 1,5A 125V cc 0,22A 1,0A 28 VA 24V cc 1,2A 2,0A 28 VA... - Page 80 I metodi corretti di soppressione di picco per i dispositivi di carico in ca induttivi comprendono un varistor, una rete RC o un soppressore di picco Allen-Bradley, di seguito illustrati. È necessario calcolare accuratamente la velocità di frequenza di tali componenti in modo da sopprimere il transitorio di commutazione specifico del particolare dispositivo induttivo.
- Page 81 I soppressori consigliati per le uscite triac quando si commutano carichi induttivi da 120V ca sono un Harris MOV, numero di catalogo V220 MA2A o un Allen-Bradley MOV, numero di catalogo 599-K04 o 599-KA04. Quando per l’applicazione si sceglie un varistor, consultare la scheda tecnica della casa produttrice del varistor.
-
Page 82: Tabella Di Traduzione Dei Termini Relativi Allo Schema Di Cablaggio
Controllori SLC 500™ compatti Tabella di traduzione dei termini relativi allo schema di cablaggio Inglese Italiano Dimensions in mm (in.) Dimensioni in mm. (poll.) Catalog Number Numero di catalogo Inputs Ingressi High-Speed Counter Input Ingresso contatore veloce Sinking Inputs Ingressi a comune negativo Sourcing Inputs Ingressi a comune positivo Relay Outputs... -
Page 83: Sección En Español
Instrucciones de instalación Sección en español Controladores tipo hardware compacto SLC 500™ (Números de catálogo 1747-L20, 1747-L30 y 1747-L40) Contenido… página Información importante para el usuario..........84 Para obtener más información ............. 85 Consideraciones de seguridad ............. 86 Espacios del controlador ..............87 Montaje del chasis de expansión de 2 ranuras (opcional) .... -
Page 84: Información Importante Para El Usuario
Está prohibida la reproducción total o parcial del contenido de esta publicación de propiedad exclusiva sin el permiso por escrito de Allen-Bradley Company, Inc. En estas instrucciones de instalación hacemos anotaciones para alertarle de... -
Page 85: Para Obtener Más Información
Para obtener más información Como parte de nuestro esfuerzo para preservar, proteger y mejorar nuestro medio ambiente, Allen-Bradley está reduciendo la cantidad de papel que usa. Menos papel significa más opciones para usted. Además de las publicaciones impresas tradicionales, ahora ofrecemos manuales en línea con la información más actualizada disponible. -
Page 86: Consideraciones De Seguridad
Controladores tipo hardware compacto SLC 500™ Consideraciones de seguridad Voltajes elevados - Controladores tipo hardware compacto SLC 500 (Serie C) (Se aplica a los controladores 1747-L20A, -L30A, -L40A, -L20C, -L30C y -L40C) Cubierta frontal La tarjeta de circuito impreso, ubicada debajo de la cubierta ATENCION frontal de los controladores tipo hardware compacto Serie C, tiene voltajes elevados (120V ca y 240V ca) en ciertos puntos... -
Page 87: Espacios Del Controlador
Controladores tipo hardware compacto SLC 500™ Espacios del controlador Siga la orientación de controlador recomendada y los espacios mínimos mostrados a continuación para permitir el enfriamiento por convexión dentro del envolvente. El aire dentro del envolvente debe mantenerse dentro de los límites de 0°C a +60°C (+32°F a +140°F). -
Page 88: Montaje Del Controlador
Controladores tipo hardware compacto SLC 500™ 2. Para instalar E/S adicionales y módulos de E/S especiales, deslice suavemente el módulo hacia adentro hasta que las abrazaderas de retención superior e inferior estén aseguradas. Abrazadera de retención Montaje del controlador Se puede montar la unidad tipo hardware compacto directamente al panel posterior del envolvente utilizando las lengüetas de montaje y tornillos #10 y #12. -
Page 89: Configuración Del Contador De Alta Velocidad
Controladores tipo hardware compacto SLC 500™ Configuración del contador de alta velocidad Los controladores compactos que tienen circuitos de entrada de 24V cc también están equipados con un contador de alta velocidad. Para usar el contador de alta velocidad, siga el procedimiento descrito a continuación: 1. -
Page 90: Conexión A Tierra Del Controlador
Controladores tipo hardware compacto SLC 500™ Conexión a tierra del controlador En sistemas de control de estado sólido, la conexión a tierra ayuda a limitar los efectos de ruido debido a interferencia electromagnética (EMI). Instale la conexión a tierra desde el tornillo de conexión a tierra del controlador (primer tornillo desde la izquierda en el renglón de terminal de entrada inferior) al bus de conexión a tierra. -
Page 91: Cableado Del Controlador
Controladores tipo hardware compacto SLC 500™ Cableado del controlador Vea la página 104 para conocer la ubicación del diagrama de cableado del controlador. ATENCION Antes de instalar y cablear los dispositivos de E/S, desconecte la alimentación eléctrica del controlador y cualquier otra fuente a los dispositivos de E/S. -
Page 92: Descripción De Los Mensajes Led
3. Lea la tabla para identificar la causa probable. 4. Siga los pasos de acción recomendados para cada causa probable hasta que la causa sea identificada. Si las acciones recomendadas no identifican la causa, comuníquese con la oficina de ventas o distribuidor local Allen-Bradley. Causa probable Acción recomendada POWER Condición de... - Page 93 Controladores tipo hardware compacto SLC 500™ POWER Causa probable Acción recomendada PC RUN No hay alimentación Verifique el voltaje de línea y las eléctrica de linea conexiones de los terminales de CPU FAULT alimentación eléctrica sean los FORCED I/O adecuados. BATTERY LOW Se quemó...
- Page 94 Controladores tipo hardware compacto SLC 500™ POWER Causa probable Acción recomendada PC RUN Error de memoria de Apague y vuelva a encender. Si vuelve a la CPU o CPU con aparecer el indicador LED de CPU FAULT, CPU FAULT fallo cambie el controlador.
-
Page 95: Opciones De Configuración
Controladores tipo hardware compacto SLC 500™ Opciones de configuración La siguiente tabla contiene las opciones de configuración para los controladores compactos. Número Alim. Configuración de E/S Contador Alim. eléct. eléct. de de alta del cliente Entrada Salida catálogo línea velocidad 1747- L20A 120/... -
Page 96: Especificaciones
Controladores tipo hardware compacto SLC 500™ Especificaciones Descriptión Especificación Tipo de memoria Memoria RAM con capacitor. Batería de respaldo (backup) opcional. Opciones de respaldo (backup) de memoria EEPROM o UVPROM Memoria de programa 1K de capacidad de instrucción Duración de la bateria 5 años Tiempo de de respaldo de la memoria del 30 dias a 25°C (77°F) - Page 97 Controladores tipo hardware compacto SLC 500™ Especificaciones de entradas Entradas Especificaciones 120V ca Voltaje de estado encendido 85-132V ca Frecuencia 47-63 Hz Voltaje de estado desactivado 30V ca (máximo) Corriente de arranque 0.8 A pico Corriente de entrada nominal 12 mA a 120V ca Tiempo de encendido 35 ms (máximo) Tiempo de apagado...
- Page 98 Controladores tipo hardware compacto SLC 500™ Especificaciones de salidas Salidas Especificaciones Triac Voltaje de salida 85-265V ca Corriente continua (por salida) 0.5 A a +30°C 0.25 A a +60°C (máximo) Corriente de carga mínima 10 mA Tiempo de encendido 0.1 ms (máximo) Tiempo de apagado 10 ms (máximo) Máx.
-
Page 99: Uso De Supresores De Sobretensión
Controladores tipo hardware compacto SLC 500™ Capacidades nominales de contactos de relé Volts máximos Amperes Amperes Volt-amperes Continuos Cierre Apertura Cierre Apertura 240V ca 7.5 A 0.75 A 2.5 A 1800 VA 180 VA 120V ca 15 A 1.5 A 125V cc 0.22 A 1.0 A... - Page 100 Controladores tipo hardware compacto SLC 500™ El siguiente diagrama muestra una salida con un dispositivo de supresión. recomendamos que se ubique el dispositivo de supresión tan cerca del dispositivo de carga como sea posible. + cc o bien L1 VAC/VDC Supresor OUT 0 OUT 1...
- Page 101 Los supresores que recomendamos para salidas triac cuando se cambian cargas inductivas de 120V ca son un Harris MOV, número de parte V220 MA2A, o un MOV Allen-Bradley, número de catálogo 599-K04 ó 599-KA04. Consulte la hoja de información del fabricante del varistor cuando seleccione un varistor para su aplicación.
-
Page 102: Tabla De Traducción De Términos De Los Diagramas De Cableado
Controladores tipo hardware compacto SLC 500™ Tabla de traducción de términos de los diagramas de cableado Inglés Español Dimensions in mm (in.) Dimensiones en mm (pulg.) Catalog Number Número de catálogo Inputs Entradas High–Speed Counter Input Entrada de contador de alta velocidad Sinking Inputs Entradas de drenador Sourcing Inputs... -
Page 103: Physical Dimensions
Physical Dimensions 1747-L20 I/O Fixed Controller - Dimensions in mm (in.) (4.13) (6.22) (6.73) (5.51) Cat. 5.50 Dia. (.217) (4.13) 6.35 (0.25) (5.71) (6.50) Left Side View Front View 1747-L30 & -L40 I/O Fixed Controller (6.89) (6.73) (6.22) 140 (5.51) Cat. -
Page 104: Wiring Diagrams
Wiring Diagrams Catalog Number Wiring Diagram Location 1747-L20A page 105 1747-L20B page 107 1747-L20C page 109 1747-L20D page 111 1747-L20E page 113 1747-L20F page 115 1747-L20G page 117 1747-L20L page 119 1747-L20N page 121 1747-L20P page 123 1747-L20R page 125 1747-L30A page 127 1747-L30B... -
Page 105: Encombrement
Catalog Number 1747-L20A (12) 120V ac Inputs & (8) Relay Outputs (Hi) (Lo) (Hi) (Lo) 5-265V ac or 5-265V ac or 5-125V dc 5-125V dc VAC- VAC- OUT 1 OUT 2 OUT 0 OUT 3 OUT 4 OUT 5 OUT 6 OUT 7 VDC 1 VDC 2... -
Page 106: Schémas De Câblage
Catalog Number 1747-L20A (12) 120V ac Inputs & (8) Relay Outputs On/Off State Voltage Ranges 0V ac 30V ac 85V ac 132V ac Off-state Input State Not Guaranteed On-state Operating State Voltage Ranges 0V 5V ac 265V ac 0V 5V dc 125V dc Recommended Operating Range Operation Not... - Page 107 Catalog Number 1747-L20B (12) 120V ac Inputs & (8) Triac Outputs (Hi) (Lo) (Hi) (Lo) 85 - 265V ac 85 - 265V ac OUT 0 VAC 1 OUT 1 OUT 2 OUT 3 VAC 2 OUT 4 OUT 7 OUT 5 OUT 6 (Hi) (Lo)
- Page 108 Catalog Number 1747-L20B (12) 120V ac Inputs & (8) Triac Outputs On/Off State Voltage Ranges 0V ac 30V ac 85V ac 132V ac On-state Off-state Input State Not Guaranteed Operating Voltage Ranges 0V ac 85V ac 265V ac Operation Not Guaranteed Recommended Operating Range Important: If you measure the voltage at an output terminal that is not connected to a load or is...
- Page 109 Catalog Number 1747-L20C (12) 24V dc Sinking Inputs, High-Speed Counter Input, & (8) Relay Outputs (Hi) (Lo) (Hi) (Lo) 5-265V ac or 5-265V ac or 5-125V dc 5-125V dc VAC- VAC- OUT 0 OUT 1 OUT 2 OUT 3 OUT 4 OUT 7 OUT 5 OUT 6...
- Page 110 Catalog Number 1747-L20C (12) 24V dc Sinking Inputs, High-Speed Counter Input, & (8) Relay Outputs On/Off State Voltage Ranges - Input 0 (HSC) 0V dc 4V dc 10V dc 30V dc On-state Off-state Input State Not Guaranteed On/Off State Voltage Ranges - All Other Inputs 0V dc 5V dc 10V dc...
- Page 111 Catalog Number 1747-L20D (12) 24V dc Sinking Inputs, High-Speed Counter Input, & (8) Triac Outputs (Hi) (Lo) (Hi) (Lo) 85 - 265V ac 85 - 265V ac VAC 1 OUT 0 OUT 3 OUT 1 OUT 2 VAC 2 OUT 4 OUT 7 OUT 5 OUT 6...
- Page 112 Catalog Number 1747-L20D (12) 24V dc Sinking Inputs, High-Speed Counter Input, & (8) Triac Outputs On/Off State Voltage Ranges - Input 0 (HSC) 0V dc 4V dc 10V dc 30V dc On-state Off-state Input State Not Guaranteed On/Off State Voltage Ranges - All Other Inputs 0V dc 5V dc 10V dc...
- Page 113 Catalog Number 1747-L20E (12) 24V dc Sinking Inputs, High-Speed Counter Input, & (8) Transistor Sourcing Outputs - dc + dc 10-50V dc OUT 3 OUT 4 OUT 5 OUT 6 OUT 7 OUT 0 OUT 2 OUT 1 (Hi) (Lo) 85-265V ac Sourcing Device 120/240...
- Page 114 Catalog Number 1747-L20E (12) 24V dc Sinking Inputs, High-Speed Counter Input, & (8) Transistor Sourcing Outputs On/Off state Voltage Ranges - Input 0 (HSC) 0V dc 4V dc 10V dc 30V dc On-state Input State Not Off-state Guaranteed On/Off state Voltage Ranges - All Other Inputs 10V dc 0V dc 5V dc...
- Page 115 Catalog Number 1747-L20F (12) 24V dc Sinking Inputs, High-Speed Counter Input, & (8) Relay Outputs (Hi) (Lo) (Hi) (Lo) 5-265V ac or 5-265V ac or 5-125V dc 5-125V dc VAC- VAC- OUT 0 OUT 1 OUT 2 OUT 3 OUT 4 OUT 7 OUT 5 OUT 6...
- Page 116 Catalog Number 1747-L20F (12) 24V dc Sinking Inputs, High-Speed Counter Input, & (8) Relay Outputs On/Off State Voltage Ranges - Input 0 (HSC) 0V dc 4V dc 10V dc 30V dc On-state Off-state Input State Not Guaranteed On/Off State Voltage Ranges - All Other Inputs 0V dc 5V dc 10V dc...
- Page 117 Catalog Number 1747-L20G (12) 24V dc Sinking Inputs, High-Speed Counter Input, & (8) Transistor Sourcing Outputs + dc - dc 10-50V dc OUT 3 OUT 4 OUT 5 OUT 6 OUT 7 OUT 0 OUT 1 OUT 2 + dc - dc 10-30V dc 24V dc...
- Page 118 Catalog Number 1747-L20G (12) 24V dc Sinking Inputs, High-Speed Counter Input, & (8) Transistor Sourcing Outputs On/Off State Voltage Ranges - Input 0 (HSC) 0V dc 4V dc 10V dc 30V dc On-state Input State Not Off-state Guaranteed On/Off State Voltage Ranges - All Other Inputs 0V dc 5V dc 10V dc...
- Page 119 Catalog Number 1747-L20L (12) 24V dc Sourcing Inputs, High-Speed Counter Input, & (8) Transistor Sinking Outputs + dc - dc 10-50V dc OUT 3 OUT 4 OUT 5 OUT 6 OUT 7 OUT 0 OUT 2 OUT 1 (Hi) (Lo) 85-265 V ac Sinking Device 120/240...
- Page 120 Catalog Number 1747-L20L (12) 24V dc Sourcing Inputs, High-Speed Counter Input, & (8) Transistor Sinking Outputs On/Off State Voltage Ranges - Input 0 (HSC) 10V dc 0V dc 4V dc 30V dc On-state Off-state Input State Not Guaranteed On/Off State Voltage Ranges - All Other Inputs 10V dc 0V dc 5V dc...
- Page 121 Catalog Number 1747-L20N (12) 24V dc Sourcing Inputs, High-Speed Counter Input, & (8) Transistor Sinking Outputs + dc - dc 10-50V dc OUT 3 OUT 4 OUT 5 OUT 6 OUT 7 OUT 0 OUT 1 OUT 2 - dc + dc 10-30V dc 24V dc...
- Page 122 Catalog Number 1747-L20N (12) 24V dc Sourcing Inputs, High-Speed Counter Input, & (8) Transistor Sinking Outputs On/Off State Voltage Ranges - Input 0 (HSC) 0V dc 4V dc 10V dc 30V dc On-state Off-state Input State Not Guaranteed On/Off State Voltage Ranges - All Other Inputs 10V dc 0V dc 5V dc...
- Page 123 Catalog Number 1747-L20P (12) 240V ac Inputs & (8) Triac Outputs (Hi) (Lo) (Hi) (Lo) 85 - 265V ac 85 - 265V ac VAC 1 OUT 0 OUT 1 OUT 2 VAC 2 OUT 3 OUT 4 OUT 7 OUT 5 OUT 6 (Hi) (Lo)
- Page 124 Catalog Number 1747-L20P (12) 240V ac Inputs & (8) Triac Outputs On/Off State Voltage Ranges 265V ac 0V ac 50V ac 170V ac Input State Not Guaranteed On-state Off-state Operating Voltage Ranges 265V ac 0V ac 85V ac Recommended Operating Range Operation Not Guaranteed Important: If you measure the voltage at an output terminal that is not connected to a load or is connected to a high-impedance load, you may measure as much as 100V ac even though the output is off.
- Page 125 Catalog Number 1747-L20R (12) 240V ac Inputs & (8) Relay Outputs (Hi) (Lo) (Hi) (Lo) 5-265V ac or 5-265V ac or 5-125V dc 5-125V dc VAC- VAC- OUT 0 OUT 1 OUT 2 OUT 3 OUT 4 OUT 7 OUT 5 OUT 6 VDC 1 VDC 2...
- Page 126 Catalog Number 1747-L20R (12) 240V ac Inputs & (8) Relay Outputs On/Off State Voltage Ranges 265V ac 0V ac 50V ac 170V ac On-state Input State Not Guaranteed Off-state Operating Voltage Range 0V 5V ac 265V ac 0V 5V dc 125V dc Recommended Operating Range Operation Not...
- Page 127 Catalog Number 1747-L30A (18) 120V ac Inputs & (12) Relay Outputs (Hi) (Lo) (Hi) (Lo) (Hi) (Hi) (Lo) (Lo) 5-265V ac 5-265V ac 5-265V ac 5-265V ac 5-125V dc 5-125V dc 5-125V dc 5-125V dc VAC- OUT 4 OUT 5 NOT VAC- VAC- OUT 10 OUT 11...
- Page 128 Catalog Number 1747-L30A (18) 120V ac Inputs & (12) Relay Outputs On/Off State Voltage Ranges 132V ac 0V ac 30V ac 85V ac Input State Not Guaranteed On-state Off-state Operating Voltage Ranges 0V 5V ac 265V ac 0V 5V dc 125V dc Recommended Operating Range Operation Not...
- Page 129 Catalog Number 1747-L30B (18) 120V ac Inputs & (12) Triac Outputs (Hi) (Hi) (Lo) (Lo) 85-265V ac 85-265V ac OUT 6 OUT 7 OUT 8 OUT 9 OUT 10 OUT 11 NOT VAC 1 OUT 0 OUT 1 OUT 2 OUT 3 OUT 4 OUT 5 NOT VAC 2 VAC 2 VAC 1 USED...
- Page 130 Catalog Number 1747-L30B (18) 120V ac Inputs & (12) Triac Outputs On/Off State Voltage Ranges 132V ac 0V ac 30V ac 85V ac Input State Not Guaranteed On-state Off-state Operating Voltage Ranges 265V ac 0V ac 85V ac Recommended Operating Range Operation Not Guaranteed Important: If you measure the voltage at an output terminal that is not connected to a load or is connected...
- Page 131 Catalog Number 1747-L30C (18) 24V dc Sinking Inputs, High-Speed Counter Input, & (12) Relay Outputs (Hi) (Hi) (Lo) (Lo) (Hi) (Lo) (Hi) (Lo) 5-265V ac 5-265V ac 5-265V ac 5-265V ac 5-125V dc 5-125V dc 5-125V dc 5-125V dc VAC- OUT 4 OUT 5 NOT VAC- VAC-...
- Page 132 Catalog Number 1747-L30C (18) 24V dc Sinking Inputs, High-Speed Counter Input, & (12) Relay Outputs On/Off State Voltage Ranges - Input 0 (HSC) 0V dc 4V dc 10V dc 30V dc On-state Off-state Input State Not Guaranteed On/Off State Voltage Ranges - All Other Inputs 0V dc 5V dc 10V dc...
- Page 133 Catalog Number 1747-L30D (18) 24V dc Sinking Inputs, High-Speed Counter Input, & (12) Triac Outputs (Hi) (Hi) (Lo) (Lo) 85-265V ac 85-265V ac OUT 6 OUT 7 OUT 8 OUT 9 OUT 10 OUT 11 NOT VAC 1 OUT 0 OUT 1 OUT 2 OUT 3 OUT 4 OUT 5 NOT VAC 1 VAC 2 VAC 2 USED...
- Page 134 Catalog Number 1747-L30D (18) 24V dc Sinking Inputs, High-Speed Counter Input, & (12) Triac Outputs On/Off State Voltage Ranges - Input 0 (HSC) 0V dc 4V dc 10V dc 30V dc On-state Off-state Input State Not Guaranteed On/Off State Voltage Ranges - All Other Inputs 0V dc 5V dc 10V dc...
- Page 135 Catalog Number 1747-L30L (18) 24V dc Sourcing Inputs, High-Speed Counter Input, & (12) Transistor Sinking Outputs + dc - dc - dc + dc 10-50V dc 10-50V dc OUT 7 OUT 8 OUT 9 OUT 10 OUT 11 NOT OUT 2 OUT 3 OUT 4 OUT 5 NOT VDC 2 OUT 6 VDC 1 OUT 0...
- Page 136 Catalog Number 1747-L30L (18) 24V dc Sourcing Inputs, High-Speed Counter Input, & (12) Transistor Sinking Outputs On/Off State Voltage Ranges - Input 0 (HSC) 0V dc 4V dc 10V dc 30V dc On-state Off-state Input State Not Guaranteed On/Off State Voltage Ranges - All Other Inputs 0V dc 5V dc 10V dc...
- Page 137 Catalog Number 1747-L30P (18) 240V ac Inputs & (12) Triac Outputs (Hi) (Hi) (Lo) (Lo) 85-265V ac 85-265V ac OUT 6 OUT 7 OUT 8 OUT 9 OUT 10 OUT 11 NOT VAC 1 OUT 0 OUT 1 OUT 2 OUT 3 OUT 4 OUT 5 NOT VAC 1 VAC 2 VAC 2 USED...
- Page 138 Catalog Number 1747-L30P (18) 240V ac Inputs & (12) Triac Outputs On/Off Voltage Ranges 265V ac 0V ac 50V ac 170V ac Input State Not Guaranteed On-state Off-state Operating Voltage Range 265V ac 85V ac 0V ac Recommended Operating Range Operation Not Guaranteed Important: If you measure the voltage at an output terminal that is not connected to a load or is connected...
- Page 139 Catalog Number 1747-L40A (24) 120V ac Inputs & (16) Relay Outputs (Hi) (Lo) (Hi) (Lo) (Lo) (Hi) (Hi) (Lo) 5-265V ac 5-265V ac 5-265V ac 5-265V ac 5-125V dc 5-125V dc 5-125V dc 5-125V dc VAC- VAC- OUT 2 OUT 3 VAC- VAC- OUT 0 OUT 1...
- Page 140 Catalog Number 1747-L40A (24) 120V ac Inputs & (16) Relay Outputs On/Off State Voltage Ranges 132V ac 0V ac 30V ac 85V ac On-state Input State Not Guaranteed Off-state Operating Voltage Range 0V 5V ac 265V ac 0V 5V dc 125V dc Recommended Operating Range Operation Not...
- Page 141 Catalog Number 1747-L40B (24) 120V ac Inputs & (16) Triac Outputs (Hi) (Lo) (Hi) (Lo) 85-265V ac 85-265V ac OUT 8 OUT 9 OUT 10 OUT 11 OUT 12 OUT 13 OUT 14 OUT 15 VAC 1 VAC 1 OUT 0 OUT 1 OUT 2 OUT 3 OUT 4 OUT 5 OUT 6 OUT 7 VAC 2 VAC 2 VAC 1 VAC 2 Connected...
- Page 142 Catalog Number 1747-L40B (24) 120V ac Inputs & (16) Triac Outputs On/Off State Voltage Ranges 132V ac 0V ac 30V ac 85V ac Input State Not Guaranteed On-state Off-state Operating Voltage Range 265V ac 0V ac 85V ac Recommended Operating Range Operation Not Guaranteed Important: If you measure the voltage at an output terminal that is not connected to a load or is...
- Page 143 Catalog Number 1747-L40C (24) 24V dc Sinking Inputs, High-Speed Counter Input, & (16) Relay Outputs (Hi) (Lo) (Hi) (Lo) (Lo) (Hi) (Hi) (Lo) 5-265V ac 5-265V ac 5-265V ac 5-265V ac 5-125V dc 5-125V dc 5-125V dc 5-125V dc VAC- VAC- OUT 2 OUT 3 VAC- VAC-...
- Page 144 Catalog Number 1747-L40C (24) 24V dc Sinking Inputs, High-Speed Counter Input, & (16) Relay Outputs On/Off State Voltage Ranges - Input 0 (HSC) 0V dc 4V dc 10V dc 30V dc On-state Off-state Input State Not Guaranteed On/Off State Voltage Ranges - All Other Inputs 0V dc 5V dc 10V dc...
- Page 145 Catalog Number 1747-L40E (24) 24V dc Sinking Inputs, High-Speed Counter Input, & (16) Transistor Sourcing Outputs - dc + dc + dc - dc 10-50V dc 10-50V dc OUT 2 OUT 3 OUT 4 OUT 5 OUT 6 OUT 7 DC OUT 9 OUT 10 OUT 11 OUT 12 OUT 13 OUT 14 OUT 15 DC VDC 1 OUT 0...
- Page 146 Catalog Number 1747-L40E (24) 24V dc Sinking Inputs, High-Speed Counter Input, & (16) Transistor Sourcing Outputs On/Off State Voltage Ranges - Input 0 (HSC) 0V dc 4V dc 10V dc 30V dc On-state Off-state Input State Not Guaranteed On/Off State Voltage Ranges - All Other Inputs 0V dc 5V dc 10V dc...
- Page 147 Catalog Number 1747-L40F (24) 24V dc Sinking Inputs, High-Speed Counter Input, & (16) Relay Outputs (Hi) (Lo) (Hi) (Lo) (Lo) (Hi) (Hi) (Lo) 5-265V ac 5-265V ac 5-265V ac 5-265V ac 5-125V dc 5-125V dc 5-125V dc 5-125V dc VAC- VAC- OUT 2 OUT 3 VAC- VAC-...
- Page 148 Catalog Number 1747-L40F (24) 24V dc Sinking Inputs, High-Speed Counter Input, & (16) Relay Outputs On/Off State Voltage Ranges - Input 0 (HSC) 0V dc 4V dc 10V dc 30V dc On-state Off-state Input State Not Guaranteed On/Off State Voltage Ranges - All Other Inputs 0V dc 5V dc 10V dc...
- Page 149 Catalog Number 1747-L40L (24) 24V dc Sourcing Inputs, High-Speed Counter Input, & (16) Transistor Sinking Outputs + dc - dc + dc - dc 10-50V dc 10-50V dc OUT 2 OUT 3 OUT 4 OUT 5 OUT 6 OUT 7 DC OUT 9 OUT 10 OUT 11 OUT 12 OUT 13 OUT 14 OUT 15 DC VDC 1 OUT 0...
- Page 150 Catalog Number 1747-L40L (24) 24V dc Sourcing Inputs, High-Speed Counter Input, & (16) Transistor Sinking Outputs On/Off State Voltage Ranges - Input 0 (HSC) 0V dc 4V dc 10V dc 30V dc On-state Off-state Input State Not Guaranteed On/Off State Voltage Ranges - All Other Inputs 0V dc 5V dc 10V dc...
- Page 151 Catalog Number 1747-L40P (24) 240V ac Inputs & (16) Triac Outputs (Hi) (Hi) (Lo) (Lo) 85-265V ac 85-265V ac VAC 1 OUT 0 OUT 1 OUT 2 OUT 3 OUT 4 OUT 5 OUT 6 OUT 7 VAC 2 VAC 2 OUT 8 OUT 9 OUT 10 OUT 11 OUT 12 OUT 13 OUT 14 OUT 15 VAC 1 VAC 2...
- Page 152 Catalog Number 1747-L40P (24) 240V ac Inputs & (16) Triac Outputs On/Off State Voltage Ranges 265V ac 0V ac 50V ac 170V ac On-state Input State Not Guaranteed Off-state Operating Voltage Range 265V ac 0V ac 85V ac Recommended Operating Range Operation Not Guaranteed Important: If you measure the voltage at an output terminal that is not connected to a load or is connected to a high-impedance load, you may measure as much as 100V ac even though the output is off.
- Page 154 Publication 1747-IN008B-MU-P - November 2000 PN 40072-092-01 (B) Supersedes Publication 1747-IN008A-ML-P - February 2000 © 2000 Rockwell International Corporation. Printed in the U.S.A.
Need help?
Do you have a question about the SLC 500 1747-L20 and is the answer not in the manual?
Questions and answers