Table of Contents
Advertisement
Quick Links
MOUNTING (PERMANENT MOUNT)
1) Locate and clean a position on the
left side of helmet close to lower
edge of the helmet.
2) Peel off the 3M double sided tape
protective film and place the mount
with logo on bottom and place Mount
to the position in step 1.
3) Apply pressure to the metal bracket
to ensure that the bracket is firmly
secured. Note: It takes 24hours for
adhesive to set.
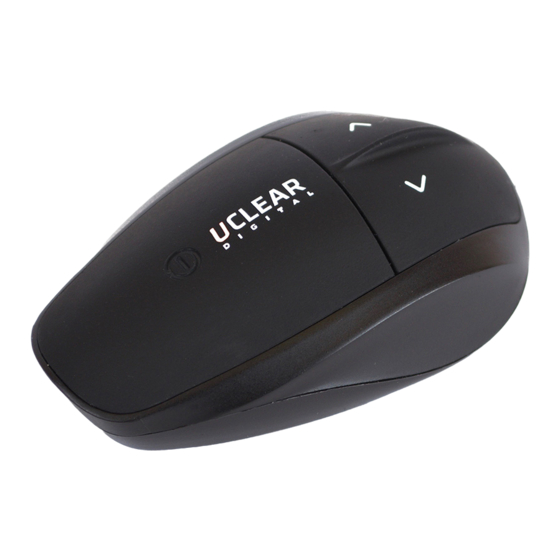
INSTALL CONTROL UNIT
1) From the top, slide AMP unit onto the
bracket. You should hear a 'click' sound
when fully inserted.
2) Fully insert the speaker USB connector.
PULSE PRO & BOOST PRO PLACEMENT
FIG.A
SPEAKER
5.5"
TOWARDS EAR
3/16"
MIC PORT
FACE FORWARD
MIC MINIMUM PLACEMENT
SEE FIG.A
OR
TECHNICAL DATA
Bluetooth: V4.2 (BR/EDR/BLE), Class 1
Profiles: HSP, HFP, A2DP
Intercom: AVRCP
Carrier Frequency: 2.402 - 2.480 GHz
Range: Up to 700m (0.43mi)
AMP Pro Multi-Hop Intercom: 2 Users and Up
AMP Plus Multi-Hop Intercom: 2-6 Users
AMP Multi-Hop Intercom: 2 Users
BUTTON CONFIGURATION REFERENCE
BASIC COMMANDS
Power On
Hold Press "Power" once for 2 seconds
Power Off
Hold "Power" for 5 seconds
Activate Bluetooth Pairing
Hold "Up" and "Down" for 2 seconds
Volume Up
Press "Up" once per volume level
Volume Down
Press "Down" once per volume level
Reset
Press "Power", "Up" and "Down" once simultaneously
PHONE CALLS
Pick up Incoming Call
Press "Power" Once
End Call In Progress
Hold "Power" for 2 Seconds
Reject Incoming Call
Hold "Power" for 2 Seconds
Voice Dial
Hold "Power" and Down for 2 Seconds
Last Number Redial
Hold "Power" and Up for 2 Seconds
MUSIC
Play
Press "Power" 2 Times
Stop
Press "Power" 1 Time
Fast Forward Track
Press "Up" Button 2 Times
Backtrack
Press "Down" Button 2 Times
GROUP INTERCOM
Pairing as Unit 1
Unit is off, "Power" and "Down" for 3 seconds
Pairing as Unit 2
Unit is off, "Power" and "Up" for 3 seconds
Connect intercom
Hold "Up" for 2 Seconds
Disconnect intercom
Hold "Down" for 2 Seconds
OPEN INTERCOM
Activate Open Pairing
Unit is off, hold "Power" for 10 seconds
Activate [other brand] Pairing
Refer to the Respective Manufacturer User Manual
Connect intercom
Hold "Up' for 2 Seconds
Disconnect intercom
Hold "Down" for 2 Seconds
PRIVATE INTERCOM
Set Up
While all units are connected, hold "Power" and "Up"
Switch To Group Intercom
Press "Power" 1 Time
Switch To Private Intercom
Press "Power" 1 Time
MOUNTING (TEMPORARY MOUNT)
1) Position and fasten the clip
TOP
bracket onto the helmet.
2) Remove the metal handles
after clip bracket has been
installed.
3) Use additional
anti-slip rubber
patch provided
if required.
REMOVE CONTROL UNIT
Remove USB speaker connector.
1)
Slide AMP upward to release from
2)
BOOST PLUS PLACEMENT
SPEAKER
TOWARDS EAR
MICROPHONE
FACE FORWARD
Both mics should be placed parallel to each other
SPEAKER USB PLUG
Insert the speaker USB
wire into the control
unit until you can no
longer see the 3 ribs on
the USB speaker wire plug.
Battery: 3.7V, 500mAh Lithium-ion
Talk Time: Up to 10 Hours
Stand by Time: 400 Hours
Operating Temp: -30C(-4F) to 60C(140F)
Required Charging Temp: 0°C(32F) to 45°C(+113 F°)
Controller Unit Size: 60 x 40 x 18mm(2.9 x 1.75 x 1")
ClearLink: Android 4.4 or Later. Apple iOS 8 or Later
AMP SERIES USER GUIDE
FOR A DIGITAL COPY OF THIS USER GUIDE LAUNCH CLEARLINK APP OR
BUTTONS
POWER ON
POWER OFF
Press & Hold "Power"
Press & Hold "Power"
for 2 seconds
for 5 seconds
PAIRING TO SMARTPHONE
1)
Power on the unit.
2)
Turn on the phone's
Hold "Up" and
Bluetooth, search
"Down"2 seconds
Bluetooth device list
until LED alternately
and select/connect
blinks blue and red.
your AMP model.
3)
After successful Pairing power off Unit to
store Phone into Memory. When AMP Pro,
AMP Plus or Amp is powered on, it will auto
connect to the phone.
MUSIC PLAYBACK
x2
PLAY MUSIC
STOP/PAUSE MUSIC
Press
Press
"Power" twice
"Power" once
MUSIC SHARE (AMP PRO & AMP PLUS ONLY)
1)
Pair Units for Group Intercom(See Above)
2)
On Unit 1 quickly press "Power" & Down" two
times.
3)
On Unit 2 quickly press "Power" & Up" two
times.
4)
Both Units will blink blue and red until paired.
On successful pairing units will blink Blue.
Unit 1 will now share it's music to unit 2
GROUP INTERCOM
UNIT 1
UNIT 2
1)
Power off all the units.
2)
On the 1st unit, hold "Power" and "Down" 5 seconds, LED will blink
purple.
3)
On the 2nd unit, hold "Power" and "Up" button 5 seconds, LED will
blink purple, wait until the previous unit blinks blue, then proceed to
next step.
4)
Repeat step 3 if you have more units. Go to step 5 if no more units.
1)
Make sure all intercom units are powered on and Paired for
Group Intercom(see group intercom) and are in Intercom Mode.
2)
On unit 1 and unit 2 press "Power" and "Up" until indicator
blinks purple.
3)
After both units are blinking purple press "Power" on unit 2 to
end the pairing process.
Note: You will only need to pair this ONCE and you can create
multiple private groups in a Group Intercom.
TO ENTER GROUP INTERCOM FROM PRIVATE INTERCOM
Press "Power" once. A single "Beep" will sound.
TO ENTER PRIVATE INTERCOM FROM GROUP INTERCOM
Press "Power" once. A double "Beep" will sound.
CROSS-BRAND INTERCOM PAIRING
1)
Set your [Other brand] intercom device in
pairing mode.
2)
Power on the AMP unit by pressing the
power button 10 seconds until LED blinks
purple. Pairing is successful when AMP
LED blinks blue.
3)
Power Off AMP unit to store pairing into
memory.
STATUS INDICATOR REFERENCE
1)
Off (No Power)
2)
On (Bluetooth not connected)
3)
On (Bluetooth connected)
4)
Phone & Music Device Pairing Mode
5)
Call in Progress
6)
In-coming Call
7)
Battery Low
8)
Power Down
9)
Intercom Connected
Intercom Pairing Mode (first unit)
10)
Intercom Pairing Mode (subsequent unit)
11)
Battery Charging
12)
Battery Fully Charged
13)
14)
Battery Faulty
VISIT WWW.UCLEAR-DIGITAL.COM
VOLUME UP
VOLUME DOWN
Press & Release "Down"
once per level
PHONE FUNCTIONS
ANSWER INCOMING CALL
REJECT OR END CALL
Say "Hello"or
Hold "Power"
Press "Power" once
REDIAL LAST NUMBER
Hold "Power" and
Hold "Power" and
"Up" 2 seconds
"Down" 2 seconds
x2
BACKTRACK
FAST FORWARD
Press
"Down" twice
"Up" twice
x2
x2
UNIT 1
UNIT 2
Quickly Press
Quickly Press
"Power" & Down
"Power" &"Up"
twice
twice
UNIT 3
UNIT 4 PLUS
5)
To end the pairing
process, press "Power"
on the last unit in the
chain.
6)
Power Off all Units to
store pairing into
memory.
"Power" &"Up"
to end pairing
GROUP & CROSSBRAND INTERCOM USE
START INTERCOM
STOP INTERCOM
Hold "Up" 2 seconds
Hold "Down" 2 seconds
N/A
Blinks Blue Quickly
Blink Blue Slowly
Blinks Blue and Red Alternately
Blinks Blue Very Slowly
Blinks Blue and Red Alternately
Blinks Red Every 2 Seconds
Blinks Red 5 Times
Blinks Blue Twice Every 2 Seconds
Blinks Purple Fast
Blinks Purple Slowly
Solid Red
Solid Blue
Solid Purple
RESET
Press all 3 buttons
for 2 seconds
2 Seconds
VOICE DIAL
x2
Press
x2
x2
UNIT 1 & 2
Press
Indicator will
Blink Purple
UNIT 2
Press
"Power"
Advertisement
Table of Contents

Related Manuals for Uclear AMP Series


Summary of Contents for Uclear AMP Series
- Page 1 AMP SERIES USER GUIDE FOR A DIGITAL COPY OF THIS USER GUIDE LAUNCH CLEARLINK APP OR VISIT WWW.UCLEAR-DIGITAL.COM BUTTONS MOUNTING (PERMANENT MOUNT) MOUNTING (TEMPORARY MOUNT) 1) Locate and clean a position on the 1) Position and fasten the clip POWER ON...
- Page 2 Your product must be registered at uclear-digital.com upon purchase. > Never make any modifications to any part of the UCLEAR Digital Amp unit in any way as it may cause the system to malfunction causing hurt to you.
Need help?
Do you have a question about the AMP Series and is the answer not in the manual?
Questions and answers