Table of Contents
Advertisement
Advertisement
Table of Contents

Related Manuals for ooznest WorkBee CNC xPro V3


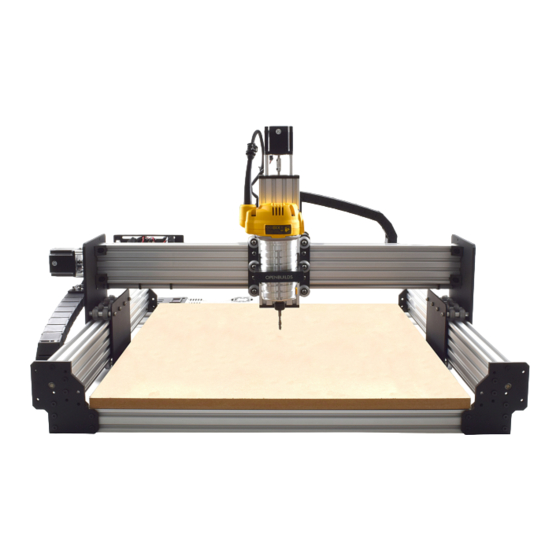
Summary of Contents for ooznest WorkBee CNC xPro V3
- Page 1 WorkBee CNC CNC xPro V3 Assembly & Commissioning...
-
Page 3: Table Of Contents
Table of Contents Getting Started Check Product Contents Notes on Assembly CNC xPro Assembly 2.0.1 Fan Mount Assembly..............6 2.0.2 Attaching The CNC-xPro ............... 7 2.0.3 Mounting the CNC-xPro Assembly..........8 Wiring & Commissioning CNC-xPro Wiring Software & Machine Settings 3.2.1 Installing Universal G-Code Sender (UGS) ........ -
Page 4: Getting Started
1.0 Getting Started WorkBee CNC Getting Started... -
Page 5: Check Product Contents
Additional spare small parts will be included. If anything is missing or damaged (or if you have any other problems) please contact us at sales@ooznest.co.uk and we will aim to resolve the issue as quickly as possible. 1.2 Notes on Assembly This manual has been written for the construction of a 750 x 750mm screw driven version of the WorkBee. -
Page 6: Cnc Xpro Assembly
2.0 CNC xPro Assembly WorkBee CNC CNC xPro Assembly... -
Page 7: Fan Mount Assembly
2.0.1 Fan Mount Assembly A. Attach the Dual-30mm-24V-DC-Fan to the CNC-xPro-Fan-Mount using 8 x M3-Cap- Head-20mm bolts and 8 x M3-Nyloc-Nuts. Ensure that the Dual-30mm-24V-DC-Fans are blowing downwards by ensuring that the side of the fan with the label on is against the CNC-xPro-Fan-Mount. -
Page 8: Attaching The Cnc-Xpro
2.0.2 Attaching The CNC-xPro A. If you have purchased the bluetooth adaptor, now would be a good time to attach it to the CNC-xPro following the instructions on the pamphlet inside the bluetooth packet. B. Insert 4 x M4-Cap-Head-40mm bolts through the previously assembled CNC-xPro- Fan-Mount, and then through the CNC-xPro and each through a Nylon-Spacer-Quar- ter-Inch. -
Page 9: Mounting The Cnc-Xpro Assembly
2.0.3 Mounting the CNC-xPro Assembly WorkBee CNC CNC xPro Assembly... - Page 10 A. Insert 4 x M5-Low-Profile-50mm bolts through each mounting hole on the CNC-xPro- Mount. B. On to each M5-Low-Profile-50mm bolt slide an Aluminium-Onehalf-Inch and a Slot- Washer. The rounded face of the Slot-Washer should be flush against the Aluminium- Onehalf-Inch. C.
-
Page 11: Wiring & Commissioning
3.0 Wiring & Commissioning WorkBee CNC Wiring & Commissioning... -
Page 12: Cnc-Xpro Wiring
3.1 CNC-xPro Wiring A. Following the wiring diagram above, strip and connect the second PSU-Output-Power- Cable to the power input terminal on the CNC-xPro. If you have the bluetooth adaptor also attach the provided capacitor, with the correct orientation with regards to the positive and negative side. -
Page 13: Software & Machine Settings
3.2 Software & Machine Settings 3.2.1 Installing Universal G-Code Sender (UGS) A. Universal G-Code Sender (UGS) is a simple Java-based cross platform G-Code sender. It requires the latest version of Java to be installed on your computer from https:// java.com/en/download/ . Download UGS from the first Classic GUI link under the ‘Nightly Builds’... -
Page 14: Configuring The Firmware
3.2.2 Configuring The Firmware A. Under the large white console output, there is a text input area labeled ‘Command:’ where G-Code commands can be sent to the CNC-xPro. To bring up the current firm- ware settings type ‘$$’ and press enter. B. -
Page 15: Testing
3.3 Testing A. Next to each driver on the CNC-xPro, there is a current control pot, and these can be adjusted using the Ceramic-Screwdriver. Rotate clockwise to increase the current, and anti-clockwise to decrease. Turn each one clockwise until it stops, and then back 1/4 of a full turn. - Page 16 F. Testing of the machine is now complete. WorkBee CNC Wiring & Commissioning...
-
Page 17: Wire Tidying
3.4 Wire Tidying A. Once the machine is operating correctly, using a Cable-Tie-Large secure the wires in Section 4.2.2 or 4.2.3 to the V-Slot-2040-750mm at the position shown by the right hand rectangle above. One at a time, the wires can be disconnected from the CNC- xPro and trimmed to the correct length. -
Page 18: Appendix
4.0 Appendix WorkBee CNC Appendix... -
Page 19: Appendix A - Kit Contents
4.1 Appendix A - Kit Contents CNC-xPro Assembly 1 x CNC-xPro 1 x CNC-xPro- Mount 1 x CNC-xPro-Fan- 1 x Ceramic-Screw- Mount Driver 1 x Dual-30mm- Cap-Head: 24V-DC-Fan 8 x M3-20mm 4 x M4-40mm 4 x M5-Low-Profile- 4 x Slot-Washer 50mm WorkBee CNC Appendix... - Page 20 4 x Nylon-Spacer- 4 x Aluminium- Quarter-Inch Spacer-OneHalf- Ince Nyloc-Nuts: 6 x M5-Drop-In- Tee-Nut 8 x M3 4 x M4 2 x Limit-Switch 1 x Z-Axis-Limit- Switch (They are the same as the Limit-Switch except the holes are larger) 2 x Limit-Switch- 2 x M5-Low-Profile- Plate WorkBee CNC...
- Page 21 2 x M3-Socket- 4 x Plastite-Screw- Head-10mm M3-8mm 1 x USB-Cable WorkBee CNC Appendix...
- Page 22 5.0 Appendix B WorkBee CNC Appendix B...
-
Page 23: Recommended Grbl Settings
5.1 Recommended GRBL Settings The settings below are for a belt driven WorkBee. WorkBee CNC Appendix B... - Page 24 The settings below are for a screw driven WorkBee. WorkBee CNC Appendix B...
- Page 25 The settings below are for a belt & screw driven WorkBee. WorkBee CNC Appendix B...
-
Page 26: Invert Mask Table
5.2 Invert Mask Table WorkBee CNC Appendix B... - Page 27 6.0 Appendix C WorkBee CNC Appendix C...
-
Page 28: Common Trouble Shooting Questions
6.1 Common Trouble Shooting Questions The problems and answers below are the most common issues that we have received in our experience. If you are having an issue, before contacting us, we recommend reading through this beforehand. Problem - LED Volt Meter is not displaying anything. Check it is wired correctly - if it is wired correctly please email us asking for a replace- ment and one will be sent out right away. - Page 29 Sometimes the $$ settings can change value, this usually happens if the machine is moved around by hand. Re-check all $$ values to make sure they are set correctly. Problem - Can’t connect to CNC xPro/GRBL is not loading. First try another USB Cable. Then try another computer. The last thing to try is resetting the firmware on the controller.
- Page 30 WorkBee CNC Appendix C...
- Page 31 WorkBee CNC Appendix C...
- Page 32 WorkBee CNC Appendix C...
- Page 33 WorkBee CNC Appendix C...
- Page 34 WorkBee CNC Appendix C...
- Page 35 WorkBee CNC Appendix C...
- Page 36 WorkBee CNC Appendix C...
- Page 37 WorkBee CNC Appendix C...
- Page 38 WorkBee CNC Appendix C...
- Page 39 WorkBee CNC Appendix C...
- Page 40 WorkBee CNC Appendix C...
- Page 41 WorkBee CNC Appendix C...
- Page 42 WorkBee CNC Appendix C...
- Page 43 WorkBee CNC Appendix C...
- Page 44 WorkBee CNC Appendix C...
- Page 45 WorkBee CNC Appendix C...
- Page 46 WorkBee CNC Appendix C...
- Page 47 WorkBee CNC Appendix C...
- Page 48 WorkBee CNC Appendix C...
- Page 49 WorkBee CNC Appendix C...
- Page 50 WorkBee CNC Appendix C...
- Page 51 WorkBee CNC Appendix C...
- Page 52 WorkBee CNC Appendix C...
- Page 53 WorkBee CNC Appendix C...
- Page 54 WorkBee CNC Appendix C...
- Page 55 WorkBee CNC Appendix C...
- Page 56 WorkBee CNC Appendix C...
- Page 57 WorkBee CNC Appendix C...
- Page 58 WorkBee CNC Appendix C...
- Page 59 WorkBee CNC Appendix C...
- Page 60 WorkBee CNC Appendix C...
- Page 61 WorkBee CNC Appendix C...
- Page 62 WorkBee CNC Appendix C...
- Page 63 WorkBee CNC Appendix C...
- Page 64 WorkBee CNC Appendix C...
- Page 65 WorkBee CNC Appendix C...
- Page 66 WorkBee CNC Appendix C...
- Page 67 WorkBee CNC Appendix C...
- Page 68 WorkBee CNC Appendix C...
- Page 69 WorkBee CNC Appendix C...
- Page 70 WorkBee CNC Appendix C...
Need help?
Do you have a question about the WorkBee CNC xPro V3 and is the answer not in the manual?
Questions and answers