Table of Contents
Advertisement
Advertisement
Table of Contents

Related Manuals for COBHAM SAILOR 6080

Summary of Contents for COBHAM SAILOR 6080
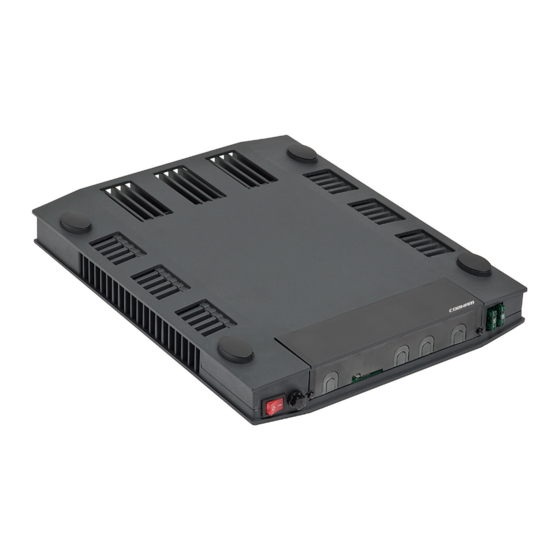
- Page 1 SAILOR 6080 Power Supply Installation manual...
- Page 3 SAILOR 6080 Power Supply Installation manual Document number: 98-129099-E Release date: January 22, 2018...
- Page 4 In the event of any discrepancies, the English version shall be the governing text. Thrane & Thrane A/S is trading as Cobham SATCOM. Copyright © 2018 Thrane & Thrane A/S. All rights reserved.
-
Page 5: Safety Summary
Safety summary The following general safety precautions must be observed during all phases of operation, service and repair of this equipment. Failure to comply with these precautions or with specific warnings elsewhere in this manual violates safety standards of design, manufacture and intended use of the equipment. -
Page 6: About The Manual
About the manual Intended readers This manual is an installation manual for the SAILOR 6080 Power Supply. It is important that you observe all safety requirements listed in the beginning of this manual, and operate the SAILOR 6080 Power Supply according to the instructions and guidelines in this manual. -
Page 7: Table Of Contents
2.2 Installing the SAILOR 6080 Power Supply .......6 2.2.1 Temperature conditions ..............6 2.2.2 Outline and dimensions ..............7 2.2.3 To install the SAILOR 6080 Power Supply ........8 2.2.4 Protective lid for the connector panel ........9 2.2.5 Inserting the cable in the spring-terminal connector ..9 2.2.6 Connectors ....................10 2.3 Installing 2, 3 or 4 SAILOR 6080 units... - Page 8 Technical specifications App. B Wall-mount tray (option) B.1 Overview ....................25 B.1.1 Dimensions and weight ..............26 App. C Wiring 3 or more SAILOR 6080 units App. D Declaration of conformity D.1 CE (LVD & EMC) ................29 Glossary ..........................31 Index ..........................33...
-
Page 9: Introduction
Chapter 1 Introduction 1.1 General description The SAILOR 6080 Power Supply can deliver 300 W output power on average with a peak of 370 W for max. 2 minutes (10% duty cycle).This is useful for MF/HF applications and DSC transmissions of short duration. -
Page 10: Features
Chapter 1: Introduction 1.2 Features The SAILOR 6080 Power Supply has the following features: Two DC connectors, output, range: 28.7 V - 31.2 V Output power 300 W continuous, 370 W peak (max. 2 min., 10% duty cycle, 100-240 VAC) or 270 W continuous, 333 W peak (max. 2 min., 10% duty cycle, 90-100 VAC) Daisy-chaining of up to four units to give up to 1480 W. -
Page 11: Block Diagram
Chapter 1: Introduction 1.3 Block diagram The drawing below shows the block diagram of the SAILOR 6080 Power Supply. Mains AC AC/DC 28.7-31.2 VDC AC Input converter output AC LED 28.7-31.2 VDC input / output Output LED Battery+ 24 VDC... -
Page 12: System Configuration
1. Vertical mounting is recommended, particularly if more than two units are stacked. If the system is powered from an emergency battery and more than 2 units are connected, the units must be connected in parallel, see Wiring 3 or more SAILOR 6080 units on page 27. System configuration... -
Page 13: Installation
• Unpacking • Installing the SAILOR 6080 Power Supply The SAILOR 6080 Power Supply can be mounted on its own as a single unit, or you can daisy-chain and stack up to 4 units. The SAILOR 6080 Power Supply can also be fitted in a 1 U rack mount. -
Page 14: Installing The Sailor 6080 Power Supply
45 °C, we recommend placing the SAILOR 6080 where unintentional contact is avoided. If the maximum ambient temperature does not exceed 45 °C, the SAILOR 6080 can be placed in a public area. Installing the SAILOR 6080 Power Supply... -
Page 15: Outline And Dimensions
Chapter 2: Installation 2.2.2 Outline and dimensions The following drawing shows the SAILOR 6080 Power Supply and the position of the mounting holes. It is mounted with four mounting bolts. • 4 mounting bolts for mounting 1 unit, M6X55 mm, DIN912 Hex... -
Page 16: To Install The Sailor 6080 Power Supply
1. If you are using the cable-relief bracket, first fasten the cable-relief bracket to the wall with four screws according to the following drawing. 2. Fasten the SAILOR 6080 to the wall with 4 mounting bolts, M6X55 mm, DIN912 (included the delivery). For dimensions, see the drawing in the previous page. -
Page 17: Protective Lid For The Connector Panel
2.2.5 Inserting the cable in the spring-terminal connector The connectors are spring-ter- minal connectors. Use a suit- able tool to open the spring and insert the cable in the opening below. Installing the SAILOR 6080 Power Supply... -
Page 18: Connectors
• Battery input • AC alarm output 2.2.6.1 AC input The SAILOR 6080 Power Supply is AC powered. To connect the AC input do as follows: 1. Remove the u-shaped cut-out for this input from the protective lid. 2. Connect the Mains cable to the connector marked MAINS AC. - Page 19 To connect to additional AC/DC Power Supply AC input 3. In order to be able to daisy-chain SAILOR 6080 Power Supply units the Mains AC connector has two terminals: • Use one terminal for the incoming mains power. • Use the other terminal for the mains power going to the next SAILOR 6080 Power Supply.
- Page 20 2.2.6.3 DC output or optional input for daisy-chaining The second DC connector (DC 2) of the SAILOR 6080 Power Supply can be used for two purposes, to provide DC output or to serve as an input connector when daisy-chaining up to four SAILOR 6080 Power Supply units.
- Page 21 Wiring 3 or more SAILOR 6080 units on page 27. To see an overview how to connect SAILOR 6080 Power Supply units in a daisy chain see Wiring for daisy-chaining on page 17. 2.2.6.4 Battery input You can connect an external 24 V emergency battery to the SAILOR 6080 Power Supply to make sure the unit is operational in case the AC input fails.
- Page 22 Chapter 2: Installation 2.2.6.5 AC alarm output The AC alarm output provides an alarm signal when the SAILOR 6080 Power Supply cannot deliver the required power from the AC input. This is the case when • No AC power is present.
-
Page 23: Installing 2, 3 Or 4 Sailor 6080 Units
Chapter 2: Installation 2.3 Installing 2, 3 or 4 SAILOR 6080 units You can mount up to four SAILOR 6080 Power Supply units (for vertical position we recommend to use the Wall- mount tray, heavy duty, with cable-relief bracket, order number: S-406080A-001). - Page 24 • 2-block mount: 4 x M6X100 mm DIN912, A4 • 3-block mount: 4 x M6X140 mm DIN912, A4 • 4-block mount: 4 x M6x190 mm DIN 912, A4 Installing 2, 3 or 4 SAILOR 6080 units...
-
Page 25: Wiring For Daisy-Chaining
Chapter 2: Installation 2.3.1 Wiring for daisy-chaining The following drawing shows how to wire the SAILOR 6080 Power Supply units when daisy-chaining two units. To daisy-chain two SAILOR 6080 Power Supply units proceed as follows: 1. Connect Mains AC of unit 1 to unit 2. - Page 26 Chapter 2: Installation Installing 2, 3 or 4 SAILOR 6080 units...
-
Page 27: Service And Repair
Chapter 3 Service and repair The SAILOR 6080 Power Supply is designed to operate without preventive maintenance. Repair or repair attempts performed by unqualified personnel may limit the warranty. The warranty on the system is defined and outlined by the distributor that supplied the SAILOR 6080 Power Supply. -
Page 28: Exchanging The Fuses
Chapter 3: Service and repair 3.2 Exchanging the fuses The SAILOR 6080 Power Supply has fuses to secure AC input and input from an external battery. Fuse, AC input 2 fuses, battery input 3.2.1 Exchange the AC fuse To exchange the AC fuse, do as follows: 1. -
Page 29: Exchange The Battery Fuses
3.3 Returning units for repair Should your Cobham SATCOM product fail, please contact your dealer or installer, or the nearest Cobham SATCOM partner. You will find the partner details on www.cobham.com/satcom, Technical Service Partner List. You can also access the Partner Portal at www.cobham.com/satcom, Cobham SYNC Partner Portal, which may help you solve the problem. -
Page 30: Repacking For Shipment
The shipping carton has been carefully designed to protect the SAILOR 6080 Power Supply and its accessories during shipment. This carton and its associated packing material should be used when repacking for shipment. Attach a tag indicating the type of service required, return address, part number and full serial number. -
Page 31: Technical Specifications
Appendix A Technical specifications The following table shows the specifications of the SAILOR 6080. Specifications Value Output power at 300 W continuous 100 VAC - 240 VAC 370 W peak (max. 2 min. with 10% duty cycle) Output power at... - Page 32 Appendix A: Technical specifications Specifications Value Dimensions H: 46.5 mm, L: 354 mm, W: 265 mm Weight Approx. 3.7 kg Compass safe distance 30 cm...
-
Page 33: Wall-Mount Tray (Option)
Appendix B Wall-mount tray (option) B.1 Overview • A Wall-mount tray, heavy duty, with cable-relief bracket is available and can be ordered (order number: 406080A-opt.001). Up to four SAILOR 6080 Power Supply units can be mounted on this tray. -
Page 34: Dimensions And Weight
Appendix B: Wall-mount tray (option) B.1.1 Dimensions and weight B.1.1.1 Dimensions B.1.1.2 Weight The Wall-mount tray, heavy duty, weighs 2.5 kg. Overview... - Page 35 Wiring 3 or more SAILOR 6080 units If you need more than 2x300 W or 20 A you can connect three or more SAILOR 6080 Power Supply units. You must connect the units as shown in the drawing. This is Important to make sure that a single connector is never overloaded with more than 20 A.
- Page 36 Appendix C: Wiring 3 or more SAILOR 6080 units...
-
Page 37: Declaration Of Conformity
Appendix D Declaration of conformity D.1 CE (LVD & EMC) The SAILOR 6080 Power Supply is CE certified (LVD & EMC directives) as stated in the simplified “EU Declaration of Conformity”, enclosed in copy on the next page. - Page 38 The full text of the EU declaration of conformity is available at the following internet address: http://sync.cobham.com/satcom/support/downloads Document no.: 99-158115-B Thrane & Thrane A/S trading as Cobham SATCOM. Registered no.: DK - 65 72 46 18. Registered address: Lundtoftegaardsvej 93 D, 2800 Kgs. Lyngby, Denmark. www.cobham.com...
-
Page 39: Glossary
Glossary Glossary Alternating Current Conformité Européenne, European conformity in French. Direct Current Electromagnetic Compatibility International Electrotechnical Commission is an international standards organization that prepares and publishes International Standards for all electrical, electronic and related technologies. International Protection Rating, sometimes also interpreted as Ingress Protection Rating, consists of the letters IP followed by two digits and an optional letter. - Page 40 Glossary...
-
Page 41: Index
Index Index AC alarm output, 14 daisy-chaining accessories, 5 setup for 2 units, 17 applications, 4 wiring, 17 approval DC input, 12 certificate, 29 DC output, 11, 12 maritime, 2 declaration of conformity, 29 document number this manual, i battery connector, 13 input, 13 features, 2... - Page 42 Index repackaging, 22 repair, 19 returning units for repair, 21 remove, 9 safety summary, iii manual servicing, 19 document number, i several units mounting bolts connecting, 27 1 unit, 7 installing, 15 2-Block mount, 16 specifications, 23 3-Block mount, 16 spring terminal connector, 9 4-Block mount, 16 stacking several units, 15...
- Page 44 98-129099-E www.cobham.com/satcom...
Need help?
Do you have a question about the SAILOR 6080 and is the answer not in the manual?
Questions and answers