Advertisement
Advertisement

Related Manuals for AireSpa ASWR300

Summary of Contents for AireSpa ASWR300
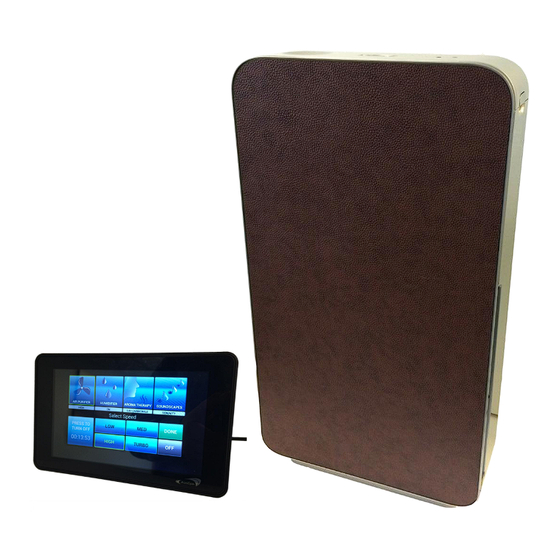
- Page 1 ASWRB100 Touch Screen Remote Control USE & CARE GUIDE...
- Page 2 FCC Statement Changes or modifications not expressly approved by the party responsible for compliance could void the user's authority to operate the equipment. This equipment has been tested and found to comply with the limits for a Class B digital device, pursuant to Part 15 of the FCC Rules.
-
Page 3: Table Of Contents
TABLE OF CONTENTS Page Description Safety instructions Part names FEATURES Floor unit setup Touchscreen remote setup Care & maintenance Alert screens Floor Unit Specs Touchscreen remote Specs... -
Page 4: Safety Instructions
•If the power cord is damaged, it must be replaced by the manufacturer, its service agent, an AireSpa Service Center or similarly qualified person in order to avoid a hazard. •Do not operate when using aerosol insecticides or in rooms where there is chemical fumes in the air, or in locations where the unit may get wet, such as a bathroom. -
Page 5: Part Names
PART NAMES 1. Floor Unit 2. Touchscreen Remote 3. Remote Adaptor 4. Aroma Wheel 5. Water Pitcher Pitcher Drain adapter Handle 6. Three Stage Filter Set Carbon HEPA Pre filter... - Page 6 CONTINUED PART NAMES A. Mist output port B. LED Functionality indicators C. Water Tank latch D. Water Tank lock E. Aroma tray F. Water drain G. Piezo cleaning brush H. Front panel J. Air Outlet K. Carrying Handle L. Air Intake...
-
Page 7: Features
FEATURES 1. Air Purifier 2. Humidifier 3. Aroma 4. Soundscapes 5. Free Trial timer/ All Off button 6. Feature controls 7. Speakers (on back of unit) -
Page 8: Floor Unit Setup
FLOOR UNIT SETUP Unpack Unit Remove floor unit from box and plastic bag Place unit in location designated by management Remove water pitcher Open front panel by pulling from top [Diagram 1] Unhook water tank lock [Diagram 2] Press-in side latch of floor unit [Diagram 3] Carefully lift lid until fully open [Diagram 4] Remove bag with water pitcher and assemble as shown on Page 6 Fill tank with tap water to MAX FILL LINE [Diagram 5], using the water... - Page 9 Assemble Water Pitcher Diagram 1 Remove all packaging Attach pitcher handle [Part P] by sliding it up as shown above Hold the drain adapter [Part N] in hand, with angled fin [as shown in diagram 1] facing the lip of the pitcher Place drain adapter [Part N] onto top edge of water pitcher [Part M] and slide back until drain adapter clicks onto water pitcher...
- Page 10 Install the filter Remove all filters from unit Remove all packaging from True HEPA, Carbon and Washable Pre-Filters Insert Carbon filter [Part Q] Insert True HEPA air filter [Part R] Insert Washable Pre-filter [Part S] Note: When installing the filters Use pull tabs located on top front of all filters;...
- Page 11 Insert Aroma tray Grasp aroma tray handle, and press to left to release and pull open [Part F] Remove aroma wheel from packaging [Part 4) Place aroma wheel into aroma tray [Part F] Push aroma door closed until locked in place Note: The post with flat face in center of tray must be aligned with aroma wheel center hole.
- Page 12 Close front panel Close front panel Place lower hinges into slots on unit Push front panel toward the unit until magnets lock in place Plug unit in outlet...
-
Page 13: Touchscreen Remote Setup
TOUCHSCREEN REMOTE SETUP Placement and plug-in Remove remote from box and plastic bag Plug bedside tablet into provided 3-plug adapter and plug into wall outlet nearest to bed Press and hold tablet POWER BUTTON on bottom of the tablet Note: Tablet will automatically start to display software SET UP... - Page 14 Software SET UP TOUCH CORRECT FLOOR UNIT MODEL (located on label of floor unit)
- Page 15 INPUT HOTEL AND ROOM NUMBER, PRESS ENTER CONFIRM SETUP SELECTION If selections are accurate press CONTINUE button to complete setup Note: To change selections press the EDIT button...
- Page 16 SCREEN DISPLAYS WHEN SETUP FINALIZES INVALID CODES WILL DISPLAY IN RED...
- Page 17 CARE AND MAINTANENCE Touchscreen remote & floor unit To prevent dirt or stains on the unit, clean regularly. If stains are allowed to remain, they may become difficult to remove. Before clean unit,please power off floor unit. Wipe with a dry, soft cloth For stubborn stains or dirt, use a soft cloth dampened with warm water.
- Page 18 Draining Water Tank (use water pitcher) Pull tab to remove cover of water drain Twist water drain cap clockwise to remove Remove water drain cap Align fins on top of water pitcher with rails below the water drain Gently slide forward to engage fins of water pitcher fully into rails Place one hand on top of the unit, and press the water pitcher forward to engage water valve (water will drain into water pitcher).
-
Page 19: Alert Screens
ALERT SCREENS Please Close the Front Panel GREEN LED Unit has power and ready to use RED LED Action Required • Front Panel Open • Top Lid Open • Refill Water • Unit Unstable • Floor unit unplugged • Aroma Tray Open •... - Page 20 CAUTIONS CONCERNING OPERATION •Do not block the intake and/or air outlet. •Do not use the unit near or on hot objects, such as stoves or heaters or where it may come into contact with steam. •Always operate the unit in an upright position. •Do not operate the unit without the filters, water tank, and aroma tray properly installed.
-
Page 21: Floor Unit Specs
FLOOR UNIT SPECS MODEL ASWR300 FLOOR UNIT: Air Purifier/Humidifier/Aromatherapy H 31.0" x W 17.4" x D 9.9" 33.4 lbs Unit Size/Weight Room Size 300 Sq Ft. Voltage 120V/1A DC Motor Speeds: LOW/MED/HIGH/TURBO Operating Temperature 0-40 Degrees C 3-Prong, Flat plug end, 90 Degree Angle, 12'... -
Page 22: Touchscreen Remote Specs
TOUCHSCREEN REMOTE SPECS MODEL ASWRT100 Touch Screen Remote Control with SoundScapes 7" 16:9 Display CTS MultiPoint EasyTouch® Remote Control Screen Resolution 1024 x 60 0 Pixels Processor: Rockchip RK2928G DDR3 512 MB Android 4.1 Internal Memory Nand Flash 16 .0 GB External Memory T Flash 32 GB Max Lithium Battery...
Need help?
Do you have a question about the ASWR300 and is the answer not in the manual?
Questions and answers
How to connect with mobile