Advertisement
Table of Contents
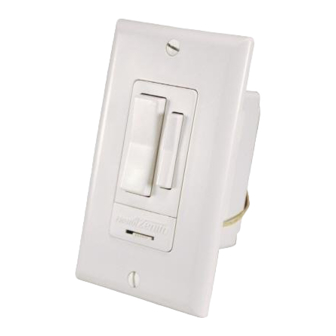
3-WAY WALL SWITCH TRANSMITTER
Important: This product should be used in
conjunction with the Wall Switch Receiver.
3-way circuit wiring is required to install
and use this product.
Note: If you are not familiar with electrical
wiring, consult an electrician about installation.
In addition, some local building codes may
require installation by a qualified electrician.
Installation
1. Select light switch to be replaced by 3-way wall
switch transmitter.
2. Turn off the power to the light switch circuit
before you proceed. Do this at your circuit breaker
or fuse box.
3. Remove the existing wall plate and switch. Label the
wires on the existing switch according to the diagram
in Figure 1. Note: Typical 3-way wiring is shown.
Actual wiring may vary.
WHITE
FROM
POWER
SOURCE
1
BLACK
(Hot)
GREEN
(Ground)
Figure 1 (Typical 3-Way Wiring Shown)
4. Disconnect the two power wires and the ground wire.
5. Connect the wires of the 3-way wall switch transmit-
ter and wall switch receiver to the wires in the junction
box as shown in Figure 2. Use the supplied wire
connectors to secure the wires (see Figure 2). Note:
Either black wire on the transmitter and receiver can
be used to connect to the hot wire.
6. Connect the green ground wire from transmitter to
the ground wire removed from old switch. Use one of
the supplied wire connectors to secure the wires (see
Figure 3).
7. Check wire connections to make sure they are se-
cure and that no bare wires are exposed.
8. Position the wall switch transmitter in the junction box
with the DIM button located to the right. Use the two
wall switch screws (long) supplied to mount the
receiver to the junction box (see Figure 3). Push
excess wiring into junction box while you do this,
bending the wires to fit if necessary.
WHITE (Neutral)
WHITE
2 RED
3 BLACK
9. Mount the wall plate to the wall switch transmitter
with the screws (short) provided.
10. Turn on the power to the light switch circuit. Do this
at your circuit breaker or fuse box.
WHITE
FROM
POWER
SOURCE
1
BLACK
(Hot)
ON/OFF
Button
4 BLACK
Cover Plate Screw
WHITE (Neutral)
2 RED
3 BLACK
DIM
SL-6023
GREEN (Ground)
Figure 2
Wall Switch
Wall Switch
Screw
Power
Disconnect
Switch
Cover Plate
Figure 3
WHITE
4 BLACK
SL-6017
Junction Box
Wall
DIM
Button
Advertisement
Table of Contents

Related Manuals for Health Zenith

Summary of Contents for Health Zenith
- Page 1 9. Mount the wall plate to the wall switch transmitter with the screws (short) provided. 10. Turn on the power to the light switch circuit. Do this at your circuit breaker or fuse box. 3-WAY WALL SWITCH TRANSMITTER WHITE WHITE (Neutral) WHITE Important: This product should be used in conjunction with the Wall Switch Receiver.
- Page 2 Operation 1. Verify the power disconnect switch on the transmitter and receiver is in the ON (right side) position. 2. Push the ON (top) button and release. The light should turn on full bright. Note: If you are controlling a lamp, make sure it is connected to the switched outlet and the lamp is switched on.
Need help?
Do you have a question about the Zenith and is the answer not in the manual?
Questions and answers