TRENDnet TEW-731BR User Manual
N300 wifi router
Hide thumbs
Also See for TEW-731BR:
- User manual (88 pages) ,
- Quick installation manual (17 pages) ,
- Specifications (3 pages)
Table of Contents
Advertisement
Quick Links
Advertisement
Table of Contents

Related Manuals for TRENDnet TEW-731BR


Summary of Contents for TRENDnet TEW-731BR
- Page 1 Cover Page TRENDnet User’s Guide...
-
Page 2: Table Of Contents
Router Management Page Structure ..........40 MAC address filters ....................20 Technical Specifications ..............41 Domain/URL Filters ....................21 Troubleshooting ................43 Advanced Router Setup ..............22 Appendix ..................44 Access your router management page ................ 22 © Copyright 2014 TRENDnet. All Rights Reserved. -
Page 3: Product Overview
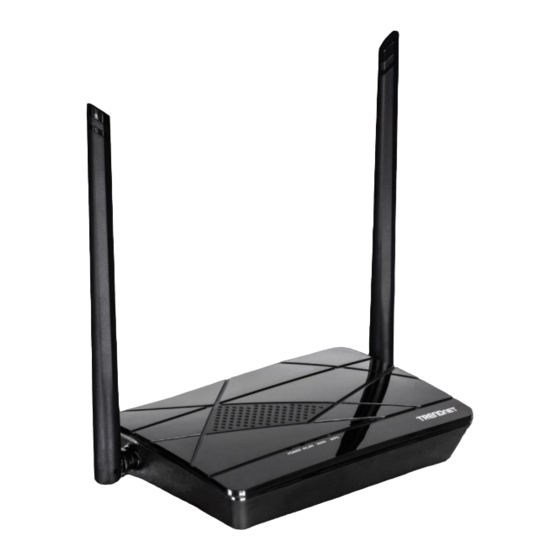
Features Product Overview TRENDnet’s N300 WiFi Router, model TEW-731BR, offers up to 300 Mbps wireless N networking to share files, play games, and surf the internet. Control access to the internet and manage bandwidth for devices connected to router. For your convenience, the wireless network is setup and pre-encrypted out of the box. -
Page 4: Product Hardware Features
WAN Port– Connect an Ethernet cable from your router WAN port to your modem. Power Port – Connect the included power adapter from your router power port and to an available power outlet. Antennas – The antennas broadcast wireless network signals. © Copyright 2016 TRENDnet. All Rights Reserved. - Page 5 “On” and functioning properly on your router. This LED indicator will be blinking green rapidly while data is transmitted or received by your wireless clients or wireless network devices connected to your router. © Copyright 2016 TRENDnet. All Rights Reserved.
-
Page 6: Application Diagram
Provider”) and physically connected to it from the router’s WAN port to the modem’s network port which connects to the Internet. Wireless signals from the router are broadcasted to wireless clients such as laptops (with wireless capability) thereby providing Internet access. © Copyright 2016 TRENDnet. All Rights Reserved. -
Page 7: Basic Router Setup
Computers/devices with an Ethernet port (also called network port) or wireless networking capabilities. A modem and Internet service to your home, provided by your ISP (modem typically supplied by your ISP). A router to connect multiple devices to the Internet. © Copyright 2016 TRENDnet. All Rights Reserved. -
Page 8: Router Installation
Verify Password: ________________ Verify Password: ________________ IP Address: ____. _____._____._____ (e.g. 215.24.24.129) 4. PPPoE with a fixed IP address User Name: _________ Password: ________________ Verify Password: ________________ IP Address: ____. _____._____._____ (e.g. 215.24.24.129) © Copyright 2016 TRENDnet. All Rights Reserved. - Page 9 TEW-731BR TRENDnet User’s Guide © Copyright 2016 TRENDnet. All Rights Reserved.
- Page 10 3. Use the default or change the wireless settings and click Next. By default, a unique SSID (Wi-Fi Name) and wireless key (Wi-Fi Password) have already been preconfigured on your router. If you change the default settings, please write down the new wireless © Copyright 2016 TRENDnet. All Rights Reserved.
-
Page 11: Connect Additional Wired Devices To Your Network
Note: If you encounter issues connecting to your network, there may be a problem with your computer or device network settings. Please ensure that your computer or device network settings (also called TCP/IP settings) are configured to obtain IP address settings automatically (also called dynamic IP address or DHCP) and to Obtain DNS Server address settings automatically. © Copyright 2016 TRENDnet. All Rights Reserved. -
Page 12: Wireless Networking And Security
Setting up wireless security is very important. Leaving your wireless network open and Much of the older 802.11g hardware was been upgraded (with firmware/driver unsecure could expose your entire network and personal files to outsiders. TRENDnet upgrades) to support this encryption standard. Total wireless speeds under recommends reading through this entire section and setting up wireless security on your new router. -
Page 13: Secure Your Wireless Network
Different key sizes TKIP Recommended Open System ASCII Preshared Key Preshared Key Configuration 13 characters 8-63 characters 8-63 characters *Dependent on the maximum 802.11n data rate supported by the device (150Mbps, 300Mbps, or 450Mbps) © Copyright 2016 TRENDnet. All Rights Reserved. -
Page 14: Connect Wireless Devices To Your Router
3, or 4 will block the ability to connect) and enter password 12345) A variety of wireless network devices can connect to your wireless network such as: Gaming Consoles Selecting WPA-PSK, WPA2-PSK, or WPA-PSK/WPA2-PSK (WPA2 recommended): © Copyright 2016 TRENDnet. All Rights Reserved. -
Page 15: Connect Wireless Devices Using Wps
LED on your router WPS button will flash indicating that the WPS setup process has been activated on your router. (See “Product Hardware Features” on page For connecting additional WPS supported devices, repeat this process for each additional device. © Copyright 2016 TRENDnet. All Rights Reserved. -
Page 16: Basic Wireless Settings
Auto Channel – In North America, this router can broadcast on 1 of 11 Channels (13 in Europe and other countries). Selecting Auto Channel enables the router to automatically select the best Channel for wireless communication. © Copyright 2016 TRENDnet. All Rights Reserved. - Page 17 802.11g technology a single 20MHz channel or 40MHz (two 20MHz channels). When (typically not recommended). 40MHz is active, this mode is capable of providing higher performance © Copyright 2016 TRENDnet. All Rights Reserved.
-
Page 18: Steps To Improve Wireless Connectivity
Dense materials like metal, solid wood, glass or even furniture may block or degrade the signal. © Copyright 2016 TRENDnet. All Rights Reserved. - Page 19 802.11n. If a wirelessly networked device uses an older standard, the performance of the entire wireless network may be slower. If you are still experiencing low or no signal, consider repositioning the wireless devices or installing additional access points. © Copyright 2016 TRENDnet. All Rights Reserved.
-
Page 20: Advanced Wireless Settings
3. Enable the repeater mode by clicking on the Repeater Enabled, and click on the Site improve data efficiency when transferring or receiving data between wireless Survey button. This will allow the TEW-731BR to scan for the wireless network you devices. The fragmentation threshold defines the maximum size of the data would like to repeat or extend. - Page 21 6. If your wireless network requires an encryption key, enter it in the field provided and click Apply. 7. You can now disconnect your router and place in the location where you would like to extend or repeater your existing wireless network signal for increased coverage. © Copyright 2016 TRENDnet. All Rights Reserved.
-
Page 22: Access Control Filters
Delete all – Removes all existing MAC address entries. 4. Add the MAC addresses to the MAC Table first before applying the MAC filter function. Add – Saves a new MAC address entry. © Copyright 2016 TRENDnet. All Rights Reserved. -
Page 23: Domain/Url Filters
You may want to allow or block computers or devices on your network access to specific websites (e.g. www.trendnet.com, etc.), also called domains or URLs (Uniform Resource Locators). You may also enter a keyword (e.g. instead of complete URL to generally allow or block computers or devices access to websites that may contain the keyword in the URL or on the web page. -
Page 24: Advanced Router Setup
Set your router date and time Maintenance > Time and Date 1. Log into your router management page (see “Access your router management page” page 22). 2. Click on Maintenance, and click on Time and Date. © Copyright 2016 TRENDnet. All Rights Reserved. -
Page 25: Manually Configure Your Internet Connection
Internet public IP addresses due to the 128-bit IP address structure 1. Log into your router management page (see “Access your router management page” versus IPv4 32-bit address structure. In addition, there are several integrated page 22). © Copyright 2016 TRENDnet. All Rights Reserved. -
Page 26: Clone A Mac Address
Setup > Internet Setup On any home network, each network device has a unique MAC (Media Access Control) address. Some ISPs register the MAC address of the device (usually a router or a © Copyright 2016 TRENDnet. All Rights Reserved. -
Page 27: Change Your Router Ip Address
Domain Name (Optional) – Specifies a domain name to assign to computers or address settings so you do not have to change the DHCP address range manually to devices. (e.g. trendnet.com) match your new router IP address settings. © Copyright 2016 TRENDnet. All Rights Reserved. -
Page 28: Set Up Dhcp Reservation
(e.g. 00:11:22:AA:BB:CC) Add - Saves the reservation. DHCP Static IP Table – You can view the list of reservations for computers or devices that have been created in this list. © Copyright 2016 TRENDnet. All Rights Reserved. -
Page 29: Enable/Disable Upnp On Your Router
2. Click on Advanced, and click on UPnP. 4. Check the Enable box under DDNS Configuration. 3. Next to UPnP, click Enabled or Disabled to turn the feature on or off on your router. © Copyright 2016 TRENDnet. All Rights Reserved. -
Page 30: Allow Remote Access To Your Router Management Page
2. Click on Advanced, and click on Access Control List. 3. Under the ACL Settings section, select WAN or IP Address and click Web Port– It is recommended to leave this setting as 8080. © Copyright 2016 TRENDnet. All Rights Reserved. -
Page 31: Open A Device On Your Network To The Internet
Your router includes the DMZ (Demilitarized Zone) feature (TRENDnet IP cameras default to HTTP TCP port 80 for remote access web requests) on that makes all the ports and services available on the WAN/Internet side of the router your network to be able to view it over the Internet. - Page 32 AUTH from the drop down menu. 1. Setup DynDNS service (See DynDNS section). User-defined Service Name – Enable and manually input your own virtual 2. Access TRENDnet IP Camera management page and forward Port 80 (see server product documentation) ...
- Page 33 7. The fields will be populated with the selected pre-defined virtual server entry. 8. Next to LAN IP address, enter the IP address assigned to the camera. (e.g. 192.168.10.101) 9. To save the changes, click Apply Changes. © Copyright 2016 TRENDnet. All Rights Reserved.
-
Page 34: Special Applications
End Match Port – Enter the ending port range requested by the device (e.g. 554 or 6112) Note: Please refer to the device documentation to determine which ports and protocols are required. Incoming – Port(s) forwarded to the device. © Copyright 2016 TRENDnet. All Rights Reserved. - Page 35 Apply Changes – Saves a new special application. To delete an existing application, click on the Delete button in the Current Port Triggering Table list. Delete – Removes an existing special application. © Copyright 2016 TRENDnet. All Rights Reserved.
-
Page 36: Router Maintenance & Monitoring
1. Log into your router management page (see “Access your router management page” page 22). 2. Click on Maintenance and click on Reboot/Reset. 3. Click on Reset. If prompted, click Yes or Ok. © Copyright 2016 TRENDnet. All Rights Reserved. -
Page 37: Backup And Restore Your Router Configuration Settings
To restore your router configuration: 1. Log into your router management page (see “Access your router management page” page 22). 2. Click on Maintenance and click on Backup/Restore. 3. Under Load Settings From, click on Choose File. © Copyright 2016 TRENDnet. All Rights Reserved. - Page 38 TRENDnet may periodically release firmware upgrades that may add features or fix version under System. problems associated with your TRENDnet router model and version. To check if there is a firmware upgrade available for your device, please check your TRENDnet model and version using the link.
-
Page 39: Restart Your Router
1. Log into your router management page (see “Access your router management page” page 22). 2. Click on Maintenance and click on Reboot/Reset. 3. Click on the Reboot button. If prompted, click Yes or OK. © Copyright 2016 TRENDnet. All Rights Reserved. -
Page 40: Check The Router System Information
DHCP client listing. Gateway – The current gateway assigned to your router WAN port or interface configuration. DNS (Domain Name System) – The current DNS address(es) assigned to your router port or interface configuration. © Copyright 2016 TRENDnet. All Rights Reserved. -
Page 41: View Your Router Packet Statistics
You may want to check the wireless devices connected to your router. 1. Log into your router management page (see “Access your router management page” page 25). 2. Click on Status and click on Active Client Table. © Copyright 2016 TRENDnet. All Rights Reserved. -
Page 42: Router Management Page Structure
Wireless Advanced Advanced Access Control List Maintenance Port Triggering Status URL Block Dynamic DNS Traffic Control UPnP Telnet Configuration Virtual Server © Copyright 2016 TRENDnet. All Rights Reserved. -
Page 43: Technical Specifications
Quality of Service 802.11g: FCC: 15 dBm (max.), ETSI: 17 dBm (max.) @ 54 Mbps 802.11n: FCC: 17 dBm (max.), ETSI: 14 dBm (max.) @ 300 Mbps Internet Bandwidth Control © Copyright 2016 TRENDnet. All Rights Reserved. - Page 44 164 g (5.8 oz.) *Maximum wireless signal rates are referenced from IEEE 802.11 theoretical specifications. Actual data throughput and coverage will vary depending on interference, network traffic, building materials and other conditions. © Copyright 2016 TRENDnet. All Rights Reserved.
-
Page 45: Troubleshooting
Note: If you are experiencing difficulties, please contact your computer or operating 5. Please see “Steps to improve wireless connectivity” on page 16 if you continue to system manufacturer for assistance. have wireless connectivity problems. © Copyright 2016 TRENDnet. All Rights Reserved. -
Page 46: Appendix
In MAC 10.4, from the Configure IPv4, drop-down list, select Using your network status and your IP address settings displayed. DHCP and click the Apply Now button. Note: If you are experiencing difficulties, please contact your computer or operating system manufacturer for assistance. © Copyright 2016 TRENDnet. All Rights Reserved. - Page 47 3. You may be prompted to enter a security key in order to connect to the network. 3. On the Ethernet tab, the Ethernet ID is your MAC Address. 4. Enter in the security key corresponding to the wireless network, and click Connect. © Copyright 2016 TRENDnet. All Rights Reserved.
- Page 48 This equipment has been tested and found to comply with the limits for a Class B digital TRENDnet hereby declare that the product is in compliance with the essential requirements device, pursuant to Part 15 of the FCC Rules. These limits are designed to provide reasonable and other relevant provisions under our sole responsibility.
- Page 49 [Portuguese] 2014/30/CE, 2011/65/EU, e 2009/125/CE. o exigibles de la Directiva 1999/5/CE, 2014/35/CE, 2014/30/CE, 2011/65/EU, 2009/125/CE y. TRENDnet izjavlja, da je ta TEW-731BR v skladu z bistvenimi zahtevami in Slovensko ostalimi relevantnimi določili direktive 1999/5/ES, 2014/35/ES, ΜΕ ΤΗΝ ΠΑΡΟΥΣΑTRENDnet ΔΗΛΩΝΕΙ ΟΤΙTEW-731BRΣΥΜΜΟΡΦΩΝΕΤΑΙ...
- Page 50 Cet équipement est conforme aux limites d'exposition aux rayonnements IC établies pour un environnement non contrôlé. Cet équipement doit être installé et utilisé avec un minimum de 20 cm de distance entre la source de rayonnement et votre corps. © Copyright 2016 TRENDnet. All Rights Reserved.
- Page 51 An RMA number is required in order to initiate warranty service support the event that the RMA unit needs to be replaced, TRENDnet may replace it with a for all TRENDnet products. Products that are sent to TRENDnet for RMA service must refurbished product of the same or comparable model.
- Page 52 OF SUCH DAMAGES, AND LIMITS ITS LIABILITY TO REPAIR, REPLACEMENT, OR REFUND evidence of the original purchaser's date of purchase. Replacement products may be OF THE PURCHASE PRICE PAID, AT TRENDNET'S OPTION. THIS DISCLAIMER OF LIABILITY refurbished or contain refurbished materials. If TRENDnet, by its sole determination, is...
Need help?
Do you have a question about the TEW-731BR and is the answer not in the manual?
Questions and answers