Table of Contents
Advertisement
Advertisement
Table of Contents

Related Manuals for Hyundai HYT140


Summary of Contents for Hyundai HYT140
- Page 1 PETROL TILLER HYT140 User Manual...
-
Page 2: Table Of Contents
INDEX CONTENTS PAGE NO.S SAFETY 3 - 8 PART LOCATIONS QUICK START GUIDE 10 - 15 STARTING PROCEDURE 16 - 17 STOPPING PROCEDURE USING THE MACHINE 19 - 21 MAINTENANCE 22 - 29 LONG TERM STORAGE TROUBLE SHOOTING SPECIFICATION DECLARATION OF CONFORMITY RECYCLING &... -
Page 3: Safety
1. SAFETY General Safety Notes. The operator of the machine is responsible for, and has a duty of care in making sure that the machine is operated safely and in accordance with the instructions in this user manual. Keep the manual safe and pass it on if the machine is loaned or sold to another user. - Page 4 1.10 Carbon Monoxide (where applicable). 1.11 Carbon monoxide is a colourless and odourless gas. Inhaling this gas can cause death as well as serious long term health problems such as brain damage. 1.12 The symptoms of carbon monoxide poisoning can include but are not limited to the following;...
- Page 5 1.30 Fueling/De-fueling (where applicable). CAUTION ALL FUELS ARE FLAMABLE 1.31 ALWAYS fuel and defuel in a well ventilated area outside of buildings. 1.32 ALWAYS wear correct, suitable and fit for purpose Personal Protective Equipment (PPE), suggested items are but not limited to safety gloves, overalls. 1.33 When fueling/de-fueling ALWAYS avoid inhaling fumes.
- Page 6 1.50 Batteries (where present). 1.51 Batteries present a risk if they become damaged by the possible leaking of electrolyte. This electrolyte is an acid and can cause serious burn injuries. Care should be taken when working on or near them. NOTE the electrolyte may be in a liquid or gel form.
- Page 7 1.70 Noise (where applicable). 1.71 The operating noise of the machine can damage your hearing. Wear hearing protection such as earplugs or ear defenders to protect your hearing. Long-term and regular users are advised to have hearing checked regularly. Be especially vigilant and cautious when hearing ear protection because your ability to hear alarm warnings will be reduced.
- Page 8 1.91 DO NOT overload the machine. For the first tilling of the season use the highest setting. It will prevent the machine from being overloaded. 1.92 The machine will work better when operated within its specified performance range. 1.93 If the blade is blunt, have it sharpened and rebalanced or replace it. Blunt blades will not till the soil sufficiently so check the blades carefully before each use.
-
Page 9: Part Locations
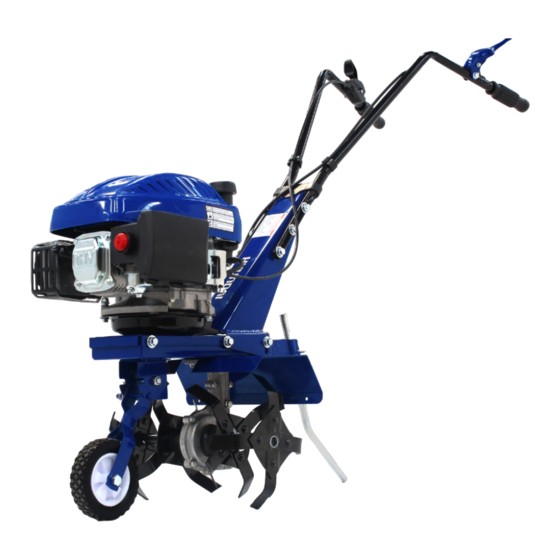
2. PART LOCATIONS Throttle Lever Exhaust Clutch Lever Transport Wheel Recoil Starter Handle Tiller Blades Oil Filler/Dipstick Depth Bar Air Filter Blade Cover Primer Bulb Handlebars Spark Plug... -
Page 10: Quick Start Guide
3. QUICK START GUIDE CAUTION This guide is meant to serve as a quick reference for operating your HYT140 Tiller. It is for convenience and the user should read and understand the manual in full first. WARNING This HYT140 Tiller produces Carbon Monoxide – a poisonous, colourless &... - Page 11 Once this has been done, you can offer each handlebar up to the support bracket, we advise you get assistance to hold them in place whilst the fixing bolts and washers are inserted. Push the bolts from the outside of the handlebar then through a spring and flat washer, then through the support bracket.
- Page 12 2.11 Once the handlebars have been fitted, you must check that the clutch cable is fitted as per the image below. 2.12 The clutch is factory adjusted. However after use, you may need to adjust the setting to cope with wear. 2.13 Undo the lock nut and adjust the clutch by turning the adjusting nut.
- Page 13 2.16 To fit the drag bar you must first remove the spring clip, then insert the depth (drag) bar into the depth bar fixing hole. 2.17 Push the spring clip into the hole and align it with one of the three desired slots. 2.18 The transport wheel has two positions, one is for moving the machine into place where the wheel is down and the other position is for tilling, where the wheel is to be...
- Page 14 CAUTION DO NOT change or add engine oil just after the engine has been running. The oil will be HOT and will be a burn/scald hazard. You should however, drain the oil whilst the engine is still WARM so that the oil drains fully.
- Page 15 CAUTION DO NOT add fuel or remove fuel just after the engine has been running. You MUST allow the engine to cool fully before carrying out this task. 2.28 To add petrol you MUST make sure the machine is on a flat, level and stable surface.
-
Page 16: Starting Procedure
4. STARTING PROCEDURE CAUTION The machine is shipped without fuel & oil, therefore you MUST fill the engine with fuel & oil before starting the engine. Failure to do so will result in engine damage which will not be covered by warranty. CAUTION Kickback is the rapid retraction of the starter cord. - Page 17 FROM WARM Move the throttle lever forward towards the MID position. SLOWLY pull the recoil starter handle until you feel resistance. Once you feel resistance, return the recoil starter handle and then pull swiftly with a smooth and steady motion to start. 3.10 Pull the handle straight out to avoid excessive rope wear.
-
Page 18: Stopping Procedure
5. STOPPING PROCEDURE Release the clutch lever. Allow the engine to idle under no load for a few minutes. Move the throttle lever all the way back past the MIN position and hold there until the engine comes to a stop. DO NOT touch any of the rotating parts until it has come to a complete STOP and you have removed the spark plug HT lead cap. -
Page 19: Using The Machine
6. USING THE MACHINE WARNING You MUST STOP using the machine if any of the following occur. The engine speed changes with no control. In case of misfire. In case of high vibration. If you are not familiar with this type of machine you should seek advice and guidance from your dealer. - Page 20 CAUTION ALWAYS use approved protective clothing and approved protective equipment when using the machine. Protective clothing a protective equipment cannot eliminate the risk of an accident but wearing proper clothing and the correct equipment will reduce the degree of injury should and accident occur. Ask your dealer about approved protective clothing and approved protective equipment recommended.
- Page 21 5.17 Stop and inspect the equipment if you run over or into anything. If any damage has occurred you MUST make all the necessary repairs before starting work again. DO NOT use a damaged machine. 5.18 You should ALWAYS park the machine on level ground, disengage the drive, turn off the engine and wait until all moving parts have stopped before leaving the machine.
-
Page 22: Maintenance
7. MAINTENANCE NOTE The machine may be tipped backward or on its side to facilitate access for cleaning or service but for no longer than 2 minutes. If the machine is held in this position for too long, the engine can be damaged by petrol draining into the crankcase. -
Page 23: Air Filter
Every 3 Every 6 Every 12 Every 24 Every months months months months ITEM or 15 or 50 or 100 or 300 hours hours hours hours Check Air Filter Clean Check/Adjust Spark Plug Replace Carburetor Clean Check Engine Oil Change Cutting blades Check Replace as required... - Page 24 AIR FILTER CAUTION The engine MUST NOT be run without an air filter element, otherwise piston and/or cylinder wear can occur. This type of damage will not be covered under warranty. Maintaining the air filter in good condition is very important. If dirt is allowed to enter the engine through improperly installed, serviced or inadequate elements, it can damage and wear out the engine.
- Page 25 SPARK PLUG CAUTION ALWAYS allow the engine to cool down before removing the spark plug. NOTE ALWAYS replace the spark plug with the same model. Incorrect spark plug installation can cause serious engine damage. DO NOT allow dirt or debris to enter the cylinder bore. Unplug the spark plug HT Lead cap to expose the spark plug.
- Page 26 CARBURETOR WARNING Petrol is extremely flammable. ALWAYS fuel and defuel in a well ventilated area with the engine turned off, allowed to cool and the HT spark Plug lead cap removed. Keep clear of naked flames, fire or any other forms of ignition. ALWAYS clear up any spills before use.
- Page 27 CAUTION DO NOT change the oil just after the engine has been running. The oil will be hot and will be a burn/scald hazard. You should however drain the oil whilst the engine is still warm so the oil drains fully. 6.19 To drain the oil, undo the oil filler/dipstick.
- Page 28 TINES CAUTION You MUST stop the engine and allow the tines to come to a full stop and remove the spark plug HT lead cap before beginning to change the tines. 6.25 Among the most critical elements of the tiller is the tines. It is also subject to the most damage and wear.
-
Page 29: Long Term Storage
6.34 To avoid damage to the tiller, store in an upright position at all times. 6.35 Remove the HT lead spark plug cap to prevent unintentional starting. 6.36 Never lay heavy objects on top of the tiller. 6.37 Carefully select a suitable storage area away from extremes of temperature and any ignition sources such as boilers. -
Page 30: Troubleshooting
9. TROUBLESHOOTING Problem Possible Cause Possible Solution Choke open Move choke lever to the closed position Fuel tank empty Add fuel Engine will not start – Fuel Machine stored incorrectly Check and clean fuel tank and fuel lines System Water in fuel system Drain and fill with fresh fuel Carburetor problem Contact your dealer... -
Page 31: Specification
10. SPECIFICATION HYT140 IC140V – 4 stroke OHV Engine Displacement – cc Power @ 2800 RPM – Kw Start method Recoil Engine Specification Fuel tank capacity – L Fuel type Unleaded petrol Engine oil capacity – L Engine oil type... -
Page 32: Declaration Of Conformity
11. DECLARATION OF CONFORMITY Genpower Ltd confirms that this Hyundai product conform to the following CE Directives; 2006/42/EC Machinery Directive 2004/108/EC EMC Directive 97/68/EC_2010/26/EC NRMM Emissions Directive Roland Llewellin. Genpower Ltd, Isaac Way, Pembroke Dock, Pembrokeshire SA72 4RW. 28/11/2014 Roland Llewellin... -
Page 33: Recycling & Product Disposal
12. RECYCLING & PRODUCT DISPOSAL We do not offer a takeback scheme for the recovery of Waste Electrical Electronic Equipment (WEEE) & Batteries. Instead the responsibility to dispose of WEEE and or Batteries is passed onto you by So when it becomes necessary to dispose of your machine you must take it to your local Civic Amenity Site. -
Page 34: Contact Details
13. CONTACT DETAILS POSTAL ADDRESS Genpower Ltd, Isaac Way, London Road, Pembroke Dock, Pembrokeshire. SA72 4RW. UK. TELEPHONE +44 (0) 1646 687880 +44 (0) 0164 686198 TECHNICAL EMAIL aftersales@genpower.co.uk WEBSITE www.hyundaipowerequipment.co.uk 14. WARRANTY To register your machine for the manufacturer’s warranty, please visit: 10.0 http://www.hyundaipowerequipment.co.uk/warranty 15. - Page 36 GENPOWER LTD Licensed by Hyundai Corporation, Korea...
Need help?
Do you have a question about the HYT140 and is the answer not in the manual?
Questions and answers