Table of Contents
Advertisement
Quick Links
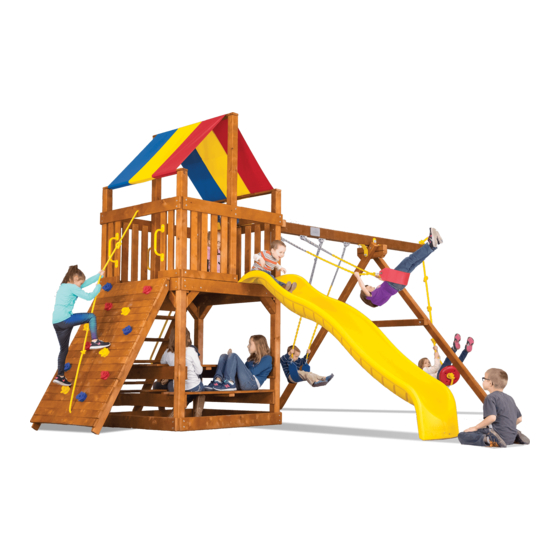
Carnival Clubhouse
Assembly Instructions
5-70-0424
(Rev 1 -3/7/17)
Contains Assembly, Use, and Maintenance Instructions
Turbo Carnival
Clubhouse
Carnival
Clubhouse
WARNING: Not suitable for children under 36 months. Fall Hazard.
!
Only for domestic use.
To be used under the direct supervision of an adult. Intended for children ages 3-12.
This owner's manual contains important information about how to assemble, locate, use,
and maintain this playground equipment. Read this manual before you start assembly. Follow all
instructions. Be sure to educate all children who use this playground and all adult supervisors about
the rules for safe use that are contained in this manual.
Keep this Owner's Manual for future reference and to remind you of how to safely use and maintain this equipment.
RAINBOW RESERVES THE RIGHT TO MAKE CHANGES AND MODIFICATIONS TO THIS PRODUCT.
COPYRIGHT 2017 RAINBOW PLAY SYSTEMS, INC. ALL RIGHTS RESERVED
Advertisement
Table of Contents

Related Manuals for Rainbow Play Systems Carnival series


Summary of Contents for Rainbow Play Systems Carnival series
- Page 1 Keep this Owner's Manual for future reference and to remind you of how to safely use and maintain this equipment. RAINBOW RESERVES THE RIGHT TO MAKE CHANGES AND MODIFICATIONS TO THIS PRODUCT. COPYRIGHT 2017 RAINBOW PLAY SYSTEMS, INC. ALL RIGHTS RESERVED...
- Page 2 OWNER'S MANUAL Rainbow Play Systems, Inc. Thank you for choosing Rainbow Play Systems, Inc. Please read the instruction manual thoroughly before you start building your Carnival Clubhouse to help ensure safe installation. Familiarize yourself with all hardware and parts to help with building your playground.
-
Page 3: Rules For Safe Play
Please keep these instructions for future reference. This product is recommended for children 3 to 12 years of age. Note: This product is not intended for public use. Rainbow Play Systems, Inc. does not warranty its Residential Play Equipment subject to commercial use. - Page 4 Choosing a location for your play system When selecting your play site, always keep the child's safety in mind. Here are some recommendations that should help you achieve a safe play area. 1. The play system should be located on solid level ground free of objects that could cause injury such as, but not limited to, tree stumps, roots, and large rocks.
-
Page 5: Maintenance
TABLE 3.1 Fall Height in Feet From Which a Life Threatening Head Injury Would Not Be Expected Type of Material 6 in. depth 9 in. depth 12 in. depth Double Shredded Bark Mulch 6 ft. 10 ft. 11 ft. Wood Chips 6 ft. - Page 6 Helpful Installation Hints 1. Wear safety glasses to protect your eyes from flying wood chips when drilling or cutting. 2. Verify that all bolts and screws are secured tightly and all acorn nuts are snug (acorn nuts should be tightened to 5 foot pounds of torque). 3.
-
Page 7: Commonly Asked Questions
COMMONLY ASKED QUESTIONS Question: How do I know when Lag Bolts and other Fasteners are tightened properly? Answer: Lag Bolts and other Fasteners are tight when the head of the Lag Bolt and Washer are firmly compressed against the wood. If splintering occurs, that is an indication you are over tightening the Lag Bolts and other Fasteners. - Page 8 Hardware for Assembly Note: Thread length may vary from what is pictured.
- Page 9 Hardware for Assembly Note: Thread length may vary from what is pictured. H115 H116 H131 H119 H133 H215 H121 H143 H135 H146 H139 H124 H151 H129...
- Page 10 Hardware for Assembly *Note: Thread length may vary from what is pictured. H169 H192 H166 H164 H104 H157 H216 H108 H183 H188 H100 H155 H154 H153 H152 H194...
-
Page 11: Hardware
Hardware for Assembly *Note: Thread length may vary from what is pictured. TOOLS REQUIRED FOR ASSEMBLY Tape Measure Electric Impact Gun or 1/4" 7/16" Deep Well Socket Carpenters Level and 3/8" Ratchet 1/2" Deep Well Socket Carpenters Square 1/8" Drill Bit 9/16"... - Page 12 Carnival Clubhouse Hardware List F/N# DESCRIPTION DIMENSION FOUND IN Flat Washer 1/4" 5-46-0892 Flat Washer 3/8" 5-46-0892 Flat Washer 1/2" 5-46-0892 SAE Flat Washer 1/4" 5-46-0892 Lock Washer 3/8" 5-46-0892 Standard Nut 3/8" 5-46-0892 Acorn Nut 3/8" 5-46-0892 Carriage Bolt 3/8"...
- Page 13 Carnival Clubhouse Base Parts List Continued 9219 9222 1 @ 5/4 x 4 x 21" SLIDE FILLER 24 @ 5/4 x 4 x 29 1/2" RAIL UPRIGHT (3-09-0222) BLOCK (3-09-0219) 9223 2 @ 5/4 x 4 x 30 5/8" CORNER FACIA (3-09-0223) 9229 2 @ 5/4 x 4 x 51 1/4"...
- Page 14 Carnival Clubhouse Tarp Option Parts List 6138 2 @ 4 x 4 x 75 3/4" CENTER POST (3-06-0138) *Not Shown: 1 @ Carnival Clubhouse Tarp N352 9233 (5-22-0284) (5-22-0285) 3 @ 5/4 x 4 x 58" 2 HOLE FACIA (3-09-0233) Carnival Clubhouse Step Ladder Parts List 4135 1 @ 2 x 6 x 81"...
- Page 15 Carnival Clubhouse Picnic Table Parts List F/N# DESCRIPTION DIMENSION FOUND IN Flat Washer 1/4" 5-46-0894 H108 Lag Bolt 5/16" x 3" 5-46-0894 H154 Phillips Wood Screw #8 x 2" 5-46-0894 3297 3293 1 @ 2 x 4 x 28 7/8" TABLE RUNNER (3-03-0293) 2 @ 2 x 4 x 9 3/8"...
- Page 16 Carnival Clubhouse Rock Wall Parts List F/N# DESCRIPTION DIMENSION FOUND IN Flat Washer 1/4" 5-46-0893 SAE Flat Washer 1/4" 5-46-0893 Lock Washer 3/8" 5-46-0893 4 Prong T-Nut 1/4" 5-46-0893 4 Prong T-Nut 3/8" 5-46-0893 Carriage Bolt 3/8" x 6 1/2" 5-46-0893 H108 Lag Bolt...
- Page 17 Turbo Carnival Clubhouse Rock Wall Parts List F/N# DESCRIPTION DIMENSION FOUND IN Flat Washer 1/4" 5-46-0893 SAE Flat Washer 1/4" 5-46-0893 Lock Washer 3/8" 5-46-0893 4 Prong T-Nut 1/4" 5-46-0893 4 Prong T-Nut 3/8" 5-46-0893 Carriage Bolt 3/8" x 6 1/2" 5-46-0893 H108 Lag Bolt...
- Page 18 Carnival Clubhouse Wood Roof Parts List F/N# DESCRIPTION DIMENSION FOUND IN Flat Washer 3/8" 5-46-0898 Lock Washer 3/8" 5-46-0898 4 Prong T-Nut 3/8" 5-46-0898 H131 Hex Head Bolt 3/8" x 4 1/2" 5-46-0898 H154 Phillips Wood Screw #8 x 2" 5-46-0898 H152 Phillips Wood Screw...
- Page 19 Carnival Club Lower Level Playhouse Parts List F/N# DESCRIPTION DIMENSION FOUND IN Flat Washer 1/4" 5-46-0900 Carriage Bolt 3/8" x 6 1/2" 5-46-0900 H108 Lag Bolt 5/16" x 3" 5-46-0900 H164 Phillips Pan Head Screw #14 x 1" 5-46-0900 H154 Phillips Wood Screw #8 x 2"...
- Page 20 Turbo Carnival Clubhouse Lower Level Playhouse Add-On Parts List F/N# DESCRIPTION DIMENSION FOUND IN Flat Washer 1/4" 5-46-0901 H108 Lag Bolt 5/16" x 3" 5-46-0901 2073 2074 3 @ 1 x 6 x 54 1/4" PLAYHOUSE UPRIGHT (3-02-0073) 1 @ 1 x 6 x 7 1/8" SHORT PLAYHOUSE UPRIGHT (3-02-0074) 9233 4 @ 5/4 x 4 x 58"...
- Page 21 Carnival 4x4 Monkey Bar Parts List F/N# DESCRIPTION DIMENSION FOUND IN Flat Washer 3/8" 5-46-0902 Flat Washer 1/2" 5-46-0902 Flat Washer 3/4" 5-46-0902 Lock Washer 3/8" 5-46-0902 Lock Washer 1/2" 5-46-0902 Standard Nut 3/8" 5-46-0902 Standard Nut 1/2" 5-46-0902 Acorn Nut 3/8"...
- Page 22 Carnival 4x6 Monkey Bar Parts List F/N# DESCRIPTION DIMENSION FOUND IN Standard Nut 3/8" 5-46-0903 Acorn Nut 3/8" 5-46-0903 Carriage Bolt 3/8" x 6 1/2" 5-46-0903 H104 Lag Bolt 5/16" x 2" 5-46-0695 H116 Lag Bolt 3/8" x 3 1/2" 5-46-0903 H119 Lag Bolt...
- Page 23 Carnival Penthouse Parts List F/N# DESCRIPTION DIMENSION FOUND IN Flat Washer 1/4" 5-46-0906 Flat Washer 3/8" 5-46-0906 Lock Washer 1/4" 5-46-0906 4 Prong T-Nut 1/4" 5-46-0906 Lag Bolt 1/4" x 3" 5-46-0906 H104 Lag Bolt 5/16" x 2" 5-46-0906 H116 Lag Bolt 3/8"...
- Page 24 Carnival Penthouse w/ Spiral Opening Parts List F/N# DESCRIPTION DIMENSION FOUND IN Flat Washer 1/4" 5-46-0906 Flat Washer 3/8" 5-46-0906 Lock Washer 1/4" 5-46-0906 4 Prong T-Nut 1/4" 5-46-0906 Lag Bolt 1/4" x 3" 5-46-0906 H104 Lag Bolt 5/16" x 2" 5-46-0906 H116 Lag Bolt...
- Page 25 Carnival PENT w/ Spiral Opening Parts List Continued *NOT SHOWN: N391 1 @ CARNIVAL PENTHOUSE N377 SPIRAL TARP 2 @ SAFETY HANDLE 2 @ T- BRACKET 3 @ SMALL 90 (5-22-0280) (5-22-0281) (5-33-0121) (5-35-0087) BRACKET (5-35-0089) Carnival Penthouse Wood Roof Parts List F/N# DESCRIPTION DIMENSION...
- Page 26 10' Wave Slide Parts List F/N# DESCRIPTION DIMENSION FOUND IN H164 Phillips Pan Head Tap Screw #14 x 1" 5-46-0446 SAE Flat Washer 1/4" 5-46-0446 *NOT SHOWN: 1 @ 10' WAVE SLIDE 5-44-0139, 5-44-0140 10' Wave Slide Block Parts List F/N# DESCRIPTION DIMENSION...
- Page 27 10' Scoop Slide Parts List Continued 3956 2 @ 2 x 4 x 98 3/4" 10' SLIDE RAIL (1-03-0956) 6952 7006 2 @ 4 x 4 x 19" SLIDE BLOCK (1-06-0952) 1 @ 4 x 6 x 27 3/4" LEFT SLIDE LEG (1-07-0006) 7007 7091 1 @ 4 x 6 x 27 3/4"...
- Page 28 24" Dia. Spiral Slide Parts List F/N# DESCRIPTION DIMENSION FOUND IN Flat Washer 1/4" 5-46-0462 Flat Washer 3/8" 5-46-0462 Lock Washer 3/8" 5-46-0462 Standard Nut 3/8" 5-46-0462 Acorn Nut 3/8" 5-46-0462 Carriage Bolt 3/8" x 1 1/4" 5-46-0462 H108 Lag Bolt 5/16"...
- Page 29 66" Deck Height PC A-Frame Parts List F/N# DESCRIPTION DIMENSION FOUND IN Flat Washer 3/8" 5-46-0563 Flat Washer 1/2" 5-46-0563 Flat Washer 3/4" 5-46-0563 Lock Washer 1/2" 5-46-0563 Standard Nut 1/2" 5-46-0563 Acorn Nut 1/2" 5-46-0563 Carriage Bolt 1/2" x 3 1/2" 5-46-0563 Carriage Bolt 1/2"...
-
Page 30: H116
60"/62" DH A-Frame Bench Parts List F/N# DESCRIPTION DIMENSION FOUND IN Flat Washer 1/2" 5-46-0876 Flat Washer 3/4" 5-46-0876 Lock Washer 1/2" 5-46-0876 Standard Nut 1/2" 5-46-0876 Acorn Nut 1/2" 5-46-0876 Carriage Bolt 1/2" x 11" 5-46-0876 6021 2 @ 4 x 4 x 91" A-FRAME BENCH SEAT (1-06-1021) 6022 1 @ 4 x 4 x 125"... - Page 31 2 & 3 Position Dual Attach Swing Beam Parts List F/N# DESCRIPTION DIMENSION FOUND IN Flat Washer 1/2" 5-46-0786 Flat Washer 3/4" 5-46-0786 Lock Washer 1/2" 5-46-0786 Standard Nut 1/2" 5-46-0786 Acorn Nut 1/2" 5-46-0786 Carriage Bolt 1/2" x 3 1/2" 5-46-0786 Carriage Bolt 1/2"...
-
Page 32: H131
Box Kit Glider Hardware List F/N# DESCRIPTION DIMENSION FOUND IN Flat Washer 1/4" 5-46-0754 Flat Washer 3/8" 5-46-0754 Flat Washer 1/2" 5-46-0754 Lock Washer 3/8" 5-46-0754 Standard Nut 3/8" 5-46-0754 Nylock Nut 3/8" 5-46-0754 Acorn Nut 3/8" 5-46-0754 Carriage Bolt 3/8"... -
Page 33: H133
2 Hole Mount 4x6 Chin-Up Bar Parts List F/N# DESCRIPTION DIMENSION FOUND IN Flat Washer 3/8" 5-46-0710 Lock Washer 3/8" 5-46-0710 Round Pallet Nut 3/8" 5-46-0710 H133 Hex Head Bolt 3/8" x 5 1/2" 5-46-0710 N380 1 @ CHIN-UP BAR 2 HOLE MOUNT (5-33-0122) 4 Hole Mount 4x6 Chin-Up Bar Parts List... - Page 34 Fire Pole Parts List F/N# DESCRIPTION DIMENSION FOUND IN Flat Washer 3/8" 5-46-0880 Lock Washer 3/8" 5-46-0880 4 Prong T-Nut 3/8" 5-46-0880 H116 Lag Bolt 3/8" x 3 1/2" 5-46-0880 H123 Hex Head Bolt 3/8" x 1 1/4" 5-46-0880 H125 Hex Head Bolt 3/8"...
- Page 35 Wacky Sign Boards Hardware List F/N# DESCRIPTION DIMENSION FOUND IN H176 Phillips Wood Screw #8 x 1" 5-46-0808 Wacky Sign Boards Parts List 1229 1225 1 @ 1 x 4 x 36" NO TRESPASSING 1 @ 1 x 4 x 24" KEEP OUT (1-01-0225) (1-01-0229) 1230 1226...
- Page 38 Step 1 First Wall Assembly (without Rock Wall) *NOTE: Predrill 1/8" holes for all 5/16" Lag Bolts. *NOTE: If installing Rock Wall, skip to Step 2. *NOTE: Processes are shown assembling the Carnival Clubhouse. Processes will be the same if installing the Turbo Carnival Clubhouse unless otherwise noted. *NOTE: If installing Lower Level Playhouse, skip to Step 4.
- Page 39 Step 2 First Wall Assembly (with Rock Wall) *NOTE: Predrill 1/8" holes for all 5/16" Lag Bolts. *NOTE: Processes are shown assembling the Carnival Clubhouse. Processes will be the same if installing the Turbo Carnival Clubhouse unless otherwise noted. *NOTE: Refer to INSET A if the Accessory Arm (6303) needs to be cut down. 1.
- Page 40 Step 3 First Wall Assembly (with Rock Wall) *NOTE: Pre-drill 1/8" holes for all 5/16" Lag Bolts. 1. Attach Rock Wall Mounting Facia (0145) to Corner Uprights (6202) (6324) through bottom pre-drilled holes in Facia and Main Beam (7058) using 1/2" Hardware (H4) and 3/8" Hardware (H3) (H11) (H17) (H28) (H56).
- Page 41 Step 4 Lower Level Playhouse Upright Installation *NOTE: If installing the Lower Level Playhouse on the Carnival Clubhouse, Playhouse Uprights (1267) (1268) (2073) will have to be attached to Rock Wall Mounting Facias (0145) and 2 Hole Facias (9233), prior to building wall assemblies. If installing Lower Level Playhouse on the Turbo Carnival Clubhouse, DO NOT install Playhouse Uprights (1267) (1268) (2073) on the backs of Rock Wall Mounting Facias.
- Page 42 Step 5 First Wall Assembly (with Lower Level Playhouse) *NOTE: Pre-drill 1/8" holes for all 5/16" Lag Bolts. *NOTE: Depending on your set configuration the Accessory Arm (6303) may be flipped to run out the back of the set. If the Accessory Arm needs to be cut down refer to Step 1 for measurements to cut down Accessory Arm.
- Page 43 Step 6 Second Wall Assembly *NOTE: If installing Lower Level Playhouse skip to Step 8. *NOTE: Pre-drill 1/8" holes for all 5/16" Lag Bolts. *NOTE: Corner Uprights (6324) will be used if installing the Turbo Carnival Clubhouse. 1. Position Top Joist against Corner Uprights (6302) (6324) and attach using 1/2" Hardware (H4) and 3/8"...
-
Page 44: H166
Step 7 Second Wall Assembly *NOTE: Pre-drill 1/4" holes for all 3/8" Lag Bolts. 1. Position Left and Right Slim Brackets (6107) (6108) against Corner Uprights (6302) (6324) and Main Beam (7058) and attach using 3/8" Hardware (H3) (H115) (H116). *NOTE: Be sure to use the 3/8"...
Need help?
Do you have a question about the Carnival series and is the answer not in the manual?
Questions and answers