Table of Contents
Advertisement
Advertisement
Table of Contents

Subscribe to Our Youtube Channel
Related Manuals for SD GlucoNavii Link0.3 NFC


Summary of Contents for SD GlucoNavii Link0.3 NFC
- Page 2 SD GlucoNavii® Link0.3 NFC BLOOD GLUCOSE MONITORING SYSTEM Dear SD GlucoNavii® Link0.3 NFC System Owner; Thank you for choosing SD GlucoNavii® Link0.3 NFC Blood Glucose Monitoring System. Your new SD GlucoNavii® Link0.3 NFC Blood Glucose Monitoring System is an important tool that can help you better manage your diabetes.
-
Page 3: Table Of Contents
SD GlucoNavii® Link0.3 NFC BLOOD GLUCOSE MONITORING SYSTEM TABLE OF CONTENTS Chapter 1 : Understanding Your New System Before You Start Testing Special Information for Healthcare Providers and Caregivers Indication for Use Product Description and the Principle of the use The Complete SD GlucoNavii®... - Page 4 SD GlucoNavii® Link0.3 NFC BLOOD GLUCOSE MONITORING SYSTEM Chapter 4 : Using NFC function Information on NFC function Information on Caution for NFC Using NFC function How to use GlucoNavii App How to use GlucoNavii DMS for PC Chapter 5 : Using the Meter Memory...
-
Page 5: Chapter 1 : Understanding Your New System
Carefully read and follow the instructions in the User Instruction Guide and Package Inserts for the test strips and SD Glucose control solution. It is very important to follow the instructions in order to prevent an incorrect result or improper treatment. - Page 6 SD GlucoNavii® Link0.3 NFC BLOOD GLUCOSE MONITORING SYSTEM Keep the meter and testing supplies away from small children. The battery door, test strips, lancets, protective disks, and control solution cap are choking hazards. CAUTION Do not eat the test strips.
-
Page 7: Special Information For Healthcare Providers And Caregivers
60% or below 20% can cause false results. 3. Indication for use (Purpose of the devices) Your new SD GlucoNavii® Link0.3 NFC meter and accessories work together to measure the amount of glucose (sugar) in your blood. - Page 8 The blood glucose result is displayed on the meter’s LCD display. By touching a drop of blood to the tip of the SD GlucoNavii® Link0.3 test strip, the strip’s reaction chamber automatically draws the blood into the strip through capillary action.
-
Page 9: Sd Gluconavii® Link0.3 Nfc Meter
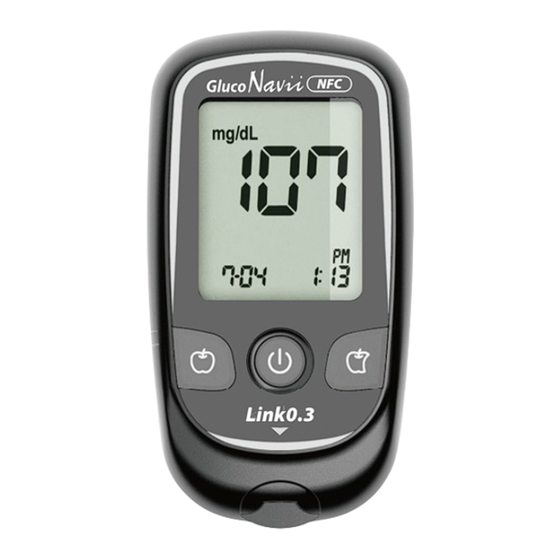
SD GlucoNavii® Link0.3 NFC BLOOD GLUCOSE MONITORING SYSTEM 6. SD GlucoNavii® Link0.3 NFC Meter Display Shows blood glucose result, messages, and glucose result stored in memory. ON/OFF Button Press to turn meter ON or OFF. Arrow Buttons Use for meter setup and review of memory moving Link0.3... - Page 10 SD GlucoNavii® Link0.3 NFC BLOOD GLUCOSE MONITORING SYSTEM Display Indicates Indicates during the meter Measurement time setting Warns when the Indicates beep battery is low or must be setting replaced Indicates if environmental Indicates post-meal or temperature is pre-meal exceeded during...
- Page 11 SD GlucoNavii® Link0.3 NFC BLOOD GLUCOSE MONITORING SYSTEM Indicates the Test strip average result Tell you when to apply the sample and indicates if you Indicates a control select whole blood solution test result for blood reference type Indicates alarm...
- Page 12 SD GlucoNavii® Link0.3 NFC BLOOD GLUCOSE MONITORING SYSTEM 1) Strip Stand-by Display After turning on the meter, the below will be displayed automatically to show the test strip icon ashing. In this Strip Stand-by Display, it’s able to enter setting mode of the meter or search the test results.
-
Page 13: Sd Gluconavii® Link0.3 Nfc
SD GlucoNavii® Link0.3 NFC System measures the amount of glucose in whole blood. Blood is applied in the Yellow Window (TOP EDGE) of SD GlucoNavii® Link0.3 Test Strip and is automatically drawn into the reaction cell where the reaction takes place. -
Page 14: Sd Gluconavii® Link0.3 Nfc Accessories
SD GlucoNavii® Link0.3 NFC BLOOD GLUCOSE MONITORING SYSTEM 8. SD GlucoNavii® Link0.3 NFC Accessories Lancet SD Glucose check strip Electrode Arming Knob Lancing Device Cap & Comfort dial with puncture depth selection Release Arming Button Knob SD GlucoNavii® control solution... -
Page 15: Changing The Battery
SD GlucoNavii® Link0.3 NFC BLOOD GLUCOSE MONITORING SYSTEM 9. Changing the Battery Inserting and replacing the Battery Your meter is shipped with one 3V battery type CR2032 that needs to be inserted before testing. The battery that comes with your meter can be found in the mesh pocket of your carrying case. - Page 16 SD GlucoNavii® Link0.3 NFC BLOOD GLUCOSE MONITORING SYSTEM STEP-2: Insert the 3V battery (type CR2032) into the compartment with “+” side facing you. STEP-3: Snap battery cover back in place. STEP-4: Push the ON/OFF button or insert a strip to start testing.
-
Page 17: Meter Set Up
SD GlucoNavii® Link0.3 NFC BLOOD GLUCOSE MONITORING SYSTEM 10. Meter Set up STEP-1 : Setting the Audible Beep In Strip Stand-by Display, if you press the ON/OFF button during 3 seconds, the display for setting the beep will appear, the rst step of the setting mode. - Page 18 SD GlucoNavii® Link0.3 NFC BLOOD GLUCOSE MONITORING SYSTEM STEP-2: Setting the Hypo warning You can set the meter to let you know when your result indicates a possible low blood glucose (hypoglycemia). You can also select what blood glucose level you want this indicator to have 60, 70, 80 mg/dL(3.3, 3.9, 4.4...
- Page 19 SD GlucoNavii® Link0.3 NFC BLOOD GLUCOSE MONITORING SYSTEM Your new meter comes with a preset time and date. You may need to change the time to your time zone. Having the right time and date in your meter is important if you use the meter memory.
- Page 20 SD GlucoNavii® Link0.3 NFC BLOOD GLUCOSE MONITORING SYSTEM Link0.3 Link0.3 [ Left or right [ ON/OFF button ] button ] Next will appear the setting display for month and day format. The meter can display the month and day in either a Month-Day (m-d) format or a Day-Month (d- m) format.
- Page 21 SD GlucoNavii® Link0.3 NFC BLOOD GLUCOSE MONITORING SYSTEM [ Time Setting ] Next will appear the display for setting the 12 or 24 Hour clock format. The meter can display the time in either the 12h format or the 24h format. Set the preferred format on the display by pressing either the left or the right button and select by pressing the ON/OFF button.
- Page 22 SD GlucoNavii® Link0.3 NFC BLOOD GLUCOSE MONITORING SYSTEM STEP 4: Post-meal alarm You can use the meter’s post-meal alarm function to remind you to test your blood glucose after meal. After day and time setting, the display for setting the post-meal alarm will appear the fourth of setting mode.
- Page 23 SD GlucoNavii® Link0.3 NFC BLOOD GLUCOSE MONITORING SYSTEM If you select the post-meal alarm ‘2h’ feature and test with pre-meal mark, the ‘clock symbol’ will appear on result display and the ‘beep’ sound will be made in 2 hours to remind you to test your blood glucose after meal for 1mimute.
- Page 24 SD GlucoNavii® Link0.3 NFC BLOOD GLUCOSE MONITORING SYSTEM STEP 5: Setting the alarm You can use the meter’s alarm function to remind you to test your blood glucose. After Post-meal alarm setting the display for setting the alarm will appear, the fth of setting mode.
- Page 25 SD GlucoNavii® Link0.3 NFC BLOOD GLUCOSE MONITORING SYSTEM If you select the alarm on feature in rst alarm mode, the clock will blink. Set the correct time and minute you want to set an alarm on the display by pressing either the left or the right button and then select the preferred feature by pressing the ON/OFF button.
- Page 26 SD GlucoNavii® Link0.3 NFC BLOOD GLUCOSE MONITORING SYSTEM STEP 6: DATA REVIEW SETTING This function is to review the latest test result when inserting the strip into the meter. You can check your latest test result before testing. After alarm setting, display the Data review setting mode.
-
Page 27: Using Sd Gluconavii® Link0.3 Nfc Test Strips
11. Using SD GlucoNavii® Link0.3 Test Strips [ Important Test Strip Information ] SD GlucoNavii® Link0.3 blood glucose test strip should be used with SD GlucoNavii® Link0.3 NFC meter. Using other glucose test strip can cause inaccurate the result or ‘E-1’... - Page 28 Test Strips after the discard date. (6 months after rst opening from the container.) SD GlucoNavii® Link0.3 Test Strips are for single use only. Never reuse a test strip that has had either blood or control solution applied to it.
-
Page 29: Chapter 2 : Control Solution Test
CHAPTER 2 : Control Solution Test Why you do control solution test ; SD Glucose control solution is used to check that the meter and the test strips are working together as a system and that you are performing the test correctly. -
Page 30: Performing A Control Solution Test
You need the meter, a test strip, and control solution Level M or Level H. The control level is printed on the test strip label. For more information how to obtain SD Glucose control solution, call at +82-31-300-0400. A set of Level M and H control solutions is available for purchase. - Page 31 SD GlucoNavii® Link0.3 NFC BLOOD GLUCOSE MONITORING SYSTEM STEP-1: Remove a new test strip from container. Be sure to tightly replace container cap after removing test strip. Insert a test strip (yellow window printed ‘Link0.3’ facing up) into test strip slot. The meter turns on automatically.
- Page 32 SD GlucoNavii® Link0.3 NFC BLOOD GLUCOSE MONITORING SYSTEM The control solution result appears on the screen in just 5 seconds. Compare control solution result with the range printed on the test strip container. If the results are not within the control range printed on the test strip container, then the meter and strips may not be working properly.
-
Page 33: Troubleshooting Control Solution Test
SD GlucoNavii® Link0.3 NFC BLOOD GLUCOSE MONITORING SYSTEM 2. Troubleshooting Control Solution Test Check Action Did you do the test in If not, do the test again. Insert a control solution mode? test strip; Press the left button Did you see “control for 3 seconds in Blood Stand- solution container icon”... - Page 34 SD GlucoNavii® Link0.3 NFC BLOOD GLUCOSE MONITORING SYSTEM Check Action Make sure test strip is inserted Did you insert test strip into the test strip slot until it will rmly into meter? go on further. Read again “Chapter 2 : Control Did you follow the Solution Test”...
-
Page 35: Chapter 3 : Testing Your Blood Glucose
SD GlucoNavii® Link0.3 NFC BLOOD GLUCOSE MONITORING SYSTEM CHAPTER 3 : Testing Your Blood Glucose 1. Getting a Drop of Blood Wash your hands in warm, soapy water. Rinse well and dry completely. Warming ngers can increase blood ow. Turn the lancet insert cap counterclockwise to remove it, insert the lancet into the lancing device holder and push down rmly until it is fully seated. - Page 36 SD GlucoNavii® Link0.3 NFC BLOOD GLUCOSE MONITORING SYSTEM After cocking the lancing device back, hold the lancing device rmly against the side of nger and then press the release button. A lancet should only be used once. Do not share used lancets with another person. To prevent possible infection, a used lancet should not be touched by another person.
Need help?
Do you have a question about the GlucoNavii Link0.3 NFC and is the answer not in the manual?
Questions and answers