
Subscribe to Our Youtube Channel
Related Manuals for Cadex C8000


Summary of Contents for Cadex C8000
- Page 1 C8000 Battery Testing System User Manual (V2.x) Cadex ® Electronics Inc. 22000 Fraserwood Way Richmond, British Columbia Canada V6W 1J6 Phone: 1-604-231-7777 FAX: 1-604-231-7755 Web: www.cadex.com E-mail: info@cadex.com...
- Page 2 Trademark Cadex ® and BatteryLab ® are registered trademarks of Cadex Electronics Inc. All other trademarks or registered trademarks mentioned herein are the property of their respective owners. Copyright Notice Copyright © 2010 by Cadex Electronics Inc. All rights reserved. No part of this...
-
Page 3: Table Of Contents
1.3.2 Restore Calibration Data ..................... 8 Battery Tester ........................10 Getting Started with the Battery Tester ................ 10 2.1.1 The C8000 Battery Tester User Manual ..............10 2.1.1.1 Topics You Need to Know ................10 2.1.2 What is in the Box..................... 11 2.1.3 Optional C8000 Accessories .................. - Page 4 Cooling Fans ..................... 18 Cadex C8000 Adapter Unit ................... 18 2.2.1 Cadex C8000 Adapter Unit ..................18 2.2.2 Connect the C8000 Adapter Unit to the C8000............19 Cables ..........................20 2.3.1 Power Port Cable ...................... 20 2.3.2 Connect the Power Port Cable to the C8000 ............20 2.3.3 Auxiliary data cables (for I/O ports) .................
- Page 5 C8000 Battery Testing System User Manual 2.6.4 Replace the Backup Battery ..................32 The Battery Tester Application ..................35 2.7.1 Execute a Program on a Battery ................36 2.7.1.1 Execute a Program without BatteryLab ............36 2.7.1.2 Suspend and Resume a Running Program ............39 2.7.1.3...
- Page 6 C8000 Battery Testing System User Manual 2.11.2 User Information ....................64 2.11.3 LCD Settings ......................65 2.11.4 Serial Ports ......................65 2.11.5 Specify the TCP/IP Address on the C8000 ............66 2.11.6 Maintenance ......................67 2.11.7 Options ........................67 2.11.8 Security ......................... 69 2.11.9 System Information ....................
- Page 7 The Menu Bar ....................90 3.1.12 Set the Clock on the C8000 .................. 92 3.1.13 Set Security Setting on the C8000 ................ 93 3.1.14 Set the Password to Configure C8000 Functions ..........94 3.1.15 C8000 Settings ...................... 94 3.1.16 Alert Window......................96 3.1.17 Exit BatteryLab .....................
- Page 8 C8000 Battery Testing System User Manual 3.6.2 Print a Search List ....................114 3.6.3 View and Print Test Details ..................115 3.6.3.1 Edit a Test Result Record ................116 3.6.3.2 Delete a Battery Test Record ................117 3.6.3.3 Print Test Result Document ................117 3.6.3.4...
- Page 9 C8000 Battery Testing System User Manual 3.8.5 Import a Battery ID ....................139 3.8.6 Export a Battery ID ....................143 3.8.7 Search for a Battery ID ................... 147 3.8.8 Sort Battery IDs ...................... 147 C-Code ........................147 3.9.1 Add a C-Code ......................147 3.9.2 Add a SM-BUS (Smart Battery) C-Code..............
- Page 10 C8000 Battery Testing System User Manual 3.11 Load Capture ....................... 211 3.11.1 Load Capture Programs Database ............... 215 3.11.2 Add a Load Capture Program ................215 3.11.3 Edit a Load Capture Program ................216 3.11.4 Delete a Load Capture Program ................218 3.11.5...
- Page 11 C8000 Battery Testing System User Manual 3.13.7 Search for a Program Sequence ................259 3.13.8 Sort Program Sequences ..................259 3.14 System Updates ......................260 3.14.1 Firmware Information ..................260 3.14.1.1 Update the Firmware on the C8000s ............260 3.14.1.2 Update the Calibration Data................
-
Page 13: Safety And Warranty
Please read this document and equipment labeling before using the equipment. 1.1.2 Modification of Equipment CE, FCC, Safety Agency, and other approvals apply only to the C8000 Battery Testing System in the factory-authorized configuration. Changes or modification to the equipment not expressly approved by Cadex will void the approvals and void your authority to operate the equipment. -
Page 14: Hazard Symbols
Warning or Danger Information that, if ignored, can result in serious injury or death. Caution Information that, if ignored, can result in damage to the C8000 Battery Testing System, battery adapters, or the battery. Potential Electrical Shock Hazard Potential Explosion Hazard... -
Page 15: Disposal Of Waste Electrical And Electronic Equipment (Weee) In The European Union
C8000 Battery Testing System User Manual 1.1.4 Disposal of Waste Electrical and Electronic Equipment (WEEE) in the European Union This symbol on the product and package indicates that this product must not be disposed of with unsorted municipal waste. Instead, it is your responsibility to dispose of WEEE by handing it over to a designated collection point for the disposal. -
Page 16: Explosion Hazard
Press the battery firmly into the adapter. Observe battery temperature, which is displayed on the C8000 Status screen. Internal battery temperature must be between 5°C (41°F) and 50°C (122°F) during testing. Stop service if the battery's internal temperature exceeds 50°C. -
Page 17: Charge And Discharge Lithium-Ion (Li-Ion) Batteries
C8000 Battery Testing System User Manual Do not exceed the battery manufacturer’s recommended charge current and voltage limits for batteries. Do not remove the battery from the adapter while the test is running. To minimize arcing, stop or cancel battery service before removing the battery from the adapter. -
Page 18: Shock Hazard
Use only a grounded AC outlet to power the tester. Before attempting any internal service, remove all batteries from the battery channels, turn the C8000 Battery Testing System off and disconnect the power cord from the wall socket. Wait a few minutes before opening the cover. -
Page 19: Warranty And Service
Products used for rental purposes. 1.2.1 Warranty Service Before sending the unit for service, contact Cadex Technical Support. If your product requires warranty service, the representative will provide a Material Return Authorization Form or Material Return Authorization (MRA) and the location of the nearest service center. -
Page 20: Non Warranty Repairs
C8000 Battery Testing System User Manual 1.2.2 Non Warranty Repairs Before sending the unit in for service, contact Cadex Technical Support at 1-800- 565-5228 or 1-604-231-7777. If your product is not covered by warranty, the representative will provide the contact information for the nearest service center. - Page 21 C8000 Battery Testing System User Manual 1. From the Tools menu, click System Update. 2. Select the check box for each C8000 to restore calibration data for. 3. Under the Calibration tab, click Restore Calibration Data to restore previously backed up data.
-
Page 22: Battery Tester
C8000 and to test batteries. Up to four batteries can be tested at any time using one of several testing programs. 2.1.1.1 Topics You Need to Know To properly use the C8000, review the following sections of this manual: Cautions and Warnings ... -
Page 23: What Is In The Box
C8000 Battery Testing System User Manual Caution! The C8000 has been calibrated at the factory and has its factory calibration data stored on it. The calibration data is automatically backed up to a file in the \Batlab\DB folder (or the folder indicated in the About window) when a C8000 connects to Cadex BatteryLab. -
Page 24: Optional C8000 Accessories
Adapter sections of this manual. When ready, see section Configure the C8000 to continue. Caution The case of the C8000 has air vents to allow cooling airflow. Do not cover, block, or obstruct the air-vents. 2.1.3 Optional C8000 Accessories 2.1.3.1 C8000 Adapter Unit... -
Page 25: Snaplock Universal Battery Adapter (4-Wire Versions Only)
The adapter contains C-Codes that can be used to configure the C8000 and other Cadex platforms to the correct setting. Specialty adapters available on request. Requires C8000 Adapter Unit. -
Page 26: Front Panel
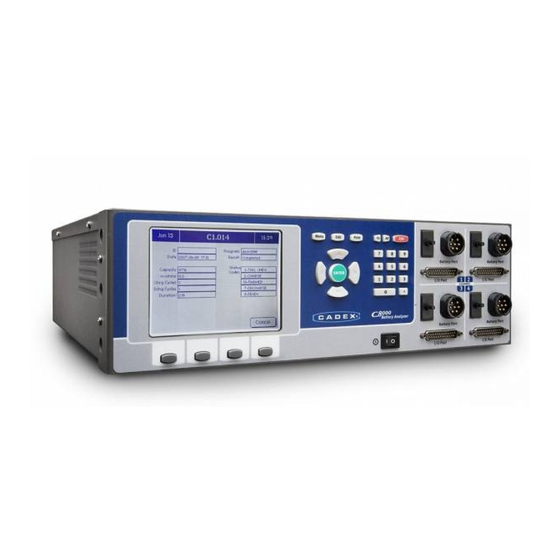
C8000 Battery Testing System User Manual Display and Controls 2.1.4 Front Panel 2.1.4.1 LCD Settings The LCD screen displays the fields that you need to fill in prior to executing a test and also displays test status and results. Use the keypad and arrow buttons to enter information into the fields on the screen. -
Page 27: Arrow And Enter Buttons
C8000 Battery Testing System User Manual 2.1.4.3 Arrow and ENTER Buttons Use the arrow buttons to move from field to field. Use the button to accept the ENTER information entered into the fields Note: The Menu and Print buttons are not used. The Edit button activates the onscreen keypad when an editable field is selected on the C8000. -
Page 28: Battery Port Connections
C8000 Battery Testing System User Manual 2.1.4.6 Battery Port Connections There are four port connections, to attach up to four battery adapters. Each channel has a battery port, an auxiliary input/output, and a circuit breaker. Each Battery Port is used to plug... -
Page 29: Back Panel
IEC320 socket on the back panel. A fuse protects the C8000 from AC overload. 2.1.5.2 Ethernet Port The Ethernet port is used to connect the C8000 to the network or the host computer. The Ethernet Port (on the back panel) has two LEDs to indicate communication between the C8000 and a computer. -
Page 30: Cooling Fans
USB functionality is not enabled. 2.1.5.4 Cooling Fans The thermostatically controlled fans operate automatically to keep the inside of the C8000 at optimum temperature. Keep all case vents and fan openings clear to ensure free airflow through the C8000. 2.2 Cadex C8000 Adapter Unit 2.2.1 Cadex C8000 Adapter Unit... -
Page 31: Connect The C8000 Adapter Unit To The C8000
3. Push the DB25 female connector in to corresponding Auxiliary connector of the C8000 channel and tighten the connector hand screws. To remove the battery connector cable from the C8000, turn the ring on the connector plug counter-clockwise and then pull the cable plug out of the connector. -
Page 32: Cables
2.3.1 Power Port Cable The Power Port Cable conducts electric power between a connected battery and the C8000. The Power Port Cable is used only for power transfer, voltage measurement and temperature reads – all other functions operate via the Auxiliary Input/Output (I/O) cable. - Page 33 Figure 2 – Dual power port cable connector end-view iii. Push the battery connector plug into the desired battery channel outlet (on the C8000), then rotate the locking wheel to secure the connector to the battery channel outlet. Battery Tester...
- Page 34 Figure 3 – Channel 1 outlet (on C8000) iv. The Power port cable is now ready to connect to a battery. To remove the battery connector cable from the C8000, turn the ring on the connector plug counter-clockwise and then pull the cable plug out of the connector.
-
Page 35: Auxiliary Data Cables (For I/O Ports)
C8000 Battery Testing System User Manual 2.3.3 Auxiliary data cables (for I/O ports) The Auxiliary data cables (for I/O ports) enables the C8000 to interface with third-party devices, the Cadex SnapLock/RigidArm series (when using the C8000 Adapter Unit), and SM-Bus batteries. - Page 36 C8000 Battery Testing System User Manual Note: Once theC8000 Adapter Unit is connected, the input/output ports become reserved. The following diagrams show the pin and electrical specifications of interfaces for the Auxiliary Input/Output Connector. Auxiliary data cables (for I/O ports) Pinout Diagram...
- Page 37 C8000 Battery Testing System User Manual Auxiliary data cables (for I/O ports) Wiring Chart Pin # Function Wire Color Digital I/O 1 White Digital I/O 2 Yellow Digital I/O 3 Orange Digital I/O 4 Pink Analog Out 1 Gray Analog Out 2...
-
Page 38: C8000 Specifications
C8000 Battery Testing System User Manual 2.4 C8000 Specifications 2.4.1 C8000 System Techincal Specifications 4 Independent Channels each including: Channels 1 Battery Port + 1 I/O Port Physical 480mm x 380mm x 140mm (18.9” x 15.0” x 5.5”) Dimensions ... - Page 39 C8000 Battery Testing System User Manual Battery Compatibilty All Standard Battery Types Chemistries Lead Acid Ni-based: NiMH, NiCd Li-based: Li-ion, Li-Phosphate 50mAh to 1000Ah Capacity Range Electrical Input Power 100-240 VAC 50-60 Hz ...
-
Page 40: Auxillary Port Absolute Maximum Ratings
2.4.2 Auxillary Port Absolute Maximum Ratings When using the Auxiliary Input/Output Connector, the voltage settings for the pins must not exceed the absolute maximum ratings – otherwise the C8000 may become damaged. The absolute maximum ratings for the Auxiliary Input/Output Connector are as follows:... -
Page 41: Auxillary Port Operating Ratings
C8000 Battery Testing System User Manual Input 1-4 (differential): Current at Digital I/O 1-3: -20mA (open collector / sinking only) Current at Digital I/O 4: -100mA (open collector / sinking only) Current at Analog Out 1-2: ±5mA Current at +5VDC: +100mA 2.4.3 Auxillary Port Operating Ratings... -
Page 42: Configure The C8000
To set up and configure the C8000 perform the following steps: 1. Plug in the power cord and ensure the battery adapter cords are properly connected to the C8000. 2. Switch ON the C8000 set the clock and enters user information. For instructions, see 2.11.1 Set the Clock 2.11.2 User... -
Page 43: Clean The C8000
Warnings. 2.6.3 Replace the Fuse If the C8000 does not power up, make sure that the power cord is properly inserted and that power is available. If the C8000 still does not power up, the main (AC input) fuse may need to be replaced. -
Page 44: Replace The Backup Battery
The C8000 uses a 3-volt lithium coin battery (type CR2032 or equivalent, Cadex part number 45-206-0001) to preserve settings while the C8000 is turned OFF. With normal use of the C8000, you will seldom need to replace the backup battery. - Page 45 C8000 Battery Testing System User Manual Caution! Electrostatic Sensitive Device Do not open the C8000 or touch any part of its internal components if you are not grounded. Do not attempt to open the C8000 while it is plugged into an electrical outlet or any peripheral device.
- Page 46 C8000 case. 2. Replace the seven cover screws. 3. Plug in the power cord and cables. 4. Turn ON the C8000. The settings may have returned to factory defaults, in which case you will need to reprogram settings. Battery Tester...
-
Page 47: The Battery Tester Application
3. No Graphing or Detail information for Test Results. (Summary of information only). 4. No Load Capture capabilities. When you power on the C8000 without any batteries connected, the Main screen appears: When connected to BatteryLab, the C8000 displays the Unit # that corresponds to BatteryLab’s windows. -
Page 48: Execute A Program On A Battery
The date appears in the top left corner of the Main screen while the time appears in the top right corner. When the caption says C8000 – Unit 3, it means the C8000 is connected to BatteryLab. If the caption says Cadex C8000, it means the C8000 is in standalone mode. - Page 49 On completion of a program, indicates the file to which the results have been saved. Note: BatLab will generate an impendent TEST ID and will incorporate the data from the C8000 test result file.) C-Code The battery parameters being applied by the C8000.
- Page 50 1. From the Main screen, press the Channel button for the C8000 to test. The Channel screen appears. 2. The Channel screen shows the status of this channel, providing a test is currently running.
-
Page 51: Suspend And Resume A Running Program
C8000 Battery Testing System User Manual 2.7.1.2 Suspend and Resume a Running Program While a program is running, it can be temporarily suspended. Later, the program can be resumed. 1. From the Channel screen, click Suspend. The program is immediately interrupted. -
Page 52: View Auxiliary Port Information
C8000 Battery Testing System User Manual 2. Press OK. The Aborted screen appears. 2.7.1.4 View Auxiliary Port Information While a program is active, the current program configuration can be viewed. 1. From the Channel screen, press MORE. A second Channel screen appears. -
Page 53: Jump To A Specific Program Step
C8000 Battery Testing System User Manual 2. Press AuxPorts. The Auxiliary Ports screen appears. 3. Press BACK twice to return to the Channel screen. 2.7.1.5 Jump to a Specific Program Step A program may contain one or more action steps. The “JUMP”... -
Page 54: View Sm-Bus Information
3. The Current Step field shows the current step that the program is in. Enter the step number to move to in the Jump To field and press OK. The C8000 will resume program operation at the selected step. 2.7.1.6 View SM-Bus Information Before using any SM-Bus battery functions, ensure the SM-Bus lines from the I/O port are connected to the battery. -
Page 55: Select A Program To Run
C8000 Battery Testing System User Manual Fully Charged Finished Terminate Charge Alarm Finished Overcharged Alarm Finished Fully Discharged Finished Terminate Discharge Alarm Finished Over-Temperature Alarm Two retries The following are definitions for available actions on the status/alarm bits: Finished The C8000 will end the current step as a success. - Page 56 C8000 Battery Testing System User Manual 1. Select the program by battery ID or C-Code. 2. In the Program field, press ENTER. The Select Program screen appears. 3. Select the program to run and press ENTER. Note: When scrolling through the list of programs, all factory programs are indented.
-
Page 57: Test Results
C8000 Battery Testing System User Manual 2.7.2 Test Results 2.7.2.1 View Test Results 1. From the C8000 Main screen, select Test Results. The Test Results screen shows the results sorted by battery ID, followed by the sequential number if the test was started using a battery ID or Cx (where x is the channel number, followed by the sequential number). -
Page 58: Print Test Results
C8000 Battery Testing System User Manual The following table describes the fields that appear in the Results screen. Field Description The battery’s identification. Date The date the test was performed. Program The program run during the test. Result Indicates whether the battery completed or failed the test. -
Page 59: Delete All Test Results
C8000 Battery Testing System User Manual 2. Select the test result to delete. 3. Press DELETE. The Confirm Action screen appears. 4. Press OK to delete the test result. 2.7.2.4 Delete All Test Results To delete all test results: 1. From the Main screen, select Test Results. The Test Results screen shows the results sorted by battery serial number. -
Page 60: Battery Profiles
2. Press, "DELETE ALL." The Confirm Action screen appears. 3. Press OK to delete all test results. 2.7.3 Battery Profiles To add, edit, and delete battery profiles in the C8000: From the Main menu, select Batteries. The Battery Profiles screen appears. -
Page 61: View And Edit A Battery Profile
C8000 Battery Testing System User Manual 2.7.3.1 View and Edit a Battery Profile To view a battery profile, select the profile in the Battery Profiles screen and press ENTER. The Battery Profiles screen appears. Edit the information for the battery profile, as required, and press OK to save the changes. - Page 62 C8000 Battery Testing System User Manual Select the c-code for the battery profile and press ENTER. For a description of the fields, see 2.8.1.2 View and Edit a C-Code. Edit the details of the battery c-code as required and press OK to save the changes.
-
Page 63: Delete A Battery Profile
C8000 Battery Testing System User Manual Edit the details of the battery c-code as required. (For instructions on editing a c-code, see 2.8.1.2 View and Edit a C-Code.) Press BACK to return to the Page 1 screen. 2.7.3.2 Delete a Battery Profile To delete a battery profile: From the Main screen, select Batteries and press ENTER. -
Page 64: C-Codes
Code is not deleted. 2.8 C-Codes To create, view, and edit c-codes, and to import or export c-codes to and from the C8000: (Note: The Import and Export functions apply only to SnapLock/RigidArm Adapters when using the C8000 Adapter Unit.) From the Main screen, select C-Codes and press ENTER. -
Page 65: Create A C-Code
C8000 Battery Testing System User Manual 2.8.1.1 Create a C-Code To create a c-code, select View/Edit in the C-Code Options screen and press NEW. Enter the c-code identification. To select the chemistry, use the Enter key or the arrow keys. Press NEXT. - Page 66 C8000 Battery Testing System User Manual Edit the details as required and press OK to save the changes. See Section 4 C-Code Parameters for system limitations during C-code Creation. Field Description C-Code ID A unique identification name for the C- Code.
- Page 67 C8000 Battery Testing System User Manual Dchg Rate The rate of discharge current to be applied (Unit (A)) End Dchg The end-of-discharge voltage (Unit (VV)) Rapid Chrg The required voltage level for the battery before a full charge current (as per Chrg Rate) is applied.
-
Page 68: Delete A C-Code
C8000 Battery Testing System User Manual Constant Voltage charge (Unit (V)) (SLA/LiPH only) End of Charge point for a battery charge (Unit (A)) (SLA/Li/LiPH only) Min Voltage The minimal voltage the C8 allows before terminating action (Unit (VV)) Max Voltage... -
Page 69: Import A C-Code
C8000 Battery Testing System User Manual 2.8.2 Import a C-Code To import a c-code from a SnapLock/RigidArm Adapter to the C8000 (an adapter unit is required), select C7 Import from the C- Code Options screen and press ENTER. The Import C-Codes screen appears. -
Page 70: Export A C-Code
The numbered (1 through 10) fields list all c-codes contained within the SnapLock/RigidArm Adapter. In the C-Code field, press Enter to retrieve a list of c-codes currently on the C8000 and select one. The name of the c-code you just selected appears in the Export Name field –... -
Page 71: Programs
1. Select a channel. 2. Select the C8000 C-Code to export. 3. Edit the Export name, if needed. 4. Select the location to export the C8000 C-Code to. 5. Save the C-Code. 2.9 Programs The C8000 includes factory default programs. See 3.10.1 Factory... -
Page 72: Delete A Custom Program
C8000 Battery Testing System User Manual indicates the part number). The Digital I/O, Analog Output #, and Analog In # fields display the settings for the port as programmed. 3. When finished viewing the information about the custom program, press CANCEL to return to the Custom Programs screen. -
Page 73: Waveforms
C8000 Battery Testing System User Manual 3. Press DELETE. The Confirm Action screen appears. 4. Press OK. 2.10 Waveforms To view information about a waveform or delete one or more waveforms: From the Main screen, select Waveforms. The Custom Waveforms screen appears. -
Page 74: Delete A Waveform
C8000 Battery Testing System User Manual Select the waveform and press ENTER. The screen shows the version, the waveform, and comments about the selected waveform. Note: if a version number is not entered when the waveform is created, V0.00 is displayed. -
Page 75: Specify System Options
Maintenance, Options, Security, System Information, and Factory Defaults. 2.11.1 Set the Clock To set the time and date on the C8000: 1. From the Main screen, select System and press ENTER. The System Options screen appears. 2. Select Set Clock and press ENTER. The System Time screen appears. -
Page 76: User Information
C8000 Battery Testing System User Manual 3. Using the numeric keypad, enter the time (in 24-hour format) and the date (year/month/day). 4. Press OK. 2.11.2 User Information To enter user information: 1. From the Main screen, select System and press ENTER. -
Page 77: Lcd Settings
Navigating the LCD Display. 2.11.3 LCD Settings To set the contrast of the C8000’s LCD screen: 1. From the Main screen, select System and press ENTER. The System Options screen appears. 2. Select LCD Contrast and press ENTER. The Set LCD Contrast screen appears. -
Page 78: Specify The Tcp/Ip Address On The C8000
4. Press OK. 5. Restart the C8000 after modifications. 2.11.5 Specify the TCP/IP Address on the C8000 Note that the TCP/IP addresses must be static IP addresses. For more information, see 3.1.10 Selecting a TCP/IP Address for the C8000. -
Page 79: Maintenance
5. Press OK two times and let the C8000 reboot. Note: Ensure that the IP Address is unique on the network system and the IP Address assigned to the C8000 has been removed from the DCHP server assignment list. 2.11.6... - Page 80 You can specify the capture rate (5-100 readings per second). If the Save Results Data option is enabled, the C8000 saves test results for each completed test. This is open default to ON. If a power failure occurs while a test is executing, and the power is restored within the specified timeout, the interrupted test will be resumed.
-
Page 81: Security
C8000 Battery Testing System User Manual 2.11.8 Security When security is enabled on the C8000, you (or another operator) cannot delete test results or alter c-codes stored in the unit. Note that the password is a numeric password only; alphabetic and alphanumeric characters are not valid in the password. -
Page 82: System Information
C8000 Battery Testing System User Manual 5. Press OK. A valid password can be changed in BatteryLab. To receive additional help with passwords, contact Cadex Electronics Inc. or an authorized service center. To disable the password, enter a value of “0000”. - Page 83 Power on time The last time the C8000 was turned on The security password enables or disables the C8000’s security feature. The default password is 0000 and security features are disabled by default. If a security password is specified, security will be enabled.
-
Page 84: Factory Defaults
C8000 Battery Testing System User Manual 2.11.10 Factory Defaults Use this option to restore the C8000 back to its factory default settings. Warning: Restoring factory defaults erases all saved data, customized programs, waveforms, and c-codes. This data should be backed up before proceeding to restore factory defaults. -
Page 85: External Devices
Connect an electronic load Configure the external load to communicate with the following settings; BAUD: 384000 (Recommended), Data bits: 8, Parity: N, Stop Bits: 1 Connect a 9-pin Serial Cable to the C8000 and DC load. Reboot the C8000. Note: 1) Ensure that all waveforms used in conjunction with an electronic load are within the capabilities of the DC load. -
Page 86: Cadex Batterylab
A 100-BASE-T Ethernet network switch or hub with sufficient free ports, to connect the hub to the local network, a port for the Host PC, and one for each Cadex C8000 Battery Tester. A switch or hub is not required if the Battery Tester... -
Page 87: Set Windows Explorer And My Computer To Display File Extensions
C8000 Battery Testing System User Manual PC and C8000 are connected directly and are not required to be connected to the local network. An SVGA color monitor with 1024 x 768 or better resolution, and 16-bit color minimum. A writable CD or DVD drive, for installing software and ... -
Page 88: Back Up The Data Files On The Pc
\(Installation Location)\DB folder. 4. Copy the newc8000.mdb file in the same directory and then rename this second copy to c8000.mdb.This way, you can repeat this function multiple times, if required. 5. Start BatteryLab. -
Page 89: Install Batterylab
C8000 Battery Testing System User Manual installed, the Upgrade window appears – BatteryLab’s database is automatically preserved during the upgrade. 3.1.5.1 Install BatteryLab 1. Insert the installation CD into the CD drive. Browse your CD drive in Windows Explorer and double- click . - Page 90 C8000 Battery Testing System User Manual 3. Click Next. The License window appears. 4. Read the license agreement and click I Agree. The Choose Program Location window appears. 5. BatteryLab is installed in the C:\Program Files\Batlab folder by default. To install BatteryLab in a different location, click Browse.
- Page 91 C8000 Battery Testing System User Manual BatteryLab's database is installed in the C:\..\Application Data\Cadex\Batlab folder by default. To install BatteryLab's database in a different location, click Browse. The Select Destination Directory window appears. Select the location and click OK. Click Yes to overwrite the existing copy of BatteryLab's database.
-
Page 92: Uninstall Batterylab
C8000 Battery Testing System User Manual 9. The Installation Complete window appears. Click Finish. 3.1.5.2 Uninstall BatteryLab 1. In Control Panel, click Add Remove Programs. 2. Select Cadex BatteryLab and click Remove. 3. You can select either Automatic or Custom. If you select... -
Page 93: Software Updates
About window. 3.1.6.2 Update BatteryLab Software When a new version of BatteryLab becomes available, registered users can download it from the Cadex website. The download is a compressed executable file (with file extension .EXE). -
Page 94: Batterylab Security Information
Before starting to test batteries with BatteryLab, set up the following items: The cables connecting each C8000 to the network. The “Host” IP Address of the PC where BatteryLab is installed and the IP Address for each C8000 connected to the local network. Cadex BatteryLab... -
Page 95: Connect The C8000 To The Network
IP Address and a network mask. The static IP addresses for each C8000 must be unique and belong to the same network. For more information on assigning an IP address to a C8000, see 3.1.10.3 Add IP Addresses for C8000s on the... -
Page 96: Find The Ip Address For Your Pc
1-254, as the final part of the IP address. The final number for a C8000 cannot be the same as the final number in the IP Address of the PC or the final number in the IP Address of any other device on the Local Area Network. -
Page 97: Network Cable
A network connection between the computer and C8000 can occur using a hub or switch or directly using the network cable provided. The host PC’s IP address must connect the C8000 to the PC directly via the provided cable. 3.1.9 Firewalls... -
Page 98: Ports
2: Note: If the network system uses dynamic IP address assignment, ensure that any IP addresses assigned, to a C8000, are exempted from the Dynamic IP Address range of the server/router. 1. Determine a unique IP address for each C8000 to be connected to the local network. - Page 99 C8000 Battery Testing System User Manual IP Address This is the Internet Protocol (IP) address for the PC on the local network. An IP address is a 32-bit number that is notated by using four numbers from 0 through 255, separated by periods...
-
Page 100: Ping The Network To Check For Available Ip Address
If there is no device on the local network currently using this address, the ping request will not return a reply indicating that the IP address is available and can be assigned to one C8000: Request timed out. Request timed out. - Page 101 C8000 and select the Enabled check box. Do not enter leading zeros in any of the four parts of an IP address. 3. If you want to verify that a C8000 is available and online, click Verify Connection. The firmware version number for each connected C8000 appears in green type below the IP Address field.
-
Page 102: Disable An Ip Address
To temporarily disable communications with a C8000, clear the Enabled check box for the IP address: 1. Open the IP Address Manager. 2. Under the IP address, of the C8000 to disable, clear the Enabled check box. 3. Click OK. - Page 103 Real-Time Status: View the real-time statuses for the selected C8000 channel. Set Clock: Sets the computer’s clock for one or all C8000s. Set Options: Sets the system options for the selected C8000 or all C8000s. External Device Info: Retrieves the model information for the supported external devices that are currently connected to the selected C8000.
-
Page 104: Set The Clock On The C8000
About: Displays the About window, which shows details about the BatteryLab application. 3.1.12 Set the Clock on the C8000 From the C8000 menu, select Set Clock and then select Selected C8000 or All connected C8000(s). The Password window appears, if security is enabled. Cadex BatteryLab... -
Page 105: Set Security Setting On The C8000
C8000 Battery Testing System User Manual Enter your password and click OK. An information window appears indicating a list of the C8000 that the clock was updated. Note: Do not update the C8000 clocks if there are any batteries connected. 3.1.13 Set Security Setting on the C8000 Security setting in BatteryLab is either enabled or disabled. -
Page 106: Set The Password To Configure C8000 Functions
C8000 Battery Testing System User Manual 3.1.14 Set the Password to Configure C8000 Functions To secure functions that configures the C8000 (such as Set Clock, Set Options, etc): 1. Select Password Setting from the Database menu. The Password window appears. - Page 107 Specify System Options. 5. In the Resume Hours field, enter a value 0-24 where 0=off. The C8000 will resume a test if this option is set after a power interruption. The C8000 will only resume a service, after a power interruption, up to the number of hours specified.
-
Page 108: Alert Window
C8000 Battery Testing System User Manual 6. In the File Storage Duration field, enter a value 0-999, where 0=off. This is the number of days the C8000 will keep all test results before automatically deleting all files that are older than the specified number of days. Note that no warning is issued before deletion. -
Page 109: Exit Batterylab
Alert window. All C8000 service warning/error(s) will be recorded in the Test record for the service. 3.1.17 Exit BatteryLab From the C8000 menu, click Exit to terminate BatteryLab. The Confirm window appears. Click Yes to close the BatteryLab application. Cadex BatteryLab... -
Page 110: Configure Batterylab
Step Duration The duration of the current step Step Description A user-defined description of the current step Status The current status of the C8000 channel or program Pgm Name The executing program’s name Result The test result of the current program... - Page 111 C8000 Battery Testing System User Manual Variable Description DigitalOut3 Status of Digital 3 when configured as an output DigitalOut4 Status of Digital 4 when configured as an output DigitalIn1 Status of Digital 1 when configured as an input DigitalIn2 Status of Digital 2 when configured as an input...
- Page 112 C8000 Battery Testing System User Manual 2. Click Results Panel. The Results Panel window appears. 3. To add a field to the Results window, select the field in the Available Fields column and click Add. 4. To remove a field from the Results window, select the field in the Display Fields window and click Remove.
-
Page 113: Event Logging
C8000 Battery Testing System User Manual 5. To select the order the fields appear in the Results window, select the fields in the Display Fields column and click Up and Down. Note: The first field listed will appear on the left side of the Results panel. -
Page 114: Report Template Options
C8000 Battery Testing System User Manual 5. Select the Enable Communication Data Log check box to log all communications between the C8000 and BatteryLab for debug purposes only. Note: Multiple files maybe stored in this location if the file size exceeds 100MB. Any additional files will be numerically appended in the order of 1. - Page 115 C8000 Battery Testing System User Manual 1. From the Tools menu, select BatteryLab Configuration. The BatteryLab Configuration window appears. Click Graph Options. The Graph Options window appears. 2. To add a variable, select the variable in the Available Variables column and click Add. Note: A maximum of 4 variables can be plotted at anytime.
-
Page 116: View Battery Status In Real-Time
3.3 View Battery Status in Real-Time When BatteryLab successfully connects to one or more batteries, select a channel and click the Real-Time icon in the C8000 Result Panel or right-click the channel, to view the status of a battery. The Real-Time Status window appears. - Page 117 C8000 Battery Testing System User Manual Graph –displays all the recorded data. The graph can display up to five individual variables, simultaneously. Located in the bottom right. Options - Allows the selection of the variables to be displayed. All Data- Shows the entire graph. The standard real-time graph is limited to a maximum of 10000 points.
- Page 118 C8000 Battery Testing System User Manual To view the current C-Code for this channel, click C-Code. To view waveforms for this channel, click Custom Waveform. The Waveforms real-time information appears. To view the playback of a waveform, click Playback Waveform.
- Page 119 C8000 Battery Testing System User Manual To view smart battery real-time information, click Smart Battery. To view the schedule of programs for this channel, click Schedule. The Schedule window displays the program steps that were executed. Cadex BatteryLab...
-
Page 120: Test Batteries With Batterylab
Wait for the C8000 to connect to BatteryLab before starting to test a battery. If the C8000 and software do not connect within 15 to 60 seconds, check the IP addresses and verify that no IP address is duplicated on the network. - Page 121 To automatically create a SM-BUS C-code, select Import from Smart Battery. See section 3.9.2 Add a SM-BUS (Smart Battery) C-Code details. 3. Click OK. 4. Connect correct battery channel terminals on C8000 to battery. The prompt clears automatically when the test starts. Cadex BatteryLab...
-
Page 122: View The Status Of A Test In Batterylab
C8000 Battery Testing System User Manual 3.4.1 View the Status of a Test in BatteryLab The C8000 window in Battery Lab displays the status of each test running on the C8000: Channel Volts Current Program step Status message ... -
Page 123: Cancel Or Suspend A Test In Batterylab
3.4.3 Retrieve Test Results from the C8000 Test results are automatically retrieved from the C8000s as long as BatteryLab is online and the C8000 is connected. When a test is started, BatteryLab immediately retrieves the test results. Tests started on the C8000 must be manually retrieved using the Test Results window in BatteryLab. -
Page 124: Test Status
Note: If results for tests NOT started via BatteryLab are retrieved long after Test Results on the C8000 are automatically deleted, then there is a chance that the wrong Test Result record will become associated with Test Records in the BatteryLab database. -
Page 125: View Test Results In Batterylab
Tests started with BatteryLab are automatically retrieved from the C8000 when the test completes and BatteryLab is still running. If a test is started on a C8000 and BatteryLab is not running, the Test Results will be saved on the C8000. When BatteryLab is run... -
Page 126: Import Test Results
4. Click Search. The results appear in the window. 3.6.1 Import Test Results To import test results from a file: 1. From the C8000 menu, click Results. The Test Results window appears. 2. From the File menu, select Import Test Results. The Open window appears. -
Page 127: View And Print Test Details
View detailed battery test information by selecting a record in the Test Result list and clicking View Record. 1. From the C8000 menu, click Results. The Test Results window appears with 100 of the latest results listed. Click Search to view all Test Results. -
Page 128: Edit A Test Result Record
C8000 Battery Testing System User Manual 3.6.3.1 Edit a Test Result Record To edit the remarks for a test result: 1. From the C8000 menu, click Results. The Test Results window appears. 2. In the Test Results window, search for the test result by a battery ID or C-Code and click Search. -
Page 129: Delete A Battery Test Record
3.6.3.2 Delete a Battery Test Record If a battery test record is no longer needed, delete it from the database. From the C8000 menu, click Results. The Test Results window appears. In the Test Results window, search for the test result by battery ID or C-Code and click Search. -
Page 130: View Details
C8000 Battery Testing System User Manual In the Test Record window, click Print Record. 3.6.3.4 View Details To the Details: 1. In the Test Record window, click Details. 2. The Details window displays a list of all the recorded data. -
Page 131: View A Battery Test Graph
C8000 Battery Testing System User Manual 2. The Program Steps window displays each program step and the step’s parameters. 3.6.3.6 View a Battery Test Graph To view a graph of the battery test, click Graph in the Test Record window. -
Page 132: Custom Waveform
C8000 Battery Testing System User Manual 3.6.3.8 Custom Waveform To view custom waveform information, click Custom Waveform in the Test Record window. Note: If no Custom Waveform was used in the program, this option will be grayed out. 3.6.3.9 Playback a Waveform... -
Page 133: Load Capture Waveform
C8000 Battery Testing System User Manual In the Test Record window, click Playback Waveform. Note: If no Playback Waveform was used in the program, this option will be grayed out. 3.6.3.10 Load Capture Waveform To view a load capture waveform in the Test Record window, click Load Capture Waveform. -
Page 134: Cycle Graph
C8000 Battery Testing System User Manual In the Test Record window, click Termination Data. Click the Data Point tab to view data point information. Click the Graph tab to view termination data in graph form. 3.6.3.12 Cycle Graph To view a cycle graph:... -
Page 135: Print Results
C8000 Battery Testing System User Manual In the Test Record window, click Cycle Graph. 3.6.3.13 Print Results To print a hardcopy of the test results: In the Test Record window, click Print Results. 3.6.3.14 Print a Battery Test Graph To print a hardcopy of the battery test graph: 1. -
Page 136: Export Graph Data To A File
C8000 Battery Testing System User Manual 2. Click the File name field and type a new name for the file, if necessary. 3. Click Save. 3.6.3.16 Export Graph Data To a File To export graph data: 1. In the Test Record window, click Export Graph Data. The Save As window appears. -
Page 137: Export Termination Data To A File
Report Template. 3.7.1 Print Battery Test Reports To print a battery test report: 1. From the C8000 menu, click Results. The Test Results window appears. 2. In the Test Results window, search for test records by Battery ID, c-code, or date range. - Page 138 C8000 Battery Testing System User Manual 2. Click Add. The Password window appears 3. Enter your password and click OK. The Template Fields window appears. Cadex BatteryLab...
-
Page 139: Edit A Report Template
C8000 Battery Testing System User Manual 4. In the Template Name field, type the name for the new template. 5. By default, all field names are automatically selected. Clear the check box next to a field’s name to exclude that field from the report. -
Page 140: Set The Default Report Template
C8000 Battery Testing System User Manual 1. From the Tools menu, click Report Templates. The Report Template window appears. 2. From the list of templates, select the template you want to edit. 3. Click Edit. If security is enabled, a password prompt appears. -
Page 141: Delete A Report Template
C8000 Battery Testing System User Manual 1. From the Tools menu, click Report Template. The Report Templates window appears. 2. Place a check mark in the Default check box to set the template as the default report template. 3. Click OK. -
Page 142: Copy A Report Template
C8000 Battery Testing System User Manual 2. Select the report template to delete. 3. Click Delete. A Confirmation window appears. Click Yes. The report template is deleted. 4. Click OK. 3.7.2.5 Copy a Report Template It is possible to create a report template based on an existing template record. - Page 143 C8000 Battery Testing System User Manual 2. Select the template to copy. 3. Click Copy. The Copy Report Template window appears. 4. Type a name for the new report template. 5. Click OK. The Template Fields window appears. Cadex BatteryLab...
-
Page 144: Set Up Your Printer
C8000 Battery Testing System User Manual Clear the check box next to a field’s name to exclude that field from the report template. Select the check box next to the field’s name to include that field in the report template. - Page 145 C8000 Battery Testing System User Manual After launching BatteryLab the first time, specify the default Windows printer driver for printing reports. 1. From the Tools menu, select Report Template. The Report Templates window appears. 2. Click Printer Setup. The Print Setup window appears.
-
Page 146: Battery Id Database
C8000 Battery Testing System User Manual 3.8 Battery ID Database A battery ID identifies a physical battery with a unique ID. The Battery ID Database window displays the battery ID and the corresponding c-code for each battery ID. (Note: The corresponding c-code may be changed at any time.) The C-Code... -
Page 147: Edit A Battery Id
C8000 Battery Testing System User Manual 4. Click the Pencil icon next to the C-Code field. The C-Code Database window appears. Select a C-Code for the battery ID and click OK. 5. Type any remarks in the Comment 1 and Comment 2 fields. -
Page 148: Delete A Battery Id
C8000 Battery Testing System User Manual 4. Enter your password and click OK. The Battery ID Definition window appears. 5. Edit the information, as required. 6. Click OK. 3.8.3 Delete a Battery ID To delete a battery ID: 1. From the Database menu, click Battery ID. The Battery ID Database window appears. - Page 149 5. If you select Delete from BatteryLab option, the Confirm window appears. Click Yes to delete the battery ID. If you select the Delete from Connected C8000, the Delete Battery ID window appears. The top half of this window lists all connected C8000s while the bottom half of this window lists the battery IDs for the selected C8000.
-
Page 150: Copy A Battery Id
C8000 Battery Testing System User Manual 3.8.4 Copy a Battery ID Copy a battery ID to create a battery ID: 1. From the Database menu, click Battery ID. The Battery ID Database window appears. 2. Select the battery ID to copy. -
Page 151: Import A Battery Id
C8000 Battery Testing System User Manual 4. Enter your password and click OK. The Battery ID Definition window appears. 5. Click OK. The new battery ID appears in the Battery ID Database window. 3.8.5 Import a Battery ID To import a battery ID from a file: 1. - Page 152 C8000 Battery Testing System User Manual 2. Click Import. If database security is enabled, the Password window appears. 3. Enter your password and click OK. The Import a Battery ID window appears. Cadex BatteryLab...
- Page 153 C8000 Battery Testing System User Manual 4. Click Browse. The Open window appears. 5. Select the file that contains the battery ID information to import. 6. Click Open. If the c-code specified in the to-be-imported file already exists, this error window will appear. Type a new name for the c-code and click OK.
- Page 154 C8000 Battery Testing System User Manual 7. An Information window appears with the number of files imported. To import a battery ID from the C8000: 1. From the Database menu, click Battery ID. The Battery ID Database window appears. Cadex BatteryLab...
-
Page 155: Export A Battery Id
3. Enter your password and click OK. The Import Battery ID window appears. 4. Click From the C8000. 5. Select the C8000 that contains the battery ID information to import. 6. Click Import and click OK. 3.8.6 Export a Battery ID... - Page 156 C8000 Battery Testing System User Manual 1. From the Database menu, click Battery ID. The Battery ID Database window appears. 2. Select the battery ID to export. Hold the CTRL key down to select multiple records. 3. Click Export. Click Browse. The Save As window appears.
- Page 157 C8000 Battery Testing System User Manual To export a battery ID to the C8000: 1. From the Database menu, click Battery ID. The Battery ID Database window appears. 2. Select the battery ID to export. Hold the CTRL key down to select multiple records.
- Page 158 C8000 Battery Testing System User Manual 3. Click Export. The Export Battery ID window appears. 4. Click To the C8000. A list of connected C8000s appears. 5. Click Export. Cadex BatteryLab...
-
Page 159: Search For A Battery Id
C8000 Battery Testing System User Manual 3.8.7 Search for a Battery ID The BatteryLab database may contain hundreds, or even thousands, of battery IDs. To find a battery ID, click the Search By Battery ID field to move the cursor to that field. -
Page 160: Add A Sm-Bus (Smart Battery) C-Code
C8000 Battery Testing System User Manual 2. Click Add. The C-Code Definition window appears. 3. If required, edit the detail fields in the C-Code Definition window to describe the new c-code. 4. Type a name for the new c-code in the C-Code Name field. - Page 161 Auxillary I/O port cable. To automatically add a SM-BUS c-code in BatteryLab: 1. Select a C8000, choose a channel, select and right-click on the channel and choose Test Battery. The Test Battery window appears..
- Page 162 C8000 Battery Testing System User Manual appears. The following table shows, which register where automatically, downloaded. All other c-code fields are dynamically adjusted to recommended values. C-code Field SM-BUS Register Description Chemistry 0x22 Displays the chemistry type reported Rating 0x18...
- Page 163 7. The SM-Bus codes will have an additional six (6) options available. These fields control the actions that will occur when the C8000 retrieves the associated flag from the Battery Status register. When active the C-code is enabled for SM-BUS batteries and the...
-
Page 164: Edit A C-Code
C8000 Battery Testing System User Manual 3.9.3 Edit a C-Code To edit a c-code: 1. From the Database menu, click C-Code. The C-Code Database window appears. 2. Select the c-code to edit. 3. Click Edit. If database security is enabled, the Password window appears. -
Page 165: Delete A C-Code
C8000 Battery Testing System User Manual 5. Edit the information as required. 6. Click OK. 3.9.4 Delete a C-Code To delete a c-code from BatteryLab: 1. From the Database menu, click C-Code. The C-Code Database window appears. 2. Select the c-code to delete. - Page 166 5. If you select Delete from BatteryLab option, the Confirm window appears. Click Yes to delete the c-code. 6. If you select the Delete from Connected C8000, the Delete C- Code window appears. The top half of this window lists all connected C8000s while the bottom half of this window lists the c-codes for the selected C8000.
-
Page 167: Copy A C-Code
C8000 Battery Testing System User Manual 3.9.5 Copy a C-Code To create a c-code based on an existing C-Code: 1. From the Database menu, click C-Code. The C-Code Database window appears. 2. Select the c-code to copy. 3. Click Copy. The C-Code Definition window appears. -
Page 168: Import A C-Code
C8000 Battery Testing System User Manual 4. Edit the chemistry settings for the c-code, as required. 5. Type a name for the new c-code in the C-Code Name field. 6. Click OK. 3.9.6 Import a C-Code To import a c-code from a file: 1. - Page 169 OK to overwrite the existing c-code. Alternatively, specify a different name for the c-code and click OK to import it.) Note that multiple c-codes can exist in one file. To import a c-code from the C8000: Cadex BatteryLab...
- Page 170 C8000 Battery Testing System User Manual 1. From the Database menu, click C-Code. The C-Code Database window appears. 2. Click Import. The Import C-Code window appears. 3. Click From the C8000. The Import C-Code window appears. Cadex BatteryLab...
- Page 171 C8000 Battery Testing System User Manual 5. Select the C8000 that contains the c-code to import and click Import or click Import from SnapLock Adapter to see a list of stations the SnapLock/RigidArm Adapter may be attached to. Cadex BatteryLab...
-
Page 172: Export A C-Code
C8000 Battery Testing System User Manual Click Refresh to update the list of c-codes from the SnapLock/RigidArm Adapter. Next, select the c-code(s) to download. Click Import to transfer the c-code(s) file(s). 3.9.7 Export a C-Code To export c-codes to a file: 1. - Page 173 C8000 Battery Testing System User Manual 3. Click Export. The Export C-Code window appears. 4. Click Browse. The Save As window appears. 5. Type a name for the file in the File name field. 6. Click Save. All selected c-codes are saved to the file. An Information window appears with the number of C-Codes exported.
- Page 174 To export c-codes to the C8000: 1. From the Database menu, click C-Code. The C-Code Database window appears. 2. Select the c-code(s) to export. 3. Select the C8000 to export the c-codes to and click Export. The Export C-Code window appears. Cadex BatteryLab...
- Page 175 C8000 Battery Testing System User Manual 4. Click To the C8000. The Import/Export window appears. 5. Click Export. All selected c-codes are exported to the same file. An Information window appears with the number of C-Codes exported. Cadex BatteryLab...
-
Page 176: Search For A C-Code
3.10 Programs The Program Database window lists the system and custom programs that are available for the C8000. For each program, the Program Database window shows the program’s name, the program’s type, and whether the program is active. A program contains one or more steps that will be executed in the order specified. -
Page 177: Factory Default Programs
4. Discharge @ constant current; if analog input > nighttime value, proceed to step 1 3.10.1 Factory Default Programs The following table describes the C8000 Factory Default programs. Program Description Auto Function: Exercises batteries to maintain optimum performance. This is the recommended program for routine maintenance of batteries. - Page 178 C8000 Battery Testing System User Manual Sequence: The battery is first cycled (charged and then discharged) to determine its true capacity. If NiCD and NiMH batteries do not meet the target capacity at the end of the discharge cycle, they are reconditioned to reduce battery memory.
- Page 179 C8000 Battery Testing System User Manual Lifecycle Note: Lifecycle is a “destructive” test that continuously cycles a battery until a failure occurs. Do not run this program on a battery that needs to be used after the program completes. Function: Determines total battery life by the number of cycles.
- Page 180 C8000 Battery Testing System User Manual high state of charge (i.e. fully charged) to provide accurate values. If battery SoC is less than 50%, OhmTest readings are less consistent. Low state of charge may produce poor or low values. It provides an estimate of the battery capability to handle load.
- Page 181 C-Codes. Boost Function: Reactivates batteries with open or shorted protection circuits or with voltage so low that the Cadex analyzer does not recognize them or gives a ‘Shorted’ (Code 121) message when they are inserted in Battery Adapters. Sequence: The battery is trickle-charged for three minutes at 100mA.
- Page 182 C8000 Battery Testing System User Manual for SLA, and 4 hours for Li-ion using default C-Codes. SMB-DChg Function: For SM-Bus batteries only. This is similar to the standard “DchgOnly” program, but also monitors the SM-Bus status and alarm flags during the discharge.
-
Page 183: A Custom-Program Example
C8000 Battery Testing System User Manual 3.10.2 A Custom-Program Example The following is a custom-program intended to test the performance of a solar-charged battery operating over a 10-day period. The battery charges for 3 hours at low current simulating early morning sun. - Page 184 C8000 Battery Testing System User Manual Step 1 - charge at lower current for 3 hours Cadex BatteryLab...
- Page 185 C8000 Battery Testing System User Manual Step 2 - charge at higher current for 6 hours Step 3 - charge at lower current for 3 hours Cadex BatteryLab...
- Page 186 C8000 Battery Testing System User Manual Step 4 - discharge at constant current for 12 hours At the end of Step 4 there is a Loop Counter test. If the loop counter is 5 or more the test finishes; otherwise, the test increments the loop counter and jumps to Step 1.
-
Page 187: A Custom-Program With Thermal Chamber Example
C8000 Battery Testing System User Manual 3.10.3 A Custom-Program with Thermal Chamber Example The following is a custom-program intended to test the performance of a solar-charged battery operating over a 10-day period in an environment similar to the summer months. - Page 188 C8000 Battery Testing System User Manual Step 1 – Environment is configured to starting temperature Step 2 – Battery is saturated in the early morning environment Cadex BatteryLab...
- Page 189 C8000 Battery Testing System User Manual Step 3 – Environmental Temperature is increased over a 3-hour period. Step 4 - charge at lower current for 3 hours during the temperature rise Cadex BatteryLab...
- Page 190 C8000 Battery Testing System User Manual Step 5 – Battery is Rested for 30 minutes Step 6 – Environmental temperature is increased Cadex BatteryLab...
- Page 191 C8000 Battery Testing System User Manual Step 7 – charge at high current for 6 hours during the temperature rise Step 8 – Battery is Rested for 30 minutes Cadex BatteryLab...
- Page 192 C8000 Battery Testing System User Manual Step 9 – Environmental temperature is decreased Step 10 – charge at low current for 3 hours during the temperature decrease. Cadex BatteryLab...
- Page 193 C8000 Battery Testing System User Manual Step 11 – Battery is Rested for 30 minutes. Step 12 – Environmental temperature is decreased over a 6-hour period. Cadex BatteryLab...
- Page 194 C8000 Battery Testing System User Manual Step 13 – Battery is discharge for 6 hours, during the temperature fall. At the end of Step 13 there is a Loop Counter test. If the loop counter is equivalent 9, the test finishes otherwise, the test increments the loop counter and jumps to Step 2.
-
Page 195: Add A Program
C8000 Battery Testing System User Manual 3.10.4 Add a Program To add a custom program to BatteryLab, click Programs in the Database menu. The Program Database window appears. Next, click Add. T he Add Custom Program window appears. Cadex BatteryLab... -
Page 196: Add A Step To A Program
C8000 Battery Testing System User Manual The top portion of the Add Custom Program window shows the individual steps in the program. For each step, BatteryLab displays the step number, the action that will be performed, the amount of time the action will take to execute, the type of test to be performed and action to take if the test is True or False. - Page 197 C8000 Battery Testing System User Manual Action Parameter Tables Available Actions Action Required Action Sub- Description of the Action parameters Finished - No action None On completion of service, stop all monitoring. Available for Step zero (0) only Finished – Standby None On completion of service, monitor the battery.
- Page 198 C8000 Battery Testing System User Manual Action Required Action Sub- Description of the Action parameters programmed (No Scaling) Charge Type: Performs a Charge on the battery. Allows the selection of the Default: shall use the charge current value in the C-code type of discharge to perform.
- Page 199 “RESUME” Discharge Playback Uses a playback waveform to perform a discharge on the Dchg Device C8000 or on a supported external load. Selection of the Device to perform a discharge Requires a supported Electronic DC Load Programmable DC Electronic See section 2.12.1.1...
- Page 200 C8000 Battery Testing System User Manual Action Required Action Sub- Description of the Action parameters chambers Parallel Discharge Type: Accessory Requirement: Allows the selection of the See section Error! Reference source not found. Error! type of discharge to perform. Reference source not found.
- Page 201 C8000 Battery Testing System User Manual Test Type Sub-Parameter Description of the Test Type Function of the step action) Total Capacity Requires capacity value. Compares the latest calculated Capacity value for the (Percentage) (Default: "0%") service against the capacity value entered into the program.
- Page 202 C8000 Battery Testing System User Manual Test Type Sub-Parameter Description of the Test Type Function (Default: "0") SM-Bus Voltage Requires Voltage value parameter Compares the Voltage level of a SM-bus register (0x15) (V) (Default "0.000v) against the Voltage level enter in the step. Comparison is conducted every 200mS, 5 seconds after the start of the program step.
- Page 203 C8000 Battery Testing System User Manual True/False Action Required Parameter Description of the Program Parameter This action can not goto step zero (0) Finished Pass None (Default for Successfully completes the test with no warning. True Action) Finished Fail None (Default for...
- Page 204 The C8000 will automatically save the last 500 data per second (2ms) points for the Voltage and Current at a high capture rate. This parameter will program the rate in which the C8000 sample the last 500 points. Options available:...
-
Page 205: Remove A Step From A Program
Unchecked Enables any of the Analog input or output port of the C8000. Check mark the Analog ports to enable The Analog output ports have a 0~5 volt range and the output value is controlled in the Action Parameter Tab. -
Page 206: Add Folders
C8000 Battery Testing System User Manual 3.10.5 Add Folders Programs can be organized, or grouped, into folders. A folder is a directory on your hard drive. A folder icon appears adjacent to the folder’s name to identify it as a folder; a text document icon adjacent to the program’s name can identify programs. -
Page 207: Edit A Program
C8000 Battery Testing System User Manual 5. To view the contents of a folder, double-click the folder’s name. The programs stored in that folder appear in the Program Database window. 3.10.6 Edit a Program BatteryLab allows edits to custom programs created by the user. -
Page 208: Delete A Program
C8000 Battery Testing System User Manual 5. Select the step to change. Make the required changes to the record. 6. Click OK. 3.10.7 Delete a Program BatteryLab allows deletion of a custom program provided there are no running tests using this program. Historical data related to this program is retained for display and reporting operations. - Page 209 C8000 Battery Testing System User Manual 2. Select the program to delete. Click Delete. If database security is enabled, the Password window appears. 3. Enter your password and click OK. The Delete Options window appears. Select the Delete From BatteryLab check box.
- Page 210 C8000 Battery Testing System User Manual 4. Click Yes. To delete a program from the connected C8000: 1. From the Database menu, click Programs. The Program Database window appears. 2. Select the program to delete. Click Delete. If database security is enabled, the Password window appears.
-
Page 211: Copy A Program
C8000 Battery Testing System User Manual 4. Select the custom program to delete and click Delete. 5. The Confirm window appears. 6. Click Yes. 3.10.8 Copy a Program It is possible to create a program based on a custom program. - Page 212 C8000 Battery Testing System User Manual 1. From the Database menu, click Programs. The Program Database window appears. 2. Select the program to copy. 3. Click Copy. If database security is enabled, the Password window appears. Enter your password and click OK. The Program Editor window appears.
- Page 213 C8000 Battery Testing System User Manual 5. Type a name for the new program in the Program Name field. 6. Select the Active check box if the program is to be an active program. 7. Type any notes in the Comment 1 and Comment 2 fields, as required.
-
Page 214: Organize Programs In Folders
C8000 Battery Testing System User Manual 3.10.9 Organize Programs in Folders Programs can be organized, or grouped, into folders. To move a program to a folder: 1. From the Database menu, click Programs. The Program Database window appears. 2. Select the program (identified by a text document icon) to move to a folder. -
Page 215: Import A Program
C8000 Battery Testing System User Manual 4. Double-click the name of the folder to move the program to. The target folder appears. 5. Click OK. The program is moved to the target folder. 3.10.10 Import a Program To import a program from a file: 1. - Page 216 C8000 Battery Testing System User Manual 2. Click Import. If database security is enabled, the Password window appears. 3. Enter your password and click OK. The Import Program window appears. Cadex BatteryLab...
- Page 217 OK to overwrite the existing program. Alternatively, specify a different name for the program and click OK to import it.) To import a program from the C8000: From the Database menu, click Programs. The Program Database window appears.
- Page 218 C8000 Battery Testing System User Manual Click Import. The Import Program window appears. Click From the C8000. Select a C8000 first from the list (C800s are listed by their IP addresses. Select the program to import and click Import. The Import Program window shows the programs.
-
Page 219: Export A Program
C8000 Battery Testing System User Manual 3.10.11 Export a Program To export a program to a file: 1. From the Database menu, click Programs. The Program Database window appears. 2. Select the program to export. 3. Click Export. The Export a Program window appears. - Page 220 The Information window appears with the number of programs exported to the file. 6. Click OK. To export a program to the C8000: 1. From the Database menu, click Programs. The Program Database window appears. Cadex BatteryLab...
- Page 221 C8000 Battery Testing System User Manual 2. Select the program to export. 3. Click Export. The Export a Program window appears. 4. Click To the C8000. The Export Program window updates with a list of connected C8000s. Cadex BatteryLab...
-
Page 222: Search For A Program
C8000 Battery Testing System User Manual 5. Click the C8000 to export programs for. The window lists the programs found on this C8000. 6. Click Export. Note that multiple programs can be exported to a single file. The Information window appears with the number of program files exported. -
Page 223: Load Capture
C8000 Battery Testing System User Manual 3.11 Load Capture Load Capture Unit required (see 2.1.3.4 Load Capture Unit (LCU)) To begin load capture: 1. Plug in the LCU on Channel 1 only. The Test Battery caption now changes to Start Capture when the active selected channel is connected to the LCU. - Page 224 Perform zero offset – Set the zero offset to the current level being measured. Reset Zero offset – Reset the zero offset to the default value, determined when the LCU was connected to the C8000. Reset Capture Resets the LCU to its StartUp state. Unit...
- Page 225 If no trigger condition is present the LCU will begin capturing immediately. Note: There is an approximate 3 ~5 second delay between the program begin initialized and the C8000 begin the capture. This is normal operation while the Load Capture Unit is configured for use.
- Page 226 C8000 Battery Testing System User Manual The following table describes the fields in the Load Capture Test window. (Page 192) Field Description No. of Samples The number of sample points to be captured (minimum=10, maximum=500). Rate The sample rate for each point – stated in milli- seconds with a range of 0.5ms to 30000ms.
-
Page 227: Load Capture Programs Database
C8000 Battery Testing System User Manual LCU. Sub-Parameters: Range 0-10A: captures current range from 0-10A; Range: 0-100A: captures the current range from 0- 100A. Current Probe: Captures current readings input from an external probe. (Scale 1mV to 1A) Trigger Port The sub-parameter for the Trigger Type parameter’s... -
Page 228: Edit A Load Capture Program
C8000 Battery Testing System User Manual (See Page 194 for Test Parameter definitions) 3. Enter in the Test Parameters. a. If required, edit the Comment “x” fields in the Load Capture Program Editor window to describe the load capture program. - Page 229 C8000 Battery Testing System User Manual 2. Select the load capture program to edit. 3. Click Edit. If database security is enabled, the Password window appears. 4. Enter your password and click OK. The Load Capture Program Editor window appears.
-
Page 230: Delete A Load Capture Program
C8000 Battery Testing System User Manual 5. Edit the information as required. 6. Click OK. 3.11.4 Delete a Load Capture Program To delete a load capture program from BatteryLab: 1. From the Database menu, click Load Capture. The Program Database window appears. -
Page 231: Copy A Load Capture Program
C8000 Battery Testing System User Manual 3. Click Delete. If database security is enabled, the Password window appears. 4. Enter your password and click OK. The Confirm window appears. Click Yes to delete the load capture program. 3.11.5 Copy a Load Capture Program... - Page 232 C8000 Battery Testing System User Manual 2. Select the load capture program to copy. 3. Click Copy. The Load Capture Program Editor window appears. 4. Edit the settings for the load capture program, as required. 5. Type a name for the new load capture program in the Program Name field.
-
Page 233: Import A Load Capture Program
C8000 Battery Testing System User Manual 3.11.6 Import a Load Capture Program To import a load capture program from a file: 1. From the Database menu, click Load Capture. The Program Database window appears. 2. Click Import. The Import a Load Capture Program window appears. -
Page 234: Export A Load Capture Program
C8000 Battery Testing System User Manual 3. Click Browse. The Open window appears. 4. Select the file to import and click Open. The Information window appears, showing the number of load capture programs imported. (If the load capture program already... - Page 235 C8000 Battery Testing System User Manual 2. Select the load capture program to export. Note that multiple load capture programs can be exported to the same file. 3. Click Export. The Export a Load Capture Program window appears. 4. Click Browse. The Save As window appears.
-
Page 236: Search For A Load Capture Program
3.12 Waveforms The Waveforms window lists the custom waveforms available to the C8000. For each waveform, the Waveforms Database window shows the waveform’s name. A waveform contains one or more steps that will be executed in the order specified and will be continuously repeated until a program termination has occurred. - Page 237 C8000 Battery Testing System User Manual the battery for 550 us and a 200 mA load for 4 ms. First; select the device compatibility and the maximum steps. Step 5 - 550 us load @ 2A Cadex BatteryLab...
- Page 238 C8000 Battery Testing System User Manual Step 6 - 4 ms load @ 200 mA Once a GSM waveform is created, it can be used in a custom program. The following program will charge the battery, discharge the battery using a GSM waveform, and then charge the battery back up.
- Page 239 C8000 Battery Testing System User Manual Step 8 - discharge using the GSM waveform Step 9 - Charge the battery back up Cadex BatteryLab...
-
Page 240: Add A Waveform
Waveform Database window appears. 2. Select the Custom, Load Capture, or Playback folder and click Add. The Add New Waveform window appears. Explanation: The Add New Waveform window is used to configure the waveform. This configuration allows the C8000 system to Cadex BatteryLab... - Page 241 BK device has been selected a five second “0” current step is required between the charge and discharge currents. All charge steps will be performed by the C8000. Maximum Steps This option sets the maximum number of steps that a waveform will support.
-
Page 242: Add A Step To A Waveform
C8000 Battery Testing System User Manual 5. In the Waveform Name field, type a name for this waveform. 6. In the Comment 1 and Comment 2 fields, type any notes about this waveform. 7. Click OK. The new waveform appears in the Waveform Database window. -
Page 243: Move The Order Of Steps In A Waveform
C8000 Battery Testing System User Manual 3.12.2.4 Move the Order of Steps in a Waveform To move the position of a step up or down in the waveform, click the field name and then click Move Up or Move Down. This sets the order that the steps will be executed in the waveform. - Page 244 C8000 Battery Testing System User Manual 7. Select the waveform (identified by a text document icon) to move to a folder. 8. Click Move To. The Target Folder window appears. 9. If necessary, create a folder by clicking Add Folder.
-
Page 245: Edit A Waveform
C8000 Battery Testing System User Manual 10. Double-click the name of the folder to move the waveform to. The target folder appears. 11. Click OK. The waveform is moved to the target folder. Note: Waveforms cannot be moved from one group to another. -
Page 246: Delete A Waveform
C8000 Battery Testing System User Manual 2. Select the waveform to edit. 3. Click Edit. The Waveform Editor window appears. 4. Edit the information for the waveform, as required. 5. Click OK. 3.12.5 Delete a Waveform To delete a custom waveform:... -
Page 247: Copy A Waveform
3. Click Delete. The Delete Options window appears. To delete the waveform from BatteryLab, select the Delete From BatteryLab check box. To delete the waveform from the connected C8000, select the Delete From Connected C8000 check box. Click OK. 4. The Confirm window appears. - Page 248 C8000 Battery Testing System User Manual 2. Select the waveform to copy. 3. Click Copy. The Waveform Editor window appears. 4. Type a name for the new waveform in the Waveform Name field. 5. Type any notes in the Comment 1 and Comment 2 fields, as required.
-
Page 249: Import A Waveform
C8000 Battery Testing System User Manual 7. Click OK. The new waveform appears in the Waveform Database window. 3.12.7 Import a Waveform To import a waveform from a file: 1. From the Database menu, click Waveforms. The Waveform Database window appears. - Page 250 Alternatively, specify a different name for the waveform and click OK to import it.) To import a waveform from the C8000: Note: Load Capture Waveforms cannot be imported from a C8000. From the Database menu, click Waveforms. The Waveform Database window appears.
- Page 251 C8000 Battery Testing System User Manual Click Import. The Import a Waveform window appears. Click From the C8000. The window updates with a list of connected C8000s and available waveforms for the selected C8000. Select the waveform to import. Click Import. The Information window appears with the number of waveform files imported.
-
Page 252: Export A Waveform
Export a Waveform To export a waveform to a file: 1. From the Database menu, click Waveforms. The Waveform Database window appears. 2. Select the waveform to export. 3. Click Export. The Available Waveforms for C8000 window appears. Cadex BatteryLab... - Page 253 C8000 Battery Testing System User Manual 4. Select the folder to export the waveforms to and click Export. 5. Click Browse. The Save As window appears. Type a name for the export file in the File Name field. 7. Click Save. The Information window appears with the number of waveforms exported to the file.
- Page 254 C8000 Battery Testing System User Manual 8. Click OK. To export a waveform to the C8000: 1. From the Database menu, click Waveforms. The Waveform Database window appears. 2. Select the waveform to export. Cadex BatteryLab...
- Page 255 C8000 Battery Testing System User Manual 3. Click Export. The Export a Waveform window appears. 4. Click To the C8000. The window updates with a list of connected C8000s. Click Export. The Information window appears with the number of waveforms exported.
-
Page 256: Search For A Waveform
C8000 Battery Testing System User Manual 3.12.9 Search for a Waveform The BatteryLab database may contain many waveforms. To find a specific waveform, click the Search By Waveform field to move the cursor to that field. Next, type the first one or two characters of the waveform you want to find. -
Page 257: Add A Program Sequence
C8000 Battery Testing System User Manual 3.13.1 Add a Program Sequence 1. From the Database menu, click Sequencer. The Sequence Database window appears. 2. Click Add. The Add Program Sequence window appears. 3. Select the program to add the program sequence to. Next, select the C-Code for that program. -
Page 258: Edit A Program Sequence
C8000 Battery Testing System User Manual 5. Click the in the Battery ID field and select a DOWN ARROW battery ID. 6. Type any remarks in the Notes field. 7. Click OK. The new program sequence appears in the Sequence Database window. - Page 259 C8000 Battery Testing System User Manual 3. Click Edit. If database security is enabled, the Password window appears. 4. Enter your password and click OK. The Modify Program Sequence window appears. 5. Edit the information, as required. Cadex BatteryLab...
-
Page 260: Delete A Program Sequence
C8000 Battery Testing System User Manual 6. Click OK. 3.13.3 Delete a Program Sequence To delete a program sequence: 1. From the Database menu, click Sequencer. The Sequence Database window appears. 2. Select the program sequence to delete. 3. Click Delete. If database security is enabled, the Password window appears. -
Page 261: Copy A Program Sequence
C8000 Battery Testing System User Manual 3.13.4 Copy a Program Sequence Copy a program sequence to create a program sequence: 1. From the Database menu, click Sequencer. The Sequence Database window appears. 2. Select the program sequence to copy. 3. Click Copy. If database security is enabled, the Password window appears. - Page 262 C8000 Battery Testing System User Manual 4. Enter your password and click OK. The Copy Program Sequence window appears. 5. In the Sequence Name field, type a name for the new sequence. 6. Click OK. The new program sequence appears in the Sequence Database window.
-
Page 263: Import A Program Sequence
C8000 Battery Testing System User Manual 3.13.5 Import a Program Sequence To import a program sequence from a file: 1. From the Database menu, click Sequencer. The Sequence Database window appears. 2. Click Import. If database security is enabled, the Password window appears. - Page 264 C8000 Battery Testing System User Manual 4. Click Browse. The Open window appears. 5. Select the file that contains the program sequence to import. 6. Click Open. If the c-code specified in the to-be-imported file already exists, this error window will appear. Type a new name for the c-code and click OK.
- Page 265 C8000 Battery Testing System User Manual 7. An Information window appears with the number of program sequences imported. To import a program sequence from the C8000: 1. From the Database menu, click Sequencer. The Sequence Database window appears. Cadex BatteryLab...
- Page 266 C8000 Battery Testing System User Manual 2. Click Import. If database security is enabled, the Password window appears. 3. Enter your password and click OK. The Import a Sequence window appears. Cadex BatteryLab...
-
Page 267: Export A Program Sequence
C8000 Battery Testing System User Manual 4. Click From the C8000. 5. Select the C8000 that contains the program sequence to import. 6. Click Import and click OK. 3.13.6 Export a Program Sequence Note: Only one sequence program may be exported at a time. To export a program sequence to a file: 1. - Page 268 C8000 Battery Testing System User Manual 2. Select the program sequence to export. Hold the CTRL key down to select multiple records. 3. Click Export. The Export a Sequence window appears. Cadex BatteryLab...
- Page 269 5. Type a name for the export file in the File name field. 6. Click Save. 7. An Information window appears with the number of program sequences exported. To export a program sequence to the C8000: From the Database menu, click Sequencer. The Sequence Database window appears. Cadex BatteryLab...
- Page 270 C8000 Battery Testing System User Manual 2. Select the program sequence to export. Hold the CTRL key down to select multiple records. 3. Click Export. The Export a Schedule window appears. Cadex BatteryLab...
-
Page 271: Search For A Program Sequence
C8000 Battery Testing System User Manual 4. Click To the C8000. A list of connected C8000s appears. 5. Click Export. 3.13.7 Search for a Program Sequence The BatteryLab database may contain many program sequences. To find a program sequence, click the Search By Name field to move the cursor to that field. -
Page 272: System Updates
C8000s to the PC. From the Tools menu you can view the System Update window, which shows you: The Device List displays each connected C8000 with its associated firmware version’s IP address and status. - Page 273 2. Click Firmware. 3. Select the check box for each C8000 to update. Note: Only a single C8000 can be updated at any given time. 4. Click Browse to find the folder containing the new firmware file on your hard drive. (The firmware files have a .c8u extension;...
-
Page 274: Update The Calibration Data
C8000 Battery Testing System User Manual 3.14.1.2 Update the Calibration Data To update the calibration data on the C8000s: 1. From the Tools menu, click System Update. The System Update window appears. 2. Click Calibration Data. 3. To back up the calibration data, click Backup Calibration Data. -
Page 275: Troubleshooting
The keyboard and display on the C8000 may stop functioning if the Ethernet cable is disconnected and reconnected from the PC, the local network hub, or the C8000 while the C8000 is on. To solve this problem, recycle the power on the C8000. -
Page 276: Corrupt Database
Backup” in Windows XP, use Start > Help and use the Help Index to find topics under restoring backed up data. If your System Administrator cannot solve the problem, contact Cadex Customer Support for help in repairing the database. 3.15.1.6 Folder Access Permissions BatteryLab Setup sets the required folder permissions during installation. -
Page 277: Error Writing To The Log File
C8000 Battery Testing System User Manual 6. Clear the Allow inheritable permissions from parent to propagate this object check box. 7. Click Copy. 8. Click OK. If the Security tab is not displayed, use the following method: 1. Double-click My Documents on the desktop. -
Page 278: Code Parameters
C8000 Battery Testing System User Manual 4 C-Code Parameters The following table lists the parameters for c-codes. Note that not all parameters are used by all chemistries. Limits SM-BUS Compatible Additional Field Description Units Typical Range(s) Imported Chemistry requirements Min. - Page 279 C8000 Battery Testing System User Manual Limits SM-BUS Compatible Additional Field Description Units Typical Range(s) Imported Chemistry requirements Min. Max. Notes: Registers Voltage LiPh 0.750 * cells ---- Primary 0.320 * cells ---- NiMH & 1.800 * cells 45.000 NiCD...
- Page 280 C8000 Battery Testing System User Manual Limits SM-BUS Compatible Additional Field Description Units Typical Range(s) Imported Chemistry requirements Min. Max. Notes: Registers Rating>100ah 0.200 Rating<=100ah 0.055 SLA, Li, LiPh Rating>100ah 0.200 Rating<=100ah 0.055 Discharge = Maximum Discharge rate ---- 0.01~2C...
- Page 281 C8000 Battery Testing System User Manual Limits SM-BUS Compatible Additional Field Description Units Typical Range(s) Imported Chemistry requirements Min. Max. Notes: Registers (NiCD, NiMH) < Maximum Voltage Rapid Voltage requirement for Charge > Minimal Voltage ---- ---- ---- full charge...
- Page 282 C8000 Battery Testing System User Manual Limits SM-BUS Compatible Additional Field Description Units Typical Range(s) Imported Chemistry requirements Min. Max. Notes: Registers Rating<=100ah 0.055 Trickle NiMH & <= Charge ---- ---- 0.01~0.05C ---- charge rate NiCD Current Rating>100ah 0.200 Rating<=100ah...
- Page 283 C8000 Battery Testing System User Manual Limits SM-BUS Compatible Additional Field Description Units Typical Range(s) Imported Chemistry requirements Min. Max. Notes: Registers terminated when the voltage drop reaches the pre-set rate). Zero value is Negative Duration before valid and NiMH &...
- Page 284 Retry x (1~10) – will wait for multiple flag conditions before terminating with a failure. (Over temperature Only). Alters the Maximum Discharge Rate field to use the device’s (specified in the Use External Load Maximum Discharge Rate program) Maximum current rate. (Defaults to C8000 maximum of 10A). C-Code Parameters...
-
Page 285: Status Messages
C8000 Battery Testing System User Manual 5 Status Messages The following table lists status messages by status code. The second table lists status messages by detailed message. That table describes the reason for each type of message and possible solutions. - Page 286 C8000 Battery Testing System User Manual COLD WAIT THE BATTERY TEMPERATURE BEING REPORTED VIA THE CHANNEL THERMISTOR IS BELOW THE “LOW TEMPERATURE LIMIT” (C-CODE) AND WAITING FOR THE TEMPERATURE TO RISE 5°C ABOVE, BEFORE CONTINUING SERVICING THE BATTERY. HOT WAIT THE BATTERY TEMPERATURE BEING REPORTED VIA THE CHANNEL THERMISTOR IS BELOW THE “HIGH...
- Page 287 C8000 Battery Testing System User Manual LCU READY LOAD CAPTURE UNIT IS CONNECTED AND FUNCTIONAL RESERVED RESERVED RESERVED RESERVED RESERVED RESERVED RESERVED RESERVED RESERVED RESERVED RESERVED RESERVED RESERVED RESERVED RESERVED RESERVED CELL MISMATCH CELLS ARE REACHING FULL CHARGE AT DIFFERENT TIMES SO THE NEGATIVE SLOPE IS NOT WELL DEFINED.
- Page 288 C8000 Battery Testing System User Manual RESERVED RESERVED RESERVED RESERVED IMPED. SKIPPED AC IMPEDANCE TEST CAN BE PERFORMED ON CHANNEL 1 ONLY Out-of-Range AC IMPEDANCE MEASUREMENT VALUE IS OUT OF MEASURABLE RANGE. DCHG TIMEOUT THE MAXIMUM DISCHARGE TIME HAS BEEN REACHED AS DEFINED IN THE C-CODE.
- Page 289 C8000 Battery Testing System User Manual BAD WAVEFORM THE REQUESTED WAVEFORM EXCEEDS EITHER THE SYSTEM MAXIMUM LIMITS OR IS GREATER THAN THE BATTERY LIMIT AS DEFINED IN THE C-CODE WATTS > MAX THE REQUESTED POWER (WATTAGE) IS GREATER THAN THE SYSTEM MAXIMUM OF 100W (CHARGE) / 80W...
-
Page 290: Status Messages Listed By Detailed Message
Check the circuit breakers on the tester. If all fails, contact Cadex for service. BATTERY The C8000 detects a battery in an adapter. If message persists, press ESC. INSERTED BATTERY OVER Battery has overheated during charge. - Page 291 C8000 Battery Testing System User Manual OFFLINE A system operation, such as a firmware upgrade, is being performed. CELL MISMATCH Cells are reaching full charge at different Wait until processing is complete. times so the negative slope is not well Battery is old or has been in storage.
- Page 292 C8000 Battery Testing System User Manual READY A battery has been inserted and is ready to be serviced. (Also, indicated as Startup). RECONDITIONING Battery is being reconditioned. The program will proceed to the next step when recondition has completed. RESTING...
-
Page 293: Glossary Of Terms
C8000 Battery Testing System User Manual 6 Glossary of Terms Abbreviation for ampere. Amperage The strength of a current of electricity expressed in amperes. Ampere The current produced by one volt across a resistance of one ohm. American Wire Gauge (US wire size standard). - Page 294 PC may have up to 4 COM ports (COM1, COM2, COM3, and COM4). Configuration Code Battery parameters that are stored in Cadex battery testers, and tell the C8000 how to service a specific battery type. C-Rate A value (C number) that is used to calculate charge and discharge times. A discharge of 1 C draws a current equal to the rated capacity of the battery.
- Page 295 C8000 Battery Testing System User Manual Cycle One charge and discharge sequence, even if the battery is only partially charged or discharged. A software component, which provides a common interface between an application and one or more data storage devices, such as a database files.
- Page 296 Local area network. Liquid Crystal Display. A type of display panel often used on the front panel of electronic devices, such as the C8000 Battery Tester. Load Capture Unit. Light emitting diode. LEDs are used to display status of a device.
- Page 297 Milliohm, a measure of resistance or impedance, one thousandth of an ohm. Return Material Authorization. A number or form that must be obtained from Cadex to return goods for a warranty claim NiCD Nickel-cadmium battery chemistry. NiMH Nickel-metal-hydride battery chemistry.
- Page 298 A data field that must have appropriate data entered in it. Required fields are usually identified by an asterisk (*) beside the field name. Residual Capacity Capacity remaining in a battery when it is connected to a C8000. Resistance Also called internal resistance of a battery. Opposition to current flow.
- Page 299 C8000 Battery Testing System User Manual Serial port Serial communications port (RS-232C serial port) on a computer used for ® attaching modems or other serial interface peripheral devices. An Intel compatible PC may have up to 4 COM ports (COM1, COM2, COM3, and COM4).
- Page 300 C8000 Battery Testing System User Manual User datagram protocol, UDP uses ports to allow application-to-application communication on networked computers. Uninterruptible Power Supply, a device that prevents a power blackout or brownout from causing a computer to lose data. When AC from the power utility fails, a UPS converts DC battery power to AC, providing AC power for a period of time sufficient for you to shut down the computer.
Need help?
Do you have a question about the C8000 and is the answer not in the manual?
Questions and answers