Table of Contents
Advertisement
Quick Links
Advertisement
Table of Contents

Subscribe to Our Youtube Channel
Related Manuals for Zener SMARTSTART 6000


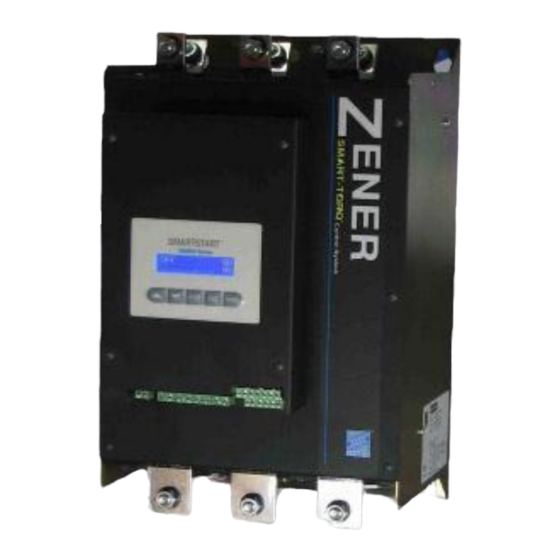
Summary of Contents for Zener SMARTSTART 6000
- Page 1 ZENER VARIDRIVE SOLUTIONS ZENER SMARTSTART® 6000 Soft Starter Instruction Manual ...
-
Page 3: Table Of Contents
Contents Introduction Receiving ……… 2 Handling & Storage ……… 2 Handling on Installation ……… 2 Software ……… 2 ® The Smartstart 6000 Soft Starter Operation ……… 3 ‘SMART‐TORQ’ Torque Control ……… 3 Warning) (General Installation Read & familiarise yourself with the warnings Mechanical Installation ……… 4 detailed on Page 1 of the manual before Heat Dissipation & ventilation ... - Page 4 IMPORTANT – Read this first !! ® Read all operating instructions before installing, wiring, operating, servicing or inspecting the Smartstart 6000. Ensure that the instruction manual is made available to the final user of the product as well as all personnel involved in any aspect of installation, adjustment or maintenance. ® Your Smartstart 6000 must be applied and installed by a suitably qualified and experienced electrical tradesperson in accordance with this manual, good engineering practice and all local rules and regulations. ® There are hazardous voltages inside the Smartstart 6000 whenever it is connected to an electrical supply. ® The Smartstart 6000 contains high energy circuits that may be hazardous. Do not operate with the covers removed or the ...
-
Page 5: Introduction
Introduction Receiving: ® Inspect the for any shipping damage. If any Smartstart 6000 damage is found, report it to the carrier immediately. Remove cover of starter and visually check for damage. ® Do not attempt to operate the if any Smartstart 6000 obvious damage exists or suspect damage has occurred. ® After the initial inspection, the can be Smartstart 6000 repacked ... -
Page 6: The Smartstart 6000
SMART‐TORQ Torque Control ® ® The Zener is a reduced voltage controller Smartstart 6000 ® The Zener incorporates a closed loop Smartstart 6000 designed for starting standard 3 Phase induction motors. torque control system to provide better control over The unit is solid state, using a microprocessor to control starting & stopping 3 phase induction motors. inverse parallel (back to back) pairs of SCR’s. Conventional voltage ramp control systems typically ... -
Page 7: Installation
Installation ‐ Mechanical Mechanical Installation Heat Dissipation ® ® The Smartstart 6000 is cooled by temperature controlled The Smartstart 6000 should be installed by qualified electrical personnel only. The following should be internal fans. Installing a bypass contactor will reduce the considered when installing. heat dissipated and the ventilation required. Soft Starters generally dissipate approximately 4.5watts per Amp Mount in a vibration free environment. when operated without a bypass contactor. Mount vertically and away from heat radiating ... -
Page 8: Mechanical Dimensions
Installation ‐ Mechanical Dimensions (All Dimensions in mm) Model: Chassis A B Depth 6R005B2 B2 335 162 6R015B2 B2 335 162 6R030B2 B2 335 162 6R060B2 B3 440 162 6R080B2 B3 440 162 Mounting Holes: Model: Chassis B Depth 6R10000 A2 430 248 6R19000 ... -
Page 9: Power Wiring - General
Installation ‐ Power Wiring Power Wiring ® The Zener Smartstart 6000 is installed between the Motor Protection: mains and cable to the motor. If a mains or isolation contactor is used it is best controlled by the starters ® The Smartstart 6000 ... -
Page 10: Power Wiring - 15A-80A
Installation ‐ Power Terminals (up to 80Amp) 3 Wire with integral Bypass Only Models; 6R015B2 & 6R005B2 6R030B2 6R060B2 6R080B2 Power Terminations Model: Max cable size Tightening Torque 6R005B2 6 mm 1.5 – 1.8 Nm 6R015B2 6 mm 1.5 – 1.8 Nm 6R030B2 6 mm 1.5 – 1.8 Nm 6R060B2 35mm 3.2 – 3.7 Nm 6R080B2 35mm ... -
Page 11: Power Terminals - 100A And Above
Installation ‐ Power Terminals (100A model and above) Power Terminations Chassis A2: Model: Chassis Busbar Hole Bolt Size Earth Stud 6R10000 A2 1x 8.5mm 6R19000 A2 1x 10.4mm 6R22000 A2 1x 10.4mm 6V09000 A2+ 1x 8.5mm 6R36000 A3 2x 10.4mm 6R58000 A3 2x 10.4mm 6R83000 A3 2x 10.4mm 6V20000 A3 2x 10.4mm 6V40000 A3 2x 10.4mm 6V60000 A4 ... - Page 12 Installation ‐ Power Wiring (100A model and above) 3 Wire Bypass 3 Wire Continuous (Without Bypass Contactor) NOTE: The SS6000 must have the appropriate rating to operate without a bypass contactor. Optional Fast Acting Semiconductor Fuses selected to suit the SCR devices used. Optional Fast Acting Semiconductor Fuses selected to Line Contactor controlled by the Soft Starter. suit the SCR devices used. (see Control wiring on Page 13 & 14 and application Line Contactor controlled by the Soft Starter. drawings on Page 46‐48) (see Control wiring on Page 13 & 14 and application Bypass Contactor controlled by the Soft Starter. drawings on Page 46‐48) (see Control wiring on Page 13 & 14 and application drawings on Page 46‐48) Refer to page 13 & 14 Refer to page 13 & 14 For Control Wiring For Control Wiring ® Technical Manual: Smartstart 6000 IMI0042 rev K Page 9 ...
-
Page 13: Power Terminals - 6 Wire & Ct Relocation
Installation ‐ Power Wiring (100A model and above) Using 6 wire Configuration ® The Smartstart 6000 can be configured to operate in 6 wire mode. 6 wire mode may be the preferred method due to: 1. Possible reduction in the size of starter required, The following illustrates the difference between 3 wire & 6 saving on space and /or cost. wire connection: 2. Wiring may already be present if a start/delta type starter was previously used. 3. Reduced motor cable size. The major advantage is that the current in the SCR is ... - Page 14 Installation ‐ Power Wiring (100A model and above) Standard 6 wire Bypass Standard 6 wire Continuous Optional Fast Acting Semiconductor Fuses selected to suit the SCR Optional Fast Acting Semiconductor Fuses selected to devices used. suit the SCR devices used. Line Contactor controlled by the Soft Starter. Line Contactor controlled by the Soft Starter. (see Control wiring on Page 13 & 14 and application drawings on (see Control wiring on Page 13 & 14 and application Page 46‐48) drawings on Page 46‐48) Bypass Contactor controlled by the Soft Starter. (see Control wiring on Page 13 & 14 and application drawings on Page 46‐48) Refer to page 13 & 14 Refer to page 13 & 14 For Control Wiring For Control Wiring Refer to page 12 Refer to page 12 For details on correctly installing For details on correctly installing external C.T’s external C.T’s ® Technical Manual: Smartstart 6000 IMI0042 rev K Page 11 ...
- Page 15 Installation ‐ Power Wiring (100A model and above) Relocating the Internal Current Transformers for 6 wire operation. ® The Smartstart 6000 comes standard with internal Current Transformers (C.T’s) for monitoring the current during acceleration, deceleration and when in bypass. ® It is important that the Smartstart 6000 be wired in a manner to ensure the C.T’s are always monitoring the motor current. For this reason 9 terminals are ...
-
Page 16: Control Wiring
Control Wiring Typical Configuration of Control Terminals. ® Technical Manual: Smartstart 6000 IMI0042 rev K Page 13 ... - Page 17 Control Wiring Default/Standard Control: Alternative configuration available: 1. Standard Power‐up Start (no Soft Stop) 1. 3 wire Start/Stop A53 Start Logic : ‘edge sensed’ X10 Dig In 1 : Enabled X11 Dig In 1 Variable : Start (latching) DIGIn 2 16 X11 Dig In 1 Delay : 0.0sec DIGIn 1 15 ENABLE 14 Use enable or DIG in2 for stop: X20 Dig In 2 : Invert X21 Dig In 2 Variable : Stop 24VDC 12/13 X22 Dig In 2 Delay : 0.0sec C20 Decel Ramp : 0.0 for coast : Adjust for soft stop (>0) ...
-
Page 18: Communications
To reduce network noise place a line terminator near each of the two ends of the bus. A 120 Ohm resistor A comprehensive Network Guide is available on our is recommended for both line terminators. A website: www.zener.com.au or contact us for more capacitor (1nf) in series with the resistor may also details. improve performance. ®... -
Page 19: Programming
This symbol identifies the T00 NO TRIP ALM The ‘!’ symbol is displayed in the top right corner of parameters for quick setup. the display when the starter has operated in ESO mode and the starter has been ‘stressed’. This can only be reset by Zener Electric and may void any product warranty ® Technical Manual: Smartstart 6000 IMI0042 rev K ... - Page 20 Programming Operating Status Indication Warnings, Alarms and Messages: % of Accel or Current status Actual Current ® The Smartstart 6000 has been designed to provide the Decel time user with a comprehensive display of its operating status. Messages in plain English are flashed across the ACCEL 250A 50 % screen (if enabled) to alert the user of its current status, any warnings, trips or pending actions. The 300% code ...
-
Page 21: Trip Log / Resetting
Programming Trip Log: The Trip Log Message: The trip log is accessed from the ‘Trip status’ screen. Log The ‘Trip status’ screen is the last DASHBOARD screen Number (or press the reset button). The “Trip status’ screen TRIP Code displays the last trip. 04 Jan 2014 ... -
Page 22: Menu Map
P02 Motor Over Temp D02 Default Screen ENTER P03 Phase Rotation D03 Bargraph Variable ENTER Setup Menu P10 Accel OverTime SMARTSTART 6000 D04 Bargraph FS P20 Voltage Imbalance Alarm 1 Display D05 Flash (Warning) Alarms 6R030 V1.32 P21 Volt Imbal Alarm... -
Page 23: 1 Setup Menu - Display (D01-D20)
Programming Menu Navigation Setup Menu 1 Display Dashboard screen (1 of 11) D01 Menu Access: Enter Sets the desired user access to menu. Setup Menu Refer to Page 20 1 Display Selection: Disabled; Setup; Read only Default: Setup To save changes To exit without saving Setup Menu Refer to Page 21 2 Motor If the menu access is disabled a user access code is required to access the menu. The access code is 1470. Setup Menu Refer to Page 21 3 Control MENU ACCESS... -
Page 24: 2 Setup Menu - Motor (M01 - M04)
Programming D05 (Flash) Warnings/Alarms: Setup Menu General inclusion of warning alarms to be ‘flashed over’ the current dashboard screen. Refer to table 2 Motor 4 (p35 & 36) for alarm message explanation. M01 Motor Amps: Selection: All Alarms; Disabled; Trips only; Flt Adjust to the value of motor full load current (FLC) Warnings; Major Warnings indicated on the motor rating plate, even if Default: All Alarms connected in 6 wire (inside delta). To save changes To exit without saving Range: 40% of Nom. unit rating to max. rating D06 Alm over Bar: Default: Nom. rating of unit To save changes The default screen will display when a trip has To exit without saving occurred, with details of the type of trip in the [‘Nom. unit rating’ = 3wire, bypass, light duty] ® trip log. The Smartstart 6000 may be configured to display the trip or alarm warning on the ... - Page 25 Programming C02 Current Limit: C12 Start Torque: The current limit is expressed as a percentage of The initial torque provided when a start is the entered motor Amps (FLC). This current limit initiated. Adjust to the lowest setting which setting operates during the ramp time only and allows the motor to turn on a start command. will ...
-
Page 26: 4 Setup Menu - Protection (P01-P73)
Programming C22 Release Torq: C42 Release Torq: ® The Smartstart 6000 will decelerate the motor Release Torque for 2 parameter operation at the ‘decel time’ rate until the torque reaches . the release torque value entered. This is entered Range: 0 to 100% Default: 20% as a percentage of nominal Torque (FLT). To save changes To exit without saving Range: 0 to 100% Default: 20% To save changes To exit without saving Setup Menu 4 Protection In pump applications the deceleration provided by the ®... - Page 27 Programming P03 Ph Rotation: P21 Volt Imbal Alarm: Provide protection against a supply voltage imbalance. Selectable phase sequence protection to inhibit motor operation if a prohibited phase sequence is Range: off; trip; warn detected (ie. reverse operation). Ideal for pumping Default: trip applications. To save changes To exit without saving Range: Ignore; 1‐2‐3; 3‐2‐1; Default: Ignore P22 Volt Imbal Level: To save changes Adjust to set the voltage imbalance threshold, as a To exit without saving percentage of the average phase voltage. Range: 5 – 25% P10 Acc Overtime : Default: 25% P10 Accel OverTime To save changes ...
- Page 28 Programming P33 Curr Imbal Delay: P50 Overcurrent: P50 Overcurrent Set a delay for the current imbalance trip. Trip 110% Range: 0 – 10 seconds Status Default: 10s To save changes Level To exit without saving Delay To enter submenu to modify P40 Undercurrent: To exit sub menu P40 Undercurrent Trip P51 Overcurrent Alarm: ...
-
Page 29: 5 Setup Menu - Reset (R01-R13)
Programming P61 Under torque Alarm: P71 Over Torque Alarm: Provide protection against under‐torque. This Provide protection against excess torque. This protection is not active during the accel & decel protection is not active during the accel & decel period. period. Range: off; trip; warn Range: off; trip; warn Default: off Default: off To save changes To save changes To exit without saving To exit without saving ‘Trip’: The soft starter trips, stops the motor and indicates ‘Trip’: The soft starter trips, stops the motor and indicates an ‘Under Torque trip’. The Trip relay will change state if an ‘Over Torque trip’. The Trip relay will change state if selected. selected. ‘Warn’: The soft starter does not trip or stop the motor. See ‘Warn’: The soft starter does not trip or stop the motor. See D05 & D06 for more information regarding warning alarms. D05 & D06 for more information regarding warning alarms. ... -
Page 30: 6 Setup Menu - Input (X10-X22)
Programming R03 Start Reset X11 DigIn 1 Variable Activate or de‐activate reset on a start command. Set the functionality of digital input 1. Refer to page 34 and page 37 (Brake On) for more details. Range: Enable; Disable Default: Disabled Range: Trip; Reset; Start; Stop; Coast; Local; To save changes ESO; Brake On (see page 37) To exit without saving Default: Reset To save changes To exit without saving R10 Auto Restart X12 DigIn 1 Delay Set the delay that the digital input needs to be P70 Over Torque active for the Soft starter to respond. 1200s Range: 0.0 – 300.0 seconds No. of Attempts ... - Page 31 Programming Y50 An Out 1 Mode Y11 Relay 1 Variable Activate and set the signal type for Analogue Set the functionality of Relay 1. Output 1. Range: See table on page 34 Range: Disabled ; 0‐10v; 0‐5v; 0‐20mA; 4‐20mA Default: Line Ctrl Default: Disabled To save changes To save changes To exit without saving To exit without saving Y20 Relay 2 Mode Y51 An Out 1 Variable Activates Relay 2. Set the functionality of Analogue Output 1. Range: Enable; Invert; Disable Range: See table on page 34 Default: Enable Default: Current To save changes To save changes To exit without saving ...
-
Page 32: 8 Setup Menu - Advanced (A10-A61)
Programming Y92 Timer Run A20 Accel Method Set to the desired run time for the Soft A20 Accel Method Starter/Motor. Squared Torque Range: 00.00 to 20.00 hh:mm Default: 0 Accel Profile To save changes Accel Control To exit without saving The acceleration method allows adjustment of the Y93 Timer Wait aceleration profile and acceleration control. This Set to the desired off time for the Soft Starter/Motor ... - Page 33 Programming A44 Warning Delay To save changes To exit without saving Set the warning threshold for protection based on a time function. Eg. Overcurrent. Enter as a % of A31 Decel Profile the trip delay time. Select the type of deceleration profile to match the type of load or application. Range: 25‐100% Default: 50% Range: Linear; Squared To save changes Default: Linear To exit without saving To save changes To exit without saving Notes: 1) If the soft starter is configured to display warning A32 Decel Control alarms(see D05 & D06) this sets the threshold point which a warning alert is displayed. Select the type of deceleration control to suit ...
-
Page 34: 9 Setup Menu - Network (N01-N20)
Programming An optional ‘Start’ function is also selectable as a digital Setup Menu input. This is a latching input, which is unlatched by a 9 Network stop control input, deactivating the enable input or a trip. Below are the menu parameters that may require Level Sense: The default setting when using the enable ... -
Page 35: 10 Setup Menu - Commands
Programming N11 RS485 Speed (RS485 only) Setup Menu Adjust to the required baud rate. 10 Commands Range: 4800,9600,19k2,38k4 Default: 19k2 To clear/reset any of the following a confirmation To save changes code is required: To exit without saving N12 RS485 Format (RS485 only) 1 Reset Trip Select the correct protocol format. 2 ClrTrip Log 3 Clr Mtr OL Range: 8o1, 8n1, 8n2, 8e1 4 Clr Counters Default: 8e1 ... -
Page 36: 12 Setup Menu - Network Diagram
Programming Setup Menu 12 Network Diag This menu provides a diagnostic for Network Communications. Network Status Idle Network status & event wheel Diag Flgs 0x0000 Network Diagnostic Flags (in hex) C0: ReqsAoK 0 Count of requests processed normally C1: BusMsgs 0 Count of error free bus messages C2: BusErrs 0 Count of bus messages with a No Comms errors communication error Count of bad requests received C3: Reqs Bad 0 No Exceptions Shows no or recent exception Count of requests received (with or C4: Reqs Rxd 0 ... -
Page 37: Relay Functions, I/O Functions, Alarm & Trip Messages
Programming Table 1: Output Relay Table 2: Analogue Output Functionality Functionality Relay Function Analogue Output Selection: Description Selection: Description Line Ctrl Control for Line Contactor Mtr Torque Estimated torque produced in motor Bypass Ctrl Control for Bypass Contactor Mtr Thermal Estimated Motor temperature of over load Accel Ramp Starter in acceleration ramp mode STR thermal Soft Starter temperature Decel Ramp Starter in deceleration ramp mode Active power Power consumed kW Ramping Starter in Ramp Mode Power Factor Power Factor Up to Speed motor is up to speed Mtr Current Motor Current Motor On Motor is running Test (100%) Maximum output Trip Alarm A trip alarm is active ... - Page 38 Programming Table 4: Flash Alerts / Messages Table 5: Interlock Messages Message: Explanation: Message: Explanation: PENDING: Start is delayed/postponed by an I21 STR OVERTEMP Starter too hot to start. active interlock alarm. Waiting for heatsink to cool. WARNING: There is an active warning alarm. I30 MTR OVERLOAD Motor is too hot to start. The alarm is identified by W### Motor TOL reset threshold not displayed on 2 line. The Soft reached. starter has not tripped. Refer to ‘D05 Warning Alarms’ for selection and I31 MTR OVERTEMP Motor (thermistor) is too hot adjustment. to start. TRIPPED: The SMARTSTART has tripped on a I51 Min Off Time Waiting for min off timer to fault condition. The alarm is expire. identified by T### displayed on 2 line. Refer to page 30 for more detail I52 Prestart Dly Waiting for ‘start’ input on trip alarms. ...
- Page 39 Programming Trip (Warning) codes & messages A warning message will have a ‘W’ in place of the ‘T’ for the following messages. CODE/Message Description CODE/Message Description T32 MTR TEMP FLT Motor thermistor sensor fault T00 NO TRIP ALM No fault or trip has occurred. detected. Check thermistor Control supply voltage low. Check T01 PSU LOW VOLT and wiring. control voltage. Over current trip as per user T33 MTR OVERCURR T02 LINE FREQ Line supply frequency out of range while setting. See P50 page 25. motor running. T34 MTR UNDERCURR Under current trip as per user T03 LINE PH FLT 3 Phase supply problem, one phase setting. See P40 page 24. open. Check L1; L2; L3. T35 MTR OVERTORQ Over torque trip as per user Line Phase sequence in wrong direction – T04 PHS ROTATION ...
-
Page 40: Brake Fail Protection
Programming Brake Fail Protection: A T40 BRAKE FAULT (Trip) will occur if the Brake is ON A digital input can be programmed for ‘Brake On’. This while the motor is ON. An adjustable delay allows time allows a voltage free contact indicating the position of for the brake to lift during starting. If in Bypass mode, a mechanical brake to the Soft Starter. the trip has a fixed delay to prevent false trips and to allow the Soft starter to use the SCR’s to break any The intention of this feature is for the soft starter to potential high locked Rotor Currents. ... -
Page 41: Specifications
Specification Input Voltage: Inputs: 6R series: 220 to 460Vac Digital Inputs: 24Vdc Logic 6R15‐80: 380Vac to 415Vac Function: 2x Programmable inputs 6V series: 600 to 1000V (+10%) 1x Enable Input Thermistor: Thermistor or NC switch Input Frequency: 50 / 60Hz +/‐ 3Hz, PTC type, Trip Resistance 3000Ohms, Auto detecting <20ohms detected as Short Circuit. Control Supply: 24Vdc (+15%, ‐15%) Outputs: Digital Output: 4 Programmable Relays 24VDC Power Supply (min. requirements): Contact Rating: ... -
Page 42: Thermal Protection
Thermal Protection Starter Thermal Protection: Motor thermal Protection: Thermal protection of the soft starter is provided by a Cold Curves temperature sensor located on the heatsink and by calculating the temperature of the thyristor junction with sophisticated modeling of the specific devices used. Fans SS6000 Motor Thermal Overload Curves - Cold are powered by 24VDC supply and thermally controlled 10000.000 when the heatsink temperature exceeds 40°C and whilst the motor is ramping. Motor thermal Protection ® The Smartstart 6000 provides thermal protection of the 1000.000 motor by providing a thermistor input and also a programmable motor overload protection feature. The starter continuously monitors the current and Class 30 Cold calculates the temperature rise of the motor based on the Class 20 Cold 100.000 Class 10 Cold motor data provided. The standard IEC60947‐4‐2 defines ... -
Page 43: Unit Ratings
Unit ratings The following tables provide the maximum motor FLC that should be used on each model for specific starting & operating duties. 15A – 80A with Integral Bypass Contactor ( 380 ‐ 415V) Light Duty: Standard Duty: Severe Duty: Model Chassis Dimensions (mm) (Amps) (Amps) (Amps) 5 5 5 6R005B2 B2 335h 162w 174d 15 15 15 6R015B2 B2 335h 162w 174d 30 25 20 6R030B2 B2 335h 162w 174d 60 54 44 6R060B2 B3 440h 162w 174d 80 ... -
Page 44: Shipping/Packaging Details
Unit ratings 220 ‐460V 6 Wire Continuous (Inside Delta Connection) Light Duty: Standard Duty: Severe Duty: Dimensions Model Chassis (Amps) (Amps) (Amps) (mm) 173 152 128 6R10000 A2 430h 248w 244d 308 270 224 6R19000 A2 430h 248w 244d 350 310 255 6R22000 A2 430h 248w 244d 590 520 442 6R36000 ... -
Page 45: Options
SS6000 Options Control Supply Options Part Number Description Comments TF60013 415VAC Internal Control Supply, 6R15/30 ‐ fitted Control powered from 3phase 415V supply internally TF60014 415VAC Internal Control Supply, 6R60/80 ‐ fitted Control powered from 3phase 415V supply internally TF60031 18VAC Control Supply, 6R60/80 ‐ fitted TF60032 18VAC Control Supply, 6R15/30 ‐ fitted TF60033 18VAC Control Supply, 6R100+ ‐ fitted All models from 6R100 to 6R830 TF60034 240VAC Control Supply, 6R15/30 TF60035 240VAC Control Supply, 6R60/80 TF60036 240VAC Control Supply, 6R100‐R220 All models from 6R100 to 6R220 TF60037 240VAC Control Supply, 6R360+ All models from R360 to R830 24vdc Power Supplies Part Number Description Comments TQ60001 24Vdc Power Supply, 36W, 1.5 Amps Power Supply to suit 6R15 to 6R30 ... - Page 46 SS6000 Options Other Options SS6000 Model Description Part Number: 6R100 – 6R220 Prepared for 6 wire TF60015 6R360 – 6R830 Prepared for 6 wire TF60016 ® For 6 wire operation the Current transformers supplied integral to the Smartstart 6000 must be relocated to L1 & L3 of the Line circuit (not the Phase circuit). Semiconductor Fuse Kits – IP00 Replacement SS6000 Model Description Part Number: Fuse: 6R015B2 Semiconductor Fuse Kit to suit 6R15 TQ60020 TF20032 6R030B2 Semiconductor Fuse Kit to suit 6R30 TQ60021 TF20080 6R060B2 Semiconductor Fuse Kit to suit 6R60 TQ60022 TF20125 ...
-
Page 47: A - Smart-Torque / Typical Start Parameters
100% Speed ® ‘SMART‐TORQ ’ is a Torque Control System developed by Zener to overcome this How is this achieved ? problem with greater control over the acceleration torque in the motor. The torque ® is controlled in a manner which suits the type of load to achieve a linear acceleration The SMARTSTART 6000 continually monitors start variables such as motor current, in motor shaft speed. This control system is also active during the deceleration ... - Page 48 Appendix A Indicative parameters for different load types 1. Pump (3 wire/Bypass with No Soft Stop) 5. Conveyor: (3 wire/Bypass) Factory defaults are intended for general pumping/fan Factory defaults are preset for a variable torque load. application with no Soft Stop. Enter motor parameters The Torque settings will need to be adjusted for a as per motor nameplate. constant torque type load. Enter motor parameters as per motor nameplate. 2. Submersible Pump (3 wire/Bypass with No Soft Stop) Page Parameter Setting (factory Default) Start Torque 80% (30%) Factory defaults are intended for general pumping Final Torque 150% (130%) application with no Soft Stop. The acceleration time Accel profile Linear (Squared) needs to be reduced to 3secs or as per pump/motor Motor Overload Class 20 (10) manufacturers recommendations. Enter motor ...
-
Page 49: B - Application Diagrams
Appendix B Application Diagrams General Purpose : ® Technical Manual: Smartstart 6000 IMI0042 rev K Page 46 ... - Page 50 Appendix B Application Diagrams Typical Water & Sewerage Pumping : ® Technical Manual: Smartstart 6000 IMI0042 rev K Page 47 ...
- Page 51 Appendix B Application Diagrams Irrigation Pump : ® Technical Manual: Smartstart 6000 IMI0042 rev K Page 48 ...
-
Page 52: C - Remote Console Instructions
Appendix C Remote Console Description: The remote console kit provides the user remote access to perform the following: Scroll and display the ‘Dashboard’ Variables, a display of the following; Operating status, Motor Amps (3), Supply Voltage (3), Power, Torque, Current imbalance, Voltage imbalance, Trip, kWhrs, Run Hrs, No. of starts, No. of trips. Program any user configurable parameter. Reset a trip. Use the diagnostic menu and display I/O status. Note: There is a 30 second delay between using the local or remote operator panels. Specification: Part No.: TQ60045 Remote Console + Interface Kit (TF60045 – Interface kit fitted) IP Rating: IP66 (when installed as per instructions) Panel Thickness Up to 6 mm Cable Type: Cat‐5 Maximum Cable length: 30m (unscreened) Standard cable lengths: 1m, 2m, 3m, 5m Compatibility: Interface Board No. B132612 Installation: The kit contains the remote console assembly and a plug‐in module board to provide ® connection at the Smartstart 6000. The plug in module provides a socket for the remote console as shown. ... -
Page 53: D - Data Logger Option Board
Appendix D Data Logger Option Board Description: The Data Logger Option Card provides a SD Card slot to record the soft starter’s parameters and operating data. 1. Operating data is logged at the following rates: A rate of 1/10second during acceleration and Deceleration. Every 10 seconds during running. iii) Every 10seconds when in idle mode. ie. control supply ‘ON’ but starter not running. 2. The Soft Starter parameters are logged onto the data card when the unit is powered and if any parameters are changed. The data is stored as a text file (.txt) on to the SD card inserted. The SD card should not be removed while running or a short period after as recent data may be lost. ... - Page 54 The soft starter will create 2 files onto the data card: .txt file ‘config.txt’ , which logs the Baud Rate and Data Format. .txt file. This is where the data will be stored. A new text file will be created each time the control supply is cycled or can save data to the one text file. (see over page on instructions on how to modify this). The text file may be deleted on a computer at any stage, and a new file will be created. The text files may be removed, copied and/or sent via email to Zener for analysis should a problem exist. Modifying the config.txt file: To change the logging behavior, write over the last digit (1) or the fourth digit (2) and save the changes. This digit sets the logging behavior as follows: ...
-
Page 55: Wire Using Internal Ct's
Appendix E 6 Wire Connection using internal CT’s It may be possible to configure the SMARTSTART 6000 in 6 wire configuration with the CT’s internal. This is subject to the maximum current rating of the bus bar for each size soft starter. Warning Wiring using The current in the ‘LINE L1,L2,L3’ is 1.732x the phase internal C.T’s currents of the motor and the soft starter. The input terminals, wiring and bus bar must be rated to operate at ... -
Page 56: Set Up Record Sheet
Menu Map / Set up Record Sheet DESIGNATOR: _______________ Software Revision: ___________ Main menu Sub menu Level 1 Sub menu Level 2 Default Setting 1 Display D01 Menu Access Setup D02 Default Screen Overview D03 Bargraph Var. Mtr Current D04 Bargraph FS 300% D05 Flash/Warning Alarms All Alarms D06 Alarm over bar All Alarms ... - Page 57 Menu Map / Set up Record Sheet DESIGNATOR: _______________ Software Revision: ___________ R13 AR Clr time ‐ Main menu Sub menu Level 1 Sub menu Level 2 Default Setting 6 Inputs X10 DigIn 1 Mode Enable X11 DigIn 1 Variable Reset X12 DigIn 1 Delay 3.0s X20 DigIn 2 Mode Disable X21 DigIn 2 Variable ‐ ...
Need help?
Do you have a question about the SMARTSTART 6000 and is the answer not in the manual?
Questions and answers