
Subscribe to Our Youtube Channel
Related Manuals for Diesse VES-MATIC EASY

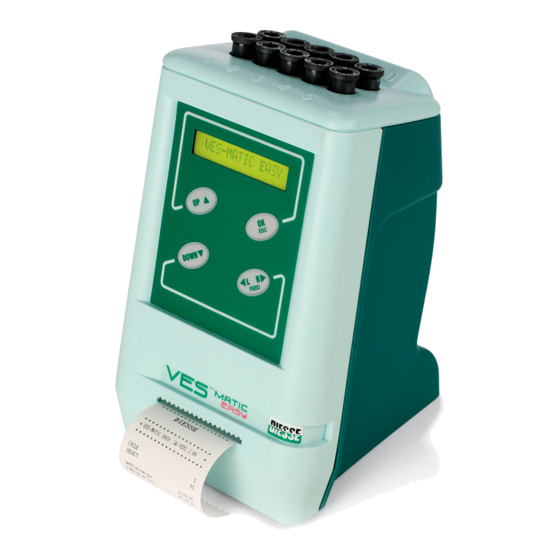
Summary of Contents for Diesse VES-MATIC EASY
- Page 1 INSTRUCTIONS MANUAL Software Release N° 2.07 Rev. 2.1 issued on November 2017 Automatic instrument for the determination of the Erythrocyte Sedimentation Rate (ESR) (Patented) For In Vitro Diagnostic use only...
- Page 2 For Technical Assistance please contact your distributor: No page in this manual may be reproduced in any form or by any means, neither electronic nor mechanical, for any use whatsoever without prior written permission from DIESSE Diagnostica Senese S.p.A. 2/54...
- Page 3 Added CE mark and Manufacturer other symbols of 04/15 2.06 of 03/15 Update chapter 1 and complete restyling. of 11/17 2.07 of 01/17 Update chapter 5.3 MODELS This manual applies to the following VES-MATIC EASY models: DIESSE Code Description 10376 VES-MATIC EASY Rev.2.1 of 11/2017 3/54...
- Page 4 Instructions Manual SYMBOLS Legend of graphic symbols used on the instrument. Instrument satisfying requirements of European directive on in vitro diagnostic medical devices (98/79/EC). In Vitro Diagnostic medical device. Date of manufacturing of the unit. Serial number of the unit. Manufacturer.
- Page 5 In the case of selling or transferring the instrument, make sure that the manual always accompanies the VES-MATIC EASY to allow the new owner to be informed about its functioning and relative warnings. The instrument should be used only by qualified and competent personnel.
-
Page 6: Table Of Contents
Instructions Manual CONTENTS CHAPTER 1 ................................8 1.0 INTENDED USE OF THE INSTRUMENT ......................8 1.1 PRESENTATION OF THE INSTRUMENT ....................... 8 1.2 GENERAL DESCRIPTION OF THE INSTRUMENT ..................10 1.3 MATERIAL SUPPLIED WITH THE INSTRUMENT ..................11 1.4 LIST OF MATERIAL REQUIRED BUT NOT PROVIDED ................11 1.5 TECHNICAL SPECIFICATIONS ........................12 1.6 BLOCK DIAGRAM ............................13 1.7 TECHNICAL DESCRIPTION OF THE INSTRUMENT ...................13... - Page 7 Instructions Manual CHAPTER 5 ................................39 5.1 GENERAL RECOMMENDATIONS.........................39 5.2 EXTERNAL CLEANING OF THE INSTRUMENT ...................39 5.3 REPLACING THE PAPER IN THE PRINTER ....................39 5.4 PERIODIC CHECKS ............................41 CHAPTER 6 ................................42 6.1 SELF-DIAGNOSIS ............................42 CHAPTER 7 ................................45 7.1 EXTERNAL BARCODE READER ........................45 7.2 CONNECTING TO A HOST COMPUTER ......................46 7.3 SPECIFICATIONS OF THE ASYNCHRONOUS SERIAL COMMUNICATION PROTOCOL ......47 7.4 “NEW PROTOCOL”...
-
Page 8: Chapter 1
1-10 results are comparable with those obtained with the Westergren method Using the 18° slant of the tubes with respect to the vertical axis, the VES-MATIC EASY allows for obtaining results equivalent to those of the Westergren method (1 hour) in only 20 minutes, and equivalent to the Westergren method (2 hour) in only 40 minutes. - Page 9 Instructions Manual The instrument is designed with the temperature correction always activated and relates the results to a according Manley’s temperature 18°C Nomogram However, it is possible to de-select the temperature correction for individual laboratory needs. Clinical concept of the ESR The Erythrocyte Sedimentation Rate test (ESR) is performed measuring the distance travelled by red cells in autologous plasma over a fixed period of time.
-
Page 10: General Description Of The Instrument
During the first hour the ESR value is normally found between 1 and 10 mm in males and between 1 and 15 mm in females; in pathological conditions it increases to values of 100 mm and over. Normal range for the VES-MATIC EASY: MALES... -
Page 11: Material Supplied With The Instrument
ON/OFF switch DC IN socket for 9Vdc power supply Paper-holder compartment MATERIAL SUPPLIED WITH THE INSTRUMENT The VES-MATIC EASY is supplied with the following material: 1 Operating Manual [English] [Order Code: P30600650] 1 “VES-MATIC EASY” CD [Order Code: P30650050] ... -
Page 12: Technical Specifications
Instructions Manual TECHNICAL SPECIFICATIONS Power supply 9Vdc@2A Dimensions 143 x 218 x146 mm ( w x h x d ) Weigh 1.2 Kg Ambient temperature Operational from +15°C to +35°C Storage from + 5°C to + 45°C Relative humidity from 20 to 80% without condensation tolerance Central unit AVR ATMEGA128-16AC microprocessor... -
Page 13: Block Diagram
Takes care of lifting the optical reader unit in order to check the cuvettes present or incorrectly inserted, with insufficient or excessive blood, and also detects the sedimentation level. KEYBOARD Consists of 4 keys used for the implementation of VES-MATIC EASY functions. CUVETTE-HOLDER Consists of ten numbered positions with 18° slant axis for inserting the cuvettes. -
Page 14: Information Regarding Disposal
DISPLAY Displays all the messages of the instrument. INFORMATION REGARDING DISPOSAL The VES-MATIC EASY instrument is operated by mains voltage, therefore has been classified as Electrical-Electronic Equipment according to the European Directive 2012/19/UE dated July 04 2012, and subsequent amendments. -
Page 15: Chapter 2
Instructions Manual CHAPTER 2 STORAGE AND TRANSPORT The VES-MATIC EASY is a precision instrument and must be treated as such. Inappropriate operations could damage the internal opto-electronic components and cause mechanical damage. In view of the overall dimensions and weight of the machine, the transport must be carried out manually by taking all necessary precautions in order to avoid impact or excessive tipping over that could damage the instrument. -
Page 16: Unpacking The Instrument
Instructions Manual specifications indicated in chapter 7 and check that there is continuity between the grounding connection and the external instruments. The operator must be trained to be familiar with the procedures, restrictions and warnings indicated in this manual, as well as those pertaining to safety in the work place. The material for the operator’s safety (gloves, containers for disposing of used expendable items, detergent solutions for cleaning the instrument) must always be available. -
Page 17: Installation
Maintain safety distances described in the figure (front panel free; rear, left and right side 15 cm). Positioning VES-MATIC EASY It is strictly prohibited to place anything on top of the instrument. Choose a position near a power point, which is free from interference and voltage surges. -
Page 18: Restrictions And Warnings
It is only possible to enter the commands with a light pressure of the fingers. Expendable materials [RESTRICTIONS] Exclusively the DIESSE cuvettes are designed for use with the VES-MATIC EASY and cannot be substituted with any other container. The DIESSE cuvettes are disposable and must not be reused. -
Page 19: Shutting Down And Shipping
Instructions Manual SHUTTING DOWN AND SHIPPING Before shutting down and shipping the instrument it is recommended carrying out the following sanitising procedure: The instrument must be turned off and cleaned internally of all residues or spillage with a liquid detergent and left to dry. Use one of the ready-to-use spray cans of isopropyl alcohol available on the market. -
Page 20: Chapter 3
Instructions Manual CHAPTER 3 TURNING ON THE INSTRUMENT Turning on After having checked the installation of the instrument as indicated in chapter 2, turn the switch, located on the back side of the instrument, to the position « ON ». System start-up When turned on, the unit will display in a sequence the instrument model and the software version installed on the unit:... -
Page 21: Keyboard
Instructions Manual KEYBOARD The VES-MATIC EASY is fitted with a keyboard with 4 bifunctional keys. The function of each key is only activated when the corresponding key is pressed in and released. Key functions description Scrolls up menus, when displayed, and enters numerical values in dedicated menus (e.g. -
Page 22: Description Of The Tests
Instructions Manual DESCRIPTION OF THE TESTS The operator has 2 types of analysis available in the main menu the operator for a total of 4 selectable cycles as described below: VES MATIC EASY ANALYSIS ANALYSIS ANALYSIS ANALYSIS ESR F1 ESR F2 ESR F1 RANDOM ESR F2 RANDOM ESR 1h... -
Page 23: Esr F1 Random (Erythrocyte Sedimentation Rate 1H) Analysis
Instructions Manual At the beginning of the test, the unit detects the presence of the cuvettes in the sample-holder and performs the first reference reading: the optical reading unit records the initial level of the blood column of each sample. If no cuvette is placed in the unit, the test is interrupted. After 1 minute, a second reference reading is taken;... -
Page 24: Esr F2 Random (Erythrocyte Sedimentation Rate 2H) Analysis
Instructions Manual 3.4.4 ESR F2 RANDOM (Erythrocyte Sedimentation Rate 2h) ANALYSIS ESR II RANDOM This test provides results according to Westergren’s method with readings at one hour and two hours, plus the Katz index for each sample introduced in the sample-holder independently from the other cuvettes introduced. -
Page 25: Set-Up Menu - Settings
Instructions Manual SET-UP MENU – SETTINGS The SETTINGS menu provides a list of functions (shown below) allowing a number of system operations to be performed. To access these functions, select “SETTINGS” item in the main menu and confirm by pressing OK. To exit, select “RETURN TO MAIN” and press OK. VES MATIC EASY SETTINGS BAR CODE ON/OFF... -
Page 26: Barcode Reader Set-Up
Instructions Manual DISPLAY = results displaying is enabled PRINTER + DISPLAY = results print and display are enabled 2. The condition set will remain enabled until a change is entered. WARNING: During testing operations in random mode, these display settings are disabled (see section 4.5) 3.5.2 BARCODE READER SET-UP To enable bar code reading:... -
Page 27: Updating The Date And Time
Instructions Manual The condition set will remain enabled until a change is entered. Print examples: Normal Reverse 3.5.4 UPDATING THE DATE AND TIME To update Date and Time, go to the settings menu: - Use ▲/▼ to go to: SET CLOCK - Press OK to view the current date and time on the display in the following format: hhmmss ggmmaa [Sequence: Hour/Minutes/Seconds Day/Month/Year]... -
Page 28: Quality Control
When the print is completed, the system will automatically return to the “Select Function” menu. QUALITY CONTROL With the VES-MATIC EASY instrument it is possible to use the control blood of the ESR Control (Sold separately: REF 10430 and REF 10434) by activating the QC function, which represents a test for monitoring the values of ESR, in order to check the analytical methods. - Page 29 Instructions Manual INP NORMAL MAX NORMAL MAX + OK* 5. Min values of abnormal Control sample INP ABNORMAL MIN ABNORMAL MIN 00 + OK* 6. Max values of abnormal Control sample INP ABNORMAL MAX ABNORMAL MAX 000 + OK* To enter or change the parameters for the Quality Control process: 0.
- Page 30 Instructions Manual - Press OK. At the end of the test, the obtained results should fall within the expected ranges (“OK” on the printout and/or on the display). In case of out of range results, the deviation value will be indicated (+). In this case, contact the Technical Assistance.
-
Page 31: Chapter 4
In order to prepare the cuvettes, refer to the relative Instructions For Use. Filling the test tube In order for the VES-MATIC EASY instrument to carry out the ESR exam the test tube must be filled with the volume comprised within maximum and minimum levels. -
Page 32: Sequence For Preparing An Exam Esr1-Esr2 Without Id Nr. And Viewing Of The Results
Instructions Manual SEQUENCE FOR PREPARING AN EXAM ESR1-ESR2 WITHOUT ID NR. AND VIEWING OF THE RESULTS Procedure: Mixing the sample Invert manually the test tubes slowly and repeatedly (20-30 times) before starting the test to ensure complete blood mixing. See package insert for further information. Loading the instrument Insert the sample cuvette into one of the open test positions. - Page 33 Instructions Manual The instrument will automatically carry out the test phases as described in point 3.4. During the analysis the time left until it is finished will appear on the display. Displaying of results Once the test has been completed, the results of the processed samples are displayed on the screen according to current settings: - With display on screen enabled (e.g.
-
Page 34: Sequence For Preparing An Exam Esr1-Esr2 With Id Nr
Instructions Manual SEQUENCE FOR PREPARING AN EXAM ESR1-ESR2 WITH ID NR To use the External Bar Code, enable “External Bar Code” in the Settings menu (section 3.5.2.) and connect it to the instrument as shown in section 7.1. Procedure without entering ID: Select and start up the analysis cycle that the instrument is to perform (without introducing the samples) The operator will be asked to confirm the mode of entering of the identification number and the... - Page 35 Instructions Manual When the bar code is not readable with the barcode reader, press OK to enter the bar code manually using the keyboard (see relevant procedure). Press ▲ to set the system back to the condition where it is ready to acquire the ID number with the external barcode reader.
-
Page 36: Sequence For Preparing An Exam Esr1-Esr2 Random Without Id Nr. And Viewing Of The Results
Instructions Manual 14. When the ID number entering introduction is completed, the system will ask the operator the following question: PRINT JOBLIST? If the printer is enabled, press OK to print a list of ID numbers entered and proceed with the test; otherwise, press ▲... - Page 37 Instructions Manual Invert manually the test tubes slowly and repeatedly (20-30 times) before starting the test to ensure accurate blood mixing. See package insert for further information. Loading the instrument Introduce the samples in open positions. During this phase, check that the cuvettes are properly inserted. System work cycle The system will automatically carry out the steps described in section 3.4.
-
Page 38: Sequence For Preparing An Exam Esr1-Esr2 Random With Id Nr
Instructions Manual SEQUENCE FOR PREPARING AN EXAM ESR1-ESR2 RANDOM WITH ID NR To use an External Barcode reader, the “External Barcode reader” item must be set in the ‘Settings’ menu (section 3.5.2.) and the instrument must be connected to the system, as shown in section 7.1. Procedure: 1. -
Page 39: Chapter 5
Instructions Manual CHAPTER 5 GENERAL RECOMMENDATIONS The VES-MATIC EASY has been designed and manufactured in such a way as to require very little maintenance. For any interventions: - disconnect the instrument from the power supply, - use the appropriate personal protection devices during operation, - do not remove the safety guards and do not ignore the safety warnings. - Page 40 Instructions Manual Lift the lever shown in figure (1) to unhook (2) and invert (3) the printing mechanism. Raise the head of the printer by lifting up the relative side lever. Replace the old roll with a new one. Insert the end of the strip of paper into the slot in the paper guide taking care to cut it off in a straight line with a pair of scissors and following the correct rotation of the paper.
-
Page 41: Periodic Checks
Instructions Manual Introduce the paper in the printer slot on the front panel (1A); pull the plastics hook (1), and close back the print mechanism (2): 1 Close the paper-holder compartment. Set the instrument back in its vertical position and cut off the projecting paper. PERIODIC CHECKS At least once every 6 months, or more frequently, check the Optical Reading Unit’s efficiency by performing a QUALITY CONTROL check. -
Page 42: Chapter 6
Instructions Manual CHAPTER 6 SELF-DIAGNOSIS Besides carrying out the command and control operations of the peripherals, the C.P.U. (Central Processing Unit) constantly controls the most important parts of the instrument. Whenever a fault is detected the operation in progress is automatically interrupted with a beep and at the same time a message with the type of fault or trouble detected appears on the display. - Page 43 Instructions Manual This message is shown when there is a jam of the Besides any possible electrical faults there may reading unit. be mechanical defects which must be removed. Contact the Technical Assistance. Replace the paper in the printer (see 5.3.) INSERT PAPER If the problem persists contact the Technical This happens when the printer paper is exhausted.
- Page 44 Instructions Manual Reduce the contents of the cuvette following the HIGH indications on the cuvette package insert, close This message is printed when the level of the sample the lid tightly and repeat the exam. is too high. If the problem persists, contact the Technical This may also occur in the case of a fault in the opto- Assistance.
-
Page 45: Chapter 7
Instructions Manual CHAPTER 7 EXTERNAL BARCODE READER VES-MATIC EASY is designed to acquire sample identification numbers (ID Nr.) by means of an external barcode reader. To enable ID Nr. Reading by means of an external barcode reader, see section 3.5.2. -
Page 46: Connecting To A Host Computer
4.4. CONNECTING TO A HOST COMPUTER It is possible to connect the VES-MATIC EASY to a Host Computer via the USB interface, installed on the back side of the instrument. For connection, use the standard USB cable [‘USB 1.1 A-B M/M CABLE’ type] supplied with the system. -
Page 47: Specifications Of The Asynchronous Serial Communication Protocol
Instructions Manual SPECIFICATIONS OF THE ASYNCHRONOUS SERIAL COMMUNICATION PROTOCOL A bi-directional serial communication protocol called “New Protocol” is installed on the VES-MATIC EASY instrument (described in the following section). “NEW PROTOCOL” SPECIFICATIONS The speed of the transmission is 19200 bit/s; the data format is of the type with 8 data bits, 1 stop bit and no parity bit. - Page 48 >00020002FF+CR+33 [ENGAGED] 0x13-P: Request for sending of analysis As a response to this command, the VES-MATIC EASY instrument will send a 160-byte record containing the results of 5 tests. If parameter P is 0x00, the last 5 tests performed will be sent. If parameter P is 0x01, the 5 previous tests will be sent, and so on.
- Page 49 Instructions Manual From VES-MATIC EASY >00A00013[see description below-160 bytes]+CR+XX Each 32-byte field containing the results of a test includes the following sub-fields: E-C-PR-P-T-H-M-S-G-M-A-BC-F1-F2-H1-H2-KI-R1-R2-R3 (1 byte) Validates the content of the whole field, if its value is zero. If its value differs from zero, the remaining bytes in the field have no meaning.
- Page 50 Not used. IMPORTANT NOTE: VES-MATIC EASY responds to commands only when it is not in the engaged status. BEFORE SENDING THIS COMMAND, SEND COMMAND 0x02 TO MAKE SURE THAT THE VES-MATIC EASY INSTRUMENT IS IN THE CORRECT CONDITION TO RESPOND.
-
Page 51: Bibliography
Blutkor- perchensenkungsgeschwindigkeit (VES-MATIC): Einsatz im Krankenhaus. Berichte der OGKC 1988; 11:112-114. Vatlet M., Brasseur M., Poplier M. et al.: Evaluation of the DIESSE VES-MATIC for the Automated Determination of the Erythrocyte Sedimentation Rate (ESR). Belgian Hematological Society Meeting 1989, Abstract. -
Page 52: Attachment A: Ce Compliance Certificate
Instructions Manual Attachment A: CE COMPLIANCE CERTIFICATE The current EC Declaration of Conformity is available for the download from DIESSE’s website www.diesse.it Attachment B: GUIDELINES FOR THE INSTALLATION REPORT Installation report Sequence see Paragraph Preliminary checks 2.2. Unpacking of the instrument 2.3. -
Page 53: Attachment C: Quick Start Guide
Instructions Manual Attachment C: QUICK START GUIDE SUMMARIZED INSTRUCTIONS FOR VES-MATIC EASY OPERATION Excerpt from CHAPTER 4: Turn the system on (Section 4.1.). When the SELECT FUNCTION option is shown on the display, programme the system work cycle (Sections 4.2, 4.4): press ▼...
Need help?
Do you have a question about the VES-MATIC EASY and is the answer not in the manual?
Questions and answers