Cassese CS 88 Technical And User Manual

Cassese CS 88 Technical And User Manual

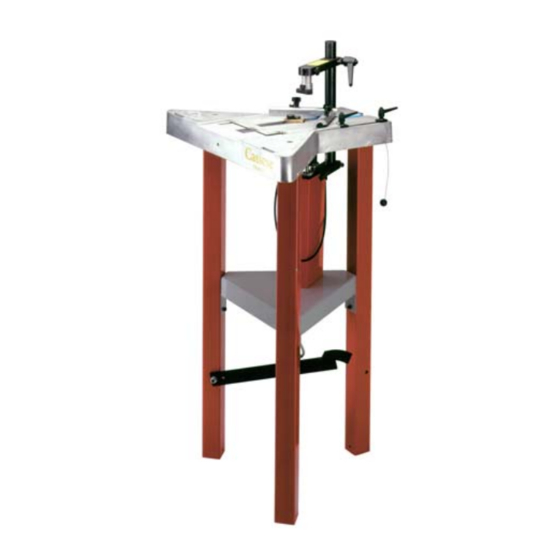
Foot-operated/pneumatic underpinners

Advertisement

U
NDERPINNERS
CS 88
CS 89
&
FOOT-OPERATED
PNEUMATIC
Technical and User Manual
Version 2 au 12 / 06
Cassese / Communication

Advertisement

Table of Contents
loading

Summary of Contents for Cassese CS 88

  • Page 1 NDERPINNERS CS 88 CS 89 & FOOT-OPERATED PNEUMATIC Technical and User Manual Version 2 au 12 / 06 Cassese / Communication...
  • Page 2 HW for very hard timbers. These hardwood wedges are to be used only on hardwoods. Your CS 88 - CS 89 is designed to use all sizes of Cassese cartridges without having to change any parts on the machine or having to adjust anything.
  • Page 3: Table Of Contents

    UNDERPINNING THE FRAME MAINTENANCE LUBRICATION CLEARING OF A WEDGE STUCK IN THE WEDGE DISTRIBUTOR IN CASE OF HAMMER AND WEDGE JAMMING CS 89 / SETTING THE LIMIT SCREW TROUBLE SHOOTING Cassese Communication CS 88 / CS 89 12 / 06...
  • Page 4: Introduction

    It will assemble wooden mouIdings of any profile (Pa- tent n’8800188). The CS 88 / CS89 is designed to permit operators to work in front of the machine or behind it. Assembly is by metal wedges designed specially to ensure perfect joining.
  • Page 5 PUTTING INTO OPERATION For safety during transportation, the moving parts of your CS 88 – 89 have been blocked : these are the Top Presser Bracket (or Plunger) / Sliding Table / Horizontal (rebate) Clamp. For the explanations given in this manual, the operator must be standing at the back of the machine, keeping the machine slightly in his left.
  • Page 6: Cs 89 Air Line Fittings

    CS 89 AIR LINE FITTINGS Advised way of fitting : STANDARD Male Connector on Machine Z 675 Z 675 quick release (Q/R) female air connector Z 749 Q/R US male Standard hose connector connector Z 701 Z 556 AIR SOURCE (compressor) The CS 89 is to be connected to the air source under its lower grey plate, at the level of air valve V.
  • Page 7: Use Of The 2 Self-Adjusting Backfences

    SELECTION OF STAPLING POSITIONS The CS 88 / 89 is designed to join mouldings in one or two places (positions) without limitation of the number of wedges in any of those places. The selection depends on the width and thick- ness of the moulding to join.
  • Page 8: Setting And Storing The Stapling Positions

    SETTING AND STORING THE STAPLING POSITIONS Release the stapling positioning stops, P1 and P2. SLIDING TABLE REFERENCE POSITION 1) UNDERPINNING WITH 2 STAPLING POINTS Position the first moulding against stop B1 and slide it up to stop B2. First stapling position: Outer side of the frame: Move the sliding table forwards and align the wedge outlet of the distributor D with...
  • Page 9 (chop service), the angles of the mouldings will be slightly different from one cutting machine to the other. The joining angle of your CS 88 / CS 89 can be adapted to find precisely the cutting angle of your cutting machine.
  • Page 10: Means Of Assembly

    These hardwood wedges are to be used only on hardwoods. Your CS 88 / CS 89 machine is designed to use all sizes of Cassese car- tridges without having to change any parts on the machine or having to adjust anything.
  • Page 11: Underpinning The Frame

    Move the sliding table forwards or backwards to stop P2 or P1 (page 5). Then: CS 88 Keeping the mouldings secure, slowly push down the pedal. When the rebate clamp comes into contact with the moulding, speed up the movement so that the wedge is inserted more easily.
  • Page 12: Lubrication

    MAINTENANCE 1) LUBRICATION Periodically, remove the wedge distributor (Fig 1, block H) and clean it (by air gun) without dis- mounting it. It is recommended to lubricate the hammer (driver blade) periodically. To do so, remove the wedge distributor (blockH) and put a small quantity of grease in the bottom hole of the wedge distributor.
  • Page 13: In Case Of Hammer And Wedge Jamming

    3) IN CASE OF HAMMER AND WEDGE JAMMING BLOCK H RULER locking screw SLIDING TABLE WEDGE DISTRIBUTOR (BLOCK H) fig 0 BLOCK H HAMMER BLOC H LOCKING SCREW HAMMER SCREW POSITIONS RETAINING SCREW Z1394 PROCEDURE - Remove the cartridge that is on machine, and the top presser. - Using the 3mm Allen key, loosen the locking screw of the wedge distributor Block H.
  • Page 14 CS 89 SETTING THE LIMIT SCREW WARNING! ONLY CARRY OUT THIS OPERATION IF IT IS RECOMMENDED IN THE TROUBLESHOOTING LIMIT DETECTOR REMEDIES AT THE END LIMIT SCREW OF THE MANUAL. 1) Take out the wedge cartridge. 2) Reduce the air pressure to 3 bars. 3) Set the plunger at less than 50 mm (2’’) from the table.
  • Page 15 TROUBLESHOOTING IF THE PROPOSED REMEDIES DO NOT SOLVE THE PROBLEM CONTACT THE AFTER-SALES SERVICE FAULT POSSIBLE CAUSES REMEDIES NO WEDGES ARE INSERTED - Fit a new wedge cartridge - The wedge cartridge is empty 88-89 INTO THE MOULDING - Clean it - The wedge distributor is clogged 88-89 - Check the condition of the spring...
  • Page 16 SUB-ASSEMBLY SOUS ENSEMBLE KOMPLETTE EINHEIT CONJUNTO Valable ˆ partir de la machnine Nû Valid from machine # V‡lido de la m‡quina Nû Gultig ab der mashine Nû 7927 + Nû 7909 A Nû 7919 + Nû 7909 to Nû7919 + Nû 7909 zu Nû7919...

This manual is also suitable for:

Cs 89

Table of Contents