
Related Manuals for E-Lux Tahoe


Summary of Contents for E-Lux Tahoe
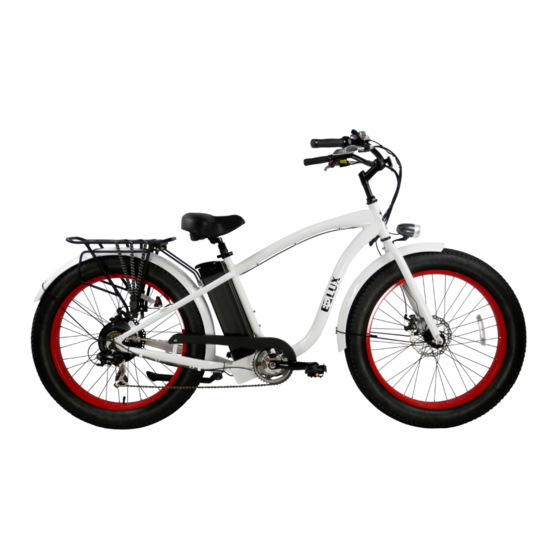
- Page 1 "Tahoe" E-Lux Fat Tire Electric Beach Cruiser Owner’s Manual 1760 Monrovia, Ste. A11 Costa Mesa, CA 92627 www.EluxBikes.com...
- Page 2 Thanks so much for purchasing your new E-Lux Fat Tire Electric Beach Cruiser and welcome to a world of new possibilities! With your new electric bike you will be able ride further, faster, and easier than ever before on a bicycle which equates to Fun, Fun, and more Fun! All while travelling for less than half a cent a mile it’s not only good for your...
-
Page 3: Table Of Contents
Gears ……………………………………………..….…..30 Tires ……………………………………………….…..32 Disconnecting Power to Rear Motor…………….…..32 Appearance and Care ….…………………………...….33 Commonly Asked Questions .…….………………..33 Technical Assistance .……………………….……..…..33 Important! Read Before Riding!………………….……34 One Year Limited Warranty ..……………………..…35 Recording Your E-Lux Bike Info .…………………..38 3 | P a g e ... -
Page 4: Carton Contents
Carton/Box Contents Caution – Please us care when opening box with sharp objects to avoid cutting any bicycle parts inside. After opening please check the box for the following content: 1. Bicycle frame with the following attached but not assembled: A. -
Page 5: Bicycle Parts Id Chart
Bicycle Parts ID Chart 5 | P a g e ... -
Page 6: Assembly
Assembly E-Lux suggests taking your electric bike to a professional bike technician for assembly. This can be done for a nominal fee at your local bike shop. If you are comfortable assembling it on your own then please refer to the directions below. - Page 7 4. Place bike upright on wheels and kickstand. 5. Apply a small amount of grease inside of the gooseneck tube as well as the threads and slider on stem of gooseneck. 6. Making sure that all wires and cables are facing front and not twisted; install handlebar into handlebar stem tightening the two bolts on handlebar stem using an allen wrench.
- Page 8 7. Pull the seat clamp handle out from the seat post to release pressure allowing you to remove the seat. Remove seat post and apply a small bit of grease inside seat tube. Then replace seat. 8| P a g e ...
- Page 9 8. Caution – When installing pedals there are two separate pedals for the left and right sides of the bike. They have different thread patterns and it is important to be sure each is installed on the correct side of the bike to avoid stripping the threads. The following procedure is performed so that when the bike is pedaled it tightens the pedals.
- Page 10 11. Left Pedal – Facing the bike from the kickstand side, place pedal Place remaining pedal on the kickstand side of bike and tighten by turning counter clockwise (top of wrench turning towards the front of bike as noted in the picture below.) Tighten pedal very tight. 12.
- Page 11 13. Spin front wheel to determine if disc is rubbing. A small amount of rubbing is OK but if it is slowing the wheel then an adjustment is needed. To adjust use two bolts on calipers to move in and out as needed. If you have issues then we suggest bringing bike to a local professional bike shop for brake adjustments.
- Page 12 Understanding the Display and Display Settings 1. To turn on be sure key in battery is turned on then press the power button on the display. 2. To turn on backlight for display press the power button a second time. 12| P a g e ...
- Page 13 3. The following pictures describe the data on the display: 13 | P a g e ...
- Page 14 IMPORTANT! – Holding the minus key down more than 5 seconds will put the bike into walk mode. The motor will turn on and the bike will move forward at 6 mph until you release the minus button or apply the brakes 5.
- Page 15 6. Briefly pressing the plus or minus key will cycle the pedal assist mode. For more on pedal assist modes please read the section called “Understanding the Power/Throttle Control” section of the manual. To quickly place the bike in throttle only mode cycle PAS mode to 0.
- Page 16 8. There are two indicators for power. One has black bars and indicates power being consumed/used. It will vary with terrain/load on the system. The other is a system power mode indicator. The indicator is a small check box next to eco, normal, or power. Directions for changing the mode are in the next section.
- Page 17 Set Mode 0 – Allows you to select system power mode using plus and minus keys. 11. Set Mode 1 – Allows you to reset the trip odometer by briefly pressing minus key. WARNING! Holding minus key for 5 seconds will put bike into walk mode and bike will begin moving at 6mph unless you are holding the brake lever.
- Page 18 12. Set Mode 2 – Indicates bike top speed. Set Mode 3 – Indicates wheel size 14. Set Mode 4 – Allows you to change the from MPH to KPH using plus and minus keys. 18| P a g e ...
- Page 19 15. Hold set button down for 5 seconds to return to operating mode. 16. In operating mode the volt indicator will display 54 volts when the battery is fully charged. At 42 volts you will be out of power. 17. To turn on headlight press the red button below the display. 19 | P a g e ...
-
Page 20: Battery Care And Charging
Battery Care and Charging Your E-Lux Bike comes with a 48 Volt 13 amp lithium battery and charger. Please be aware of the following: 1. Only use the charger provided with your battery. Using a different charger may result in overheating, fire, or an explosion damaging your battery and everything around it…... - Page 21 3. Battery may be charged while attached to bike or separately. The battery may be removed by turning the key to the unlocked position, pulling the handle up and lifting the battery. 21 | P a g e ...
- Page 22 4. To charge the battery plug the charger into the port located on the side of the battery and then plug the charger into the wall. 22| P a g e ...
- Page 23 5. Continue charging until the red light turns green indicating a full charge or the display show the battery is full. (Aprox. 4-6 hours.) 6. Then first remove the charger power plug from the wall followed by the battery side plug. 7.
-
Page 24: Battery Life
Under normal use your battery is designed to undergo 1000 charging and discharging cycles. After much use its charge holding capacity will decrease and eventually not hold enough charge even for shorter trips. At this point you should contact E-Lux Bikes or your dealer to order a new battery. - Page 25 Be sure the tires are at 20-30 psi and have no cracks or other excessive wear before riding. 3. Safe Location – your new E-Lux bike is a powerful machine. It is important to choose a safe area to familiarize yourself and become comfortable with all of its functions, features, and performance.
-
Page 26: Understand The Power/Throttle Control
5. Understand the Power/Throttle Control – Your Elux bike can be used in 3 modes. Pedal only, throttle only, and pedal assist. You can use the power button on the top left of the display to turn on and off the power to the bike. When the power is turned off the bike is in pedal only mode and operates as a standard bicycle. - Page 27 C. When PAS is set from 1 to 5 the bike is in pedal assist mode. Use the “+” and “-“ keys to adjust the PAS level. As you pedal the motor will assist you as you ride. E-Lux suggests starting at a lower setting of 1 – 3 until you are used to this feature.
-
Page 28: Stopping The Motor
6. Stopping the Motor A. The left and right brake levers have a built in feature that will stop the electric motor any time they are squeezed. B. In throttle only mode releasing the throttle will stop the motor as well. C. -
Page 29: Brakes
Brakes Your E-Lux Bike is equipped with front and rear disc brakes. Pulling the left brake lever in will apply brakes to the front wheel. Pulling the right lever in will apply brakes to the rear weel. 2. Be aware that using too much front brake force can cause the front tire to lock or slide. -
Page 30: Gears
Gears Your E-Lux bike is equipped with a 7 speed Shimano Gear System. The shifter is located on the right hand side of the handlebars. Lower gear numbers are used for climbing hills and slower speeds. Upper gears are used for flatter surfaces and faster speeds. Be sure you are pedaling while changing gears. - Page 31 When looking at the sprocket on the rear hub you will notice that when the shifter is in 1st position the chain is on the largest sprocket. When the shifter is in the 7th position the sprocket should be on the smallest sprocket. Occasionally the shifter gear number and sprocket locations may not match.
-
Page 32: Tires
Disconnecting Power to Rear Motor Your E-Lux Electric Bike has a powerful electric motor that is located in the rear hub of the bicycle. If removal of the rear tire is necessary you must first disconnect the power cable that runs to the hub. -
Page 33: Appearance And Care
5 cents a charge. What is the cost per mile to ride my E-Lux Bike? – Using the averages above it costs about a half a penny per mile! That works out to about 1200 MPG! All while reducing your carbon foot print every time you use your bike instead of your car.! -
Page 34: Important! Read Before Riding
2. Always wear a helmet. 3. E-Lux bikes are designed for one passenger only. Do not operate bicycle with more than one passanger on board. 4. Do not open the battey or battery charger. If you notice anything unusual while charging please unplug the charger and contact E-Lux. -
Page 35: One Year Limited Warranty
One Year Limited Warranty ELUX, LLC(“ELUX”) warrants that all new ELUX Electric Bikes (“Bikes”) and components therein are warranted to the original retail purchaser (“Purchaser”) against manufacturing defects in materials and/or workmanship for a period of one (1) year from the date of original retail purchase. Terms of Limited Warranty This warranty becomes effective on the date of original retail purchase. - Page 36 Exclusions: This warranty does not cover: • normal wear and tear; • damage or failure from abuse, neglect, misuse, or accident; • damage from stunt riding, ramp jumping, acrobatics, or similar activities or any activity • that is not consistent with the intended use of the Bicycle;...
- Page 37 Consumer Rights: This limited warranty gives the consumer specific legal rights. The consumer may also have other legal rights which vary from state to state or country to country. Some states and countries do not allow the exclusion or limitation of incidental or consequential damages or warranties, so some of the above limitations or exclusions may not apply to you.
-
Page 38: Recording Your E-Lux Bike Info
Model: E-Lux Fat Tire Electric Beach Cruiser Serial Number: ____________________________________ Color: ___________________________________________ Date of Purchase:__________________________________ Dealer’s Name:____________________________________ Dealer’s Phone:____________________________________ Dealer’s Email:____________________________________ 38| P a g e ... - Page 39 Notes: 39 | P a g e ...
- Page 40 Notes: 40| P a g e ...
Need help?
Do you have a question about the Tahoe and is the answer not in the manual?
Questions and answers
What size screw does the Tahoe take on the slide bar where the batter goes