
Subscribe to Our Youtube Channel
Related Manuals for Zte MF970


Summary of Contents for Zte MF970
-
Page 1: User Guide
MF970 User Guide ZTE CORPORATION NO. 55, Hi-tech Road South, Shenzhen, P.R.China Postcode: 518057... -
Page 2: Getting To Know Your Device
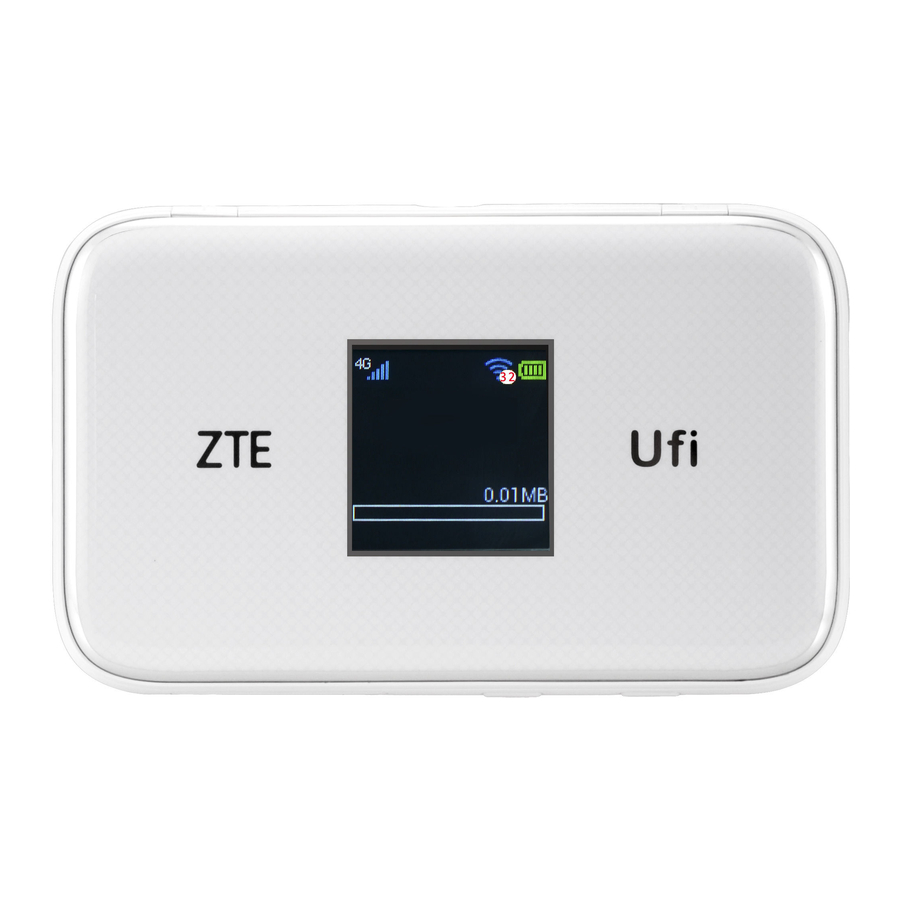
Getting to Know Your Device Appearance The following figure is for your reference only. Left Side Front Right Side 1. micro-SIM Card Slot Insert your micro-SIM Cover Reset card. Hole Restore your device to factory default settings. 2. FUNC Key Press the FUNC Key to access the options menu. - Page 3 Screen It indicates the signal type, signal strength, battery, Wi-Fi, etc. Charge your device. 5. Charging/micro-USB Connect the client to your Jack device via the USB cable. 6. External Antenna It is used to connect an Connector external antenna to enhance the signal strength.
-
Page 4: Installing The Micro-Sim Card
Connected to the Internet in the Internet Wi-Fi mode. New message (s) Wi-Fi status and the number of connected users Battery level Installing the micro-SIM Card 1. Open the micro-SIM card slot cover, and install a micro-SIM card to the micro-SIM card slot. NOTE: Do not remove the cover entirely, because it is connected with the device. -
Page 5: Charging Your Device
2. Close the micro-SIM card slot cover. Charging Your Device You can charge your device by using the USB cable or adapter. Use the USB cable to connect your device and PC directly. Use the adapter and USB cable to connect the wall outlet and your device. -
Page 6: Internet Access
NOTE: The plug only fits one way to connect your device. Do not use excessive force to insert the plug. Internet Access Connection Scenarios The device can access the Internet in two ways and it allows multiple clients to surf on the Internet at the same time. The following figures are for your reference only. -
Page 7: Connecting To Your Device
Internet Wi-Fi Mode: Your device can be connected to a WLAN device (such as a hotspot device or wireless router) through Wi-Fi to access the Internet. The WLAN device must be already connected to the Internet. NOTE: Your device and the WLAN device must be in different subnets. Connecting to Your Device Using Wi-Fi 1. -
Page 8: Using A Usb Cable
3. Select the Wi-Fi name (SSID) of your device, and click Connect. 4. Enter the Wi-Fi password if necessary, and click OK. NOTE: Refer to the chapter Getting to Know the Wi-Fi SSID and Password to get the default Wi-Fi SSID and password. 5. -
Page 9: Using The Wps(Optional)
3. Wait until the computer is connected to your device successfully. Using the WPS(Optional) If your client device supports WPS, you don’t have to input the password manually after WPS has been available. Please do the following steps: 1. Power on your device, and enable the Wi-Fi function on your device. - Page 10 2. Launch the Internet browser and enter http://192.168.0.1 or http://rogers.rockethub in the address bar. 3. Enter the password to log in to the ZTE Mobile Hotspot configuration page. The login page appears as follows. The following figure is only for your reference.
- Page 11 NOTE: The default password is admin. Changing Wi-Fi SSID Password 1. Log in to the ZTE Mobile Hotspot configuration page. 2. Select Wi-Fi Settings > Main SSID. 3. Change the Network Name (SSID) or the Password in the Main SSID area. 4. Click Apply.
-
Page 12: Accessing The Internet
3. Click to back to the home page, and click You can also press the FUNC Key and select Data Connection. Select Yes or NOTE: To modify the parameters of your device, log in to the ZTE Mobile Hotspot configuration page. - Page 13 Accessing the Internet Internet Wi-Fi Mode 1. Log in to the ZTE Mobile Hotspot configuration page. 2. Select Wi-Fi Settings > Internet Wi-Fi. 3. Set the Internet Wi-Fi Switch to Enable, and click Apply. Then set the Preferred Network to Wi-Fi, and click Apply.
- Page 14 After the client device is connected to the Wi-Fi hotspot successfully, you can access the Internet. ZTE Mobile Hotspot Configuration Page screen When you log in, the following interface appears.
- Page 15 1. Status Check the status of the current connection. 2. Current network panel Check status of mobile network connection, connected devices, upload and download data speed, or change related settings. 3. Statistic Check your approximate cumulative data usage, and left statistic. 4.
-
Page 16: Connection Mode
Connection Settings View Click Settings on My router. Connection mode Select Connection Mode. The connection mode information is shown in the following figure. Automatic: The device will automatically connect to network when it is powered on. Manual: The device will connect to network manually. Network selection Select Network Selection. - Page 17 Automatic: The device will search available network automatically. Manual: The device will search available network manually. 1. Select APN. 2. Select Manual. You can set the Access Point Name (APN) in the following figure.
- Page 18 Mode: If a fixed APN is provided by your service provider, select Manual APN. Otherwise, please select Auto APN, and the device will automatically obtain parameters. Profile: It contains one or more profile names. PDP Type: IPv4/IPv6/IPv4&IPv6. ...
- Page 19 Wi-Fi Settings You can set up wireless hotspot so that your mobile phone or laptop could access network via it. Click Wi-Fi Settings on My router. Main SSID Select Main SSID. Multi SSID: 2 SSID can be used at the same time. ...
- Page 20 (!#()+-./%=?@^_{|}~) and space, and it cant start and end with space. Broadcast Network Name(SSID): If enable this function, the device will broadcast SSID. Other wireless devices will discover and connect to this device. Security Mode: OPEN: Unencrypted mode. There are risks that network will be used by unauthorized individuals.
- Page 21 Select WPS. WPS (Wi-Fi Protected Setup) is a standard that allows users to set up a wireless network in an easy and secure way without specific configuration, such as: SSID, security mode and password.
- Page 22 PIN: You need to enter the PIN that is generated by the access client. PBC: You can select the PBC (Push Button Configuration) on the web page to enable WPS function. Internet Wi-Fi Select Internet Wi-Fi.
-
Page 23: Advance Settings
Refer to the chapter Internet Wi-Fi Mode. Advance Settings Select Advance Settings. Band Selection: You can select the suitable band for your device. - Page 24 Network Mode: Select the suitable Wi-Fi network mode, the device Wi-Fi performance will be improved. Channel Bandwidth: Select the channel bandwidth for your device. Country/Region Code: You can select the suitable Country/Region Code for your device. Frequency (Channel): Select appropriate channel to optimize the performance and coverage of your wireless network.
- Page 25 Status Information View Click next to Detail Information to check detail information about your device. SMS View Click . The SMS is shown in the following figure. The received message can be read from the Device SMS or SIM SMS in the main SMS window. You can send and receive SMS text messages straight from your computer.
- Page 26 messages, write new ones, and manage contact details. Phonebook View Click . The phonebook is shown in the following figure. You can save your contacts in Device or SIM card. Up to 350 contacts can be saved on your device. Number of contacts that can be saved on the SIM card depends on the SIM card’s capacity to save contacts.
-
Page 27: Advanced View
Advanced View Power-save Click > Power-save. The power-save will appear as shown below. Wi-Fi Coverage Short Wi-Fi Coverage: Coverage and launch small power consumption, it is the best battery life. Medium Wi-Fi Coverage: Coverage and emission power consumption is half of equipment support ability, normal power consume. - Page 28 coverage, if the terminal device still connect to your Wi-Fi network, which will decrease battery life. Wi-Fi Sleep Sleep after: When there's no Wi-Fi connection in specific time, Wi-Fi will be unavailable, and the system will turn to sleep mode for power-saving.
- Page 29 Protocol (DHCP) service is enabled, the device allocates IP addresses to clients connected to it. DHCP Server Disable: If the Dynamic Host Configuration Protocol (DHCP) service is disabled, the device does not allocate IP addresses to clients connected to it and IP addresses must be entered manually from each client.
- Page 30 Port Filtering Filtering Select Port . You can set firewall policies to protect your network from viruses, worms and malicious activities on the Internet. If you select MAC/IP/Port Filtering to Enable, the filter settings will appear as shown below: Default Policy: Set how to handle the packet if none of the rules matches.
- Page 31 provided by LAN. UpnP Select UpnP. Universal Plug and Play (UPnP) is a set of networking protocols that allows networked devices to seamlessly discover each other's presence on the network and establish functional network services for data sharing, communications, and entertainment. If you want access the services such as ftp and http which installed on the local PC from internet, you need put the PC's IP address to the DMZ address.
- Page 32 Update Click > Update. The update will appear as shown below. You can check for new version, enable or disable Auto-check for New Version function, or set Auto-check Frequency. Others Click > Others.
- Page 33 Restart and Reset Restart your device or reset it to factory settings. SIM PIN Management If the PIN code of your SIM card is enabled, you will need to input the PIN code when you log in at the first time. NOTE: The SIM card will be locked if you enter wrong PIN code...
- Page 34 Press the FUNC Key to access the options menu. You can connect or disconnect with the Internet, view device information or Wi-Fi QR code, activate WPS function, change language or enable/disable global roaming without logging in to the ZTE Mobile Hotspot Configuration Page.
-
Page 35: Configuring Your Pc
Configuring Your PC The following describes how to configure the Internet Protocol in the Windows 7 operating system for your Wi-Fi connection. 1. Right-click Network and select Properties. 2. Select Change adapter settings. 3. Right-click Wireless Network Connection and select Properties. - Page 36 • Be aware of the usage limitation when using the device at places such as oil warehouses or chemical factories, where there are explosive gases or explosive products being processed. Power off the device if necessary. • Do not use electronic transmission devices in aircrafts, at petrol stations or in hospitals.
-
Page 37: Using Battery
5% and 95% are recommended. Using Battery Do not change the built-in rechargeable battery in your device by yourself. The battery can only be changed by ZTE or ZTE authorized service provider. Limited Warranty This warranty does not apply to defects or errors in the product caused by: Reasonable abrasion. -
Page 38: Limitation Of Liability
Limitation of Liability ZTE shall not be liable for any loss of profits or indirect, special, incidental or consequential damages resulting from or arising out of or in connection with using of this product, no matter... -
Page 39: Rf Exposure Information (Sar)
guarantee that interference will not occur in a particular installation If this equipment does cause harmful interference to radio or television reception, which can be determined by turning the equipment off and on, the user is encouraged to try to correct the interference by one or more of the following measures: -Reorient or relocate the receiving antenna. - Page 40 Grant section www.fcc.gov/oet/ea/fccid after searching on FCC ID: SRQ-MF970. For this device, the highest reported SAR value for usage near the body is 1.44 W/kg. While there may be differences between the SAR levels of various devices and at various positions, they all meet the government requirement.
-
Page 41: Ic Radiation Exposure Statement
This Class B digital apparatus complies with Canadian ICES-003. Cet appareil numérique de la classe B est conforme à la norme NMB-003 du Canada. IC: 5200E-MF970 IC Radiation Exposure Statement This compliance with... -
Page 42: Legal Information
ZTE Corporation. The manual is published by ZTE Corporation. We reserve the right to make modifications on print errors or update specifications without prior notice. -
Page 43: Troubleshooting
Troubleshooting Problem Recommended Action Install the software, and run the connection installation program in the path of My between your Computer. device and a If the driver of your device is PC through a abnormal, reinstall the software. You cable need to uninstall the software first. - Page 44 Troubleshooting Problem Recommended Action client Ensure that your micro-SIM card is connected to available. device Change the location and find a place cannot access with good signal. the Internet. Check the settings of the WAN connection mode. ...
-
Page 45: Getting More Help
Getting More Help You can get help by: • Sending an email to mobile@zte.com.cn • Visiting www.ztedevice.com • Calling the service hotline: +86-755-26779999...
Need help?
Do you have a question about the MF970 and is the answer not in the manual?
Questions and answers