Table of Contents
Advertisement
Advertisement
Table of Contents

Subscribe to Our Youtube Channel
Related Manuals for MAGINON View 360


Summary of Contents for MAGINON View 360
- Page 1 User Manual 360° PANORAMA CAMERA VIEW 360 ID: #05007...
-
Page 2: Table Of Contents
Contents Overview ................. 3 Device parts ..............4 Package content/device parts ........5 Preface ................9 General ................10 Correct use ..............12 Safety ................13 Getting Started ..............18 Trouble-shooting ............30 Technical specifications ..........32 Potential legal infringements........33 Simplified EU conformity declaration ......34 Storage ................ -
Page 5: Package Content/Device Parts
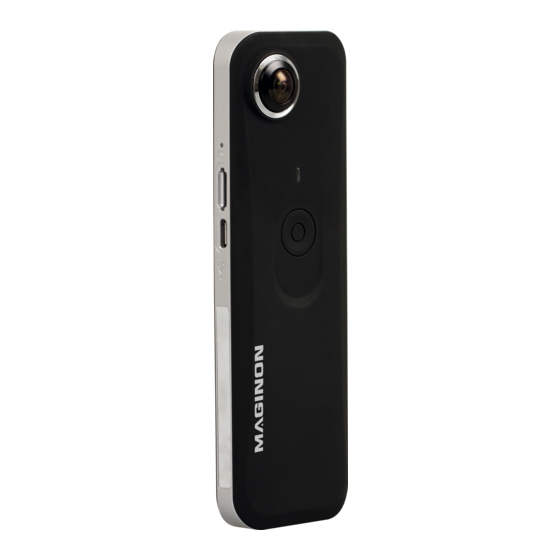
Package content/device parts Maginon 360°Panorama camera 8 GB micro SD memory card with SD card adapter Micro USB charge cable USB power supply Table tripod Ventilation Lens WiFi LED WiFi button Photo mode LED Photo mode button Video mode LED... - Page 6 Charging the internal battery ..........21 Reset ..................21 WiFi reset ................21 Using the Maginon View 360 App ........22 Installation of the Maginon View 360 app ......22 Live streaming settings for Facebook ......23 Camera settings ..............24 Live streaming settings for YouTube .........27 Camera settings ..............
- Page 7 Contents Technical specifications ........... 32 Potential legal infringements ......... 33 Copyright ................33 Simplified EU conformity declaration ......34 Storage ................35 Cleaning ................35 Disposal ................36 Disposal of packaging ............36 Disposal of used devices ............. 36 Removing the battery for disposal ........38...
-
Page 8: Preface
Preface Preface Dear customer, Congratulations on purchasing a high-quality MAGINON product. You have chosen a modern 360° panorama camera with excellent technical equipment and the relevant accessories, which is particularly easy to operate. The 360° panorama camera comes with a 3 year warranty. -
Page 9: General
General General Read and retain these instructions These operating instructions are for the 360° panorama camera (referred to below only as “panorama camera”). They contain important information about start-up and how to operate the camera. Read these operating instructions, and in particular the safety information, carefully before using the panorama camera. - Page 10 General WARNING! This symbol/word indicates a mid-level hazard which, if not avoided, may cause death or serious injury. CAUTION! This symbol/word indicates a low-level hazard which, if not avoided, may result in minor or moderate levels of injury. NOTE! This signal word warns against potential material damage. This symbol provides useful additional information regarding assembly or operation.
-
Page 11: Correct Use
Correct use Products marked with this sign are powered by direct current. The adapter delivered with the 360° panorama camera is classified as level VI under the US efficiency standard. Correct use The panorama camera is designed only as a panorama camera. -
Page 12: Safety
Safety Safety Safety information WARNING! Danger of injury! In order to prevent injuries, this camera must be securely attached to the floor/wall as outlined in the installation instructions. WARNING! Danger of electrocution! Faulty electrical installation or excessive mains voltage may cause electrocution. - Page 13 Safety − The panorama camera may not be operated with an external timer or separate remote control system. − Never immerse the panorama camera or USB cable or plug in water or other fluids. Do not place objects filled with liquid, such as vases, on the device while it is connected to a mains adapter.
- Page 14 Safety − Ensure that children do not push objects into the panorama camera. − Please restart camera in case of product failure due to static discharges or fluctuations in power. WARNING! Danger of explosion The battery must not be exposed to excessive heat, such as extreme sunshine, fire or similar, as there is a danger of explosion.
- Page 15 Safety − Disposal of the battery: Old or discharged batteries must be disposed of or recycled correctly in accordance with all applicable laws. Detailed information is available from your municipal waste disposal department. − Never touch leaking batteries without the proper protection.
- Page 16 Safety − Keep packaging foil away from children. It may pose a choking hazard. NOTE! Danger of material damage! Incorrect use of the panorama camera may result in damage to the camera. − Do not leave the panorama camera unattended during operation.
-
Page 17: Getting Started
Getting Started Getting Started Contents of packaging WARNING! Danger of suffocation! Packaging material is not a toy. Keep plastic foil and packaging away from babies and small children as they may pose a choking hazard. − Dispose of packaging material immediately to eliminate the risk of harm to babies and small children. -
Page 18: Charging
Getting Started Charging The panorama camera can be charged with an alternating current adapter or a power bank over a USB cable. A charge voltage/current of at least 5V/1A is recommended. The power LED lights up red during charging by means of a USB cable. -
Page 19: Recording A Video
Now go to the WiFi settings on your smartphone and connect the smartphone with the camera’s WiFi (SSID: Maginon View 360). The WiFi password for connecting the camera is “87654321”. The WiFi LED slowly flashes blue after successful connection of the camera. -
Page 20: Charging The Internal Battery
Getting Started Charging the internal battery The power LED lights up red when the panorama camera is connected to a USB charging device. The red LED goes out when the battery is fully charged. You can charge the panorama camera by using a USB power supply unit, a USB connection on your computer or with a power bank. -
Page 21: Using The Maginon View 360 App
Installation of the Maginon View 360 app 1. Download the Maginon View 360 app in accordance with the instructions for your mobile device. 2. Open the Maginon View 360 app and connect your mobile device to the panorama camera’s WiFi. •... -
Page 22: Live Streaming Settings For Facebook
Getting Started Live streaming settings for Facebook 1. Install the Maginon View 360 app on your mobile device. 2. Connect your mobile device to an available WiFi network or your mobile Internet. 3. Open the Maginon View 360 app, allow connection to the network selected earlier by tapping “OK”, and tap on the... -
Page 23: Camera Settings
1. Switch the panorama camera on and then activate the camera’s WiFi. 2. This will connect your mobile device to the panorama camera’s WiFi (SSID “Maginon View 360”). Open the app again and confirm the connection to the panorama camera’s WiFi. Tap on the broadcast symbol Select the platform option “Use last setting”... - Page 24 Getting Started you are transmitting. To stop, press the “Stop broadcast” button. To start again, click on “Setup” in the upper right- hand corner and delete the last broadcast. If the live transmission has finished, press STOP in the app, to end the transmission and then switch the panorama camera off.
- Page 25 Getting Started...
-
Page 26: Live Streaming Settings For Youtube
1. Install the Maginon View 360 app on your mobile device. 2. Connect your mobile device to an available WiFi network or mobile Internet. 3. Open the Maginon View 360 app, tap on the “New stream” upper left-hand corner and select “Stream button in the to YouTube”. -
Page 27: Camera Settings
1. Switch the panorama camera on and then activate the camera’s WiFi. 2. This will connect your mobile device to the panorama camera’s WiFi (SSID “Maginon View 360”). Open the app again and confirm the connection to the panorama camera’s WiFi. Tap on the transmission symbol on the front. - Page 28 Getting Started...
-
Page 29: Trouble-Shooting
Trouble-shooting Mounting the camera and holder Secure the panorama camera to the table tripod by turning the camera with the tripod socket in a clockwise direction on the screw of the pedestal. Take care not to over-turn the socket! To release the panorama camera, turn it in an anti-clockwise direction from the screw. - Page 30 Trouble-shooting A USB connection to the PC cannot be established: Please turn the camera’s WiFi off. No photos or videos can be recorded: Check that a memory card has been inserted into the camera, or replace the memory card. Recorded videos are not running smoothly: Use a memory card with Class 10 speed.
-
Page 31: Technical Specifications
Technical specifications Technical specifications Model: Maginon View 360 Type of camera: Full-spectrum camera Sensor: 2 x 2 MP CMOS sensor Photo resolution: 8 MP (4,000 x 2,000 | interpolated), 5 MP (3,200 x 1,600 | interpolated), 3 MP (2,592 x 1,296) -
Page 32: Potential Legal Infringements
Potential legal infringements Power supply: Model: 4ACT-UB Manufacturer: Lucent trans Input voltage: AC 100 ~ 240 V, 50 / 60 Hz, 0.2 A max Output voltage: 5 V Dimensions: 137 x 45 x 14 mm Weight: 83 g Design und technical specification are subject to change. -
Page 33: Simplified Eu Conformity Declaration
Simplified EU conformity declaration Simplified EU conformity declaration Hereby, supra Foto-Elektronik-Vertriebs-GmbH declares that the radio equipment type Maginon Panorama camera View 360 is in compliance with: Directive 2014/53/EU (RED Guideline) Directive 2011/65/EC (RoHs Guideline) The full text of the EU declaration of conformity is available at the following internet address: http://www.maginon.com/website/service/downloads/... -
Page 34: Storage
Storage Storage When the panorama camera is not in use, please disconnect the camera from the power supply and store it in a clean and dry place out of the reach of children. Cleaning WARNING! Burn hazard! The panorama camera becomes hot during operation! −... -
Page 35: Disposal
Disposal − Never place the panorama camera in a dishwasher. Doing so would destroy it. 1. Disconnect the mains supply prior to cleaning. 2. Let the camera cool down completely. 3. Wipe the camera with a slightly damp cloth. Let the camera cool down and then dry it thoroughly. - Page 36 Disposal Batteries and power packs may not be disposed of in domestic waste! As a consumer, you are legally obliged to correctly dispose of all batteries and power packs irrespective of whether they contain contaminants or not, at a collection point of your municipality/council or in shops, in order to ensure an environmentally friendly disposal.
-
Page 37: Removing The Battery For Disposal
Disposal Removing the battery for disposal Loosen the two cross screws on the underside the panorama camera. Now insert a screwdriver between the black housing and the silver frame and start to lever up the housing from the underside of the camera. The covering is secured by several clips on the frame. - Page 38 ALDI STORES LTD. PO BOX 26, ATHERSTONE WARWICKSHIRE, CV9 2SH ALDI STORES (IRELAND) LTD. PO BOX 726, NAAS, CO. KILDARE. Visit us at www.aldi.com AFTER SALES SUPPORT 85655 00 800 - 78 77 23 68 maginon@protel-service.com YEAR MODEL: WARRANTY View 360 08/2018...
Need help?
Do you have a question about the View 360 and is the answer not in the manual?
Questions and answers