Table of Contents
Advertisement
Congratulations on purchasing a high quality MAGINON® product.
You have acquired a modern digital camera with excellent technical features andrespective accessories, which is
particularly easy to operate. Please study this information in detail observing, in particular, the safety instructions.
The camera comes with a 3-year warranty. You will need the enclosed warranty card
and your sales receipt in the event of the camera developing a fault.
Keep these in a safe place together with the Instruction Manual.
Please include the Instruction Manual when passing on the camera to a third party.
1. Contents of box
Carefully unpack the camera and check that all of the following components are contained
in the box:
1.
MAGINON® SZ 24
2.
4 GB SDHC memory card
3.
Lithium-Ion battery
4.
USB charger
5.
Pouch
6.
USB / video cable
7.
Software CD ROM
8.
Instruction Manual
9.
Warranty documents
Note:
• Remove protective foil from camera display by pulling at the protruding tabs.
• Caution! Keep plastic foil and bags away from babies and small children, as there is danger of suffocation.
Dear customer,
1
Advertisement
Table of Contents

Related Manuals for MAGINON SZ 24


Summary of Contents for MAGINON SZ 24
-
Page 1: Introduction And Contents Of Box
Dear customer, Congratulations on purchasing a high quality MAGINON® product. You have acquired a modern digital camera with excellent technical features andrespective accessories, which is particularly easy to operate. Please study this information in detail observing, in particular, the safety instructions. -
Page 2: Table Of Contents
2. Contents 1. INTRODUCTION AND CONTENTS OF BOX 2. CONTENTS 3. HAZARD, SAFETY AND WARNING NOTICES 4. YOUR CAMERA Front view of camera Rear view of camera Monitor display Photo mode Video mode / voice recording Playback mode - photo Playback mode- video recordings / voice recordings 5. - Page 3 7.1. Function menu Setting the image size Setting the video size Setting the flash Self-timer Optimising brightness (D-Lighting) Silent mode 7.2. Recording menu Focus settings Focus frame AF range AF light Face recognition Sequence Stabilisator Reassigning buttons (L/R index) Grid Symbol help Memory 7.3.
- Page 4 9.2. Playback of photos 9.3. Playback menu Slideshow Menu settings Rotating DPOF settings Deletion protection Changing image size Cropping photos Recording voice memos Copying Delete images BASIC SETTINGS CONNECTION TO COMPUTER AND TV Download files Connecting to a TV Installation of software TECHNICAL SPECIFICATIONS MAXIMUM NUMBER OF PHOTOS Maximum number of stored photos...
-
Page 5: Hazard, Safety And Warning Notices
3. Hazard, safety and warning notices Incorrect use of the camera and accessories can be dangerous for you and others and can damage or destroy the camera. We therefore ask you to read and strictly observe the follow- ing Hazard, safety and warning notices. Intended use „... - Page 6 „ Risk of explosion in case of incorrect changing of battery or use of wrong type of battery. Always check correct polarity when inserting the battery. Only use MAGINON Lithium-Ion battery NP45, 3.7 V / 700 mAh, VG0376122700003 (battery name DS-5370) or a Lithium-Ion battery with the same specification.
- Page 7 Injuries and material damage „ Only place camcorder on sturdy surfaces. The camcorder could otherwise fall or topple over, causing damage or injury. „ Do not operate camcorder whilst running or driving. You could fall or cause a traffic accident. „...
-
Page 8: Your Camera
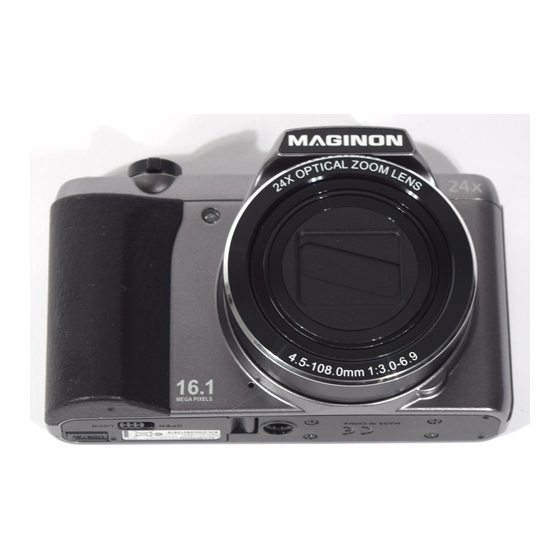
4. Your camera Front view of camera 1. Mode Wheel 2. Zoom button 3. Shutter release 4. Self-timer LED 5. (ON/OFF) button 6. Flash 7. Open Flash 8. Strap holder 9. Lens 10. Microphone Rear view of camera A. LCD display B. - Page 9 Right Left [ SET ] Confirm Down Selection The buttons of the control pad can also be used to move through the menu. SET is then used to confirm the selection. Function Element Button Photo mode Video mode Playback mode Shutter release Change to photo mode Zoom out...
-
Page 10: Monitor Display
Monitor display Photo mode 1. Number of available photos 2. Maximum duration of video recording 3. Recording mode Autom. mode Intelligent scene Voice recording 4. White balance Automatic Daylight 8. Image quality of photo Overcast Fine Shade Normal Neon_1 9. Video resoluton Neon_2 1.280 x 720 Light bulb... - Page 11 14. ISO setting 20. Battery charge level Auto Fully charged ISO 64 Half empty ISO 100 Nearly empty ISO 200 Empty ISO 400 21. [ ] Face recognition ISO 800 22. [ ] Stabilizer display ISO 1600 23. Focus setting 15.
-
Page 12: Video Mode / Voice Recording
Video mode / voice recording 1. Recording mode 2. Remaining recording time 3. Recording length 4. Exposure value 5. Battery charge 6. Video symbol Playback mode - photo 1. Playback mode photo 2. Deletion protection 3. Folder name/file name 4. Image quality 5. -
Page 13: Playback Mode- Video Recordings / Voice Recordings
Playback mode- video recordings / voice recordings 1. Playback mode video 2. Folder name/file name 3. Recording time 4. Video resolution 5. Date/time 6. Key description video playback 7. Battery charge... -
Page 14: Start
5. Start Preparation 1. Where applicable, remove protective foil from monitor by pulling at protruding edge. Secure carrying strap. The supplied carrying strap is secured to the respective fixing on the side of the camera. First push the short loop of the strap through the eyelet and then the strap itself. - Page 15 4. The memory card (SD/SDHC/SDXC card) is inserted in the small compartment next to the battery. Slide memory card with the gold contacts first and with the printed side facing the lens into the card compartment until it snaps in. „ Format memory card in camera before using it for first time with the camera (see page 20, Formatting the memory card).
-
Page 16: Charging The Battery
Charging the battery The battery is not fully charged in the new camera. Fully charge camera and use it for the first time until fully discharged in order to optimize its capacity and service life. 1. Switch off camera 2. Connect camera with USB cable to USB mains adapter. -
Page 17: Initial Settings
Note: • The supplied power supply differs from one region to the next, depending where it is purchased. • T he duration of charging depends on the ambient temperature and the remaining charging level of the battery. An empty battery is charged in about 3-4 hours. • The supplied Lithium-Ion battery comes with a 6-month warranty. Initial settings Language, date and time must be reset in the following situations: „ When the camera is switched on for the first time. „ W hen the camera is switched on again after it has not been supplied with battery power for a certain time. -
Page 18: Setting Date And Time
Setting date and time Follow the below steps to set the date and time. 1. In Photo or Playback mode press the SET button. 2. Use the / buttons to select MENU and select SET. 3. Use the / buttons in the menu to select the Setup menu. Now determine the order in which the day, month and year are displayed in the date. -
Page 19: Language Selection
Language selection Select the language in which menus and messages will be displayed on the LCD display. 1. In Photo or Playback mode press SET button. 2. Use the / buttons to select MENU and select SET. 3. Use the / buttons in the menu to select the Setup menu. 4. -
Page 20: Formatting A Memory Card
Formatting a memory card This function formats the memory card and deletes all images contained thereon. Note: • C aution: Formatting irretrievably deletes all photos and films on the memory card – even photos that are protected against deletion (see page 42). Prior to formatting, all important data should therefore be backed up to a computer. • Write protected memory cards can not be formatted. -
Page 21: Photo Mode
6. Photo mode Taking photos The camera features a 3" colour LCD-TFT display, allowing the set-up of photos, playback of recorded photos/video clips or changing of menu settings. 1. Press ON/OFF button to switch on camera. 2. Ensure that the recording mode [ ] is activated. -
Page 22: Setting The Recording Mode
Setting the recording mode Select one of the available photo modes to take a photo with the most suitable settings. Using the mode wheel select the desired photo mode. The following settings are available: ] Voice recording: Use this mode for recording voice messages. - Page 23 Scene mode Description Portrait Select this mode if you want to take a photo of a person against a blurred background. Select this mode if you want to take a photo with infinity focus, high in sharpness and Scenery saturation. Select this mode if you want to take a photo of a person in front of a motive.
- Page 24 Scene mode Description Night portrait Use this mode for taking night motives. This function is used for taking photos of food items. The increased saturation in this Food mode makes the image more appealing. Use this mode for taking photos consisting of black and white parts, e.g. a printed Text document.
-
Page 25: Using Artistic Effects
Using artistic effects The “ART“ setting offers you the option of using various artistic effects for your photos. Stylish: Allows taking of particularly stylish photos. Soft focus: A reduction in contrast produces photos with a soft tone. Soft light: In this mode, the contrast is reduced whilst the entire image is brightened. -
Page 26: Voice Recording
Fisheye lens: So-called fish-eye lenses distort photos to such an extent that a strong curva- ture always appears at the edge of a photo. The result is a drum effect for the images. 1. In photo mode turn the wheel to [ 2. -
Page 27: Photo Settings
7. Photo settings The control buttons to the right of the colour display allow a quick control and setting of the individual functions. The function is described in section 4, page 9. Extended settings for the camera are available from the menu. This is divided into two areas, the function menu and the basic settings. -
Page 28: Setting The Video Size
Setting the video size Select the desired vide size. The resolutions 1280x720 and 640x480 pixels are available. „ 720p: 1.280 x 720 „ VGA: 640 x 480 Setting the flash The camera offers different flash settings to best adapt the camera to any light situation. The respective setting is always shown on the display. -
Page 29: Self-Timer
Self-timer The camera offers various self-timer options to ensure that you can always be part of a photo. ] 10 sec.: The camera takes a photo 10 seconds after the shutter release has been pressed. ] 2 sec.: The camera takes a photo 2 seconds after the shutter release has been pressed. -
Page 30: Recording Menu
7.2. Recording menu Additional recording functions can be selected from the Recording menu, such as face recognition, change of focal range or different display views. Proceed as follows to change the settings in the recording menu: 1. In the Recording mode press the SET button to select the Function menu and then use the ... -
Page 31: Focus Settings
Focus settings In many situations the camera can automatically select the required focus setting. For close- ups or remote scenes and photos of persons, the focussing (focus) can also be adapted to the special subject matter. Apart from Auto focus, the respective setting is shown in the display. -
Page 32: Af Range
AF area The menu option “AF area” is used to determine on which area the camera focuses. ] Spot: A very small point at the centre of the image is measured. ] Multi: The camera selects the best Auto focus range from 9 possible areas. The range on which the focussing is based is shown in green. -
Page 33: Stabilisator
Stabilizer In order to reduce the likelihood of taking blurred photos due to moving motives or shaking hands when taking moving motives using the zoom function, fast moving motives or pho- tos in low-light conditions, select the stabiliser option of the camera. This digital camera comes with a Shake-Correction function using the CCD shift method combating camera movement and a highly sensitive focus correction. -
Page 34: Quality Menu
7.3. Quality menu Using the Quality menu options for your photos can be set that directly affect Image quality. This includes the resolution at which images are saved, colours, ISO values or White balance. The settings in the Quality menu are selected as described in section 7.2 on page 30. -
Page 35: Iso Value
] Shade: For photos taken in the shade of trees or buildings. ] Neon_1: For internal photos under blue Neon light. ] Neon_2: For internal photos under red Neon light. ] Tungsten: For internal photos in dim light conditions. ] Custom: This option allows manual setting of the white balance. To manually select White balance, proceed as follows: 1. -
Page 36: Video Mode
8. Video mode Recording video clips Using this mode you can record short video clips with a resolution of 1.280 x 720 or 640 x 480 with sound. 1. Press the ON/OFF button to switch on camera. 2. Align the image. 3. -
Page 37: Playback Mode
9. Playback mode The Playback mode allows photos and video recordings to be viewed directly on the camera and allows partial editing. 1. To activate the Playback mode press the button 7. „ The last photo is shown on the display. 2. -
Page 38: Playback Of Video Clips
9.1. Playback of video clips Any recorded video clips can be viewed immediately on the camera. The recorded sound is also played back through the integrated loudspeaker. 1. Select the desired video clip using the / buttons. 2. Press the button to start playback. -
Page 39: Playback Of Photos
9.2. Playback of photos At all times, recorded photos can be directly viewed on the LCD display, provided with addi- tional information, edited or deleted. 1. Use the / buttons to select the desired photo. 2. Photos can be viewed in forward or reverse order using the / buttons. „ Press the ... -
Page 40: Slideshow
Slideshow After selecting “Slideshow” from the Options menu and confirming the selection by pressing the SET button, the Settings menu for the slideshow appears. The menu offers the following options: Start: Starts slideshow. Time: Determines how long the slideshow is going to be, i.e. 1, 2, 3, 4, 5, 10, 15, 30 or 60 minutes. -
Page 41: Rotating
Rotating Once an image has been selected, select “Rotate” function and rotate image anticlockwise in 90 degree increments by confirming “Rotate”. Only the displayed image is rotated whilst the original image remains unchanged. „ Protected or zoomed images can not be rotated. „ To leave the function select “Cancel”. -
Page 42: Deletion Protection
Deletion protection Protect images to ensure that they are not accidentally deleted. 1. Select “Protect” function from the menu. 2. 3 options are available: „ O n: Select this option to select single images to be protected using the / but- tons. -
Page 43: Cropping Photos
Cropping photos Using the cropping function, images can be cropped to a different size. This function is only available for photos. 1. Using the / buttons, select the image to be cropped. 2. In the Playback menu select the option “Crop”. The Cropping window then appears in the display. -
Page 44: Copying
Copying Files can be copied from the internal memory of the camera to the memory card and from the memory card to the internal memory. „ C opy to Card: Copies all files from the internal memory to the inserted memory card. -
Page 45: Basic Settings
10. Basic settings The Settings menu allows changes to be made to the basic settings of the camera. 1. In the Recording or Playback mode press the SET button. 2. Use / buttons to change to MENU at the end of the menu and press SET. - Page 46 · Sounds Determine the sounds to be played for certain operations. „ Start sound / Half shutter release / Shutter release/ Signal tone: Select from the 5 possible sounds and switch off the sound. „ Signal sound: Determines the volume of the sounds and video playback via a TV. „ P layback: Determines the volume of playback of videos and voice notes in the camera.
- Page 47 · Date stamp You can choose to have the date of the photo or date and time stamped in the bottom corner of your photos. Once the date and time information has been stamped onto a photo this cannot be edited or deleted. „ Date / date&time / Off* ·...
- Page 48 · Assigning the photo button (REC/PLAY) Determine the function of the photo button „ Power on: The camera can be switched on using the photo button. „ Power on/off: The camera can be switched on using the photo button. „ Deactivate: The Photo button has no additional functions.
-
Page 49: Connection To Computer And Tv
11. Connection to computer and TV System requirements Windows® Macintosh „ Pentium® IV 1.6 GHz or higher „ PowerPC G3/G4/G5 „ Windows® XP/Vista/7/8 „ OS 10.3.9 later system „ 512 MB RAM „ 512 MB RAM „ 1GB available hard disk space „ 1GB available hard disk space „ CD-/DVD drive „ CD-/DVD drive „ Unassigned USB connection... -
Page 50: Connecting To A Tv
Connecting to a TV 1. Switch on camera. 2. Check that the right TV standard for your TV has been selected (see page 48). 3. Connect AV cable to camera. 4. Plug other end of cable into TV socket. „ Insert yellow connector into Video input and white connector into one of the audio inputs of the TV. -
Page 51: Installation Of Software
Installation of software The enclosed CD ROM contains the following software for Windows XP, Vista, Windows 7 & 8: MAGIX Photo Designer 7™ - Software allowing easy and varied editing and optimisation of photos. MAGIX Photo Manager MX™ - Program allowing quick archiving, editing and playback of photos on your computer. -
Page 52: Technical Specifications
12. Technical specifications Element Description Image sensor 1/2,3” CCD sensor (16,44 Mega pixels) Photo16M (4.608x3.456),3:2 (4.608x3.072),16:9 (4.608x2.592), 10M (3.648x2.736), Resolution 5M (2.560x1.920), 3M (2.048x1.536),VGA (640x480) Video: 720p (1.280x720),VGA (640x480) Display 7,62 cm (3,0“) colour TFT-LCD Storage medium SD/SDHC/SDXC-memory cards up to 64 GB (optional) File format DCF(2.0), JPEG (EXIF 2.3), DPOF;... -
Page 53: Maximum Number Of Photos
13. Maximum number of photos Maximum number of stored photos The table shows an approximate number of photos that can be stored depending on the respective setting and the capacity of the memory card. SD / SDHC memory capacity Resolution Quality 1 GB 2 GB... -
Page 54: Maximum Video Recording Length
Maximum video recording length The following table shows the approximate maximum video recording length available depending on the settings and the capacity of the SD/SDHC memory card. SD / SDHC memory card capacity Resolution 4 GB 8 GB 16 GB 32 GB 1 GB 2 GB... -
Page 55: Problem Solving
14. Problem solving Prior to returning the camera for repair check the following list of symptoms and possible solutions. Please contact our Customer Service if the problem persists. Symptom Cause Possible solution Battery not or incorrectly inserted. Insert battery correctly. Camera cannot be switched on. -
Page 56: System Information, Servicing And Disposal
The battery level is too low. Charge battery again. Serviceadress: Manufacturer’s address: Sertronics LTD supra MAGINON® Service Foto-Elektronik-Vertriebs-GmbH 45 Regal Drive, Walsall Enterprise Park Denisstr. 28a Walsall, WS2 9HQ 67663 Kaiserslautern United Kingdom Germany Tel.: 00800 - 78 77 23 68 15. -
Page 57: Conformity
Conformity This device was tested according to Part 15 of the FCC regulations and it was confirmed that the device complies with the limit values for class B digital devices. The aim of these limit values is to provide appropriate protection against adverse sources of interference in case of a domestic installation. -
Page 58: Care
Care Do not use any corrosive cleaners, such as mentholated spirits, thinners, etc. to clean the camera housing and camera accessory. When required, clean system components with a soft dry cloth. Storage Always remove battery from housing if camera is not being used for some time and store battery separately. -
Page 59: Index
16. Index Display mode 9 Image size 27 Disposal 58 Installation software 51 Accessory 1 D-Lightning 29 ISO values 35 AF light 32 DPOF 41 AF range 32 Date stamp 41, 47 Art effects 24 LCD dimming 47 ART mode 22 LCD display 10f AV connection 8, 70 Energy saving 47 LCD display 8... - Page 60 Reset 48 Rotate 41 Number of available photos 10, 53 USB cable 1, 8,16,68 USB connection 8,16, 50 USB mains adapter 1,16,52 Safety information 4f On/off button 8 Scene mode 22 Self portrait 23 Video output 50 Self-timer LED 8 Photo menu 30 Video, playback 38 Self-timer release 29 Photo mode 21f Video, recording 36...
Need help?
Do you have a question about the SZ 24 and is the answer not in the manual?
Questions and answers
My camera has lens problem,says,lens error,but wont shut down,