
Related Manuals for Kaysun KCCT-64 IPS


Summary of Contents for Kaysun KCCT-64 IPS
- Page 1 INSTALLATION AND OPERATION INSTRUCTIONS Centralised Control KCCT-64 IPS Thank you very much for purchasing our product. Before using your unit, please read this manual carefully and keep it for future reference.
- Page 3 WARNING • This manual provides the installation instructions for this controller. Refer to the included wiring diagrams to connect the controller to the indoor unit. • The controller uses low voltage. Keep a minimum distance of 12” (305 mm) between low voltage control wire and high voltage power wires. •...
-
Page 4: Installation
INSTALLATION... - Page 5 1. Installation • Connecting to one Outdoor Unit Connect the controller to the main control board of the outdoor unit using 2-conductor shielded cable XY, Fig-1(a). Alternatively, user can connect the controller to the indoor units directly throught XY cable in V4+ and V5 models, Fig-1(b).
- Page 6 Attach the back cover to the wall using screws. See fig-3. Fig-3 Attach Back Cover to Wall Insert the controller into the bottom snap joints of the back cover at an angle. See fig-4. Fig-4 Insert Controller into Back Cover...
- Page 7 Push the controller back toward the wall until it “snaps” into place. See fig-5. Fig-5 Snap Controller Into Place Specification Table-1 Input Voltage 12VDC Ambient Temperature 23~110°F (-5~43°C) Ambient Humidity RH40%~RH90%...
-
Page 8: Operation
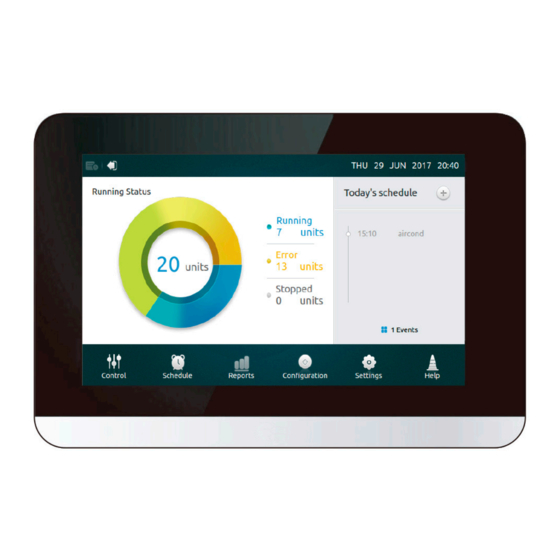
OPERATION... - Page 9 1 Home Page Button and Display Description This section includes the descriptions for login page and home page and provides the instructions related to these two pages.
- Page 10 • Table-1 Home Page Button and Display Description Table-1 Button and Display Description Screen ON/OFF Turn the Screen on/off button Username Insert login username Password Insert login password Save Password Enable saving login password Auto-login Enable auto-login in every power on Login Login botton Operation History...
- Page 11 • Turn the Screen OFF After login, touch the ON/OFF button to turn the screen backlight off or set the backlight automatically turns off in a period of time. More details can be found in the general setting section...
- Page 12 2 Control Page Description This section provides the descriptions and instructions for Control page. ② ① ③ ④ • Select/Deselect All IDUs Tap on the IDU icon one by one or alternatively by tapping Select All icon ① • Choose Group List Tap on the drop down icon to select one of the groups.
- Page 13 • Table-3 Control Page Icon Description ① ④ ② • Table-3 Control Page Icon Description • Table-3 Control Page Icon Description • Table-3 Control Page Icon Description • Table-3 Control Page Icon Description ③ ① ① ① ① ⑤ ④ ④...
- Page 14 Table-4 Operation Operation Color Color Mode Mode BLUE AUTO LIGHT BLUE COOL HEAT YELLOW ERROR/ GREEN GREY OFFLINE • Table-5 Device Icon and the Corresponding Type Table-5 Device Type Icon IDU/ODU L-DUCT M-DUCT H-DUCT/ FAPU WALL 4-WAY COMPACT C&F HP/HR...
- Page 15 ② ③ ④ ① When the centralized controller is connected to OLD systems (e.g. V4+ and V5X), AUTO mode is unavailable. • Turn ON/OFF IDUs Select the IDUs and tap the Switch “ ” ① to turn IDUs on/off. • Setting Temperature Tap the icon ②...
- Page 16 ■ When the selected IDU has an AC fan, speed mode and fan speed relationships are LOW (1, 2), MED (3, 4) and HIGH (5, 6, 7). ■ I n DRY mode, the fan speed is permanently set to AUTO. •...
- Page 17 • Table-6 Lock Control Panel Function Description Table-7 Item Description [Lock-OFF] button: Disable starting operation On/Off lock [Lock-ON] button: Disable stopping operation [Unlock] button: Disable the lock [Lock] button: Disable mode changing Mode lock [Unlock] button: Disable the lock [Unlock] button: Disable the lock Fan Speed lock [High, Mid, Low]: Lock the fan speed in one of three speed modes.
- Page 18 3 Schedule Page Description This section provides the descriptions and instructions for Schedule page. ② ③ ④ ⑤ ① ⑥ ⑦ ⑧ ⑨ • Table-7 Schedule Page Icons and Description Table-8 Number Item Description Date Display the selected date. Use [◄]/[►] to move to the previous/next month, and Today is the shortcut to return to the current date.
- Page 19 4. Touch Edit Units button to choose the desired IDUs, or group of IDUs. The selected unit will have a tick in the box. 5. Touch the Edit button in Action bar, to setup the running mode, temperature and other relevant features. 6.
- Page 20 • Holiday Settings 1. Touch icon ③ to access Holidays settings. 2. Touch Add button at the bottom right corner to setup a new holiday schedule. 3. Choose the expecting date using By Date or By Day in the setting. 4.
- Page 21 • OVERRIDE Settings 1. Tap the Override icon in the schedule list. ⑧ 2. Available lengths of delay are 0 Hrs, 0.5Hrs, 1Hrs, 1.5Hrs and 2Hrs. 3. Override delay operation is only valid once; it needs to be set again after operated every time...
- Page 22 4 Report Page Description (Only availabe in V6 models) This section provides the descriptions and instructions for Report page. • Check Operating Time 1. Touch Running Time button 2. Select the desired units or group 3. Select the time period 4.
- Page 23 Faulty IDU/ODU Address Error Code Error day and time IDU or ODU • Error Codes and Definitions Table-9 Primary IDU and ODU Error Codes and Definitions Table-8 IDU Error definition Code ODU Error definition Code No address setting Communication failure between IDU and ODU IDU Fan failure Mode conflict Power input phase error...
- Page 24 5 Configuration Page Description This section provides the descriptions and instructions for Configuration page. ① ② • Table-10 Install Page Icons and Description Table-10 Number Item Description Units Manual search and install the IDUs Groups Check IDUs and the belonging group lists •...
- Page 25 • Create/Delete/Rename Groups 1. Touch Grouping button 2. Touch Edit Group button 3. Two levels of group are available in this controller (e.g. Level one - Building One, level two - Unit Group 1). Touch Add Group button first level of group will be added by default, to insert a second level simply tap on the first level and touch Add Group.
- Page 26 • Add/Extract Units into Groups 1. Touch the Grouping button 2. Select and tap on a group from the left 3. Tap a device In the Unit list on the right, and touch the Add button to insert to the Register Unit list 4.
- Page 27 6 Setting Page Description This section provides the descriptions and instructions for setting page. • Table-11 Setting Page Icons and Description Table-11 Item Description Set date and time, lock screen time, backlight brightness, General Setting language, temperature unit (developing) and emergency shutdown (developing) Advanced Detail information of ODUs and IDUs...
- Page 28 • Add/Delete User Accounts 1. Login using an administrator account, only administrator has the authority to add/delete accounts. 2. Touch General setting and Account Setting. 3. In the general account list, touch Add User button. Enter a user name and setup a password, then press Save button.
- Page 29 4. Touch Delete button, and tap on icon of the top right corner of an unwanted account. Enter the correct administrator password and touch the Delete button to delete the account.
- Page 30 • Update Firmware Version 1. Connect a USB memory to the controller, the USB hub is located at the bottom of the controller as shown by the red rectangle. 2. Touch Firmware Update button, controller will search the update file named update.apk in the USB memory.
- Page 31 3. Tap on the number of updates 4. Select the update file, and press Yes buttion to install. If update sucess, please reboot the controller.
- Page 32 7 Help Page Description This section provides the descriptions for help page. • Error Codes and the Corresponding Definitions Press on the Error Code Descriptions button, it shows the error despcription lookup tables for IDUs and ODUs. The meaning of the common error codes for both Indoor Units and Outdoor Units can be found in Table 9.
- Page 35 MD17IU-014A 16117100001340...
Need help?
Do you have a question about the KCCT-64 IPS and is the answer not in the manual?
Questions and answers