Table of Contents
Troubleshooting

Subscribe to Our Youtube Channel
Related Manuals for Stoelting F431


Summary of Contents for Stoelting F431
- Page 1 Model F431 SERVICE MANUAL Manual No. 513605 Rev.3...
- Page 3 DO NOT ATTEMPT to operate the machine until instructions and safety precautions in this manual are read completely and are thoroughly understood. If problems develop or questions arise in connection with installation, operation, or servicing of the machine, contact Stoelting. Stoelting Foodservice Equipment Customer Service: 888.429.5920...
- Page 4 CAUTION If you need to replace a part, use genuine Stoelting The signal word “CAUTION” indicates a potentially parts with the correct part number or an equivalent hazardous situation, which, if not avoided, may result part.
-
Page 5: Table Of Contents
SECTION 1 INTRODUCTION Section Description Page Introduction Description ....................1 Specifi cations ..................... 2 Modes of Normal Operation ............... 3 Initial Status......................3 Serve Mode ......................3 Standby Mode ...................... 3 Sleep 1 Mode ....................... 4 Sleep 2 Mode ....................... 4 IntelliTec Restart (Version 3.5 or Higher) ............. - Page 6 Section Description Page Sanitizing ....................19 3.10 Initial Freeze Down and Operation ............. 20 Adding Mix ......................20 Preparing IntelliTec Control .................. 21 Initial Freeze Down ....................21 Adjusting IntelliTec Control ................... 21 Serving Product....................21 3.11 Normal Freeze Down and Operation ............22 3.12 Mix Information ...................
- Page 7 Section Description Page Valves ......................36 Thermostatic Expansion Valve (TXV) ..............36 Check Valve ......................37 High Pressure Cutout ................... 37 Hot Gas Bypass ....................38 Evaporator Pressure Regulator (EPR) ..............39 Water Valve (Water Cooled Models Only) ............40 Solenoid ......................
-
Page 9: Introduction
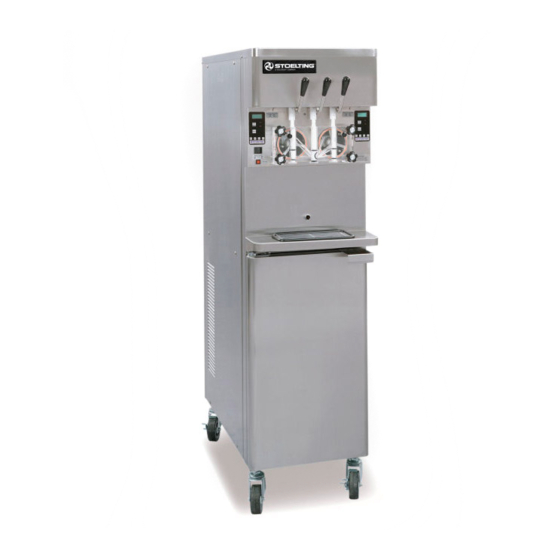
SECTION 1 INTRODUCTION 1.1 DESCRIPTION The Stoelting F431 fl oor model machine is pressure fed. The machine is equipped with fully automatic controls to provide a uniform product. The machine is designed to operate with almost any type of commercial soft-serve or non-dairy mixes available, including ice milk, ice cream, yogurt, and frozen dietary desserts. -
Page 10: Specifi Cations
1.2 SPECIFICATIONS Model F431 Dimensions Machine with crate width 19-1/8’’ (48,6 cm) 27’’ (68,6 cm) height 67-7/8’’ (172,4 cm) 78’’ (198,1 cm) depth 37-3/4’’ (95,9 cm) 48’’ (121,9 cm) 500 lbs (226,7 kg) 650 lbs (294,8 kg) Weight Electrical 1 Phase, 208-240 VAC, 60Hz... -
Page 11: Modes Of Normal Operation
1.3 MODES OF NORMAL OPERATION The IntelliTec control is Stoelting's newest and most ad- vanced controller. It combines the best features of previous controllers, with advanced sensing and troubleshooting capabilities. Following are details of the operational modes on the F431 with an IntelliTec control. -
Page 12: Sleep 1 Mode
The "Standby Mode" maintains product quality during slow times, while minimizing reactivation time. This mode lasts for a preset time (Stb Time). Once this time has been reached without user interruption, the control moves into the "Sleep 1 Mode". Refer to Figure 1-4 for a graphical representation of the "Standby Mode". -
Page 13: Clean Mode
H. CLEAN MODE 1.6 OPERATION DURING SENSOR FAILURE When the CLEAN button is pressed on the left side, all The IntelliTec control is designed to allow the machine to hopper refrigeration stops. When the CLEAN button is continue to function if a temperature sensor failure oc- pressed on the right side, only the right barrel freezing curs. - Page 14 No Sensor Default “on” time. Used in case of sensor failure * The CutOut value needs to be adjusted to product requirements. Refer to the 2183408 - Specifi cation Sheet for F431 Control located in the plastic pouch behind the header panel.
-
Page 15: Installation Instructions
Stoelting, LLC Commercial Products Take notice of all warning labels on the machine (see 502 Hwy. 67 Figure 2-1). -
Page 16: Machine Installation
The customer must place claim for damage and/or shortages WARNING in shipment with the carrier. Stoelting, LLC cannot make any claims against the carrier. Hazardous voltage High voltage will shock, burn or cause death. Turn 2.3 MACHINE INSTALLATION... -
Page 17: Mix Pickup Hose Installation
B. MIX PICKUP HOSE INSTALLATION Gently push the hose into the black cover until it The F431 machine may be connected to standard mix begins to feed. containers or prepacked mix bags. One, 5 gallon mix bag... - Page 18 Figure 2-4 Mix Pump Connections for Standard Mix Container Connect elbow fi tting to free end of tubing. Connect opposite end of elbow to 1/4" ID tan tubing on the left side of pump head. Secure with hose clamps (see Figure 2-3 and 2-4). When Using Bag Connection System (BCS) with Two Bags Per Side (optional kit #2183189): Connect 3/8"...
- Page 19 3-way Tee Low Mix Indicator Adjustment Knobs Figure 2-6 Connecting Pump Hose to BCS Manifold Figure 2-7 Completed BCS Hose Assembly Attach free end of tubing to a manifold adapter. Place one mix bag into each mix container as Secure with large hose clamp or equivalent.
-
Page 20: Mix Low Level Indicator Adjustment
When Using Two Mix Containers or Bag Connection Systems (BCS) on one Side (optional kit #2183189): The F431 can be confi gured to operate with only one freezing cylinder turned on. This may be done if only one fl avor is being dispensed during slow times. -
Page 21: Initial Set-Up And Operation
SECTION 3 INITIAL SET-UP AND OPERATION 3.1 SAFETY PRECAUTIONS 3.2 OPERATING CONTROLS AND INDICATORS SAFE OPERATION IS NO ACCIDENT; observe these Before operating the machine, it is required that the op- rules: erator know the function of each operating control. Refer to Figure 3-1 for the location of the operating controls on Know the machine. - Page 22 A. Main Freezer Power Switch H. Clean Button The Main Freezer Power switch is a two position rocker The CLEAN button is a membrane, or “snap” switch. When switch that supplies power to the IntelliTec control, freezing the button is pressed, the freezing cycle stops and the cylinder circuits and lower cabinet refrigeration system.
-
Page 23: Important Information Regarding Cleaning And Sanitizing
Selection Button (SEL) The SEL button is used Important Differences Between Cleaning and Sanitizing in combination with the up arrow to enter into the CLEANING vs. SANITIZING settings of the IntelliTec control. This button is It is important to distinguish between cleaning and sanitiz- also used to navigate through the control settings ing. -
Page 24: Disassembly Of Machine Parts
As a recommended cleaner and sanitizer for your frozen The ideal concentration of chlorine needs to be 100 ppm dessert machine, STERA-SHEEN has proven to be one (as stated by the FDA). of the best daily maintenance products for: NOTE ·... -
Page 25: Disassembly Of Auger
Remove the spigots through the bottom of the 3.5 CLEANING DISASSEMBLED PARTS front door. Remove all o-rings from spigots and Disassembled machine parts require complete cleaning, air bleed valve. sanitizing and air drying before assembling. Local and state health codes will dictate the procedure required. Some B. -
Page 26: Cleaning The Machine
3.7 CLEANING THE MACHINE Place O-Ring Petrol-Gel The exterior should be kept clean at all times to preserve Inside Insert the lustre of the stainless steel. A high grade of stainless steel has been used on the machine to ease cleanup. To remove spilled or dried mix, simply wash the exterior with 90°... -
Page 27: Sanitizing
When sanitizing the machine, refer to local sanitary regu- lations for applicable codes and recommended sanitizing products and procedures. The frequency of sanitizing must comply with local health regulations. Mix sanitizer according to manufacturer’s instructions to provide a 100 parts per million strength solution. Mix sanitizer in quanti- ties of no less than 2 gallons of 90°F to 110°F (32°C to CAUTION Risk of Product Damage... -
Page 28: Initial Freeze Down And Operation
1/2” from the air bleed valve. 3.10 INITIAL FREEZE DOWN AND OPERATION Every Stoelting soft serve machine needs to be set on site. The following adjustment will provide optimal product consistency while prolonging product life. -
Page 29: Preparing Intellitec Control
Press the up arrow () button once. The display B. PREPARING INTELLITEC CONTROL will read “CutOut amps”. On the IntelliTec control, press and hold SEL button for 8 seconds. While still holding the SEL Change the value to the recorded value by button, press the up arrow () button. -
Page 30: Normal Freeze Down And Operation
3.11 NORMAL FREEZE DOWN AND OPERATION The following section contains the recommended oper- ating procedures for the safe operation of the machine. Sanitize immediately before use. Dispense Make sure the Freezing Cylinder OFF/ON switch Rate is in the OFF position. Adjustors Fill the storage containers in the cab with at least 2.5 gallons of mix. -
Page 31: Operation Of Mix Pump
3.13 OPERATION OF MIX PUMP NOTICE The mix pump switches are located in the upper left hand Any cleaning procedure must always be followed corner, inside the refrigerated cabinet. When a pump by sanitizing before fi lling machine with mix. (Refer switch is placed in the ON position, the mix pump motor to section 3.3) will start pumping mix into the machine cylinder. - Page 32 Carefully inspect each part for wear or damage. CAUTION Replace worn or damaged parts. Wash feed tube and air tube with 90° to 110°F System Under Pressure detergent water and brushes provided. Rinse with Never disconnect hoses from machine or pump without clean, 90°...
-
Page 33: Maintenance And Adjustments
SECTION 4 MAINTENANCE AND ADJUSTMENTS MACHINE ADJUSTMENT LOCKING THE CONTROL PANEL This section is intended to provide maintenance personnel The IntelliTec control has a tamper proof mode to prevent with a general understanding of the machine adjustments. unauthorized use. When set, all buttons on the control It is recommended that any adjustments in this section panel are disabled. -
Page 34: Readings (Service Personnel Only)
IMPORTANT: ERROR CODE READINGS The following details are recorded under the ERRCODES Before making changes to any settings, record menu for each of the last 25 error codes received: the original values. If the setting changes do not achieve desired results, return settings to their Err1 (hours) original values. -
Page 35: Adjustments (Service Personnel Only)
RUN STATISTICS Cut In T (°F) In addition to dynamic readings and recorded After the consistency value has been determined, error code details, the IntelliTec control records the Cut In T value can be adjusted. The Cut In T rolling averages of run statistics. Following are the is the temperature of the refrigerant gas coming readings available under the RUNSTATS menu: out of the freezing cylinder. -
Page 36: Overrun Adjustment
Stb Time (sec) Cab On This setting determines the total amount of time If the Refriger value is set to Cabinet and the in “Standby Mode”. temperature sensor in the cabinet fails, this setting determines the length of the refrigeration cycle. If Sl1DrvOn (sec) None, 1 Hopper, or 2 Hopper is selected for the Adjustments to this setting affect the amount of... -
Page 37: Mix Pump Hose Reposition
The overrun setting is indicated by a pin. To adjust overrun, loosen the allen-head screw (located within the center of the adjustment knob) with the 5/32” allen wrench provided. Rotate the adjustment knob counterclockwise to a higher number for higher overrun, or clockwise to a lower number for lower overrun. -
Page 38: Cab Temperature Adjustment
Mode Screen. damage. Locate the Specifi cation Sheet for F431 Control behind the header panel and record the new Connect the free end of the mix pump hose to the values on this sheet. -
Page 39: Condenser Cleaning (Air-Cooled Machines)
4.13 CONDENSER CLEANING (AIR-COOLED 4.15 EXTENDED STORAGE MACHINES) Refer to the following steps for winterizing the machine or for storing the machine over any long period. The condenser requires periodic cleaning. To clean the condenser, refer to the following steps: Clean all of the parts that come in contact with mix thoroughly with warm detergent . -
Page 41: Refrigeration System
SECTION 5 REFRIGERATION SYSTEM 5.1 REFRIGERATION SYSTEM NOTE The F431 refrigeration system has two functions: For qualifi ed service personnel only. Anybody work- ing with refrigerants must be certifi ed as a Techni- Medium-Temperature - Maintaining product cian TYPE I as required by 40 CFR 82 Subpart F... -
Page 42: Refrigerant Recovery
Remove belts from the pulleys to allow drive NOTE motors to spin freely. The refrigeration system of the F431 is critically Connect power to the machine. charged. Be sure to charge the system to the weight listed on the machine’s information plate. -
Page 43: Compressor
Connect an ohmmeter to the C and R terminals. 5.4 COMPRESSOR Resistance through the run winding should be The F431 has a scroll type compressor (Refer to Figure 1.81Ω ±10%. 5-2). This compressor type uses two spiral shaped scrolls Connect ohmmeter to terminals C and S. -
Page 44: Condenser
5.5 CONDENSER the cab TXV, place the both freezing cylinder switches in the OFF position. The F431 is available with a water-cooled or an air-cooled condenser. The capacity of the machine is directly related NOTE to keeping the condenser clean and free of debris. -
Page 45: Check Valve
B. CHECK VALVE The TXV can be adjusted after the steps above are The F431 has 3 magnetic check valves (Refer to Figure completed. When adjusting, do not turn the valve 5-5). Each valve is positioned in the suction line and over 1/4 turn (90°). -
Page 46: Hot Gas Bypass
HIGH PRESSURE CUTOUT REMOVAL D. HOT GAS BYPASS Remove the left side and top panels. The hot gas bypass valve is installed in parallel to the compressor and helps to regulate the compressor tem- Recover refrigerant charge per instructions in perature (Refer to Figure 5-7). -
Page 47: Evaporator Pressure Regulator (Epr)
Evacuate and recharge system per instructions in Section 5.2. E. EVAPORATOR PRESSURE REGULATOR (EPR) There is one EPR in the F431 refrigeration system (Re- fer to Figure 5-9). It is located on the suction line of the refrigerated mix line and regulates evaporator refrigerant... -
Page 48: Water Valve (Water Cooled Models Only)
Leave the suction and discharge ports open EPR REPLACEMENT to prevent pressure buildup during water valve To replace the EPR, perform the following procedures: removal. Apply a heat sink (wet cloth) to the EPR. Unsweat the capillary tube from the discharge With an open port, braze the EPR into the system line. - Page 49 The suction line solenoid prevents refrigerant fl ow in the LIQUID LINE SOLENOID TESTING evaporator when the suction pressure drops due to the The following test will check if a liquid line solenoid has operation of the other evaporators in the system. a leaking valve seat.
-
Page 50: Filter Drier
Identify and disconnect the two wires from the FILTER DRIER REPLACEMENT solenoid coil. Position the fi lter drier so the arrow is pointing Remove the retainer holding the coil to the solenoid towards the evaporators (pointing away from the body and remove the coil. condenser). -
Page 51: Cab Unit
With the suction and discharge ports open, braze the capillary tube into the system using appropriate brazing material. Replace foam insulation to the capillary tube at the evaporator inlet. Evacuate the system per instructions in Section 5.2. Recharge the system per instructions in Section 5.3. -
Page 53: Electrical And Mechanical Control Systems
ELECTRICAL AND MECHANICAL CONTROL SYSTEMS NOTE The wiring diagram is available in Section 8. INTELLITEC CONTROLLER The IntelliTec control is Stoelting’s most advanced con- troller. It combines all of the best features of previous controllers with advanced sensing and troubleshooting capabilities. -
Page 54: Drive Motor
7 Troubleshooting. DRIVE MOTOR Loosen the belt tension adjustment nut and remove The drive motors are designed specifi cally for the F431 the belt. (Refer to Figure 6-5) machines. The drive motors are used to rotate the auger Remove the motor mounting bolts. -
Page 55: Capacitors
Using a straightedge, align the drive motor pulley Disconnect the bleeder resistor from the circuit. with the gearbox pulley. Tighten the two allen Check the capacitance across the terminals. Refer head screws. to the table below for the correct readings. Install wiring according to wiring diagram (located behind header panel). -
Page 56: Condenser Fan Motor (Air-Cooled Only)
C. GEARBOX INSTALLATION CAB CONDENSER FAN MOTOR Place the gear box in position from the rear of A. FAN MOTOR REPLACEMENT the machine. Fasten the three bolts through the Shut the machine down and remove mix from the gear box to the rear of the barrel. freezing barrel and cab. - Page 57 SPIGOT SWITCH TEST - ADJUSTMENT SPIGOT SWITCH ADJUSTMENT Place the Main Power OFF/ON switch and both NOTE Freezing Cylinder OFF/ON switches in the OFF Adjustments to the spigot switch should be done position. after the product is at consistency in “Serve Mode” Remove the header panel.
-
Page 58: Pump Pressure Switch
Fully tighten the retaining screws. TEMPERATURE CONTROL SENSOR Attach the connector to the spigot switch. The temperature control sensor is a thermistor used to sense the temperature of the suction line. As the suction Position the spigot handle assembly in the line temperature increases, the internal resistance of electrical box and fasten securely with the two the thermistor will decrease. -
Page 59: Troubleshooting
SECTION 7 TROUBLESHOOTING the Sl2CtOut temperature in "Sleep 2 Mode". 7.1 ERROR CODES This error is generally caused by very low mix When the machine experiences a problem, one of the levels in the machine’s mix container or from following error codes will be displayed on the control product breakdown. - Page 60 as reference. If measured value does not coincide ERROR CODE 5 - FREEZING CYLINDER SENSOR with a value on the table (± 400 ohms), replace The Freezing Cylinder Sensor Error (E5) indicates the sensor. a failure of the barrel sensor or an extreme out of range condition (<...
-
Page 61: Servicing Tip
ERROR CODE 11 - LOW TEMPERATURE COMMO TIMEOUT ERROR The Low Temperature Error (E11) occurs when A COMMO TIMEOUT Error indicates a the temperature of the gas refrigerant at the barrel communication interruption between the display sensor falls below -20°F or -34°F (depending and the control board. -
Page 62: Troubleshooting Machine
7.4 TROUBLESHOOTING - MACHINE PROBLEM POSSIBLE CAUSE REMEDY 1. Power to machine is off. 1. Check power to machine. Drive motor (auger) 2. Low line voltage. 2. Check, must be ±10% of nameplate voltage. “kicks-out”, or 3. Product too hard. 3. -
Page 63: Troubleshooting Mix Pump
1. Increase overrun setting. 2. Air leak. 2. Tighten all hose clamps. Overrun too low or no overrun. 3. Air compressor not pumping air. 3. Contact local Stoelting Distributor. 4. Air check valve in backwards. 4. Check arrow for direction of fl ow. - Page 64 4. Pump motor not running. 4. Turn on motor switch. 1. Pickup tube check valve missing. 1. Contact local Stoelting Distributor. Air exiting mix pick- up hose. 1. Overrun setting too high. 1. Decrease overrun setting.
-
Page 65: Replacement Parts
SECTION 8 REPLACEMENT PARTS FRONT DOOR AND AUGER PARTS * If you are replacing a front door without side grooves, the spigot extensions and rosette caps also need to be replaced. Part Number Description Quantity 149003 Bushing - Front Auger Support 381804 Auger Flight (Has 4 per Barrel) 482004... -
Page 66: Cab Tubing Assembly
8.2 CAB TUBING ASSEMBLY Part Number Description Quantity 264235 Clamp - Metal (1/4" ID Tubing) 264241 Clamp - Metal (1/2" ID Tubing) 264243 Clamp - Metal (3/8" ID Tubing) 375819 Elbow - Barbed (3/8"- 1/4") 376041 Tee Connector - 3-Way (Stainless) 558114 Mix Container Only 624607-5... -
Page 67: Spigot Cam Assembly
SPIGOT CAM ASSEMBLY 624677 232734 2177074 2177073 2177072 Part Number Description Quantity 232734 Cap - Rosette 428045 Knob - Spigot Handle (Black) 570961 Pin - Cotterless Clevis (Spigot Cam) 624677-5 O-Ring - Spigot Extension - Black (5 Pack) 696044 Spring - Torsion (Spigot Cam) 718773 Switch - Spigot Cam 2158082... -
Page 68: Rear Of Machine
REAR 717928 284085 128295 614233 342008 763017 598249 522229 231096 737039 152207 231095 778027 282047 522858-SV 558004 Part Number Description Quantity 128295 Rocker Arm Assembly w/Screw (Cab) 152207 Belt - Grip-Notch (AX-29) (Each) 231078 Capacitor - Run (#522858 Motor) 231095 Capacitor - Start (#522858 Motor) 282047 Compressor - 1 PH - 60 Hz... -
Page 69: Right Hand Side And Header Panel
RIGHT HAND SIDE AND HEADER PANEL 422074 618180 762359 598038 762454 231057 762978 230638 718794 765214 295017 521686-220 744142 229115 718532 Part Number Description Quantity 229115 Cable - Phone (Control Board to Display Board) 230638 Capacitor - Start (#282047 Compressor) 231057 Capacitor - Run (#282047 Compressor) 295017... -
Page 70: Left Hand Side And Cab Interior
LEFT HAND SIDE & CAB INTERIOR 2187932 736084 718815 162077 128311 493042 522291 284095 396449 3171952 672724 4183338 272065 458003 128312 763423 162048 423037 342020 763482 Part Number Description Quantity 128311 Hinge - Door (Top & Bottom) (Cab) 128312 Mix Container Holder Assembly w/Rollers (Cab) 162048 Blade - Fan (Evaporator) (Cab) 162077... -
Page 71: Front Panel
FRONT PANEL 718895 719025-SV 493041 Part Number Description Quantity 332541 Board - Display Module (Display Only) (See #3183217) 493041 Indicator Light (Cab On - Off) 718895 Switch - Rocker (Cab On-Off) 719025-SV Switch - Membrane Strip PART KITS Part Number Description Quantity 1177436... -
Page 72: Pump Parts
PUMP PARTS Part Number Description Quantity 376035 Tee Connector - Air Pressure Switch 432003-SV Valve Head Only w/Tubes 522229 Motor - Pump 538306 Nut - Motor Mounting 644065 Screw - Rocker Arm 650146 Set Screw - Pulley 652412 Screw - Shoulder (Crank Arm Roller Assembly) 653042 Screw - Thumb (Cover Clamp) 667896... - Page 73 PUMP PARTS (CONTINUED)
-
Page 74: Decals And Miscellaneous Parts
Decal - Adequate Ventilation 3" 324686 Decal - Danger Automatic Start 324799 Decal - Pump Off / On 324803 Decal - Domed Stoelting Logo (Large) (Header Panel) 324804 Decal - Domed Stoelting Swirl (Header Panel) 324825 Decal - Main Freezer Power 324826... -
Page 75: Refrigeration Diagram And Wiring Diagram
8.12 REFRIGERATION DIAGRAM AND WIRING DIAGRAM... - Page 77 Stoelting’s sole obligations, and Buyer’s sole remedies, for any breach of this warranty shall be, at Stoelting’s option, one of the following: repair or replacement of the affected component at Stoelting’s plant in Kiel, Wisconsin, or refund of the purchase price of the affected Equipment. Stoelting, through an Authorized Stoelting Provider, will deinstall/reinstall the affected component from/into the equipment (“Labor”) for the period listed below in the Warranty...
- Page 78 Costs not covered by the Stoelting Travel Pay policy. Stoelting covers only the first trip travel which is a flat rate by mileage one- way from the service company’s home location to the job site. The flat rate is calculated as follows:...
Need help?
Do you have a question about the F431 and is the answer not in the manual?
Questions and answers