Advertisement
Installation Instructions and Service Manual
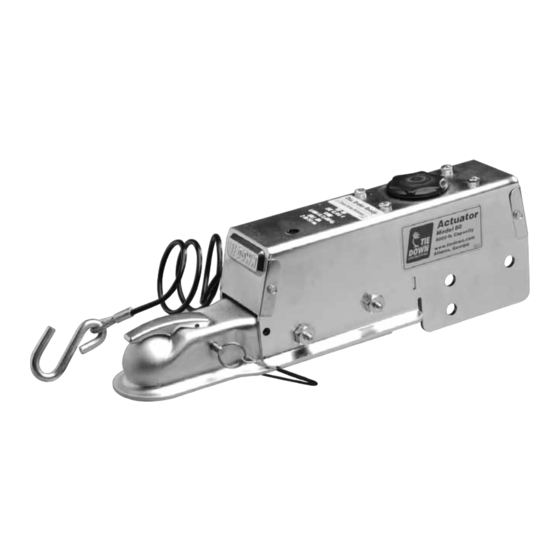
Model 80/800
Actuator* for
Trailer Brakes
8,000 lbs Capacity
Drum Brake Ready
Disc Brake Ready
Includes 8000# rated 2" Ball with 1" shank
US Patent No. 6,375,211
MODEL 80/800 ACTUATOR INSTALLATION INSTRUCTIONS
IMPORTANT: READ AND UNDERSTAND THE ENTIRE INSTRUCTION/ASSEMBLY PROCEDURE BEFORE INSTALLING YOUR
BRAKES AND ACTUATOR.
The Model 80/800 works by the "surge" or "push" of the trailer toward the tow vehicle. This automatically synchronizes the trailer brakes
with the tow vehicle axle brakes. When the trailer pushes against the tow vehicle, the actuator telescopes together and applies the force
to the master cylinder, supplying hydraulic pressure to the brakes. The built in dampening shock absorber retards the telescoping shock
against the hitch ball. Low levels of brake fluid will signal the tow vehicle operator to add brake fluid via coupler knocking.
Be sure to comply with regulations for brakes in your state. Brake laws sometimes are minimum standards and you may wish to add
additional brakes to your trailer to meet minimum Gross Vehicle Weight Ratings (GVWR).
Read your tow vehicle owner's manual on towing capacity and other towing recommendations before installing brakes or this actuator.
The Model 80/800 Actuator is completely assembled and ready to bolt into place (Tongue sizes: 3"x3", 3'x4" & 3"x5").
1.
Bolt the actuator to the tongue-using grade 5 bolts 1/2 inch in diameter, 4 inches long. Lightweight tongues, less than 10 gauge, require
spacer tubes inside the tongue for reinforcement. Attachment strength should equal or exceed 1-1/2 times trailer G.V.W.R.
2.
Hydraulic brake lines should be installed on the trailer as described in the installation manual supplied with the brakes. Note: Some disc
brakes require the use of flexible brake lines at the connection POINT on the brake caliper. Follow brake manufacturer instructions.
3.
Use only DOT-3 brake fluid in the Model 80/800 actuator. Use a pressure type brake bleeder to bleed brakes. (This type of brake
bleeder is available at your local automotive jobber.) Follow manufacturer's directions. Or, manually bleed the brakes using a
heavy-duty flat blade screwdriver inserted in the hole provided on top of the actuator near the front. Insert the screwdriver and use a
pumping action to activate the master cylinder in order to bleed the brakes. See page 8 for more details.
To bleed master cylinder and brakes, install bleeder hose on first wheel cylinder to be bled; if tandem axle trailer, bleed closest axle
first, and the closest brake on that axle first. Use a loose end of hose from the bleeder valve submerged in a glass container of brake
fluid to observe bubbling (hose must be submerged into clean brake fluid to keep air from traveling back into the brake cylinder).
Loosen the bleeder screw located in the wheel cylinder one turn, the system is now open to the atmosphere. The bleeding operation for
that brake is complete when bubbling stops. Be sure to tighten bleeder screw securely. Each wheel cylinder must be bled until all air
is out of the lines. Replenish the brake fluid during the bleeding process so the level does not fall below half full level in the master
cylinder reservoir. When bleeding and testing is completed, make sure master cylinder is filled to approximately 3/8" below the top of
the reservoir and filler cap is securely in place.
Instruction # 15388
TIE DOWN ENGINEERING • 255 Villanova Drive SW • Atlanta, GA 30336
www.tiedown.com (404) 344-0000 Fax (404) 349-0401
*Model 800 - Manufactured
after March 2012
Advertisement
Table of Contents

Subscribe to Our Youtube Channel
Related Manuals for Tie Down Engineering 80

Summary of Contents for Tie Down Engineering 80
- Page 1 POINT on the brake caliper. Follow brake manufacturer instructions. Use only DOT-3 brake fluid in the Model 80/800 actuator. Use a pressure type brake bleeder to bleed brakes. (This type of brake bleeder is available at your local automotive jobber.) Follow manufacturer’s directions.
- Page 2 DOT 3 brake fluid. Check for leaks and repair as required. Never reuse brake fluid. The model 80/800 is equipped with two “Super Lube” pins to provide grease to the inner rollers. Use a grease gun to lubricate the rollers through the grease fittings provided, every 6 months.
- Page 3 Actuator travel (shown by coupler roller path) over one inch indicates a need to adjust the brakes or add fluid to the reservoir or a need to bleed the brakes and check connections for leaks. Adjust per instructions found in brake installation manual. In general, back-off the adjusters on drum brakes from locked position, as required.
- Page 4 BOLT HHCS 1/4-20 x 3/4 GR 5 - ZINC 10548 10-32 HEX WASHER HEAD THREAD ROLLING SCREW - ZINC 10554 1/4" SPRING LOCK WASHER - ZINC & 10503 SCREW, 1/4-20 x 1/2" SELF TAP 50317 66, 70 & 80 E-STOP CABLE ASSEMBLY...
- Page 5 BOLT HHCS 1/4-20 x 3/4 GR 5 - ZINC 10548 10-32 HEX WASHER HEAD THREAD ROLLING SCREW - ZINC 10554 1/4" SPRING LOCK WASHER - ZINC & 10503 SCREW, 1/4-20 x 1/2" SELF TAP 50317 66, 70 & 80 E-STOP CABLE ASSEMBLY...
- Page 6 TIE DOWN ENGINEERING LIMITED WARRANTY Limited Warranty TIE DOWN ENGINEERING Inc (“TIE DOWN”) warrants its products to be free from defects in material an workmanship for one year from date of delivery to the original purchaser when properly installed, used and maintained by the purchaser.
- Page 7 THIS WARRANTY EXCLUDES ALL IMPLIED WARRANTIES OF MERCHANTABILITY OR FITNESS FOR A PARTICULAR PURPOSE OR ANY PURPOSE. THIS WARRANTY DOES NOT COVER NOR EXTEND TO INCIDENTAL OR CONSEQUENTIAL DAMAGE. Some states do not allow the exclusion or limitation of incidental or consequential damages, so the above limitation or exclusion may not apply to you. This warranty gives you specific legal rights, and you may also have other rights which vary from state to state.
- Page 8 WARNING: If button stop cable is showing DO NOT TOW TRAILER Release emergency stop cable by prying Button Stop spring out with a flat blade screw driver. TIE DOWN ENGINEERING • 255 Villanova Drive SW • Atlanta, GA 30336 www.tiedown.com (404) 344-0000 Fax (404) 349-0401...
Need help?
Do you have a question about the 80 and is the answer not in the manual?
Questions and answers