Table of Contents
Advertisement
Advertisement
Table of Contents

Related Manuals for HemoCue WBC DIFF

Summary of Contents for HemoCue WBC DIFF
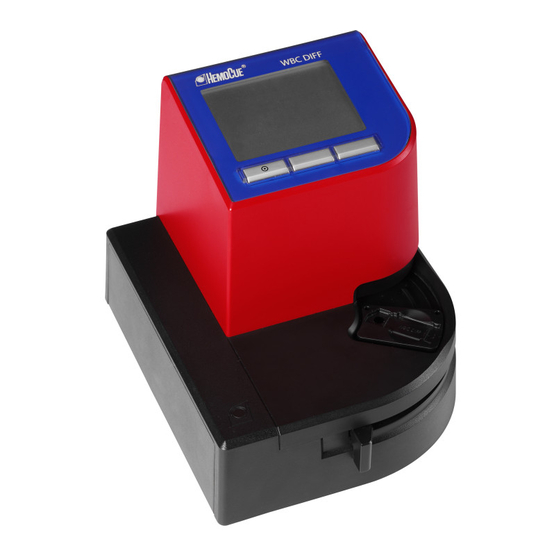
- Page 1 HemoCue WBC DIFF ® Operating Manual...
-
Page 2: Table Of Contents
Table of Content HemoCue WBC DIFF system ........... 3 Components ................4 Start-Up ..................6 Data Entry & Navigation ............10 Buttons ....................10 Keyboard..................... 10 Barcode Reader .................. 10 Symbols ..................12 Navigation Symbols ................12 Procedure Symbols ................14 Display Symbols ................. -
Page 3: Hemocue Wbc Diff System
The HemoCue WBC DIFF system is indicated for use in clinical laboratories and for point of care testing in professional health care settings on pediatric (≥ 3 months) and adult patients. -
Page 4: Components
Components... - Page 5 NOTE: Do not open the cover of the analyzer. The warranty is void if the cover of the analyzer is opened. Only WBC DIFF cuvette holder (marked WBC DIFF) is to be used with the WBC DIFF analyzer. *Not included.
-
Page 6: Start-Up
Start-Up... - Page 7 Only use AC adapters listed under Specifications in the AC Adapters section. The analyzer can be powered by either AC adapter or batteries. Connect the AC Adapter Plug the supplied AC adapter into the power inlet at the back of the analyzer. Insert Batteries Press the ribbed marked button on the back of the analyzer to open the battery compart- ment on the left side.
- Page 9 Start the Analyzer Pull the cuvette moving arm out to loading position. Press and hold the left button until the display is activated. A start-up window shows analyzer software version for approximately 15 seconds. The analyzer performs a self test and the hourglass is shown for approximately 30 seconds.
-
Page 10: Data Entry & Navigation
Data Entry & Navigation... -
Page 11: Buttons
Analyzer buttons The three buttons below the display are for navigating and confirming the choices/sym- bols displayed above each button. The left button is also for turning on/off. External keyboard Use the keyboard for data input e.g. Patient ID, Operator ID, Lab ID, Control ID and Site ID. -
Page 12: Symbols
Symbols Navigation Symbols Designation Function Home Go to main menu. Right Continue to next number/window. Left Return to previous number/window. Scroll up. Down Scroll down. - Page 13 Navigation Symbols Designation Function Accept Accept input. Reject Reject input. Switch Jump between result and data.
-
Page 14: Procedure Symbols
Procedure Symbols Designation Function Patient Test Go to Patient Test procedure. Menu Go to “Menu” window for Review/Delete/Settings/QC test. Review/Delete Go to “Review/Delete menu” window. Review Go to “Review” window. Delete Go to “Delete Results” window. Settings Go to settings menu. -
Page 15: Display Symbols
Display Symbols Designation Function Connected Analyzer connected to a PC application. Unsent Results Unsent results stored in the analyzer. Accepted Accepted result. Rejected Rejected result. Auto Accepted Auto accepted result. Battery Level Critical battery level. - Page 16 Display Symbols Designation Function Battery Level Battery level 30%. Battery level indicates 10-100%. AC Adapter Analyzer connected with AC adapter. Insert Cuvette Analyzer ready for measurement. Insert a microcuvette to start measuring. Remove Cuvette Pull the cuvette moving arm to laoding position and remove the cuvettte. Measuring Measuring.
- Page 17 Display Symbols Designation Function Page Number Current page number/total amount of pages. Caution The results for the WBC differential count are uncertain. The sample may contain pathological, abnormal or unidentified cells. For more information see the Trouble- shooting Guide section. The print-out will show an asterisk (*) instead of the display symbol Non-critical Error An error has occurred.
-
Page 18: Set-Up
Set-Up Settings... - Page 19 Settings are made in the Set-Up/Settings menu. Use the left button to confirm/accept input and move backwards. Use the right button to confirm/accept input and move forward. The center button scrolls up/downwards and ticks boxes. Turn on the analyzer as described in the Start-Up section. Press the right button.
- Page 21 Language set up window is shown. Select language by pressing the center button. Press right button to confirm and move forward. Time Zone window is shown. Select Time Zone input by pressing the button below the up arrow. Press the right button to confirm and move forward. Date Format window is shown.
- Page 23 12. Patient ID window is shown. Select Patient ID on/off by pressing the button below the up arrow. Press right button to confirm and move forward. 13. Operator ID window is shown. Select Operator ID on/off by pressing the button below the up arrow.
- Page 25 17. Unit window is shown. The results can be presented in • absolute numbers together with percentage; 10 /L, % • absolute numbers only; 10 • percentage only; % Select how to present the result by pressing the button below the down arrow. Press right button to confirm and move forward.
-
Page 26: Printer
Set-Up Printer... - Page 27 Connect the cable* to the analyzer and ASCII printer* before performing the analysis. Perform the analysis as described in the Routine Use Patient Test or Routine Use QC Test sections. The result is shown on the display (2a) and will be printed automatically (2b). Only current result can be transferred directly to the printer.
-
Page 28: Keyboard
Set-Up Keyboard... - Page 29 The keyboard can be used for data entry of Patient ID, Operator ID, Lab ID, Control ID and Site ID. To navigate use F1 for left, F2 for up/down and F3 for right. Connect cable from the keyboard* to the USB port connection on the analyzer before performing analysis.
-
Page 30: Barcode Reader
Set-Up Barcode Reader... - Page 31 The barcode reader can be used for data entry of Patient ID, Operator ID, Lab ID, Control ID and Site ID Connect cable from the barcode reader* to the USB port connection on the analyzer before performing analysis. For barcode reader settings refer to barcode reader operating manual. *Must be purchased separately.
-
Page 32: Connectivity
Set-Up Connectivity... - Page 33 2. Connection via LAN: Connect cable* from the LAN port to the LAN connection on the analyzer. The data is sent according to the POCT1-A standard. For more information about the con- nectivity and how to configure the IP address settings when connecting via the LAN port, please contact HemoCue AB. *Must be purchased separately.
-
Page 34: Blood Collection
Blood Collection Capillary Sample... - Page 35 Important! Always handle blood specimens with care, they might be infectious. Consult local environmental authorities for proper disposal. Always wear protective gloves when handling blood specimens. The microcuvette is for single use only. For measuring procedure see Routine Use/Patient Test section. Make sure the patient’s hand is warm and relaxed.
- Page 37 Sample at the side of the fingertip. While applying light pressure towards the fingertip, puncture the finger using a lancet*. Wipe away the first two or three drops of blood. Re-apply light pressure towards the fingertip until another drop of blood appears. *In order to obtain a sufficient blood flow and representative sample, high flow lancet with blade is preferred.
- Page 39 Wipe away the remains of the drop of blood and fill the second microcuvette from a new drop of blood as per steps 8–10 above. NOTE: HemoCue WBC DIFF is not validated for heel stick.
- Page 40 Blood Collection Venous Sample and Control Material...
- Page 41 Important! Always handle blood specimens with care, they might be infectious. Consult local environmental authorities for proper disposal. Always wear protective gloves when handling blood specimens. The microcuvette is for single use only. For the measuring procedure see Routine Use/QC Test or Routine Use/Patient Test. Control material shall always be measured using QC test procedure.
-
Page 42: Routine Use
Routine Use Patient Test... - Page 43 The display will show the main menu. Take a microcuvette from the package (HemoCue WBC DIFF Microcuvette or HemoCue WBC Microcuvette). For single packaged microcuvettes; open the inner wrapping and take out the microcuvette. Press the button below Patient Test symbol.
- Page 45 Insert cuvette symbol is shown. Take a sample according to Blood Collection Capillary Sample or Blood Collection Venous Sample and Control Material sections. Place the microcuvette into the cuvette holder (7a) and start measurement as soon as possible but no later than 1 minute after filling the microcuvette by gently pushing the cuvette holder to its measuring position (7b).
- Page 47 The results are displayed within < 5 minutes, 9a. WBC DIFF result window 9b. WBC result window 9c. Entered data The result windows may differ due to data entered and choice of microcuvette. To jump between the result and data entered windows press button below the Switch symbol.
- Page 48 Routine Use QC Test...
- Page 49 The display will show the main menu. Take a microcuvette from the package (HemoCue WBC DIFF Microcuvette or HemoCue WBC Microcuvette). For single packaged microcuvettes; open the wrapping and take out the microcuvette. Press right button for Menu/QC Test.
- Page 51 If data has been entered the data confirmation window is shown. Press right button to confirm. To change information, press left button until the desired window is displayed. Insert cuvette symbol is shown. Take a sample according to Blood Collection Venous Sample and Control Material sec- tions.
- Page 53 11. The results are displayed within < 5 minutes, 11a. WBC DIFF result window 11b. WBC result window 11c. Entered data The result windows may differ due to data entered and choice of microcuvette. To jump between result and data windows; press the center button.
-
Page 54: Review/Delete Results
Review/Delete Results... - Page 55 Use Set-Up/Settings menu to review/delete results. The analyzer can store up to 600 results. Start the analyzer as described in the Start-Up section. Press the button below the Menu/QC Test symbol. Press right button to accept menu and to move to next window. Enter PIN Code window is shown.
- Page 57 Review Results The latest results are displayed. To jump between result and data windows; press center button. The result windows may differ due to data entered and type of microcuvette. Return to main menu by pressing center button and then left button. To jump between result and data windows;...
-
Page 58: Maintenance
Maintenance Daily Maintenance... - Page 59 Place the cuvette moving arm in loading position before replacing the cuvette holder. Clean the cover with alcohol (20-70%) or a mild detergent. Only the WBC DIFF cuvette holder is to be used with the WBC DIFF analyzer. The WBC DIFF cuvette holder is marked WBC DIFF.
-
Page 60: Optical Parts
Maintenance Optical Parts... - Page 61 If the optical parts of the WBC DIFF Analyzer are dirty an error code is displayed. Use the HemoCue Cleaner WBC for cleaning optical parts. Turn off the analyzer. Place the cuvette moving arm in loading position, leave cuvette holder in place.
-
Page 62: Troubleshooting Guide
Troubleshooting Guide The HemoCue WBC DIFF system will display a flag or an Error Code if a problem is detected within the system or the sample. In the trouble shooting guide are explanations and recommended actions for each flag or Error Code described. - Page 63 Flag Explanation The results in the differential count are uncertain. The sample may contain pathological, abnormal or unidentified cells. The sample should be verified with a suitable laboratory method and be questioned as to the pathological condition of the patient. The printout will show an asterisk (*) instead of the display symbol The differential count is not presented when the total WBC is...
- Page 64 Flag Explanation The measured total white blood cell count is below 0.3 x 10 The sample should be verified with a suitable laboratory method. The measured white blood cell count is above 30.0 x 10 The sample should be verified with a suitable laboratory method...
- Page 65 The HemoCue WBC DIFF system will display an Error Code if a problem occurs impacting the performance of an analysis. Each error code is numbered and related to a specific cause. If an error code appears, accept the error code and continue according to the action described for the specific error code in the trouble shooting guide.
- Page 66 Error code Explanation Action Err30 The optical parts are dirty or wet after cleaning. 1. Clean the optical parts as described in the Maintenance sec- tion. Wait 15 minutes before starting the analyzer after cleaning to make sure that the optical parts are dry. 2.
- Page 67 Error code Explanation Action Err90 Internal error. 1. Wait 30 seconds, start the analyzer as decribed in Start-Up section. Take a new microcuvette, repeat the measurement as described in Routine Use Patient Test or QC Test sections 2. If the problem persists, the analyzer needs service. Contact your local distributor.
-
Page 68: Specifications
Do not analyse patient samples in eosinophil count and basophil count. QC test mode. The HemoCue WBC DIFF system is indicated for use in clinical Storage and Handling laboratories and for point of care testing in professional health Microcuvettes care settings on pediatric (≥... - Page 69 • Pipette or other transfer device (venous samples) • Lint-free tissue (non-fraying) Quality Control When the HemoCue WBC DIFF Analyzer is started, a quality control (self-test) is automatically performed to verify perfor- mance. If the test fails, an error code will be displayed.
- Page 70 Expected Values (Dacie and Lewis Practical Haematology) White Blood Cell values for normal children expressed as a mean ±2SD (95% Range) 3-6 Months 1 Year 2-6 Years 6-12 Years White Blood Cell Count x10 12±6 11±5 10±5 9±4 Neutrophils x10 1.5-8 Lymphocytes x10 4-12...
- Page 71 Expected Values (Dacie and Lewis Practical Haematology) White Blood Cell values for normal adults expressed as a mean ±2SD (95% Range) Adults (x10 Adults (%) White Blood Cell Count 4.0-10.0 Neutrophils 2.0-7.0 40-80 Lymphocytes 1.0-3.0 20-40 Monocytes 0.2-1.0 2-10 Eosinophils 0.02-0.5 Basophils 0.02-0.1...
- Page 72 For interference studies see chapter Known Interferences. Specific Performance Characteristics Linearity The white blood cell count for the WBC DIFF system has accord- ing to the FDA Guidance Premarket Notification for Automated Differential Cell Counters for Immature or Abnormal Blood Cells, been demonstrated to be linear between 0.3 –...
- Page 73 Repeatability A study has been performed according to CLSI Document H26-A2 using fresh blood samples to determine repeatability at low, normal and high concentrations. The study was performed on venous whole blood samples tested with 31 replicates per sample using 1 analyzer and 1 batch of cuvettes.
- Page 74 Method Comparison Study - Venous Samples Results from a method comparison study performed according to CLSI Document EP 9-A2 on the HemoCue WBC DIFF system and the Beckman Coulter LH750 are shown for total WBC count in Figure 1, for neutrophil count in Figure 2 and for lymphocytes in Figure 3.
- Page 75 Method Comparison Study - Capillary Samples Direct from Finger Results from a method comparison study performed on the HemoCue WBC DIFF system and the Sysmex XS-1000i are shown for total WBC count in Figure 1, for neutrophil count in Figure 2 and for lymphocytes in Figure 3. Capillary sample for Sysmex was taken in a microtube.
- Page 76 Essential Performance Nucleated red blood cells (NRBC) may be counted as white The HemoCue WBC DIFF system is an In-Vitro diagnostic system blood cells and give falsely elevated total leukocyte count. This designed for quantitative determination of white blood cells will mainly be reflected in the differential count as an elevated (WBC) in capillary or venous whole blood.
- Page 77 These guidelines may not apply in all situations. Elec- environment in which radiated RF disturbances are controlled. tromagnetic propagation is affected by absorption and reflection The customer or the user of HemoCue systems can help prevent from structures, objects and people. electromagnetic interference by maintaining a minimum distance...
- Page 78 Guidance and manufacturer’s declaration – Electromagnetic immunity The HemoCue systems are intended for use in the electromagnetic environment specified below. The customer or user of the HemoCue systems should assure that it is used in such an environment. Immunity test...
- Page 79 3 Vrms Portable and mobile RF communications equip- IEC 61000-4-6 150 kHz to 80 MHz ment should be used no closer to any part of the HemoCue systems, including cables, than the Radiated RF 3V/m 3 V/m recommended separation distance calculated IEC 61000-4-3 80 MHz to 2.5 GHz...
- Page 80 RF transmitters, an electromagnetic site survey should be considered. If the measured field strength in the location in which the HemoCue systems are used exceeds the applicable RF compliance level above, the HemoCue systems should be observed to verify normal operation. If abnormal performance is observed, additional measures may be neces- sary, such as re-orienting or relocating the systems.
- Page 81 Serial shielded maximun 1.5 m Guidance and manufacturer´s declaration – electromagnetic emissions The HemoCue systems are intended for use in the electromagnetic environment specified below. The customer or the user of the HemoCue systems should assure that it is used in such an environment.
- Page 82 US 8,009,894, EP 09702056.4, SE 0500549-1, US 7,521,243, contact your local HemoCue distributor. US 8,092,758 The HemoCue WBC DIFF system is intended for use in the elec- tromagnetic environment specified in Technical specifications. The customer or user of the HemoCue WBC DIFF system should assure that it is used in such an environment.
- Page 83 To maintain safety use only AC adapter marked Caution HCA01. CE mark References • HemoCue WBC DIFF Microcuvettes package insert Class II equipment • HemoCue WBC Microcuvettes package insert • Dacie and Lewis, Practical Haematology Tenth edition. Only valid within the European Community. Indi- •...
- Page 84 HemoCue AB | Box 1204 | SE-262 23 Ängelholm | Sweden | Phone +46 77 570 02 10 | Fax +46 77 570 02 12 info@hemocue.se | hemocue.com...
Need help?
Do you have a question about the WBC DIFF and is the answer not in the manual?
Questions and answers