
Related Manuals for OPW Petro Vend 100

Summary of Contents for OPW Petro Vend 100
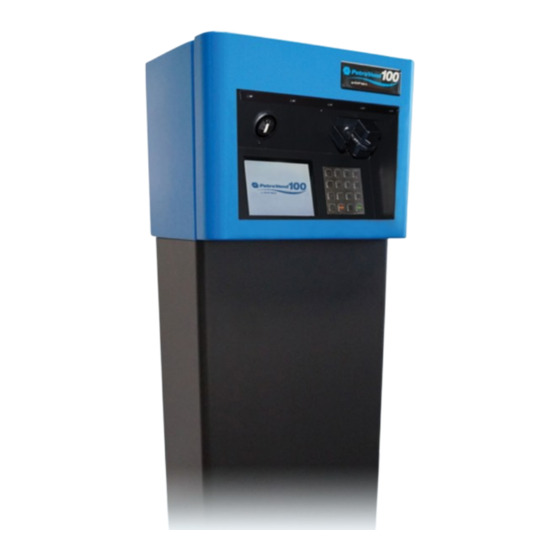
- Page 1 Part Number: M1900, Rev. 8 Issue Date: 12/4/2018 Supersedes: 5/3/2017 ® M1900 - Petro Vend 100 Fuel Control System Installation, Operation and Maintenance Guide 3.01.03f / 2.01m...
- Page 2 . Download the latest revision if necessary. OPW Fuel Management Systems is a part of Dover Fueling Solutions. Copyright Information Copyright © 2018 Delaware Capital Formation, Inc. All Rights Reserved. DOVER, the DOVER logo are registered trademarks of Delaware Capital Formation, Inc., a wholly-owned subsidiary of Dover Corporation.
-
Page 3: Table Of Contents
Doc. No.: M1900 Rev.: 8 Page 3 of 65 Table of Contents Section 1 Precautions 1.1 USB Flash Drives 1.2 Safety Warnings 1.3 Hazardous Areas 1.3.1 NFPA/NEC – Class I, Div. 1 & Div. 2 1.3.2 Installation Requirement 1.4 FCC Compliance Section 2 Introduction 2.1 Terminology 2.2 Versioning... - Page 4 Doc. No.: M1900 Rev.: 8 Page 4 of 65 5.1 Power Conduit Installation 5.2 PCM Conduit Installation 5.2.1 Pump Control/Pulser Conduit 5.2.2 Pump Pulser Conduit 5.3 System Power Wiring 5.4 PCM Pump Dispenser Wiring 5.4.1 Pump/Dispenser Wiring 5.4.2 Pump/Dispenser Pulser Wiring 5.5 PCM Startup/Configuration 5.5.1 Configuration (DIP Switches) 5.5.2 PCM Testing...
- Page 5 Doc. No.: M1900 Rev.: 8 Page 5 of 65 7.3 Pump Management 7.4 Proprietary Card File (PCF) Management 7.4.1 Clearing Totals 7.4.2 Reporting 7.5 Dual Card Security Feature Section 8 System Maintenance Appendix A - PV100® Primary Board Appendix B - Termination Codes Appendix C - Menu of Display Screens Warranty...
-
Page 6: Section 1 Precautions
Totals and Transactions. Use this key only in the PV100 J9 USB port to prevent loss of data. To prevent data loss DO NOT use the plastic Manuals USB key (identified by the OPW "diamond" logo) in the USB ports of the PV100. This key must only be used in a PC. - Page 7 Doc. No.: M1900 Rev.: 8 Page 7 of 65 IMPORTANT: The sub-sections that follow contain important safety and compliance information related to the installation and operation of this unit. Read these instructions carefully before you continue with the installation.
-
Page 8: Safety Warnings
Doc. No.: M1900 Rev.: 8 Page 8 of 65 1.2 Safety Warnings This manual contains many important Safety Alerts. There can be a risk of injury or damage to property if you do not obey these alerts. The panels below show the types of safety warnings that can be seen and how each is specified. -
Page 9: Hazardous Areas
Doc. No.: M1900 Rev.: 8 Page 9 of 65 1.3 Hazardous Areas Any fuel dispenser is a hazardous area as defined in the National Electrical Code. Installation must be in accordance with the following: National Electrical Code (NFPA No. 70) Motor Fuel Dispensing Facilities and Repair Garages Code (NFPA No. -
Page 10: Installation Requirement
IMPORTANT: It is the installer's responsibility to know and obey all local codes. OPW Fuel Management System’s fuel control systems are listed for use in a non-classified area. All of the equipment must be installed outside of the hazardous areas. - Page 11 Doc. No.: M1900 Rev.: 8 Page 11 of 65 WARNING: Knockouts and installation hardware are provided for all cabinetry. Do NOT drill holes in the enclosures. This would violate the safety listing of the system. CAUTION: Be sure to wear all required personal protective equipment (PPE).
-
Page 12: Fcc Compliance
Doc. No.: M1900 Rev.: 8 Page 12 of 65 1.4 FCC Compliance This system complies with Part 15 of the Federal Communications Commission (FCC) Rules & Regulations. Operation is applicable to these conditions: This device must not cause harmful interference. This device must accept interference received, including interference that can cause undesired operation. -
Page 13: Section 2 Introduction
This installation, operation and maintenance (IOM) manual details the installation startup, testing, ® configuration, and general troubleshooting instructions for the PV100 Fuel Control System by OPW Fuel ® Management Systems. The PV100 system is designed with an integrated fuel-site controller to control the system operation. -
Page 14: System Technical Specifications
Doc. No.: M1900 Rev.: 8 Page 14 of 65 card file information such as PIN, Prompt and available pumps must be reconfigured. Card Pump Totals are lost. The next two digits show when any other system configuration has changed. The pump configuration, stored transaction data and all saved data will be lost when this software update occurs. -
Page 15: Pump Control
® Control Slave Module” or “PCM Slave” (OPW Part #: 20-4405), is mounted on the back wall of the PV100 enclosure, providing control for up to two (2) hoses. A second "PCM Slave" board can be added to control a total of four (4) hoses. -
Page 16: Section 3 Pre-Installation Information
Doc. No.: M1900 Rev.: 8 Page 16 of 65 Section 3 Pre-Installation Information The installation instructions in this manual are written for a typical installation. Due to the flexibility of the system and the unique nature of every site, it is not possible to show every potential installation scenario. Local codes may dictate specific installation requirements. -
Page 17: Pedestal Conduits
OPW system must be grounded. A ground wire (preferably Green) must be connected between the device’s ground terminal and the main electrical service panel. One earth ground connection is required per OPW device. CAUTION: Do not rely on the conduit to provide ground connections. -
Page 18: Pv100® Power Requirements
If installed in the same conduit as the pump-control wires, then the wire must be UL-style #2567 or equivalent. You can order shielded pulser cable from OPW Part #: 12-1025 (two-conductor) or OPW Part #: 12-1026 (four-conductor). -
Page 19: Section 4 System Installation
Doc. No.: M1900 Rev.: 8 Page 19 of 65 Section 4 System Installation 4.0.1 Typical Installation Overview WARNING: Install your system a minimum of 18 inches (46 cm) from the nearest conventional or overhead pump or dispenser. ® PV100 Installation ®... - Page 20 Doc. No.: M1900 Rev.: 8 Page 20 of 65 Pedestal Mounting Hole Locations and Dimensions Mark the four (4) most appropriate locations for the anchor bolts. There are eight (8) mounting holes (see the illustrations above). Drill the holes Anchor the pedestal using 3/8” anchor bolts IMPORTANT: Use a type of anchor bolt that is appropriate for the material in which you will be drilling (e.g.
- Page 21 Doc. No.: M1900 Rev.: 8 Page 21 of 65 NOTICE: The USB cable must be unplugged to avoid damage to the internal USB. 5. Remove the heater/bracket assembly. a. Disconnect the heater cable. b. Remove the hex nut from the screw in the right bracket “leg.” Set it aside where it will not be lost.
-
Page 22: Section 5 Mechanical Pcm Pump Control
Doc. No.: M1900 Rev.: 8 Page 22 of 65 Section 5 Mechanical PCM Pump Control Typical Installation Overview with PCM Pump Control 5.1 Power Conduit Installation ® Install conduit that runs from the main circuit breaker panel to the PV100 . -
Page 23: Pcm Conduit Installation
Doc. No.: M1900 Rev.: 8 Page 23 of 65 5.2 PCM Conduit Installation 5.2.1 Pump Control/Pulser Conduit ® Install conduit runs from the PV100 to each pump junction box. These will contain the line voltage pump control and low voltage pulser wires with the exceptions noted below. Wires required are per fueling point. -
Page 24: Pcm Pump Dispenser Wiring
Doc. No.: M1900 Rev.: 8 Page 24 of 65 5.4 PCM Pump Dispenser Wiring The PCM board is used for mechanical pump control. PCM Board Connections The figure above shows the PCM board connections. The Low-voltage (pulser) connections are on the left- side of the board and the High-voltage connections (hook, signal, neutral, S1 &... - Page 25 Doc. No.: M1900 Rev.: 8 Page 25 of 65 Typical Wiring for Self-Contained Pump with Power Reset Typical Wiring for Dispenser with Power Reset...
-
Page 26: Pump/Dispenser Pulser Wiring
Doc. No.: M1900 Rev.: 8 Page 26 of 65 5.4.2 Pump/Dispenser Pulser Wiring There are two (2) types of pulsers: Passive (no voltage supplied) Active (voltage supplied) The diagram below shows typical connections for both types of pulsers. NOTE: Since the dip switch used to select pulser type controls both relay positions on the board, the two dispensers controlled by the PCM slave must be of the same type. - Page 27 Doc. No.: M1900 Rev.: 8 Page 27 of 65 Normal Operation : By placing the switches in the “off” position, relays are energized by the fuel-site controller. Manual Override : By placing the switches in the “on” position, relays are energized by the PCM, which allows pumps to fuel without fuel-site controller control.
-
Page 28: Pcm Testing
Doc. No.: M1900 Rev.: 8 Page 28 of 65 Switch #1, Positions 1-5 Switch Position Description Relay Position Description Setting Normal Operation OPEN Operational Mode Manual Override CLOSED Normal Operation OPEN Operational Mode Manual Override CLOSED Active OPEN Pulser Type 1 &... - Page 29 Doc. No.: M1900 Rev.: 8 Page 29 of 65 PCM Relay LEDs ® "Complete the Installation" on page 30 When the test is complete, power off the PV100 and proceed to complete the installation. If you have a QR code scanner/reader app for your smartphone you can scan this code to view the DIP ®...
-
Page 30: Section 6 Complete The Installation
Doc. No.: M1900 Rev.: 8 Page 30 of 65 Section 6 Complete the Installation NOTICE: Double-check the wiring before applying power to the system components. Applying line (L) voltage to low-voltage inputs will damage the system. Remove the yellow paper safety strip from the SIMM battery. If the system ever requires a cold-start, place a piece of paper or business card into the battery clip. -
Page 31: Section 7 System Configuration
Doc. No.: M1900 Rev.: 8 Page 31 of 65 Section 7 System Configuration ® Terminal Setup/Test Menu The configuration of the PV100 system is separated into two (2) parts: Management Menu Terminal Setup/Test Menu "" below (see for further instructions) allows for the adjustment of terminal system settings and peripheral devices. -
Page 32: Display Menu
Doc. No.: M1900 Rev.: 8 Page 32 of 65 Main Board DIP Switch Bank #2 and Reset Button 7.1.1 Display Menu Display Menu Display Menu Press '1' "Enter" to access the . The allows for access to the following configuration settings related to the information on the display screen, including the following: Mode Normal Screen Test Inverse Screen Test... -
Page 33: Reader Menu
Doc. No.: M1900 Rev.: 8 Page 33 of 65 Numeric/Function Keypad Test : This test verifies that the keypad is working correctly and as configured. An empty table will come into view. Press any key of the keyboard to test. When pressed, each button will appear in its corresponding box in the table displayed on the display screen. -
Page 34: System Network Number Menu
Doc. No.: M1900 Rev.: 8 Page 34 of 65 NOTE: A Keypad Tone Duration set to a value greater than 90 milliseconds is not recommended. This will cause keypad de-synchronization (pressing keys in succession will result in a delayed tone playback). 7.1.5 System Network Number Menu System Network Number Menu allows the user to set a number to identify your network. -
Page 35: Pump Control Menu
Make sure to note your current Network ID before resetting; the one option that must be reset is the Network ID. Restore Factory Defaults should only be used when recommended by an OPW Technical Service representative. 7.1.8 Pump Control Menu 1. -
Page 36: Software Updates
Software Update Menu consists of items that allow for firmware updates for the PV100 system from a USB Key. To obtain the proper firmware updates, contact OPW Technical Support at 1-877-OPW-TECH (877-679-8324) or visit http://www.opwglobal.com. 1. Program Application 2. Program FPGA 3. -
Page 37: Site Management
Doc. No.: M1900 Rev.: 8 Page 37 of 65 NOTE: It is recommended to program a second manager card when prompted, in case the first is misplaced or destroyed. In the future, only the set PIN will be required at this point. The card(s) chosen as the manager card(s) are also enabled for fueling. - Page 38 Doc. No.: M1900 Rev.: 8 Page 38 of 65 Site ID Number : A three-digit number is used to identify the fueling site for reporting purposes. To set this number (default: 001), press the corresponding menu number on the keypad to access the setting and then press “Enter”.
- Page 39 Doc. No.: M1900 Rev.: 8 Page 39 of 65 Set Year : To set the current year, use “F3” and “F4” to select the current year. Press “Enter” to save and exit, or “Clear” to undo changes and exit. Keyboard and Reader : The Keyboard and Reader item, when selected, displays the following keyboard- related configuration items: Prompt Time-Out...
-
Page 40: Pump Management
Doc. No.: M1900 Rev.: 8 Page 40 of 65 Media Type Menu Media Type : This option allows the manager to set up input mode restrictions for all card types. The options are “Reader” and “Keyboard” and they are mutually exclusive. Push the F3 function key on the keyboard to toggle between Reader and Keyboard options. -
Page 41: Proprietary Card File (Pcf) Management
Doc. No.: M1900 Rev.: 8 Page 41 of 65 Select Relay Position : This option is used to select the relay position associated with the pump to be configured (the value ranges from 1 to 4). Configure Pump : Configure the parameters that follow in regard to the pump, divided between the categories “Configure Pump”... - Page 42 Doc. No.: M1900 Rev.: 8 Page 42 of 65 Select Card Selecting Allowed : Determine one (1) specific card for which you will be Pumps Select Card Range : Determine a range of cards (example: 10-50) for which you will be Selecting Allowed Pumps Select Allowed Pumps : This option will display all configured pumps and permit the pumps...
-
Page 43: Clearing Totals
Doc. No.: M1900 Rev.: 8 Page 43 of 65 ® Card Invalid After 3 Bad Entries : When this option is enabled, the PV100 will lock cards from use after three (3) incorrect PIN entries for a single swipe. When a card is locked, the user Set Specific PIN PIN must be reset using the menu option. -
Page 44: Reporting
Doc. No.: M1900 Rev.: 8 Page 44 of 65 All Cards and Pumps Single Card Single Pump (can accept a value in the range 1 - 4) Bypass Totals Bypass Totals Screen 7.4.2 Reporting ® Reporting menu permits a user to view reports for the various functions of the PV100 , divided as follows: View Pump Totals... - Page 45 Doc. No.: M1900 Rev.: 8 Page 45 of 65 View Pump Totals View Card Totals : To show the totals for cards, press the corresponding menu number on the keypad and then “Enter." View Card Totals 4-Pump Support and 2-Pump Support NOTE: The 4-Pump site configuration will show five (5) cards with the card totals for Pump 1 and 2 showing on the top lines and totals for 3 and 4 on the bottom lines.
- Page 46 Doc. No.: M1900 Rev.: 8 Page 46 of 65 View Card Totals 4-Pump Support View Bypass Totals : To show all transactions that occurred while the pumps were in software-controlled bypass (see Appendix A), press the corresponding menu number on the keypad and press “Enter”. To perform the operations that follow, first place a USB key/thumb drive into the USB receptacle mounted above the PV100®...
- Page 47 Doc. No.: M1900 Rev.: 8 Page 47 of 65 Example of Card Totals Transactions to USB (optional) : If this purchasable option is enabled, individual transactions stored on the internal USB key will be transferred to the external USB key in the file PV100TRN.CSV. NOTE: See Appendix B for transaction termination codes.
- Page 48 Doc. No.: M1900 Rev.: 8 Page 48 of 65 Program a Carded System...
-
Page 49: Dual Card Security Feature
Doc. No.: M1900 Rev.: 8 Page 49 of 65 7.5 Dual Card Security Feature The Dual Card security feature requires both Driver and Vehicle cards to be validated to successfully authorize a pump to dispense fuel. This adds one more layer of security in the fueling process. "Site Management"... - Page 50 Doc. No.: M1900 Rev.: 8 Page 50 of 65 Card Type Setup Screen Card Type Setup Card Type Setup screen is where the Card Type is specified for a range of cards and an individual card number. The available types are Driver, Vehicle and Single. 1.
- Page 51 Doc. No.: M1900 Rev.: 8 Page 51 of 65 2. Set the Low and High values. NOTE: A range will override another if the range that is entered overlaps the range of another Card Type. 3. Push the F3 function key to show the types. Push F3 again and again to scroll through and select the Enter applicable types (Driver, Vehicle and Single).
- Page 52 Doc. No.: M1900 Rev.: 8 Page 52 of 65 NOTE: If the user tries to select Vehicle for a specified Manager card the error message below will come into view: "Selected card is Manager card and its type cannot be vehicle" NOTE: If the user tries to set a range that contains a Manager card the error message below will come into view:...
- Page 53 Doc. No.: M1900 Rev.: 8 Page 53 of 65 View Allowed Pumps View Allowed Pumps (4 Pump) When the Dual Card security feature is enabled, the View Allowed Pumps screen in Proprietary Card File (PCF) Management will show the Card Type next to each card number listed. View Card Totals View Card Totals (4 Pump) When the Dual Card security feature is enabled, the View Card Totals screen in Reporting will show the...
- Page 54 Doc. No.: M1900 Rev.: 8 Page 54 of 65 Card Totals Report Card Totals Report for Dual Card When the Dual Card security feature is enabled, the Card Totals to USB report will show Card Type information. Transaction amounts will be added to both the Driver and Vehicle card totals. Transactions Report Transactions Report for Dual Card When the Dual Card security feature is enabled, the Transactions to USB report will show Card Type...
-
Page 55: Section 8 System Maintenance
Doc. No.: M1900 Rev.: 8 Page 55 of 65 Section 8 System Maintenance ® Though the PV100 card systems are designed for years of trouble-free use, please perform the following routine maintenance as indicated below to maximize the system’s service life. Cabinet and Door : Wipe down terminals with warm water, a mild detergent (dish soap) and a non-abrasive cloth as needed. -
Page 56: Appendix A - Pv100® Primary Board
Doc. No.: M1900 Rev.: 8 Page 56 of 65 ® Appendix A - PV100 Primary Board ® PV100 Primary Board... -
Page 57: Appendix B - Termination Codes
Doc. No.: M1900 Rev.: 8 Page 57 of 65 Appendix B - Termination Codes Code Description Cause (Authorization Denied) Possible Solution Customer did not finish entering a Increase prompt time-out User entry time-out prompt before time limit was on FIT configuration exceeded Verify card is in the card Card # not in positive file... - Page 58 Doc. No.: M1900 Rev.: 8 Page 58 of 65 Code Description Cause (Authorization Denied) Possible Solution Pump error, premature Busy One (1) unit of pulse(s) being received by the pump controller without sensing the pump is “on” Verify pump controller is Pump error –...
-
Page 59: Appendix C - Menu Of Display Screens
Doc. No.: M1900 Rev.: 8 Page 59 of 65 Appendix C - Menu of Display Screens TIP: Click the cross-referenced headers to go directly to the linked topic. "Terminal Setup/Test Menu" on page 31 "Display Menu" on page 32 a. Mode b. - Page 60 Doc. No.: M1900 Rev.: 8 Page 60 of 65 "Pump Control Menu" on page 35 a. Pump Control b. Pump Simulator Mode c. Fixed Pump Number "Software Updates" on page 36 a. Update Application b. Update FPGA c. Update USB driver "Management Menu"...
- Page 61 Doc. No.: M1900 Rev.: 8 Page 61 of 65 e. Set Options f. Site Operation When USB not present "Pump Management" on page 40 a. Select Pump Terminal b. Select Relay Position c. Configure Pump Pump Number Pulse Count iii. Max Quantity Ignore Handle Set Totalizer...
- Page 62 Doc. No.: M1900 Rev.: 8 Page 62 of 65 d. Single Pump e. Bypass Totals "Reporting" on page 44 a. View Pump Totals b. View Card Totals c. View Bypass Totals d. Pump Totals to USB e. Card Totals to USB f.
-
Page 63: Warranty
In no event shall manufacturer’s liability on any claim for damages arising out of the manufacture, sale, delivery or use of the goods exceed the original purchase price of the goods. In no event shall OPW Fuel Management Systems be liable for any direct, indirect, incidental or consequential damage or loss of product. - Page 64 Doc. No.: M1900 Rev.: 8 Page 64 of 65 Revision History Revision Software Effective Key Changes Version* 2/6/13 Initial Release Revised menu content to reflect latest version of 6/16/2013 menus. Revised installation information and diagrams. Add note to page 17, "After replacing Lexan shield, rein- sert the USB cable in the UPPER USB connector on the main board.”And on page 32, add note indicating that 10/18/2013...
Need help?
Do you have a question about the Petro Vend 100 and is the answer not in the manual?
Questions and answers