Advertisement
Table of Contents
- 1 Functional Description
- 2 Installing the JUWEL Smartfeed Automatic Feeder
- 3 Keys and Display
- 4 Conveyor Screw
- 5 Replacement of the Conveyor Screw
- 6 Commissioning the JUWEL Smartfeed Automatic Feeder
- 7 Feed Chamber Enlargement
- 8 "Er" Display Message
- 9 Setting the Time
- 10 Programming the Feeding Times
- 11 Checking the Settings
- 12 Manual Feeding
- 13 Battery Replacement
- 14 Care and Maintenance
- Download this manual
Advertisement
Table of Contents

Summary of Contents for JUWEL Aquarium SmartFeed
- Page 1 INSTRUCTION MANUAL SmartFeed - Automatic Feeder www.juwel-aquarium.com...
-
Page 2: Functional Description
This opening is pre-cut and closed with a cover in many JUWEL aquariums. Notice: Cover set for the JUWEL automatic feeders If the cover of your JUWEL aquarium does not include a special retainer for the JUWEL SmartFeed automatic feeder, we recommend that you contact your specialist retailer. - Page 3 1. First, remove the lid that closes the opening for your JUWEL SmartFeed automatic feeder in the cover (if available). 2. Place the holding jacket included in the delivery into the opening. 3. Open the cap of the feed opening.
-
Page 4: Keys And Display
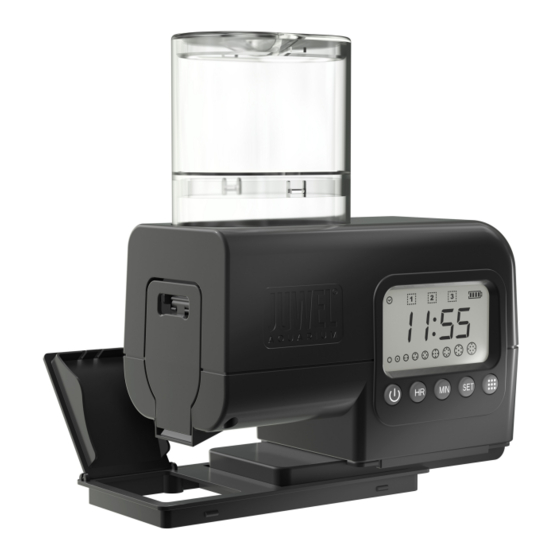
Keys and display 1. On/Off key 2. Hours key [HR] 3. Minutes key [MIN] 4. SET key [SET] 5. Feed quantity key (8 levels) 6. Number of feedings per day 7. Battery status 8. Symbol for system time setting 9. Time specification 10. -
Page 5: Replacement Of The Conveyor Screw
Replacement of the conveyor screw 1. Remove the feed cover on the side. 2. Press the clips of the conveyor screw bracket together and remove it, as shown in the illustration. 3. Pull out the conveyor screw. 4. Insert the required conveyor screw. 5. -
Page 6: Commissioning The Juwel Smartfeed Automatic Feeder
Commissioning the JUWEL SmartFeed automatic feeder 1. Switch on the SmartFeed automatic feeder with the On/Off key. TIPP If the automatic feeder is switched off, no functions are active. Feed chamber enlargement Enlarge the feed volume with the included attachment. Please follow the instructions of the feed producer for correct dispensing. -
Page 7: Setting The Time
Setting the time Press the [SET] key for 2 seconds. The time-setting symbol appears. Set the hours with the [HR] key and the minutes for the time with the [MIN] key. Confirm the set time with the [Set] key. Battery replacement After battery replacement, the time needs to be set again. -
Page 8: Programming The Feeding Times
Programming the feeding times Fe e ding 1 [1] Briefly press the [SET} key and the number [1] appears for the first feeding Set the hours with the [HR] key and the minutes for the required feeding time with the [MIN] key. Select the required quantity with the [Feed quantity] key. -
Page 9: Checking The Settings
Replace the batteries, if the flashing battery symbol appears in the display. (4xAA) Care and maintenance The JUWEL SmartFeed automatic feeder needs hardly any maintenance or attention. Use the supplied cleaning brush for care and maintenance on a regular basis. The automatic feeder must not be cleaned under running water. - Page 10 Proper disposal (electrical waste) The labelling on the product or on the accompanying literature declares that it must not be disposed of, at the end of its service life, together with household rubbish. Please dispose of this equipment separately from other waste, to protect the environment or public health from damage by unregulated waste disposal.
- Page 11 Lite, Warm-Lite, Colour-Lite, Day-Lite, Juwel Twin-Lite, HiFlex, Juwel Eccoflow, Bioflow, Cirax, Nitrax, Phorax, Carbax, BioPad, BioCarb, BioPlus, OxyPlus, Silexo, Conexo. AquaHeat 50W, AquaHeat 100W, AquaHeat 200W, AquaHeat 300W 220-240V, 50Hz JUWEL AQUARIUM AG & CO. KG Karl-Göx-Straße 1 27356 Rotenburg/Wümme . GERMANY Telefon +49(0)42 61/93 79-32 Telefax +49(0)42 61/93 79-856 Service-Mail service@juwel-aquarium.de...


Need help?
Do you have a question about the SmartFeed and is the answer not in the manual?
Questions and answers
I see that there are 3 times settings for food, what if I want to set only two times?