Advertisement
Quick Links
Advertisement

Related Manuals for Timeguard EASZKN

Summary of Contents for Timeguard EASZKN
- Page 1 Emergency Assist Alarm Kit – Single Zone Model: EASZKN...
-
Page 2: General Information
1. General Information These instructions should be read carefully and retained for further reference and maintenance. 2. Safety • Before installation or maintenance, ensure the mains supply to the alarm system is switched off and the circuit supply fuses are removed or the circuit breaker turned off. -
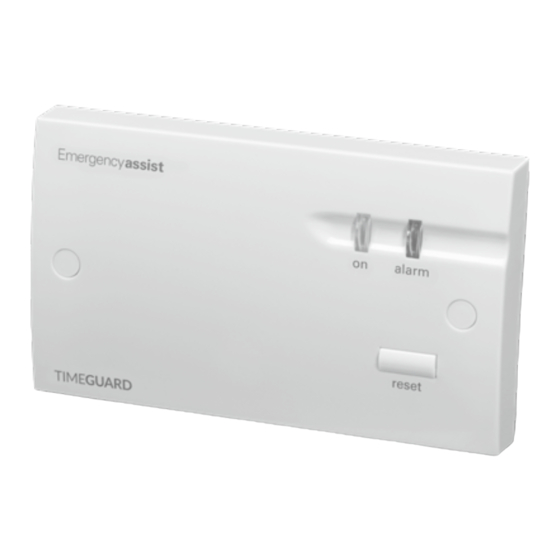
Page 3: Control Unit
• Operating Temperature: +5°C to 40°C • IP Rating: Intended for indoor use only • CE Compliant • Dimensions: Control Unit: H=85mm, W=145mm, D=33mm Over-Door Unit: H=85mm, W=85mm, D=32mm Reset Unit: H=85mm, W=85mm, D=29mm Pull Cord Unit: H=85mm, W=85mm, D=30mm Wall box minimum depth requirements –... - Page 4 5. Installation Important: • Connect the Safety Extra Low Voltage (SELV) wiring first. • Connect the mains wiring last. • When installing the 26mm wall box for the control unit, choose the fixing holes to ensure clearance between the screw heads and the rear of the control unit.
- Page 5 Safety Extra Low Voltage Wiring (SELV) Important: Ensure that the low voltage wiring is kept well away from mains wiring. The low voltage wiring must be tied to each other using the tie wrap provided to overcome clearances and to be held secure from creepage distances if any wiring becomes detached.
- Page 6 5.3 Reset Unit: Important: The BS8300 recommends that this should be sited on a wall such that for a toilet it can be reached from the W.C. and a wheelchair. The recommended height is between 750 and 1200mm above the floor and horizontally it must not be mounted closer than 350mm to any corner.
- Page 7 6. Mains Voltage Wiring: 230V AC 50Hz MAINS SUPPLY Live Earth Neutral 230V 50Hz Mains Supply Live Supply (Brown or Red) to Neutral Supply (Blue or Black) to Earth Connection (Green/Yellow) to...
- Page 8 7. Extra Low Voltage Wiring: Connector Control Mains Rating for incoming Board Information mains supply N E L WARNING Do not connect to mains supply! 2 Wire Extra Single Zone Control Unit (Rear) Low Voltage Fixing Holes Reset Unit Over-Door Light Fixing Holes Fixing...
- Page 9 8. Commissioning: • Switch on the 230V AC 50Hz mains supply to the Control Unit and check that the ‘on’ indicator (green) is illuminated. The Alarm indicator (blue) should be off. • Test the alarm system by pulling the Pull Cord Unit, the alarm will trigger the sounders on the Over-Door Light as well as the Single Zone Control Unit.
- Page 10 10. Typical Single Zone System Fused Spur 2-wire (not supplied) Single Zone Control Unit Over Door Unit 2-wire Reset Unit 2-wire Pull Cord Unit...
-
Page 11: Troubleshooting
020 8450 0515. Note: A proof of purchase is required in all cases. For all eligible replacements (where agreed by Timeguard) the customer is responsible for all shipping/postage charges outside of the UK. All shipping costs... - Page 12 If you experience problems, do not immediately return the unit to the store. Telephone the Timeguard Customer Helpline; HELPLINE 020 8450 0515 or email helpline @ timeguard.com Qualified Customer Support Coordinators will be online to assist in resolving your query.
Need help?
Do you have a question about the EASZKN and is the answer not in the manual?
Questions and answers