Table of Contents
Advertisement
Quick Links
Material: 80 GSM Bond Paper or 50# Bond Paper White
Ink: Black
Resolution: 150 DPI or above
Printing method: Offset Printing
Binding: Saddle Stitch
Folded size: 210 x 148 mm (H x W)
METRIC
[INCH]
METRIC [INCH]
CRITICAL DIMENSION
CHECKING IS COMPULSORY
3
VOLUME
cm
MASS
grams
3
DENSITY
g/cm
GENERAL TOLERANCES
EXCEPT AS NOTED
0 TO 6mm = ±0.1
>6 TO 30mm = ±0.2
>30 TO 80mm = ±0.3
>80 TO 180mm = ±0.4
>180mm = ±0.5
ANGULAR = ± 3°
DO NOT PRINT THIS PAGE
This drawing contains proprietary information and trade secrets of The Furrion Company, Inc.
Unauthorized use or copying is prohibited.
V4.0
26-Feb-18
V3.0
05-Dec-17
V2.0
21-Sep-17
V1.0
22-Dec-16
REV.
DATE
MATERIAL:
FINISH SPEC:
SCALE:
DATE:
22-Dec-16
NAME:
IM for FEHD19S0A/FEFD22S0A CMAC TV
Printing Notes:
Updated per outsourced Tech.Writer's
comments.
Updated the copyright.
Update the logo & copyright, and add
registered trademark
NEW
MODIFICATIONS
DRAWN BY:
APPROVED BY:
Streng Shi
Program: Indesign CC
Black
Streng Shi
Streng Shi
Sally Peng
Streng Shi
NAME
The Furrion Company, Inc.
COMPOSITE-NO
Jason Mak
PART NO.
XX
XX
XX
XX
ECN NO.
SHEET 1 OF 1
REVISION:
4.0
IM-FAV00002
Advertisement
Table of Contents

Subscribe to Our Youtube Channel
Related Manuals for Furrion FEHD19S0A


Summary of Contents for Furrion FEHD19S0A
- Page 1 Resolution: 150 DPI or above Printing method: Offset Printing Binding: Saddle Stitch Folded size: 210 x 148 mm (H x W) This drawing contains proprietary information and trade secrets of The Furrion Company, Inc. Unauthorized use or copying is prohibited. METRIC [INCH] METRIC [INCH] Updated per outsourced Tech.Writer's...
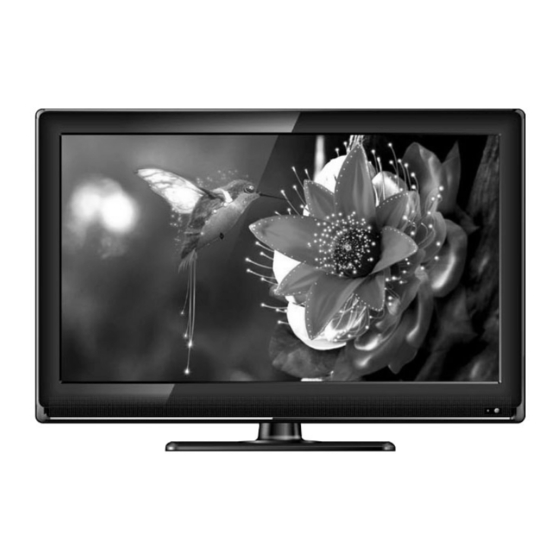
- Page 2 LED HD TV Owner’s Manual Model: FEHD19S0A / FEFD22S0A...
-
Page 3: Welcome
Welcome Thank you and congratulations for purchasing this Furrion® LED HD TV/DVD COMBO 12V TV. Before placing your new appliance into operation, please read these operating instructions carefully. This instruction manual contains important information for safe use, installation and maintenance of the appliance. -
Page 4: Table Of Contents
Contents Welcome .....................1 Contents .....................2 Safety Warnings ..................3 Important Safety Instructions ......................3 Safety Precautions ........................... 6 Function Overview ..................8 Control Panel ............................. 8 Rear Panel ..............................9 Remote Control ............................10 About Your LED HD TV ................12 Features ............................... 12 Power Source ............................ -
Page 5: Safety Warnings
Safety Warnings 9. Do not defeat the safety purpose of the CAUTION polarized or grounding- type plug. A polarized RISK OF ELECTRIC SHOCK AC Polarized plug has two blades with Plug DO NOT OPEN one wider than the other. A grounding type plug has two blades and a CAUTION: TO REDUCE THE RISK OF ELECTRIC third grounding prong. - Page 6 Safety Warnings 16. An outside antenna system should not be 20. When replacement parts are required, be located in the vicinity of overhead power sure the service technician uses replacement lines or other electric light or power circuits, parts specified by the manufacturer or those or where it can fall into such power lines or that have the same characteristics as the circuits.
- Page 7 ● Special Formats that do not use the entire in the instructions, as improper changes or screen. For example, viewing letterbox modifications not expressly approved by Furrion style (16:9) media on a normal (4:3) display could void the user’s warranty.
-
Page 8: Safety Precautions
Safety Warnings Declaration of Conformity – Not placing the television set on tall WARNING: This equipment has been tested furniture (for example, cupboards or and found to comply with the limits for a bookcases) without anchoring both the Class B digital device, pursuant to Part 15 of furniture and the television set to a suitable the FCC Rules. - Page 9 Also, this would damage the product seriously. Accordingly, Furrion accepts no responsibility or liability for any injuries or property damage resulting from the improper installation.
-
Page 10: Function Overview
Function Overview Control Panel Press to eject the disc Press to start/pause the disc playback VOL+ Press to increase the volume VOL- Press to decrease the volume Press to skip to the next channel Press to skip to the previous channel MENU Press to enter the main menu SOURCE... -
Page 11: Rear Panel
DVD Player, Games Console, Cable Box or other HDMI device. CEC Consumer Electronics Control When connected to the CEC VGA IN compatible Furrion Entertainment HDMI 3 IN Systems or other CEC Compatible devices, the TV links with the system PC AUDIO to give extra functionality. -
Page 12: Remote Control
Remote Control Button Function Switches to TV mode FIREPLACE STEREO Selects Furrion Fireplace remote control functions. * Please refer to your Furrion FIREPLACE Fireplace manual for more information. Press to turn the TV/Entertainment System on/off NUMBER Enters numbers or select channels P.MODE... - Page 13 Function Overview Button Function Button Function SLEEP/ Press to scan radio stations: A brief Sets the sleep timer CLOCK press searches through each stored station. Press & hold to scan and store the 6 strongest stations. MTS/AUDIO Cycles through MTS sound modes End or reject a call (when the system is connected to a cell Toggles random playback mode...
-
Page 14: About Your Led Hd Tv
Furrion TVs have added a special anti-interference filter which removes all power ripples and interference giving a clear picture. Furrion TVs can be used directly with 12 V or 24 V DC power systems and also with 110 V or 220 V AC system by using the external power adapter included. -
Page 15: Before Operation
For best performance, it is recommended that batteries should be replaced on a yearly basis, or when Thanks for purchasing this Furrion LED HD the remote operation becomes erratic. Do not TV. This manual will help you set up and mix old and new batteries or different types. -
Page 16: Getting Started
Getting Started The Setup Wizard window appears the first Setup Wizard time you turned on the TV. It will assist you to configure the TV and scan for available channels. Menu Language English IMPORTANT: Make sure the antenna or cable TV Air/Cable system connection is made. -
Page 17: Change The Setup Settings
Change Settings Change the Setup Settings 1. Press MENU button, the setup window will appear on the screen. keys to highlight Setup mode. 2. Use 3. Use to highlight the item you would like to reset, then press to select the settings. 4. - Page 18 Change Settings Setup Menu Selects the menu Menu Language to select English, French or Spanish. Press language Controls the Transparency transparency level of to select Off or On Press the menu Set the picture to select Wide, Normal, Auto, Panorama, Just Scan, Zoom2 or Press Zoom Mode proportion...
- Page 19 Change Settings Setup Menu CC Mode to select Off, On or CC On Mute Press Press to select CC1, CC2, CC3, CC4, Text 1, Text 2, Basic Selection Text 3 or Text 4 to select Service1, Service 2, Service 3, Press Advanced Service 4, Service 5 or Service 6...
-
Page 20: Change The Picture Settings
Change Settings Change the Picture Settings 1. Press MENU button, the setup window will appear on the screen. Picture Sound Time Setup Lock Channel keys to highlight Picture mode. 2. Use Picture Mode EnergySaving 3. Use to highlight the item you would Contrast like to reset, then press to select the... -
Page 21: Change The Sound Settings
Change Settings Change the Sound Settings 1. Press MENU button, the setup window will appear on the screen. keys to highlight Audio mode. 2. Use 3. Use to highlight the item you would like to reset, then press to select the settings. 4. - Page 22 Change Settings Sound Menu Sound Mode Select the sound mode to select Standard, Music, Movie or User mode Press Bass Control the bass level Press to change to desired level Treble Control the treble level Press to change to desired level Balance Control the balance level Press...
-
Page 23: Change The Time Setting
Change Settings Change the Time Setting 1. Press MENU button, the setup window will appear on the screen. Picture Sound Time Setup Lock Channel keys to highlight Time mode. 2. Use Sleep Timer 3. Use to highlight the item you would Time Zone Pacific Daylight Saving Time... -
Page 24: Change The Lock Settings
Change Settings Change the Lock Settings 1. Press MENU button, the setup window will appear on the screen. keys to highlight Lock mode. 2. Use keys to highlight “Enter Password” and input “0000” to enter the setup window. 3. Use 4. - Page 25 Change Settings Lock Menu Use the Number Buttons (0~9) to enter the password, the Lock Enter setup window will appear Password accesses to the lock setup menu Password * Default password is 0000 * If you forgot the password, use 8888 to enter any locked menu Use Number buttons (0-9) to enter your Set Password password...
-
Page 26: Change The Channel Settings
Change Settings Change the Channel Settings 1. Press MENU button, the setup window will appear on the screen. keys to highlight Channel mode. 2. Use 3. Use to highlight the item you would like to reset, then press to select the settings. 4. -
Page 27: Change The Pc Settings
Change Settings Change the PC Settings The PC menu is only accessible when a PC is connected to the TV via the VGA connection. 1. Press MENU button, the setup window will appear on the screen. 2. Use keys to highlight Setup mode. to highlight Advanced, then press OK 3. -
Page 28: Dvd Player Setup
Change Settings DVD Player Setup 1. During disc playback, press SETUP to enter the General Setup Page. keys to switch among General 2. Use - - General Setup Page - - Setup Page, Audio Setup Page and TV Display Wide Preference Page. -
Page 29: Usb Mode
Change Settings USB Mode 1. After connecting a fl ash drive, press SOURCE button and select MEDIA. Press OK to enter. keys to select to view Photo or Music. Press OK 2. Use to enter. 3. Use to navigate the fi les or folders on the USB drive. 4. -
Page 30: Dvd Player Controls
DVD Player Controls Button Function FIREPLACE STEREO Press to eject DVD/CD Press to select the previous track/ chapter during playback Press to start, pause or restart the playback Change the DVD audio language MTS/AUDIO (if available) P.MODE S.MODE ASPECT DISPLAY ZOOM Press to enlarge the screen images INFO... -
Page 31: Dvd Player Playback
DVD Player Playback Loading a Disc ● Press during playback to skip to the previous or next chapter/track. ● Press A-B to start the A-B repeat function. Before loading a disc into the disc Press once for the desired start point and compartment: press again for the end point. -
Page 32: Dvd Player Playback
DVD Player Playback 00:00 00:00 001/ 001 Disc Movie Video files Select Exit Menu Move 00:08 03:55 004/ 018 Disc Album\ Artist \ Artist - Track 1 Artist - Track 2 Artist - Track 3 Artist - Track 4 Artist - Track 5 Artist - Track 6 MP3 playback screen Select... -
Page 33: Troubleshooting
Troubleshooting Problem Solution/Issue ● Make sure the power cord is plugged in. TV does not ● Try another AC outlet. ● operate Power is off, check fuse or circuit breaker. ● Unplug unit for an hour, then plug it back in. ●... -
Page 34: Specifications
Specifications MODEL, DIMENSION & RESOLUTION TV Model Dimension (mm) (L*H*W) Max Resolution FEHD19S0A 1366 x 768 @ 60Hz HD FEFD22S0A 1920 x 1080 @ 60Hz FHD INPUT & OUTPUT CONNECTIONS Audio Coaxial Optical Component HDMI Audio Component TV Model (PC) - Page 37 ● 52567 Independence Ct., Elkhart, IN 46514, USA ● Toll free:1-888-354-5792 ● Email: info@furrion.com ©2007-2018 Furrion Ltd. Furrion and the Furrion logo are trademarks licensed for use by ® Furrion Ltd. and registered in the U.S. and other countries. FURRION.COM...
Need help?
Do you have a question about the FEHD19S0A and is the answer not in the manual?
Questions and answers